More Stuff

Thursday, September 29, 2016

Carousel Horses - Coming Up - The Chicken a Menagerie Animal

Its time to get ready to paint up one of the remaining unpainted carousel "horses" that were carved by my Dad. My Dad past away at the end of October in 2015 and he left one fully armored horse about 70% finished and another horse about 90% finished (known as the patriot because of the eagle and flag design on the romance side). there are three pieces that are pretty much ready to paint at this point; a small ostrich that stands about two feet tall, a decorative figure that would have been part of the carousel itself, probably on the organ, that also stands about two feet tall and the chicken that you see here. There is also a lion that needs to have its paint redone so at some point I'll need to strip and repaint that one. The lion is just tough to work with its really big weighing in between 400 and 500 pounds. The chicken was requested specifically by my Mom. Chickens are a long standing family joke but a Rooster was requested and carved just for her.

We have sat down and sorted through rooster pictures and have decided on a color scheme so I need to buy the paints that will get us close. I'll be using alkaloid enamel paints for this one which are getting a little hard to find now but there are still a couple of local sources for it.  It still needs some sanding work and a bit of carving. Mostly to reemphasize some of the detail in the feathers which has become obscured by sanding. That kind of carving I can handle. I'm hoping to at least get the sanding done this weekend during the garage sale since we will be out there for a couple of days.


Chester the Rooster
The "Patriot" horse has been transported up to Washington and the finish work is going to be done by my Dad's carving instructor Ken Means (you can google Ken Means and find him easy enough, you can also google William Shatner with carousel horse and find Ken's work that way!). The armored horse is going to be a problem. We want to see it finished but none of the local carvers are up to the challenge. There is to much work left for Ken to be able to finish it for us so that is not an option either. My mom is currently at a carousel convention in Cleveland (an annual convention no less) and she is hoping to find someone there willing to take it on.


The armored horse in is early stages.

The head of the armored horse, those are the blanks for the legs on either side of it.

You get a better sense of the leg blanks here, in reality the legs are almost finished. These are really old pictures.

The Ostrich. My Dad was considering doing the rest of his carving at this scale and moving away from the full size carousel horses and animals.


Wednesday, September 28, 2016

Kickstarter Loot 3 - Tiny Epic Western boardgame by Gamelyn Games

September was supposed to be a big month Kickstarter wise, but the inevitable delays are making it look like October is going to be the big month instead. However, Tiny Epic Western did arrive on time and I had a chance to un-box it and take a look. I have Tiny Epic Galaxy by them and I really enjoy that game so I'm looking forward to getting in some play time with TEW as well. Of course this is setting the gears in motion to get moving on Calamity as well, so maybe I'll be dusting off the workbench and get some buildings built after ReaperCon this month.

Tiny Epic Western (TEW) is a combination of poker and worker placement as you vie for control of the various buildings in town. As a Kickstarter backer I have a few extras that aren't going to be found in the commercial version of the game. For instance the standard game has 8 "Boss" cards and I received 12. There are 4 bullet dice in the Kickstarter edition and only 2 in the commercial edition. The influence tokens have designs printed on them and I don't believe the commercial versions will. In addition there is a plastic version of the wanted card with a clear window in it. Quite frankly I don't know what that is for yet, but I'm sure I'll figure it out after a couple of games.

I also ordered a full deck of the playing cards as an add on and a roll up game mat as well. The game mat arrived almost a month ago I think and I, of course, forgot to take a picture of it. Think poker mat with a town layout on it and you will be close though.

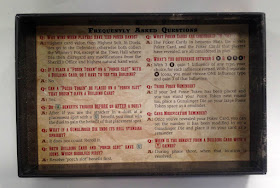
Right off the bat I can see the high quality of all the components. The box walls are very thick so its going to be very resistant to typical gaming damage. The top has printing on the inside and serves as the "dice corral" and the box bottom has basic FAQs printed on it for quick reference when you don't have time to lip through the 20 page rule booklet. I'm really excited to jump into this one!


A box packed full of game components. Note the interior printing on the inside of the box top.


These are the building mats that form the game board.

One of the 12 boss cards. The backside has basic game information on it for use as a quick reference.

The two card "decks" (eraser on the right not included)

The Building cards

The poker cards and the wanted card. This is not a full deck of playing cards there are only 20 of them. However you could order a full deck as an add on purchase which I did.

The game components. The twelve meeples in four colors will be replaced with some meeples from a supporting Kickstarter project that should be arriving in the next week or so.

Tuesday, September 27, 2016

Garden Renovation Finished

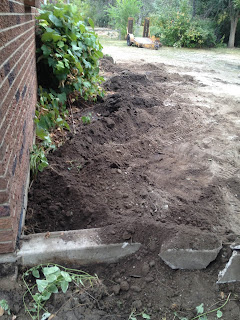
Like any contract job the garden demolition and renovation ran into some unexpected difficulties which stretched the time it took to finish out quite a bit. The crew was back out on Monday to finally finish the work. They still have to remove all the concrete but I'm quite pleased with the final look. Right now its sitting at three blocks high but I'm contemplating going to 4 blocks high. Still unsure about it so I would do that work myself. I had them leave enough blocks to do that and I'll return them myself later depending on what I decide. But its finished! The irrigation line is in and I have to add the soakers but that's not much work and can wait till spring if I want to.

As you recall this is the problem corner, the remnants of the 2' tall concrete wall mostly buried on the west side. Just to add a twist this is where the irrigation line that we want to use cuts through the concrete.

The Bobcat finally getting a chance to just move dirt instead of breaking concrete

Checking the height of the blocks. At this point its going to be built three high. A forth row would bring it up level with the foundation of the garage though.

A closer view

And there we go! You can see the stack of blocks I asked them to leave on the right. I'll have to move them so I can get into the third garage bay back there.


The rather large pile of garden dirt. Right next to the rather large pile of mulch resulting from the removal of a dead willow tree last year.

Wednesday, September 21, 2016

Renovating the Garden - Round 2

We learned even more interesting things about that wall today. One its like an iceberg with more concrete underground than above. I think its about 20" top to bottom (the contractor is estimating a full 24"). The long side and one short side are out but the concrete on the west side is almost completely buried. Also the earth is so compacted after years of use that its almost like concrete itself.

They brought in a Bobcat instead of my predicted jackhammer. The Bobcat just didn't have the torque necessary to really dig into something this compacted but they made it work, mostly, in the end.


If all goes well this morning, then they will be able to install the paver wall on Thursday.

The primary tool for the day, none of that electric jackhammer business. They wanted a bigger version of the bobcat but this is all that was available on short notice.

Serious progress by noon.

Finally the east wall gives up the ghost. Note that it came away in three large chunks rather than the hoped for easy to handle pieces. It took about an hour to get this part of the wall out.

End of the day the west wall stands alone

There is still a lot of dirt to pull out of there. Hopefully the grapevines aren't going to suffer to much.

The pavers ready for installation, we hope on thursday

A pile of large concrete pieces. Earl didn't mess around when he built the wall for his garden.

Taking out the west wall will be a challenge since its mostly buried.


Tuesday, September 20, 2016

Renovating the Garden

The house sits on a L shaped lot with approximately a half acre in the front and almost a full acre in the back. This is right in the middle of a residential neighborhood that was created from old five acre horse properties, when it was at the edge of Denver.

Keeping the back acre mowed was quite the chore, so the decision was made to sell it off. This required that a long drive way (120' long or so) 20' wide would be carved out of one edge of the property to provide access. The land has been sold and now the vegetable garden extends on to the new property and has to be revamped to fit on to our property which is now only extends 2' from the south wall of the garage.[There is a reciprocal use agreement that allows the two properties that are next to each other to access their garages using this driveway. Talk about twisted legalize!]

The vegetable garden is approximately 10' wide and 42' long and runs along the wall of the garage. It is surrounded by a concrete wall about 12" high and about 6" or so thick (it might be 8" I didn't measure it). Originally I thought I could just take a sledge hammer to it so I talked to the original builder and asked if he used rebar in it. He said no, although he didn't mention what he did use. This wall was poured about 30 years ago and in that time it only developed one crack in it. That should have been a clue.

Since concrete would have to be removed and dirt relocated we decided to contract this little job out. They started yesterday figuring that they would have all the concrete knocked out and broken into nice size pieces for handling. 8 hours later they hadn't even managed to get a third of it knocked down, let alone move any of the very compacted earth that was behind it. It was thirty year old concrete and they figured it would come apart pretty easily. The electric jack hammer just wasn't cutting it. They didn't count on the fact that the builder poured concrete for a living and replaced a good portion of the flagstone sidewalks in Denver. He really knew what he was doing and didn't cut corners just because it was a wall for his vegetable garden. The foreman said that if they still built foundations this way no one would ever have cracked basement walls.

Seems that while there isn't any rebar in there, the builder did use some braided metal wire pieces that kind of look like barbed wire, but quite a bit thicker. Today they are coming with a real jackhammer, the kind that uses compressed air. If that doesn't work I'm not sure what they will do.

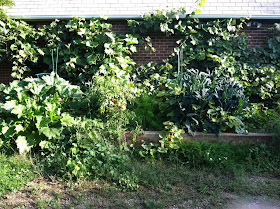
Here is the garden in full bloom one year. 12 Kale plants, 30 zucchini and 60 tomatoes by the end of the season.

No planting was done this year because the land was up for sale. Although the grapevines produced a bumper crop this year. They will stay in place.

The crack in the wall was here. They didn't make much progress,

Did better over here.

The pile of concrete. Not to many nice sized chunks though. Some of those will still have to be broken up.

The culprit. A six inch piece of twisted wire with hooks at the ends. It really holds things together.

Monday, September 19, 2016

Lead Adventure - Back of Beyond Painting Club Entries

Its been a hard finding time to just sit down and paint. The current painting club over at Lead Adventure though seems to have kick started things a little bit and I finished a couple of miniatures for it. It also gave me an excuse to make an order from Pulp Figures by Bob Murch. For this particular adventure I picked out a couple of packs from the Heroes and Personalities line figuring I could use these for just about game. Of course I'm now intrigued by the genre and may buy a few more. The minis from Bob are top notch so I'll definitely be picking up a few more packs from his inventory.

I'm also using these minis to teach with and they are excellent for that!

I picked up PHP-02 Rugged Heroes 1/New Version and in particular I painted the one Bob calls Carson Smith, He is very nice Indiana Jones style mini. I had a good time painting this one.


I also pickup up PHP-19 Dangerous Dames 2 and picked out Oberleutnant Heidi Reitsch to paint. Again thoroughly enjoyed getting back to the brushes.


Thursday, September 1, 2016

Kickstarter Loot 2 - Girl Genius Book 2 The City of Lightning

I received this bit of Kickstarter loot a couple of weeks ago, but I didn't realize the package had arrived as it got buried beneath a pile of mail. This is yet another gorgeous Girl Genius book from Phil and Kaja Foglio at Airship Entertainment. This is Book 2 in the Second Journey Series; The City of  Lightning. The First Journey of Agatha Heterodyne consisted of 13 volumes, I have all of those about half in hard back. If you have a hard back in this series that you are interested in parting with let me know!

Like the rest of the series this is a high quality full color graphic novel. It also came along with a variety of extra little goodies, like a new bookmark, signed book plate and stickers (most of which will end up on my hardbody miniature travel case). I love supporting Airship Entertainment, they really make the whole kickstarter journey fun and they have gotten very good at the game now so it doesn't take long to get from start to finish.

Everything has been so busy lately that I haven't been able to keep up with the strip so this is the first time I haven't read the story before receiving the book. I'm looking forward to sitting down for an evening and enjoying the adventures of Agatha Heterdyne; Girl Genius.