The Town of Calamity, The D&RGW RR Warehouse Row and Historical Miniature Gaming
More Stuff
▼
Wednesday, July 29, 2020
Monday, July 27, 2020
World War II Project - Return to Normandy - The Gangs all Here - AARGH!!
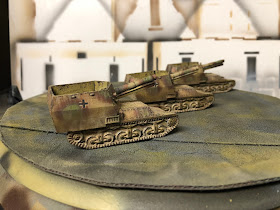
Here comes the mistake, and I managed to make two of them. I have a bottle of Liquitex matte varnish, big bottle, will last forever. I sprayed it on and it was only watching it dry that I realized that I just lost all my pigment work. That was bad enough, except that on top of that I must not have shook up the varnish very well and instead of a nice matte finish I got a nice glossy finish.
Bottom line I have to re-apply the pigments and get rid of that nice gloss coat. I forgot about not being able to seal the pigment effectively, although using the pan pastels in a more heavy handed manor will work, hence why I'm seriously considering bases for the vehicles this time around. The pan pastels hold up much better to handling than regular pigments so its still up in the air. In the mean time it will take another session or two to fix the finishing mistakes.
 |
| Pretty happy at this point, just a little pigment adjustment and they are good to go. |
 |
| Definitely to enthusiastic on this side |
 |
| Here they are all finished up just before I sprayed them. |
 |
| A bit more subtle on this side this time |
 |
| Pigments disappeared and looking nice and glossy! |
Friday, July 24, 2020
World War II Project - Return to Normandy - Railroad Station - Misc
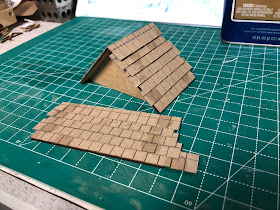
While I continue to avoid finishing the brick work I haven't completely stopped work on the Station. I decided that cut out shingles rather than paper would just look better in the long run. For Calamity I tended to buy the shingles, but there is a lot of roof work on this much larger buildings so I started saving cardboard to cut shingles from.
Along with that I figured it was about time I finished the chimney and get it into place.
Along with that I figured it was about time I finished the chimney and get it into place.
Thursday, July 23, 2020
World War II Project - Return to Normandy - The Gangs all Here - Weathering I
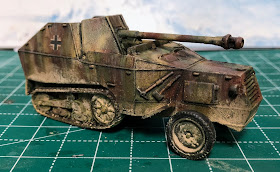
After the experiments with streaking I finally feel like I can start the weathering process. While a good portion of what I have finished would also be considered "weathering" for me weathering is the getting things muddy and dusty.
I started off with more streaking, in this case with a dust color (avoiding buff which was my first choice but I used that early in the process to fade the dunkelgelb). The technique is the same as the regular streaking just with a different color and this time I only used the make-up sponge as my brush. I did this streaking twice to intensify the effect yet tried not to go overboard.
I followed that up with a combination of pigments applied to the track bogies, drive and return wheels as well as the lower hull behind them (I'm not sure how much of the lower hull should really exist on the S307). I "fixed" the pigments, more or less, in place with white spirits. This allows me to adjust things a bit after the pigments have dried. I could have used a "fixer" that pretty much seals everything into place but good luck making any adjustments after that!
Of course I haven't done this in a while and as you can see, I may have gotten a tad over zealous with my application with the pigments. Fortunately pigments are easy to adjust with a brush or even with your finger if need be.
Wednesday, July 22, 2020
Friday, July 17, 2020
World War II Project - Return to Normandy - The Gangs all Here - Streaking II
I gave the streaking effects another shot. I used the oilbrushers and the enamel wash again, but I have decided that I'm not going to bother with the enamel wash, it doesn't cure fast enough for me and I tend to wash it completely away when I pull the streak down. Along with a regular chip brush I also pulled out a make-up sponge to try. I like the make up sponge quite a bit for streaking. I think this maybe my go to method for streaking at this point. We will see though.
I think the streaks are more evident this time and didn't become a "filter" like the first attempt. Still need to practice with this effect but its looking better.
I think the streaks are more evident this time and didn't become a "filter" like the first attempt. Still need to practice with this effect but its looking better.
 |
| Not perfect by any means but better the second time around. |
 |
| I think the S307 maybe the best of the lot. |
 |
| And the a paints; Oilbrushers; grime, rust and dark earth. The jar is streaking grime (a bit on the brown side). |
Thursday, July 16, 2020
World War II Project - Return to Normandy - Railroad Station - Brick con't
In between painting sessions I have been working on the Railroad Station. I needed to work through some of the problems and potential solutions before I posted anything about it. Progress has definitely been slow. I did decide that the brick around the openings would be applied flat to the walls. I'm counting on the thickness of the paper to make it pop out after I have "plastered" the outside walls and it saves a lot of stripwood which seems, like other things lately, to be in short supply.
Other than that I have popped the brick out from the corners with stripwood and applied the brick paper. As I have mentioned before, trying to do more than a single corner with this stuff is really tough, removing the adhesive backing would solve that issue but it would add a lot of time. For the next brick project I have acquired another batch of bumpy paper without the contact backing.
Other than that I have popped the brick out from the corners with stripwood and applied the brick paper. As I have mentioned before, trying to do more than a single corner with this stuff is really tough, removing the adhesive backing would solve that issue but it would add a lot of time. For the next brick project I have acquired another batch of bumpy paper without the contact backing.
 |
| Finished all the brick corners for the ground floor, that seemed to take forever. Here I have cut out and glued on the stripwood for the upper floor. |
 |
| Applying the brick edge. I actually did both sides so there won't be any folding necessary on the facing piece, but it does have to be wide enough to cover two edges now. |
 |
| Can I trace things accurately enough to make a template? I just needed to trace the outline of the laser cut brick. Not as easy as it would appear but certainly doable. |
 |
| The test template. It became a test because it basically disintegrated when I applied the glue. |
 |
| Thick paper to start with and paper cut to the full size of the wall to help maintain proper registration. |
 |
| I used the template to create the four windows of that size that are required. |
 |
| And here is everything cut out. Do you see the problem? I need to make the arched portion with bricks going vertically not horizontally. I will have to cut out the offending section and then lay the brick strips in one by one. Fortunately I will be able to use the lasercuts on the building to guide me through this, I'm sure it will be tedious to do. |
 |
| This is the street side. The framing around the freight doors was easy enough. A regular horizontal pattern on the edges and a soldier row across the top. |
 |
| And from the platform side. |
Wednesday, July 15, 2020
Friday, July 10, 2020
World War II Project - Return to Normandy - The Gangs all Here - Streaking
This is really my first attempt at trying to create streaks and I don't feel like this first session was particularly successfully. It feels like I ended up with more of a filter than streaks. Again gaming pieces so they are good for practice and will look fine on the table. I think I'm going to do a second round of this just to try out a different method.
 |
| The streaking effect is really hard to see on the more heavily camouflaged S307. |


