Quotes

Life is short, break the rules. Forgive quickly, kiss slowly. Love truly, laugh uncontrollably and never regret anything that makes you smile. - Samuel Longhorne Clemens (Mark Twain)

Friday, June 9, 2017

World War II Project - Buildings - Sarissa Precision Railway Station (NO 36) - Concept

Next up in the building parade is one of the railway stations from Sarissa Precision, more precisely kit NO 36. I see this station as one that would be typically found in a large village or small town. When I went on my flurry of kit buying I envisioned this one as another candidate for the photo realism technique. After the finishing the Charlie Foxtrot Models kit I decided to sit down and take a closer look at this kit before making a final decision on how to approach it and maybe map out in advance any modifications that might need to be made.

Like most MDF kits this one is pretty much dead flat with any detail engraved as panel lines. After seeing what some of the model railroad kit creators are doing with laser cuts (Monster Model Works is an excellent example) I find this lack of detail a bit discouraging, I know details like brick and stone can be done much better than what is currently being sold to the wargame market. On the other hand detail like that also takes a lot of time and laser time is money so trade offs must be made and that leaves it to the builder to decide how to approach finishing detail. But I still want finishing to be as easy as possible.

One of those easy things has come to my attention through a series of postings on LAF. This particular post can be found in the WWII forums and is simply listed as Stalingrad. The level of detail that has been achieved in a short time is pretty amazing. One of the shortcuts taken to achieve this is the use of brick sheets. These sheets are printed on "bumpy" paper and give the impression of 3D bricks. I can apply these sheets in the same way as I did on the Dormer House 2 model and I'm looking forward to seeing how it looks. Unlike the CFM kit Sarissa doesn't use puzzle cut corners so I don't have to hide those, but I do need to hide the slot and tab style that they do use. This is much easier to handle and I can actually wrap brick sheeting around the corners to get a nice fit.

Something else I want to do though is similar to the sills that I created for the Dormer House. In this case the exposed decorative brick at the corners and around the windows. I want to raise this up "above" the surface of the side of the building to enhance the 3D affect. My initial thought is to buy either bass or balsa sheeting 1/8" thick and cut that to match the engraved details. I'll wrap the brick paper around this sheeting and apply the sheeting to the building. I think that will work quite nicely. Looking at the actual pieces from the kit I'm hopeful that I can pull this off. I'm hoping to trace the detail from the parts on to a template and use that to guide the cutting on the basswood. Since the rest of the walls appear to warrant a stucco look I might just apply some of my terrain pastes to the exterior and just be prepared to finish the whole thing off with the airbrush. I'll likely just paint the interior walls directly as well, which means I need to do some interior painting work before I start the build. I'm not quite sure how I'm going to chop up these tasks yet.

Here's a look at what I'll be dealing with for this build:
Sarissa does some nice instructions for their kits and these are no exception. My biggest issue with Sarissa is usually the quality control of the MDF they use. Sometimes a piece that is out of spec works it way in and is thicker than everything else in the kit which means a lot of filing to make things fit right. I always dry fit everything from Sarissa before I assemble it.


2mm thick MDF, pretty standard stuff.


Big flat roof panels, shingles are definitely called for on this kit. Maybe something similar to the ones I used on the Dormer House 2 model but cut into strips and overlapped this time.


There are a few components that are thin cardboard, mostly doors and shutters. I might enhance these with a bit of woodwork as well just to make them pop a bit more.

This is a sheet of the "bumpy" brick sheeting that I acquired off of eBay. This is lighter in color and is the same sheeting used in the Stalingrad build on LAF. This is a more finished style of brick.

This is another version using a darker and rougher looking brick. I also have this in a smooth version that I might use underneath the stucco in exposed areas where the stucco has broken away. Both sets of brick were billed as being O Scale but I find them to be a lot closer to S Scale. This fit in nicely with the scale of the miniatures.

Thursday, June 8, 2017

The Outdoor Project - What keeps me away from the workbench

We have reached a point in the year when its relatively safe to actually plant things in Colorado. Spring can be a dicey proposition here for planting as the threat of snow can extend well into May. We had to perform a rescue mission at one point and bring all the potted plants indoors as we did get a couple of those nasty May snowstorms this year.

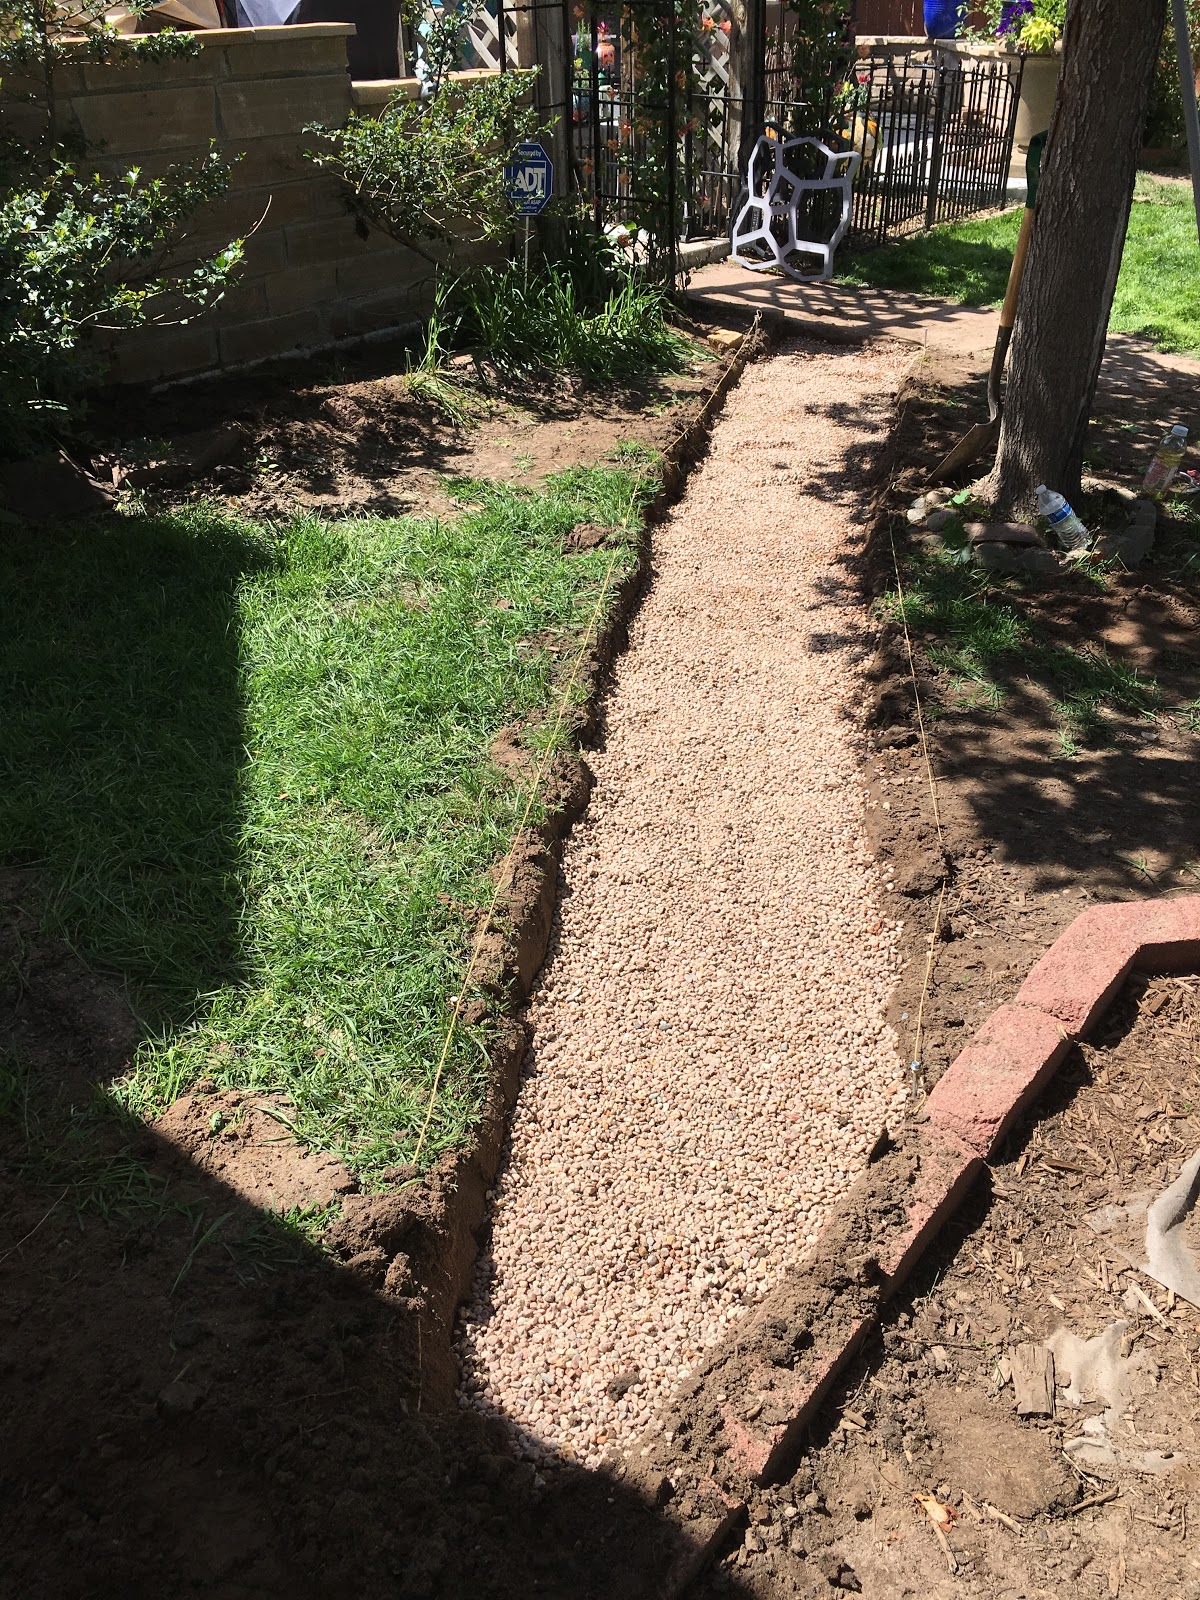
Last week was spent planting all the flowers and vegetables and getting the whole patio ready for summer entertaining. That included a little bit of back breaking labor putting in a path where the dogs have managed to wear away all the grass as they run to check out what our neighbor is doing. 


I also managed to replace the third brake light on my jeep. A little less than an hour job turned into about 4 hours until I realized that the issue was a blown fuse. Once I replaced that things worked like a charm and I managed to eliminate the "periscope" brake light that obstructs vision through the rear view mirror. All of that occurred because the tire carrier for the spare tire had cracked and needed to be replaced. That turned out to be the easy part!


Where the new concrete path will go. You can see one of the culprits giving her approval.

Digging the trench, 4 inches deep, two for the gravel bed and two for the concrete pavers.


Gravel in place, tamping has begun and will continue for a bit.


Some of the other work. We fenced in part of the flower garden by the patio so that it wouldn't become a digging ground for the dogs. I decided that this would be a good, safe spot for the large Talavera pottery pig I received from my Mom (She is in a condo in Boulder now and no longer has a garden for the pig), with the addition of a few more smaller pigs its now the pig pen.

A Talavera snail by the fountain

And an escaping pig in that odd space between the fountain and the fence.


And a Talavera pottery donkey complete with basil to help keep away mosquitoes. I really like the metal peacock on the table too.


Wednesday, June 7, 2017

World War II Project - More British Airborne Arrive

The pre-order bundle
I'm not quite sure why I did this as I pretty much have everything I need to finish off my platoon of British Paras but apparently I pre-ordered the new plastic box which came along with the Horsa Glider kit from Sarissa Precision. Oddly enough it also came along with Lt Speirs from Band of Brothers, I'm pretty certain he is an American paratrooper but I'm sure he will be a nice add to the box of American Paratroopers that I have sitting on the shelf.

I have only had a chance to take a quick look at this bunch. The Sarissa kit looks like its up to their excellent standards and is constructed from both laser cut card and MDF. Should be pretty sturdy when its built up. I have seen some less than flattering comments about the kit on LAF but for gaming purposes I think its going to be just great. I don't need a perfect scale model for the gaming table and I applaud those that are willing to scratch build that perfect scale model.

I have already seen some built and painted versions of the plastic Red Devils and this box looks like its going to be a winner. Warlord seems to be applying lessons learned to just about every kit like this that they decide to produce.


The sheet with the list of what is what on the sprue. I see sten guns, rifles, mills bombs, scoped rifle, hand grenades, piat, piat ammunition case, Bren gun pretty much everything you need except for the small mortar. And there are 18 heads available so there will be plenty of variety on the five miniatures that come on each sprue.


There is a lot of stuff packed on these sprues. Five sprues in the box enough for the listed 30 miniatures which will leave you a bit short of a full platoon with command I think.

The somewhat random selection of an American Paratrooper Officer
Now the big kit from Sarissa

Nice instructions with this one, hopefully they will make sense!


Plenty of MDF and cardboard in the kit. Should be fun to put together, hopefully it will be sturdy as well.

Tuesday, June 6, 2017

Kickstarter Rewards - Tiny Epic Galaxies; Beyond the Black Expansion

Gamelyn Games comes through again with another well done Kickstarter. Beyond the Black is an expansion for the Tiny Epic Galaxies game that I picked through one of their earlier Kickstarter projects.

Again this is not a stand alone game, it is an expansion but like everything from GG this box comes backed to the gills with components and new stuff to expand the game play. I haven't had a chance to really dig into this expansion yet so I'm not quite sure how the current game play is going to change. It doesn't help that I haven't played Tiny Epic Galaxies in over a year now either (although I do consider it to be a great little game).


Like every GG Kickstarter I have been involved with, it pretty much smashed through every goal that was listed. The box is extra thick cardboard so it should take a real beating if necessary. Extra tokens, custom tokens, extra ships and even more pilots were just some of the goals that are packed into this tiny box. And in order to take advantage of every inch of space the Rogue Pilot solo rules are printed on the inside of the box bottom.

Monday, June 5, 2017

World War II Project - Buildings - Photo Realism Concept XIII - Finished

I was on vacation for a week and was to busy to really get much done. The Honey Do List was quite long for the week. I did manage to grab an hour though and finally wrap up the Charlie Foxtrot Models Dormer House 2 though. Overall I'm pretty happy with the final product there are things that could be better but its always a learning process when you try out a new technique or two.

Things I did learn and will try to remember to do the next time.

1) Always trim the paper so that it will fold over the edges. This is for both the top and bottom as well as window and door openings. You just get a much nicer edge this way and a more complete look. You will have to file doors and windows to fit but this is worth the extra effort.

2) Hiding seams is hard! My main objective was to hide the puzzle cuts at the corners. In this I was successful, but what also needs to look better is the paper seams. On the outer corners I could hide this with different types of edging. I still see seams at the corners on the chimneys though. Granted for the most part I will be the only one that notices these issues.

3) Think through your modifications. Every time I added something to the exterior I forgot that it might affect how another part would fit. In this case it was primarily related to roof over hangs. I was fortunate that I was able to make the adjustments without breaking anything.

I really enjoyed putting together this Charlie Foxtrot Model kit and I look forward to putting together the other ones that are in the backlog now. The only real issue I have is that all the parts came in a back "unpunched" from the sprues. In there were some important pieces that look like scrap because they could have fallen out of a window or door opening. At one point I just through all the scraps away along with these pieces that are used to "fix" the first floor to the second floor. I'm not fond of the PVC piping that was provided for the chimneys either, it doesn't like acrylic paint very well, but that's a pretty minor quibble.

A few pictures of the final in process shots.


And some beauty shots to go along with those.

I think really did manage to cut down on the amount of painting that I might have normally done.