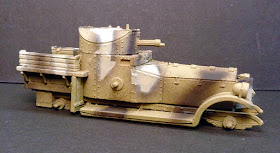
I started by going back over my lightest color and filling it in a bit more and sharpening up the edge where it meets the chocolate brown. I then followed up with the chocolate brown and repeated the process. After that I worked in the middlestone, but this time I went with the straight Vallejo Model Color middlestone which has a been more green to it than the Vallejo Model Air which has quite a bit more yellow in it.
It still needs some more work before I call the camo done but I'm much happier with it. I started on the wheels as well. I painted the interior of the two spare wheels with the middlestone to try and give it a bit of a see through effect. I which I could get some real spoked wheels for it. I might take a look around and see if I can find some after ReaperCon. I think they would look really sharp.
So tonight's work looks like this.
 |
| At the start, pretty ugly, really need to get back in practice with the airbrush |
 |
| Filling in the light color and sharpening the inside edges, starting to work the chocolate brown. |
 |
| Working the lines tighter, starting in with the middlestone |
 |
| And the wheels, white walls! You can see the two I picked out for the spare tires. |


Very nice. Kris, lovely colour scheme!
ReplyDeleteI'm not sure about nice yet, but its getting there! I'm looking forward to getting to the weathering stage on this one, all those lovely rivets to work with.
Delete