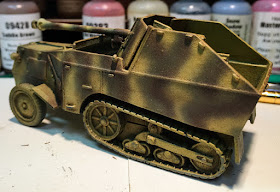
While the vehicles were still damp with the filter I applied a dark wash. I couldn't find the one I was looking for so I used a dark brown for modern vehicles which was lighter than I really wanted, but better to light than to dark! I didn't apply this across the whole vehicle, but rather concentrated on areas where grime might start to build up. I would call this effort moderately successful, I might go back and reapply. I'm using a lot of relatively new techniques for me on these so I might let it stand and just so how it holds up through the whole process.
I then cleaned up the yellow a bit as it was getting a bit to dirty for my liking again. I used mineral spirits and a small cosmetic brush to wipe away the excess wash from the higher surfaces. I might go back and do this step again as I see some areas that I missed.
I applied a little paint after this, notably anything with a wooden handle. I tried the tires and tracks but those were literally repealing the paint at this point because of the wet enamel. This may take a couple of days to dry thoroughly. My next step will be to get some decals on there and start the weathering steps (I hope).
 |
| At the beginning of the session |
 |
| Filter applied evenly across the entire vehicle |
 |
| Dark Wash applied primarily in the recesses |
 |
| What I used for this session |
 |
| After cleaning up the yellow a bit. I need to improve the desk lighting if I'm going to continue to take pictures here. I just don't have a good lighting setup right now. |


Lovely stuff.
ReplyDeleteI'm happy with it so far. Thank you!
Delete