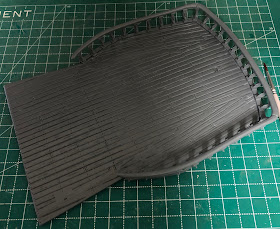
I managed to steal a bit of time and continued the disassembly of Sophie's Revenge. This time I focused on trying to separate the upper deck from the hull walls. It wasn't quite as bad as I was expecting but there were definitely a few areas that presented some difficulties.
The main hull and top deck come assembled from the factory. The deck is actually made from two different types of plastic. The hull walls and the front and back of the upper deck are made from the traditional bendy bones material (very bendy in this case). The two center sections of the deck and the two main supports are from a much harder plastic, similar to what you find in a regular model kit (but yet not quite, much like the tea served on the Heart of Gold from the Nutrimatic Drink Dispenser "almost, but not quite, entirely unlike tea" from the Hitchhiker's Guide to the Galaxy by Douglas Adams).
For the most part the glue was pretty light except in a couple of areas and I managed to only break one small piece of the deck. I did elect to make a couple of cuts rather than try and break a couple of particularly well glued joints at the front of the hull.
So the hull is almost apart, another 30 minutes should do the trick. Then because of the way the bow is shaped I'll have to figure out where I will actually need to cut things apart to allow the top deck to come off.
Here is how things went today:
 |
| I also managed to separate part of the railing. I'll be glue that back on! Didn't mean for it to come off. |
 |
| Here is the next section of deck that I managed to separate, the one just forward of the stern. |
 |
| This is the section I managed to break. Not bad as far as breaks go and I saved the piece. I should be able to glue that back into place without a problem. |
 |
| The bottom of the deck. A fair amount of stress fractures here as well. Notice how the railing overlap the decks to help hold things together. |
 |
| And another look at the hull minus two sections of deck. I will definitely have to add crossbeams to help hold support the decks. Not sure if I will leave or remove those big support cross members or not. I will have to mull that over. |


No comments:
Post a Comment