I really enjoyed working on the D&RGW switching plan (Warehouse Row) in 3D. Since I "completed" that model I have been contemplating doing it again. When I decided to do the Malinowski tribute kit builds I thought it would be an opportunity to do it again this time for the On30 layout.
While I would love to have a layout the does the Colorado & Northwestern justice I don't have the space and I don't want a second switching layout. I envisioned a figure 8 layout with a few places to switch cars but the emphasis on scenery, good sight lines for photography and letting the trains just roll.
There are a couple of parameters. It has to be less than 4' wide and breakdown in to at least two sections so it can be moved and stored easily. Being able to make it come apart definitely adds complications to the build but I'm not going to worry about that for the model. Scenery needs to be lightweight and relatively tough so the bulk of it is going to be carved out of pink/blue. The C&N, like many Colorado railroads, ran along stream banks so a stream, and the opportunity to build a few bridges, are required features.
Looking at a few maps and a lot of pictures I decided that the little mining town of Salina would fit the bill (other than the figure 8) for the location. The station is a bit separated from the town itself and the town kind of straggles up the gulch with at least one of the mines, the Black Cloud, dominating the gulch and the town. Plus the switching is more extensive than a lot of other spots on the C&N and practically everything is on a curve.
With that in mind I started doodling around with the compass and curve radii. I settled on 20" radius which, in theory, should accomodate the 2-8-0s that I finally managed to acquire. However, the problem with the radius is it really shortens up the passing siding to the point of making it almost useless if I limit myself to an 8' length. To combat that I stretched from 8' to 10'. The compromise is to break the layout down into three pieces, instead of the 2 pieces I was hoping for; 1 6' long and 2 2' long. For the width I needed 40" to accomodate th radius plus a couple of inches on either side which brings us to 44" wide. I'm not sure that only saving 4" from the less than 4' requirement is actually worth it and maybe in the end I'll just go all the way out to 4'.
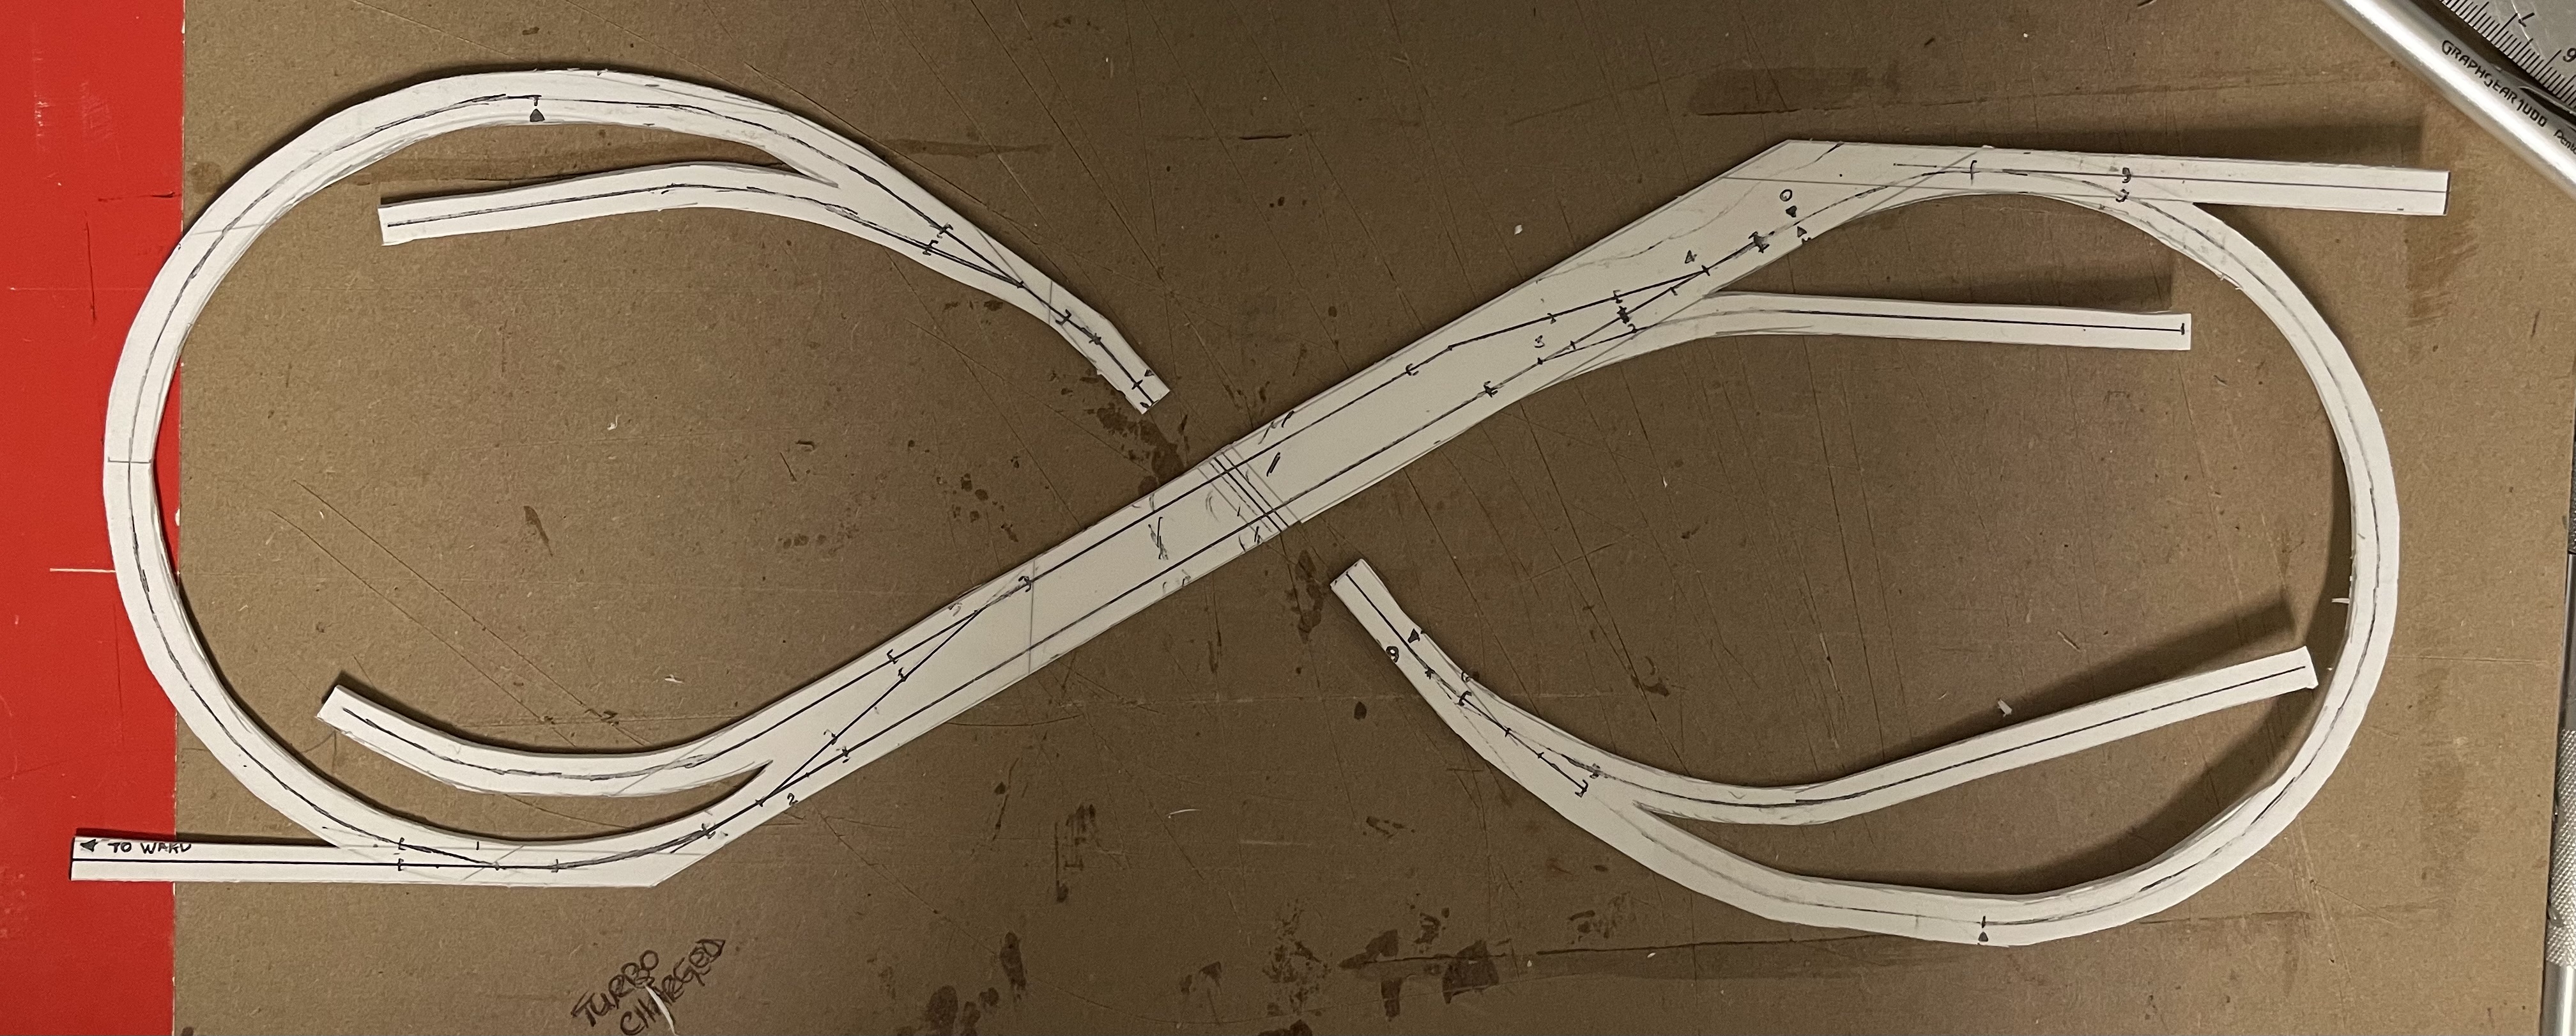
I went through 5 or 6 iterations before I arrived at one that, mostly, fit the bill. Here are a few pictures to illustrate.
 |
| The "final" iteration of the track plan |
 |
| I photocopied it so I wouldn't mess up the original when I glued it down to a sheet of PVC. |
 |
| I used some contact cement to glue the paper down to the PVC and cut the whole thing out. This actually didn't work out very well. The paper started to peal away from the PVC pretty quickly as I started to cut it out. The happy accident was that the contact cement actually transferred the track plan right to the PVC so when the paper pealed away the drawing was still on the PVC. |
 |
| I then cut a piece of Gatorboard to serve as the "tabletop". Its 1/4" thick so I'll have to add some more foam, of some kind, so I can really carve down below the track level. |
 |
| I glued down the areas that would be elevation 0" that establishes my baseline level. |
 |
| I then added some risers for the grades. The issue is I need to go from 0" to 5" in about 8' so the grades are steep. However, the C&N averaged about a 4% grade and in the area of Salina there was a section that was close to 7% (not for a long stretch but its still quite the obstacle). |
 |
| A look from the side. |
 |
| A closer look at the bridge crossing and the spot where I "cut in" another switch. Originally the train was to enter from the right side, but that created an awkward spot with the grades. By cutting in the switch on the 0" elevation I got around the grade issue on the right. |
Now I just need to find some foam to cut up to make create a bit of scenery.