Quotes

Life is short, break the rules. Forgive quickly, kiss slowly. Love truly, laugh uncontrollably and never regret anything that makes you smile. - Samuel Longhorne Clemens (Mark Twain)

Thursday, August 27, 2015

Calamity and Sanborn Fire Insurance Maps

As with most of my projects I like to do research. Now Calamity is completely a figment of my imagination but I would like to have it at least fall into the realm of possibility. I have always envisioned it as a mountain town in the old west, so narrower streets, a nice slope to that there could be visible building foundations, in other words a lot of things to keep someone's interest while they are waiting their turn in the game. When I stumbled across some RPG maps for Deadwood, South Dakota I decided I would like to see how the real Deadwood was laid out. I found out that the South Dakota state library had the Sanborn Fire Insurance maps for 1885 and 1891. Close enough to fall into my time frame. But the maps were not available online, although they had been scanned. Getting access to Sanborn maps can be really frustrating most states restrict access, even online access, to state residents (by the way if someone in LA can go to the LA city not county library and download the maps for Bodie, CA I would appreciate it). Colorado seems to be the exception and anybody can access the Sanborn Fire Insurance maps for Colorado online and download the images.

I happen to have an old friend living in South Dakota and he applied for his state library card and was able to download the 9 maps for Deadwood that I wanted. Thanks Larry! Anyway the information on these maps is very interesting, if you can get your hands on the colored versions (again thanks University of Colorado) then you can pick things out by the color which represents the major material that the building was made from. They are also drawn to scale so you can take rough building measurements from them if you need to. Not every town has a set of Sanborn maps but when they do you can literally follow the growth of a town from one edition to the next. While 1885 can be done in 3 maps, 1891 Deadwood takes 6 maps. Deadwood is an interesting place to be sure and I look forward to really digging into these maps while I work on more model buildings for Calamity.

Here I pieced together the three sections that make up the 1885 edition of Deadwood, You can see the roads, the railroad tracks, rivers, creeks and buildings.

Moving in on one of the sections. In this case map 1 includes both the scale detail but the outline of the town and how the map sections relate to the area that makes up Deadwood. Not every area is detailed on the maps. They are primarily concerned with more built up areas.

Moving in a little closer in this case where two map sections come together,

And some close up detail

This is a colored version in this case of Silver Plume Colorado which has had its fair share of influence on what I want Calamity to look like.

Thursday, August 20, 2015

A Few more Painting Guides

While I have manage to wean myself off of continually buying new rule sets I seem to be unable to pull that off in regards to painting guides. There is a new painting magazine called "Painting War" being produced by Designs & Edits WxW Co. They are currently producing "Season 1" and have published 4 issues at this point. I think their intent is to publish on a quarterly basis. Issues one and three have focused on WWII while issues two and four have been focused on Napoleonics, so something for two of the more popular periods. They intend to alternate periods until they have completed those periods. There will be issues devoted to other periods as well. Each issue will be feature the techniques of a single painter. I have issue 1; WWII German Army in Campaign and issue 3; WWII Japan & USA Armies on Campaign, the painter featured in issue 1 is Ruben Torregrosa aka "Heresybrush" and issue 3 is Claudia Zuminich. These include guides for both 28mm and 15mm miniatures.

The guides are quite nicely done, not as many in progress pictures as I would like to see but very nice high quality pictures. Colors are listed both by name, number and with a tab of the color. Each step by step indicates the paints used and how they were applied. There are separate sections for 28mm and 15mm showing an definite understanding that the two scales are painted differently. At this point all the colors used are by Vallejo, which is not to surprising. Although I don't think it is a Vallejo publication masquerading as an independent magazine as there is an ad for AK Interactive in there. Hard to say though as its quite possible that Vallejo actually makes the AK Interactive paint products.

I read all the way through Issue 1, and I found it interesting and a worthwhile read. There are plenty of step by step pieces as well as a whole raft of completed figures with full descriptions of paints, techniques, and hints/tips listed in the back. They are definitely expensive though and I'm likely to be very selective about which ones I get rather than just gettting a subscription (these were $28 each!). I received mine, quite promptly I might add, from Brigade Games here in the US.

I would certainly recommend these if the subject matter is of interest to you. For instance while I have both WWII issues at this point I'm not likely to pick up any other WWII issues. In the Napleonic series I would pick up the British issue (which might be Issue 4) and which ever one the Bavarians show up in.


The table of contents for the German Issue. While it shows some AFVs on this page there are no guides to painting AFVs in this issue.

When it says USA armies it means it. It covers both the Army in both theaters as well as the Marines.


Sunday, August 16, 2015

Up Scaling Calamity - Upping the Complexity

I decided I was a little tired of putting together rectangular boxes so I decided to try something a bit more complex. I started off with one more small square building and then jumped into one of my corner saloon/hotel designs. In this case I'm envisioning two buildings being converted into the traditional Hollywood look. It also gives this one a very interesting roof line. Might surprise the gunslinger that is expecting a nice flat space to play sniper from. This one took a bit longer to put together but I think it came out just fine. And so the accumulation of buildings continues!


My small building for Round 3. Just keeping things square!

Okay, pieces are cut out, time to try and get it together.


A little rough looking but I think it will get the job done. Especially after a little paint.

And from the back

The corner fortress

And some nice variation from the back. I just grabbed random buildings for these shots

And maybe with an alley on the left side

Thursday, August 13, 2015

Up Scaling Calamity - A Second Round of Buildings

I have discovered that it really doesn't take long to knock these buildings out. I can build about four of them an hour. I think it takes longer to decide which size to experiment with than to actual cut it out and glue it together. I better get busy with that CAD file for the doors and windows. They are looking a little plain right now.


A thin two story building nearing completion here. My steel blocks really come in handy for this work.

This building isn't going anywhere!

The front side, everything is pretty even

Its the variations in length that will really add some character.

Six buildings finished - Front

And the back

Wednesday, August 12, 2015

New Modeling Material

As Dan August suggested and Lasgunpacker correctly identified I managed to get my hands on a sample for foamed PVC. This is definitely an interesting material and after a little internet searching I found a number of sites that recommend the material.

So that let to the search for US sources. Again I managed to find quite a bit in Europe before I finally found some US suppliers. This particular piece came from TAP Plastics and measures about 4" x 4" and 1/8" thick. Its relatively light (heavier than foam core and carvable foams like the blue and pink insulation foam or Damp's favorite green foam) and when I opened the box I admit to being a bit skeptical regardless of what I had found on the web. Still after messing around with it a bit it seems to be living up to its reputation as an excellent material for modeling. Its rigid, but has some flex to it so it should hold up fine to even rough game play. It accepts a pencil line so its easy to draw on. It can be scored easily and with the same tools I would use on wood. It can be embossed and cuts very easily, much easier than styrene. I suspect that it will dull blades pretty quickly though, so I better lay in a good stock of those. Superglue seems to be the best adhesive to hold things together.

The smallest thickness I can get from TAP Plastics is 1/8th" which is fine for use with the both exterior and interior walls. I found some thinner stock measuring 1mm and 2mm in thickness available through a couple of different sources so I can do some fancy inlay work if I want to. I can get 10 sheets of 1/8th thick foamed PVC measuring 11"x 17" for $30 plus $12 shipping. Its actually sign material so you can likely find scraps of it at sign printers as well or from discarded signs. That should appeal to the more frugal among you.

Here are some bad pictures:


Straight from the box

Experimenting with some wood plank and grain detail. Easy enought!

Takes a pencil line without a problem

That was easy to cut. A few strokes down each line and I was good to go

Trying to show the clean edge from the cut. Note that it does leave a ridge like styrene. It sands quite nicely.

Tuesday, August 11, 2015

Up Scaling Calamity - First Buildings

Broke out the tools tonight and built up the first two little buildings for the scale model of Calamity. Not terribly exciting work but it felt good to be working on the project again. A few pictures from the evening.
Here is the first building. I like the proportions of this one so it might become the "standard" size. Got out the big metal blocks to help hold things together.

This one is set for the roof. I picked out a light tan matte board for this so the tan portion is on the inside. I'm going to paint these and then glue on cut outs of doors and windows.


The pieces for a smaller building. A lot of western buildings were quite small but they still need to be big enough to hold some minis

The big blocks and the little blocks in action.

Side by side. I'll do porches, sidewalks and awnings when I move on to building the board itself. Since Calamity is going to be on a distinct slope there will be quite a bit of foundation work on some of the buildings and it will be easier to add those details later. 

Sunday, August 9, 2015

Up Scaling Calamity - Building Outlines

I spent the afternoon cutting out building floors and two of the three sections of the board. These are all built on a scale of 1/2" = 1" so a building I intend to be 4 1/2" wide and 7 1/2" long will measure out 2 1/4" wide and 3 3/4" long so half the actual size. The two boards that I cut out are 12" x 24" and have a 6"x 6" grid drawn on them.

My intent is to draw out the initial board on the grid based on my sketches and then use the various sizes of floors that I cut out to determine the building arrangement. Once I have done this then I can build small prototype models of the buildings that will make up Calamity on the full size board. Everything I have cut out so far is generic so a couple of the more ornate structures haven't been cut out yet, like the larger saloon and railroad station structures. I also intend to build and scenic the entire board so it will be a working scale model of Calamity when I'm done.

The pictures aren't very good at this stage but I think you will get the idea.


Stacks of building templates ranging from 8 1/4" to 3" wide and 7 1/2" to 1 1/2" long 

Two of the three boards, sadly out of focus. Trust me there are some grid lines drawn on there!

A scattering of buildings of different sizes arranged on the two boards

Saturday, August 8, 2015

A Book for Calamity - The Western Town

Originally I was going to show off some of the matte board models I intended to build today. Instead I was distracted by a book, specifically "The Western Town, A Theory of Aggregration" by Lehnerer, Macken, Kelley and Steiger. Looking at the cover there doesn't appear to be much going on.


Quite frankly I bought it for two reasons, it is focused on 22 movie towns of the old west and it has some very cool illustrations of the buildings that make up those towns. I have struggled through reading some of the text, quite frankly its going over my head. Apparently there is nothing quite as foreign to my brain as architectural theory. I'm sure I'll get it but I wish it had been written in English, but then I'm definitely not the target audience for this book despite the wonderful description on the back:

"The western town of roughly 1860-90 exits in an ephemeral moment in American history. Alwyas being realized but never really there, these towns vanished entirely from the prairie by the end of the nineteenth century. Yet even today everyone has visited these towns, since they survive in their abstract and distilled form through the plot-generating sets of Western movies. Somehow this (re)constructed reality is able to support these plots inherently, completely, and inexhaustibly. From the Great Plains west of the Mississippi to the foothills of the Sierra Madre, the towns of Agry Town, Rio Bravo, Sweetwater and many more are home to an unflinchingly regular set of formal arrangements, typologies and social interactions - in other words, a cliched but consistent host of characteristics and characters. The Western Town's integral pieces suggest that behind its simplicity lies a rich source for architecural and urban study."

Here is an example of some of the text from the book (this part I understand), just so you know what you might be getting into.

"The Superstreet's Individual Buildings"

"LaHood's general store is one of the first structures making up the town's street. A Two-story-high front door sits at the top of a few steps attached to a wood plank deck where supplies not susceptible to the elements sit on display as riders enter the town. The second-story windows imply a more complex program than the otherwise typical building program. As the eye moves to the edge of the front facade it becomes clear that the building is not merely one mass but a collection of smaller out buildings. The general store is an eccentric collection of structures not contained or encapsulated within the clapboard siding of one dominant structure. The store is a collection of both smaller buildings and a main dominant building structre at its center, and its property boundary is not altogether clear."

(page 66)

This is the kind of revelation that I'm looking for in regards to Calamity. Calamity is very much a movie set, yet more substantial than a movie set. One of the key pieces of the book is taking these western movie sets and fleshing them out into a full fledged town and not just a collection of backdrops.

The book is full of illustrations both of movie stills and architectural designs. Here are a few of the illustrations that convinced me to add this book to my reference collection.


Fort Grant from the movie Hang 'Em High

One page for the town of Rio Bravo

What these illustrations lack is what the second story looks like. Two sets of stairs are seen here but there is no information on where the stairs go.

A saloon in Rio Bravo, note the small stable out back and the outhouses

Friday, August 7, 2015

Upscaling Calamity - First Cuts

I spent a little time with the ruler and the knife cutting matte board into strips. These will be the floor pieces so I will be wrapping the walls around them rather than on top of them. I'm going to do my best to try and keep this simple, but these things have a way of spiraling out of control.


My standard materials for making prototype models; Matte Board, Mechanical Pencil, Matte Cutter, Heavy Ruler

Thursday, August 6, 2015

Kickstarter Loot - Basius Pads

Nothing like hand delivered Kickstarter rewards! These came from the UK to Houston, to Gencon and then finally home via my brother in law. I didn't actually back this particular kickstarter but I did have a friend (in Houston) who did so I went in on a couple of these negative molds through him. Yes, you did read that correctly these are negative molds. The idea here is that you spread your favorite basing material, like green stuff or milliput on a base and then press it into some point on the pad. Pull it off and you have instant base texture! I received the dungeon and forest pads. One for use with my fantasy minis and the other for historical minis, at least some of them. You can see some of the intricate detail in the close ups. When I get a chance I'll give these a try and see how well they work.

Dungeon Pad, clean side

Dungeon Pad, cluttered side

Dungeon Pad close up, you can see variation in tile height, piles of coins and a backpack. Not sure what the stuff in the upper left corner is, guess I will have to press a base into to find out.

Forest side 1 with stream and rocks

Forest side with tree trunks and branches

A close up of the broken up trees and the leaf detail

Tuesday, August 4, 2015

Upscaling Calamity

Despite the silence on the subject I have been working a bit on Calamity, primarily messing around with the layout of the town. I stumbled across a couple of hand drawn maps for Deadwood, South Dakota, probably for an RPG. I like the look and feel I found in these drawings:


I like the look of the town being "framed" by scenery, as you can see in the first drawing, so I'm thinking of having creeks on two sides (rather than three) and steep slopes on the other two, I have always envisioned Calamity as a mountain town (loosely based on the town of Silver Plume in Colorado) and I had some of these ideas swimming around in my head so stumbling across these RPG maps of Deadwood finally brought everything together. My original concept had the town split in half by the creek with the railroad running through, basically, the middle of the board. With that configuration I was finding it very difficult to get the look and feel that I wanted let alone get the stock laser cut buildings I have to fit so its time to switch gears a bit.

Current concept (subject to change without notice as my regular readers know) is to have a creek running across the front edge and a second one coming down the left side. There will be steep slopes along the back and down the right side (still passable by dismounted minis). The railroad will run alongside the creek down the front edge with one or two spurs that reach into town. More specifically there will be a water wheel driven flour mill in the upper left side of the board and the spur will run to that building. That will bring the rails more into town and create a wrong side of the tracks area.

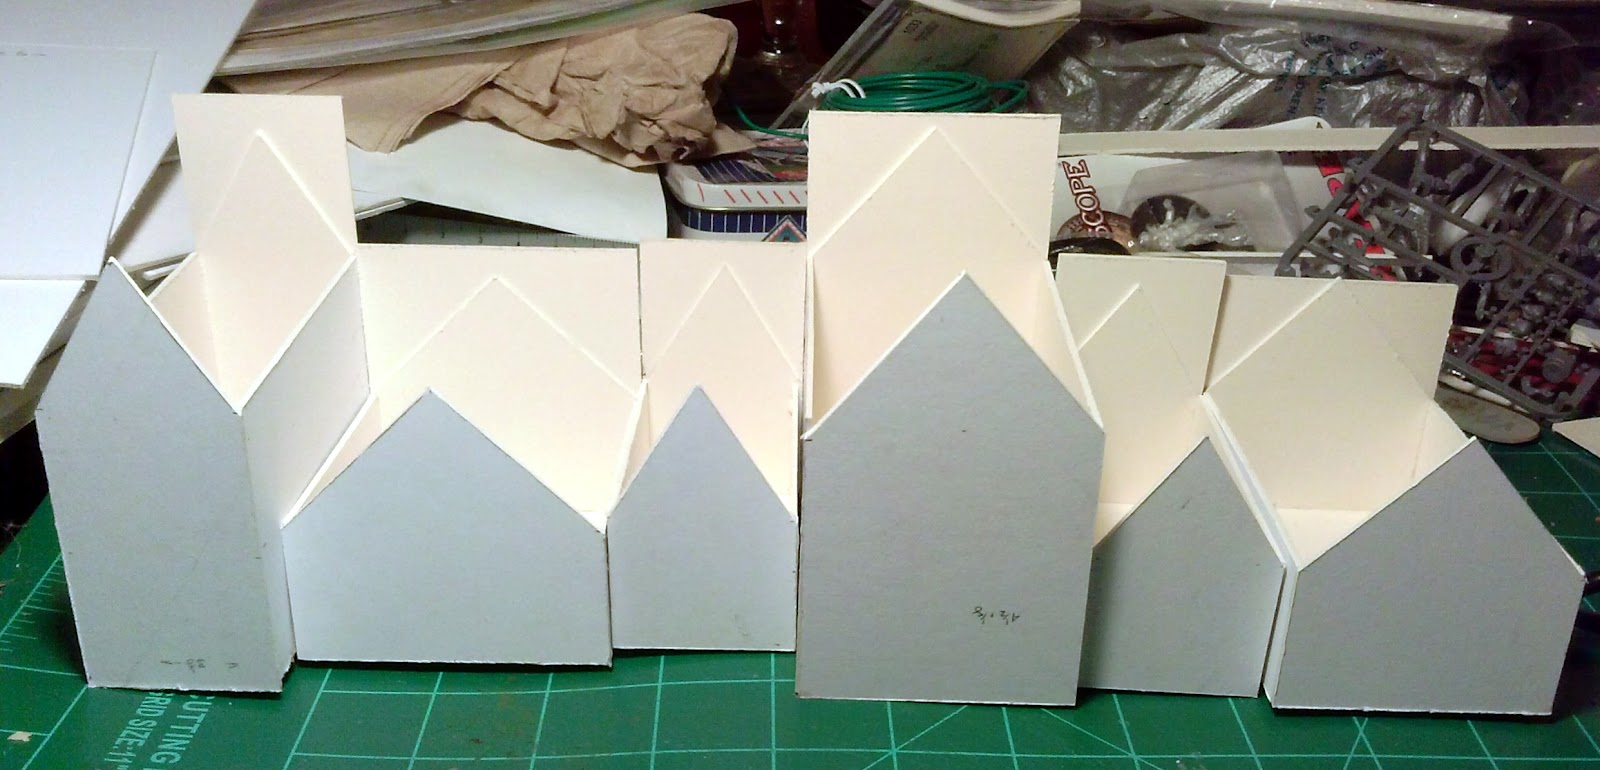
The other big decision that I have been chewing on is scratch building the entire town. This will allow me to build specifically to the atmosphere I want to create, a bit of a heltered skeltered look. While my lasercut buildings are wonderful, they are also very uniform and that makes it difficult to work them in to the plan. Ultimately I'm sure some of them will work their way into the plan anyway when I realize what a monumental undertaking the whole thing will be.

If I do scratch build the entire town I need to do a couple of things to make it all come together faster. First I need a different material for the walls. I love working with styrene plastic but cutting windows and doors out of it is a pain. Its fine for the occasional one off building that I want to spend some serious time on but they also tend to be more fragile than I would like them to be. I have already broken the newspaper office and repaired it a couple of times and its not even on the board yet! Matt board is my other favorite material much easier to work with especially for cutting, the biggest issue there is warping. While its unlikely to warp in my climate taking the whole thing to a convention in another more humid state is likely to see roofs warping and probably some walls as well. What I need is a sandwich of materials that will still allow me to cut things easily while providing some dimensional stability. I have been looking at some of the foams out there and Tony Harwood, graciously, sent me some samples of foam that he works with including his favorite green foam. That stuff would be perfect if I could actually find it here in the US and there doesn't seem to be a US equivalent to it, The one thing that I have found that has definite possibilities is something called balsa foam (no, not balsa wood, I hate working with balsa wood). The only issue with it is it comes in blocks of material rather than sheets so I would need a saw of some kind to consistently cut it to the right thickness to work with. I do think that either this by itself or combined with matt board would create the walls that I want. Something that cuts easy, can be carved, is dimensionaly stable, and glues easily.

I mentioned upscaling Calamity in the title. Normally I would just sit down and work with the small clay model that I made. Now its time to step things up a notch. since I'm happy with the basic configuration of the terrain itself its time to make a bigger model. Something that I can really sit down with and sculpt the terrain and see how the buildings are going to fit together, especially since upwards of 90% of them are going to be scratch built. I need to know that what I build is going to fit and the only way to do that is to work in a larger scale. I'm going to use 1/2" = 12", this will allow me to work in increments of 1/8th of inch and have it be a meaningful measurement of 3" which is just about how thick the walls of the buildings will be. The other aspect that I need to work on is designing a sheet of windows and doors that I can just glue into place as needed. This would eventually lead to making a sheet of windows and doors that can be laser cut which will speed up the construction of the full sized buildings. The lasercut sheet would include both the exterior framing and the interior framing something lacking in many of the lasercut kits that are out there now. I prefer to have some details on the inside rather than just a shell. Since most of the buildings will be scratch built I'm also considering adding lighting to many of them. This could get a bit tricky but I have some ideas that should work. The thing holding me back on this is not the availability of lighting (model railroading to the rescue) but that I can't find a source for Hurricane style kerosene lamps. Naturally this concept of lighting brings up thoughts of turning individual lights on and off or at least doing it by building. That might require an entire control station to be built into the base!

Off to do some building workups!