Quotes

Life is short, break the rules. Forgive quickly, kiss slowly. Love truly, laugh uncontrollably and never regret anything that makes you smile. - Samuel Longhorne Clemens (Mark Twain)

Tuesday, May 30, 2017

Kickstarter - Disposable Heros II miniatures

This campaign is wrapping up today, 12 hours to go at the time I wrote this. They restructured the awards so that the next five rewards will all freebies to people that backed at the platoon level or above. I'm already in for my maximum going for one of each of the American and German platoons plus some extras. If you were thinking of jumping in on this one now is the time! 
I have discovered that posting through my iPad is not as easy as my laptop and I can't get to the images that I want. Hence why you are seeing my Pak 40 instead of a nice Disposable Heros II logo.

Friday, May 26, 2017

World War II Project - German Armor - Mad Bobs Miniatures Beauty Shots

I tried to improve the pictures of the Pak 40 auf S307(f) and Geschutzwagen 39H(f). I think the pictures are better now but I still need to improve the lighting, especially the fill lighting so that the whole vehicle is lighted so you can see the details better. These pictures do bring out some of the streaking that I did much better though. There are a bunch of pictures so take your time and let me know what you think!


The first Pak 40 auf S307(f)


The Geschutzwagen 39H(f)


The second Pak 40 auf S307(f)


Thursday, May 25, 2017

Kickstarter Diposable Heros II Miniatures - Brigade Games - Update

The stretch goals are coming slowly in this one and its a short turnaround Kickstarter. If you are thinking of jumping in then I would certainly encourage you to do so. I did find out that the M4A3 Sherman that is an add-on is being sculpted and produced by Company B. I'm looking forward to picking one of these up. Should be a nice compliment to my M4A1 Sherman that is sitting on the shelf from Trenchworx.

28mm World War 2 Wargaming Miniatures - Disposable Heroes


We are getting some nice free stuff added to the various platoons at this point as well as access to a US .30 cal MG with crew and I can get some extra German LMG teams so I can double these guys up as a Panzergrenadier platoon.

I'm getting at least one of these.

There are a couple of other options available though.

Wednesday, May 24, 2017

World War II Project - Buildings - Photo Realism Concept XII

I'm not sure this will ever be finished, but I'm going to post something that at least looks close to finished.

I have touched up the green a bit, although it probably needs to have another coat as the green is a little transparent. The chimney stacks are in place and the roof caps are done. I still need to build and attach my seam hiders for the gaps between the 1st and 2nd floor and the 2nd floor and the roof. Roof edges need to be touched up as well and I need to add a little paint to some torn spots in the paper. If I could get a solid hour at the desk I could finish this one off and move on to the next.


Monday, May 22, 2017

World War II Project - Buildings - Photo Realism Concept XI

I was hoping that I would be able to finish off the Dormer House 2 from Charlie Foxtrot Models, once again I underestimated how much was actually left. I went to work on the dormer windows for the attic. Again the goal here is to as little painting an extra wood work as possible, so I purchased a couple more textures from Clever Models to finish the dormers with.

I opted for a weathered wood texture and the pictures below will show the process better than I can explain it. As I have moved through this particular build I tried to apply what I learned on the newer build. Especially important to get the dormer windows right as they are pretty prominent on the model and we are more likely to see the roofs of buildings first when they are on the gaming table.

So here we go to add some additional living space in the attic. One thing to note is that I certainly could have chosen to leave these windows off. There are no tabs or slots that have to be dealt with so I could have just covered right over their marked locations with the shingle paper. Hopefully there will just be one more build to finish off the little details and it should be quick.

Just a few pieces to deal with.

Time for some glue. The large steel weights are one of my favorite tools. They weigh in at 1# each and have nice square corners and edges to work with.

Two sides at once!

The dormers all glued up. the bottom edge of the front needs to be cut to match the angle of the roof. Fortunately MDF is pretty easy to cut.

A knife with a sharp blade makes short work of this job.

Ready for some boards.

I used Clever Models TO-351 for the "texture" on the dormers.

Glued the front of the dormer to the paper.

Then I cut the paper, folded it and glued it to the sides.

I left plenty of room to trim things the way I wanted.

Trimmed down and ready to fold the extra paper over the back edges. This gives it a nice smooth look, something I should have done on the stone surfaces.

A little something to hold the folds in place till the glue sets. Aleene's Original Tacky Glue for this again. I didn't need to let it dry as long since its paper to wood and not paper to plastic.

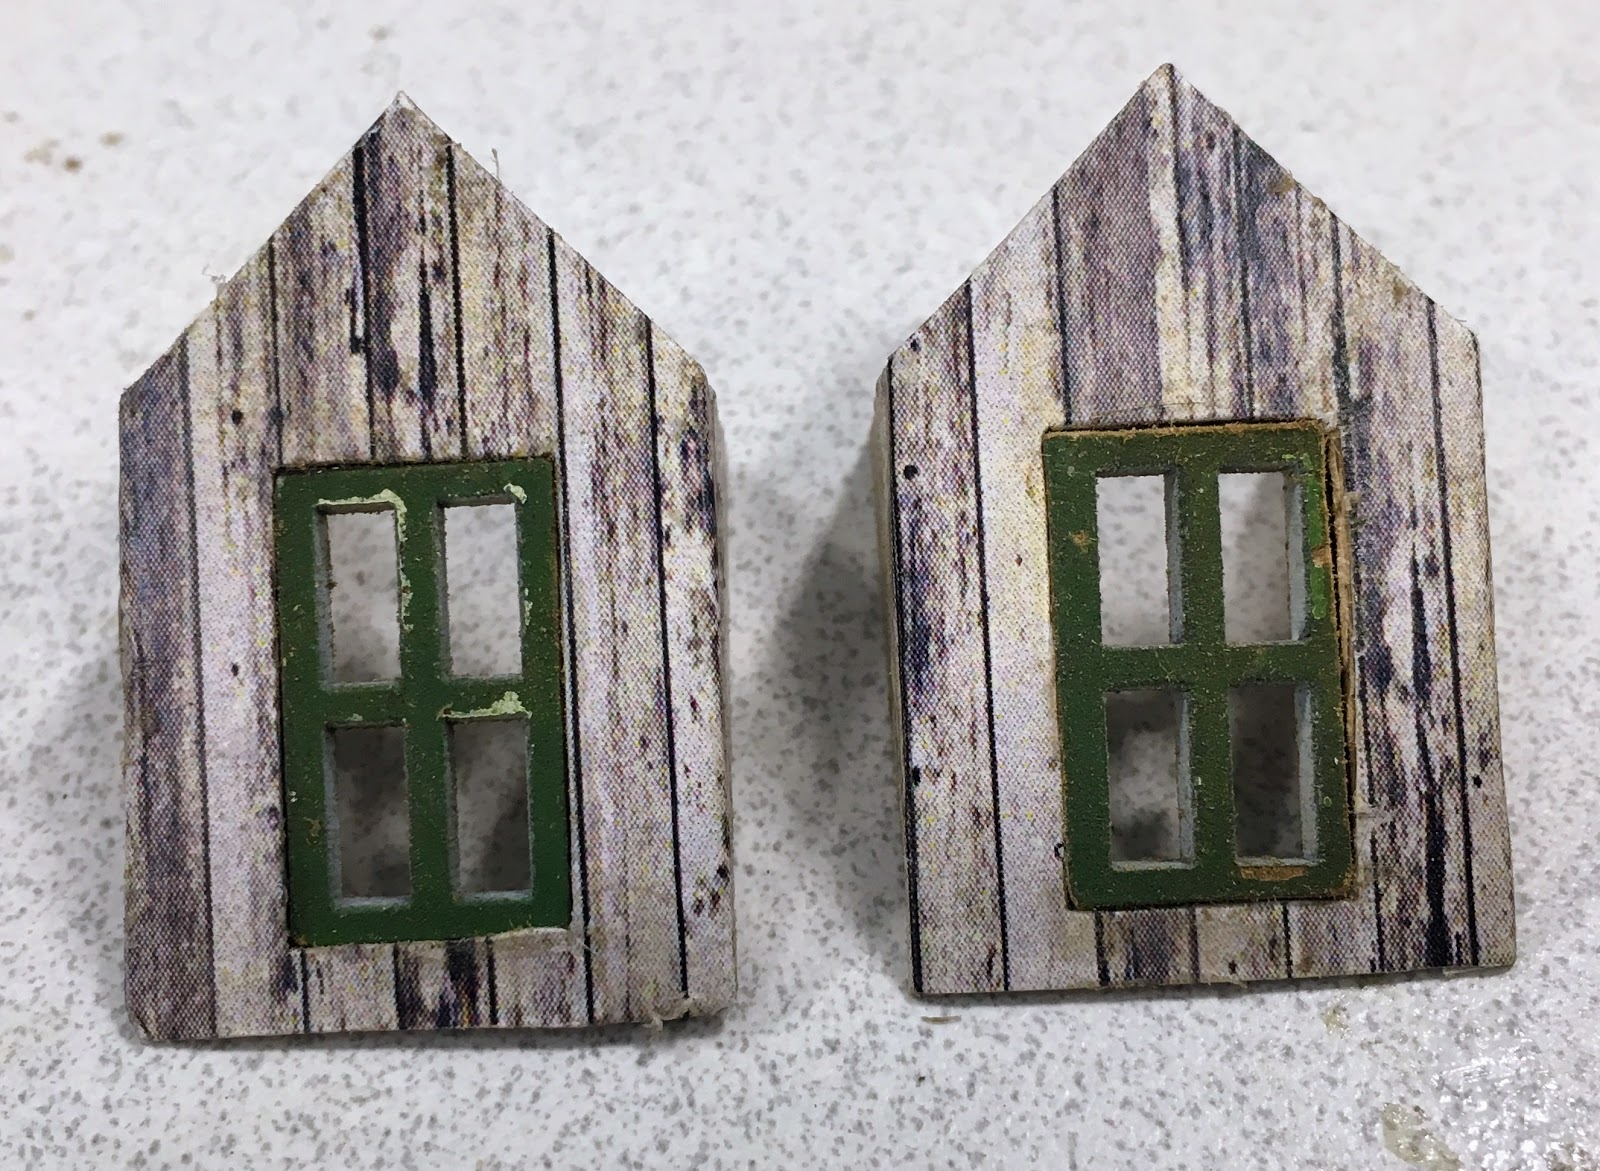
Nice sharp peaks but we seem to have lost the window.

I cut out the center of the paper and left extra to fold to cover the interior edge of the window. Note you will not be able to see the edge but it gives a neater look to the whole process

Folded and glued and ready for the windows.

By folding the paper inside to cover the edge your windows will not fit! Laser cut MDF is very precise and even that little bit of paper makes the opening to small. I used a file on the edges of the window frames to get them to fit. The other important step is to remember to push the frame in from the front of the opening, otherwise you could just be pushing your carefully folded edge out and making and leaving a messy edge.

Dormers in place and ready for their roofs.

Dormer roofs in place.

And the shingles added. I could have done this different as well. I should have glued on the paper shingles first. It took me a bit to figure out how to cut the paper shingles once the roofs were in place.

The roof in place on the second story. Pretty pleased with everything so far. In this picture, one of the dormers is clearly higher than the other. I have fixed that otherwise it would have bugged till it was even harder to remove the dormer.