Quotes

Life is short, break the rules. Forgive quickly, kiss slowly. Love truly, laugh uncontrollably and never regret anything that makes you smile. - Samuel Longhorne Clemens (Mark Twain)
Showing posts with label Geschutzwagen 39H(f). Show all posts

Tuesday, April 28, 2020

World War II Project - AFV basing

Basing vehicles is something I have gone back and forth on for a very long time. My 15mm Afrika Korps army has all the vehicles based. What I don't like about this are that some of the AFVs just don't fit well on bases or just plain don't look good on them.

I have never based vehicles for my 28mm forces (such as they are). However, as I keep leaning towards more detailed "kits" for these vehicles they are inherently more fragile. Even some of the resin vehicles are a bit fragile depending on the type of resin used. There is also the issue of transport. A base would allow for a combination of magnets and sheet metal which at least help keep breakage down to a minimum.


The other issue I have is all the space that a base takes up and those bare patches in the corners that need just a little extra detail to make look nice. Not a good situation for those of us that love to add those little details. While I was contemplating this the other night I thought that maybe curving the corners would be a good solution and of course that lead to why bother with just the corners maybe a pill shape would be a better option by reducing the amount of space in front of and behind the AFV.


Another issue is that straight fall of edge between the top of the base and the tabletop. For this I'm going to file down the edges to get a smoother transition. The concern here would be having a fragile edge but I think by using foamed PVC for the base will take care of that. We shall see!


I'm going to do a little experimenting at this point using some resin vehicles from Mad Bob Miniatures since those are currently being worked on. 


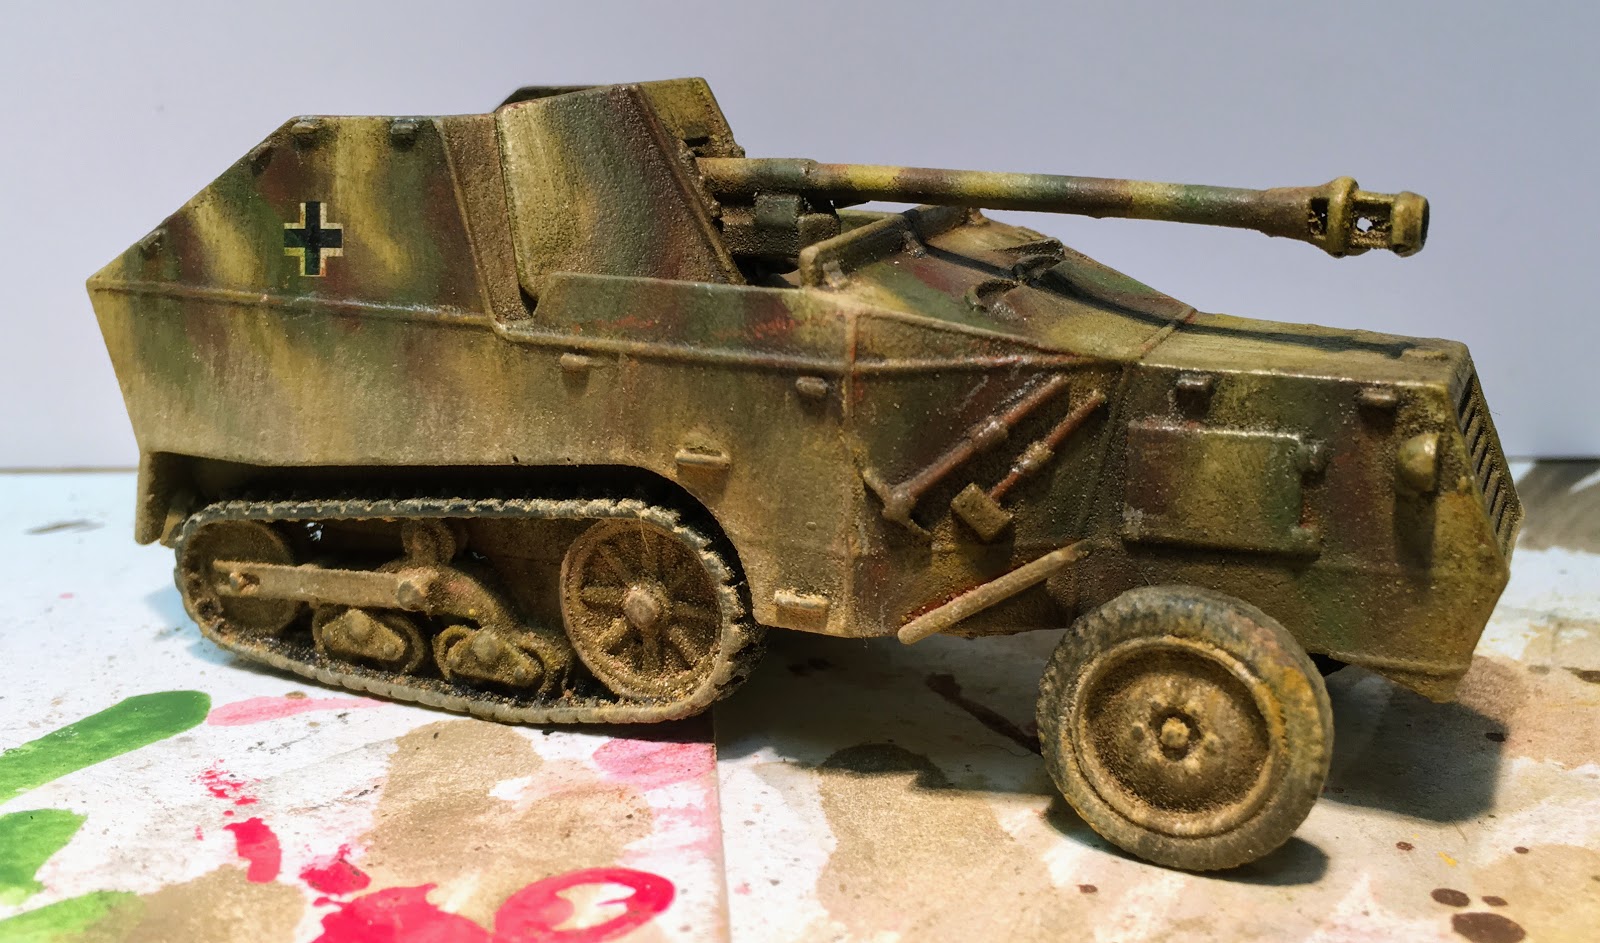
I had one last sheet of 3mm foamed PVC sheeting so I cut it up to match the three Mad Bob Vehicles that I have; the Pak 40 auf S307(f), the 39H(f) Geschutzwagen (the howitzer variant) and the 15cm sFH Lorraine Schleppers

Used a compass to draw half circles on either end, just have to figure out how best to cut these out now.

And a quick check with one of the three S307(f)s. Concept looks good to my eyes at this point.

There is more space than you think on the base when you look at it from the side. The fighting compartment hangs over quite a bit. While I am concerned with how people handle the vehicles, I seem to suffer more damage to vehicles being transported than during game play.

The next step will to be to cut out the shapes and file down the edges to, I hope, about a 30 degree slope.

Friday, May 26, 2017

World War II Project - German Armor - Mad Bobs Miniatures Beauty Shots

I tried to improve the pictures of the Pak 40 auf S307(f) and Geschutzwagen 39H(f). I think the pictures are better now but I still need to improve the lighting, especially the fill lighting so that the whole vehicle is lighted so you can see the details better. These pictures do bring out some of the streaking that I did much better though. There are a bunch of pictures so take your time and let me know what you think!


The first Pak 40 auf S307(f)


The Geschutzwagen 39H(f)


The second Pak 40 auf S307(f)


Thursday, May 11, 2017

World War II Project - German Armor - Mad Bobs Miniatures Finished

I put in some rather serious time into painting last night. I figure that these thanks just need to be finished at this point. They have been on the table far to long. So I pushed the elements and did a lot of work that I might have spread out over several sessions.

This included working with colored pencil to make some of the scratches, working with sponges for rusted chipped paint, some more enamel work for rust, rust streaks, and grime and followed the whole thing up with some dirt and dust work using the pan pastels ( I started with pigments and then decided I just didn't want to bother with them last night).


I'm definitely calling these done, while they might not be competition pieces they are certainly good gaming pieces. I really need to move on to something else at this point. There is a whole other box of German armor from Mad Bobs Miniatures that would complete the requirements for the Two Fat Lardies pint sized campaign and I might go there next. There is also a ton of troops that need to be started and finished as well.


So here is are the results from last night (I might take some better pictures on my new photo backdrops, we will see how motivated I am at this point).

These are the enamels that I used to mix my dirt glazes with. I think that I just need to keep working on this technique and not get impatient with the results

The last of the acrylics that I used. Most for the wood on the tools (middle two colors from Reaper) and the basic rust on the muffler (outside two colors, these are from Secret Weapon, I got to test them that's why they are not labeled).

A few rust streaks and a lot of grime streaks. Of course some of this is then promptly covered up by dust.

The Pan Pastel colors I used for the final layers of dirt and dust, primarliy applied to the bottom portion of the vehicles.

A Pak 40 aug S307(f) ready for the table


A Geschutzwagen 39H(f), ready for action. I do need to fix that fingerprint though!


The second Pak 40auf S307(f)


Friday, February 10, 2017

Madbob's Miniatures - Some Paint and Decals

Progress continues on the German vehicles from MadBob Miniatures. Once the filters and wash had dried I was able to get the matt black paint (AMMO) on all three vehicles. I used it on the tracks and wheels just to get a base color of paint on those areas. At my next opportunity I applied a gloss coat for the decals. This will also allow the follow on weathering steps to flow across the vehicles better. Once that had dried (fairly quickly here in Colorado) I went ahead and started to apply the decals, starting with the German crosses on the sides. Unfortunately my selection of crosses was somewhat limited and the one on the 39H(f) is a bit larger than I would like but I think after the weathering starts the size won't stand out as much.


A little black paint work


Now they are a little glossy, perfect for decals


That's a pretty big cross, hopefully the weathering will tone it done a bit


These aren't going to get a lot of decal work but I might add some others just for flavor. These should get a license "plate" in the front.


Yes, I really do need better light at my desk.

The rest of this took a lot more time than I anticipated. Basically I went back in with oil paints to restore some of the camo colors and add some more "tones" to the colors to add depth and interest. So this is new for me, I think it came out pretty good. The browns and greens were really starting to meld together so this really helped make them stand out from each other again. I think more practice will make this a useful technique. I started out with a pin wash to try an re-emphasize the details (I wish the details were sharper).


Here I added another pin wash to try and pull out the details a bit more.


Adding some brownish yellow to the dunkelgelb base color


Coming back around and adding some green to the original. I'm starting to see some more depth to the colors now.


Where the colors come together

Bringing in some Raw Sienna to the brown. The vehicles are definitely brighter and shadows are pretty deep. I need to get the rest of the decals on and I'll start the real weathering steps.


My paper at the end of the day and a very abused brush. This was a kolinsky that was nearing the end of its useful life as a detail brush.

The oil colors I used for this step.