I opted for a weathered wood texture and the pictures below will show the process better than I can explain it. As I have moved through this particular build I tried to apply what I learned on the newer build. Especially important to get the dormer windows right as they are pretty prominent on the model and we are more likely to see the roofs of buildings first when they are on the gaming table.
So here we go to add some additional living space in the attic. One thing to note is that I certainly could have chosen to leave these windows off. There are no tabs or slots that have to be dealt with so I could have just covered right over their marked locations with the shingle paper. Hopefully there will just be one more build to finish off the little details and it should be quick.
 |
| Just a few pieces to deal with. |
 |
| Time for some glue. The large steel weights are one of my favorite tools. They weigh in at 1# each and have nice square corners and edges to work with. |
 |
| Two sides at once! |
 |
| The dormers all glued up. the bottom edge of the front needs to be cut to match the angle of the roof. Fortunately MDF is pretty easy to cut. |
 |
| A knife with a sharp blade makes short work of this job. |
 |
| Ready for some boards. |
 |
| I used Clever Models TO-351 for the "texture" on the dormers. |
 |
| Glued the front of the dormer to the paper. |
 |
| Then I cut the paper, folded it and glued it to the sides. |
 |
| I left plenty of room to trim things the way I wanted. |
 |
| Trimmed down and ready to fold the extra paper over the back edges. This gives it a nice smooth look, something I should have done on the stone surfaces. |
 |
| A little something to hold the folds in place till the glue sets. Aleene's Original Tacky Glue for this again. I didn't need to let it dry as long since its paper to wood and not paper to plastic. |
 |
| Nice sharp peaks but we seem to have lost the window. |
 |
| I cut out the center of the paper and left extra to fold to cover the interior edge of the window. Note you will not be able to see the edge but it gives a neater look to the whole process |
 |
| Folded and glued and ready for the windows. |
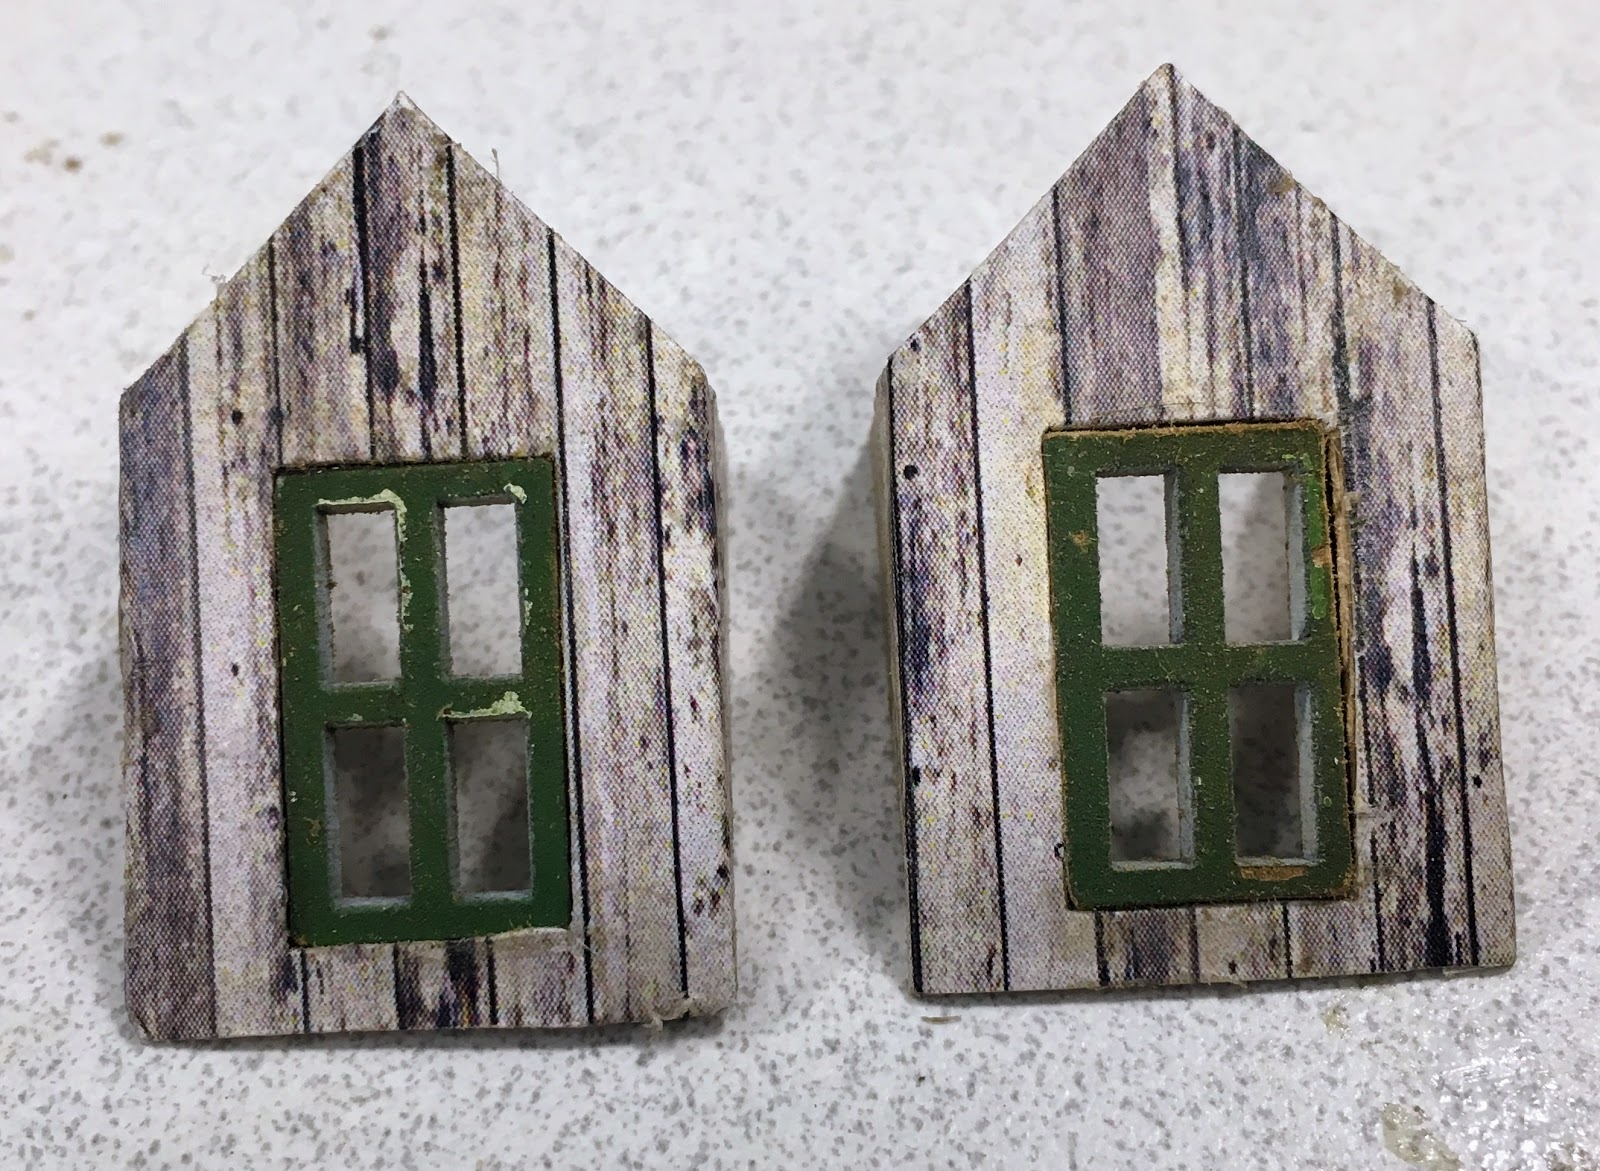 |
| By folding the paper inside to cover the edge your windows will not fit! Laser cut MDF is very precise and even that little bit of paper makes the opening to small. I used a file on the edges of the window frames to get them to fit. The other important step is to remember to push the frame in from the front of the opening, otherwise you could just be pushing your carefully folded edge out and making and leaving a messy edge. |
 |
| Dormers in place and ready for their roofs. |
 |
| Dormer roofs in place. |
 |
| And the shingles added. I could have done this different as well. I should have glued on the paper shingles first. It took me a bit to figure out how to cut the paper shingles once the roofs were in place. |
 |
| The roof in place on the second story. Pretty pleased with everything so far. In this picture, one of the dormers is clearly higher than the other. I have fixed that otherwise it would have bugged till it was even harder to remove the dormer. |
I like the effect of the weathered wood layering.
ReplyDeleteTony
I think its looking pretty good too. I have picked up some other ways to create layers of effects from the Clever Model website and their paper model kits. Looking forward to doing a little more experimenting with this!
Delete