Quotes

Life is short, break the rules. Forgive quickly, kiss slowly. Love truly, laugh uncontrollably and never regret anything that makes you smile. - Samuel Longhorne Clemens (Mark Twain)
Showing posts with label MiG Pigments. Show all posts

Tuesday, February 21, 2017

Reaper Miniatures - Shipping Container - Fading and Rusting

I had a bit of an extended weekend and managed to work in some time on the Reaper Miniatures Shipping Container. The first thing to do was to start the chipping process. The chipping fluid had been applied between my base coat of reddish brown and the red layer. I think I waited much to long. You should do this as soon as the top layer drys. Since I waited to long it was hard to create the chipping effect, and when I did it went all the way down to the primer coat and in some cases down to the plastic. Not quite what I was hoping for but not a tragedy either.

This is where my last session ended

Using water and an old brush to start scrubbing the sides.

Here you can see some of the effects. The top layer has pulled away but so did my red brown layer, you are seeing the brown liner I used as a primer and in some places the bare plastic (lower right hand side).


Once I had that effect more or less completed it was time to fad the paint job. It was a pretty bright red coming out of the bottle and I need to tone that down a bit. For this I used some Golden Fluid Acrylic paint, Titanium White, and thinned it way down to a wash. I think I applied this over the red and it served to "fade" it down to a more sun exposed red. Worked out very nice, of course I forgot to take pictures of that part of the process. I didn't get any shots in until I had applied my first couple of rust washes.

I start with a dark rust wash from AMMO, and followed that on with a light rust wash, also from AMMO. At that point I had to pack up for the evening. So the next series of pictures show both the fading and the rust coats.

You can really see the difference in the red here. These containers can really be exposed to the sun for long periods of time when they are onboard ships or sitting in the dockyards.


While normally February in Colorado is in the mid 40s or so, with 50 degree temperatures not being uncommon, this year has been unusually warm. I think we hit a high of 80 one day. I took advantage of the warm weather and worked outside. Especially nice since I was working with primarily with enamel paints and pigments with mineral spirits. Oh and don't worry I'm sure we will be paying for this warm weather shortly with a big snow fall.

In the next step I really combined working with the enamel rusting washes and the pigments. I used the washes as a base and then streaked the pigments down over the top of the washes. With the warm weather everything dried pretty quickly. I usually work with a combination of the pigments and mineral spirits which allows me to vary the consistency from a wash to a paste or apply it dry and add the mineral spirits with a brush. The nice thing about working with the pigments is that I can go back and adjust them even after they have dried. I also discovered that its hard to take pictures outside of this kind of thing, the winter light is very harsh at this altitude.

Adding layers, you an see areas on the top that haven't dried yet.

This is after all the washes and the rust orange pigment from Secret Weapon has been applied.


Here you can see the lighter "fresher" rust being worked in.


My primary "paints" for this stage. From AMMO are the streaking dark and light rust washes. I applied these first. I followed that with the Secret Weapon orange rust and then the MIG new rust. You can make out the can of mineral spirits in the back.


Of course it looks like I managed to go overboard a bit and there is very little left of the red container. Sometimes playing with the rust is just to much fun! I may go back and rub off some of the rust on the sides and ends to see if I can restore at least a few patches of the red. I'm working out the designs I want to use on the sides for the graffiti now as well. I'm going to do both sides with some more mural like graffiti and just some tags on the end panels I think.

Monday, January 19, 2015

Diorama - The Supporting Cast I

With the basic construction completed on the diorama base its time to get some painting going on that as well. In this instance I'm actually using pigments as paint. Mixed is Isopropyl alcohol to make a sludge which I brushed on to the brick walls. I picked one primary color for the brick, in this case MiG Pigment old rust, which I thought had a nice brick color. I applied a lighter rust color to break up the pattern a bit and one called cargo dust to pick out some more weathered looking bricks. I sealed this with a fixative designed to seal chalk and pencil drawings as opposed to a regular matte finish. In many cases applying a straight sealer like dullcoat literally makes pigments disappear (the base is literally dissolving our pigments). The thing to keep in mind is that the alcohol will penetrate this fixative something to keep in mind for the next step.

I let the fixative dry for an hour and applied the mortar lines. Again using MiG Pigments I created a wash with the concrete pigment and dabbed it on so that it flowed between the bricks and into the mortar lines. If you try to brush it the alcohol will penetrate the fixative and smear the layer of pigment already on the brick. Let the capillary action do the work for you.

I'm not sure if I'm happy with the result at the moment. I think my mortar lines are to "white" even though they are actually light grey. I'll let it sit for a day or two and contemplate the result before I decide to try again.

I haven't done the cobblestones yet but the lamp post is pretty close to being finished, although the "light" still needs some work. To much orange I think, I'll start adding some yellow glazes to it, to brighten it up. I also added the first rat coming out of the wall in the alley. That really started to make the whole thing come to life for me.

Everything is starting to come together and I'm confident this one will be ready for Genghis Con coming up in February. I'm not so sure if the single miniature will make it or not, but time will tell.

On to the pictures!
MiG Pigments at the ready

Bricks "colored" and fixative sprayed on and dried. It really darken everything. I wasn't expecting that.


The Lamp post. Still needs some work.

Mortar lines applied, they may be to "white"


Adding the supporting elements to build the scene


This is the basic scene, just waiting to be finished. Obviously the cobblestones still need to be painted. That will help define the light and shadow of the piece.

A Rifleman to provide a little scale

The Alley side, now complete with a rat


And here we go, five more miniatures for another diorama. This one will be for Reaper Con so there is still time to figure everything out. At least the miniatures are ready to go!

Monday, December 8, 2014

My Weathering Tools & Supplies

I had a question about what I use to do my weathering. While I was at my desk cleaning up prior to a painting session I snapped a few quick pictures of my primary tools.


From left to right, sponges, sponge handles, cheap brushes (mostly chip with a couple rounds) and Prismacolor pencils. The pencils are really handy when you need to just hit an edge, I have white, burnt sienna, raw sienna, burnt umber and raw umber.

Pan Pastels. I purchase mine from Stoney Creek Designs and Roger includes a wrapper to go around the outside with the color name and an approximation of the color inside. Quite handy when they are stacked up on a shelf.

All the information you need is underneath

This is a cake, so no messy loose powders. It also holds very well to the model.

The sponge tools for the Pan Pastels. Applying with the sponges is the easiest way. You can also erase them from the model with a regular pencil eraser

MiG pigments are seeing less use than before, but they still have their place in my weathering arsenal.

And here is one of the reasons why. Its very easy to mix the loose powder to get a different color tone. Hard to do this with the Pan Pastels.

Friday, August 29, 2014

Freight Cars for Calamity - Step by Step Weathering - Wrapping it Up

Up to this point all the previous steps have really just been prep to get to the fun part. Especially in the case of the gondola since I had to cut apart my decals to get them to fit between the stake pockets. The reality is that the weathering process itself doesn't take very long, it gets stretched out trying to take pictures (or remembering to take pictures).

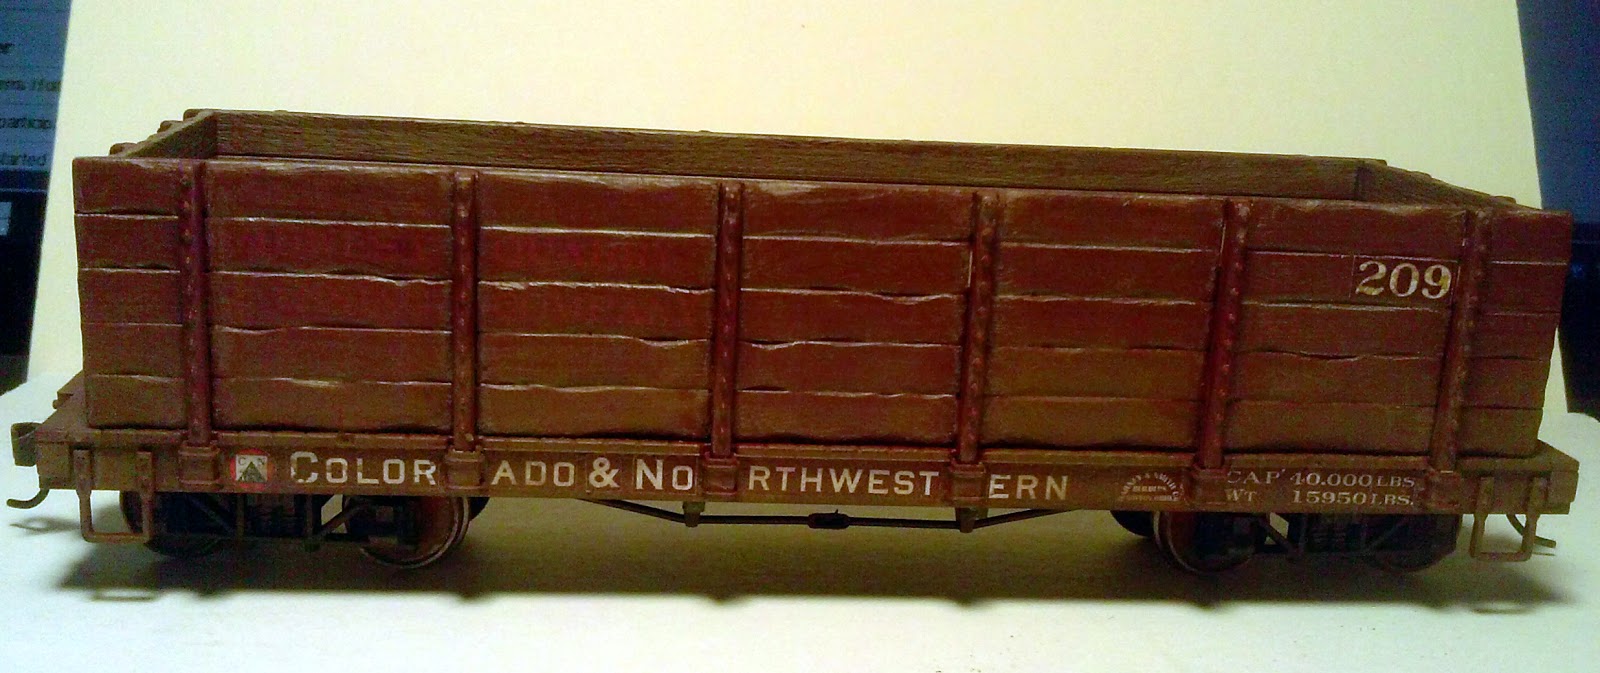
The next step for the gondola is to get some paint on the boards on the interior sides and floor. What I want to do here is show paint worn away by heavy use. The normal load for these gondolas was probably coal since the C&N had its own fleet of drop bottom hoppers for ore. However, I'm sure that they were pressed into service to carry various ores as needed. Boulder County is mostly mined for gold ore and tungsten although there were silver mines as well but none that were actually served by the railroad. I drybrushed some of the upper edges of the outside with a greyish brown paint and gave a heavy coating on the inside, leaving more of the original red in the corners and edges where the sides come together with the floor.


I then followed up with a burnt umber wash made from Liquitex Ink and distilled water. Colorado water is a little on the hard side and I try to keep the minerals out of my paints as much as I can by using distilled water.


Now all of that ink needs to dry before I can start applying pigments to it. Otherwise you can create quite a mess when dry pigment meets wet ink. Its not pretty, but it can be cleaned up when it happens.
With the gondola drying its time to turn to the boxcar. I want to try a different technique on this one involving Isopropyl Alcohol (rubbing alcohol you can get it at the grocery store or your local drugstore. I buy the 99% pure stuff) and dry pigments. I'll create a wash with this and see how that goes. Remember weathering is all about experimenting and thinking outside the lines a bit. Although its probably smarter to try something new on a cheap test car first!

For this one I used MiG pigments, their Cargo Dust and Black Smoke. The Black Smoke is to strong by itself so I tried to lighten up a bit with the Cargo Dust.


To this mixture I added the Isopropyl Alcohol. You want a wash so keep adding till you get something that just rolls right back to the bottom when you swipe your brush against the side. Keep in mind you are using alcohol and it evaporates fast (especially if you are in a high dry climate like mine)! I started on one side and proceeded to work my way around the boxcar.


Still much darker than I anticipated


I loaded up a brush with clean alcohol and proceeded to swab down the sides again. Wiping off the brush every few strokes to get rid of the excess.

That looks better

Roof is a bit uneven at this point but some additional steps latter on will help smooth it out.


In a couple of spots the alcohol started to penetrate the layer of dullcote and wiped away some of the lettering, mostly on the capacity and wt numbers on the left. It actually looks good so I didn't worry about but be aware that this can happen and go slowly least you wipe away all your decal or dry transfer work.
The problem with this particular technique is I really lost the faded look that I had started with. Maybe a thinner more directed wash would have helped maintain that effect or the two techniques just shouldn't be used on the same car. This also has to dry but you can come back with more alcohol later and continue to clean it up if you feel the need to. This is one way to set pigments, the resulting finish won't rub off without some serious effort.

Now its time to apply some straight up dry pigments. I'm using my Pan Pastels along with one another one from MiG (because, once again I put my Bragdon pigments in a safe place). While the best way to apply MiG pigments is still with a brush the best way to apply the Pan Pastels is with a very sponge. When I bought my set from Stoney Creek he included a couple of handles and variety of sponges to fit on the ends along with a couple of the big sponges for large areas. While you can brush the Pan Pastels on I have found that the sponges are definitely more effective. I was quite happy to find the Caboose Hobbies had a full kit of the brushes for the handles so I have a bunch. They come in different shapes so you can adjust to the surface you are working on.


Much like painting I like to start with the darkest pigment at the bottom edges of the car in this case I decided to use Burnt Sienna Extra Dark. On the gondola I kept it on the bottom frame, on the boxcar I went up a little bit on the sides (and its not easy to see in the pictures).


This really doesn't take very long and you don't have to wait for it to set so you can go straight to the next pigment. Next up was straight Raw Umber. I applied it starting at the top edge of the previous color to soften that line a bit and took it up a bit higher on the side.


The last application was with a brush using the MiG Pigment Gulf War Sand, which is a nice dusty color


Now the roof of the boxcar needs a little attention. It needs a lighter layer of soot which should even out the surface a bit. For this I'm using Neutral Grey Extra Dark.


Its really hard to see in the photos but I followed all of this up with a Burnt Sienna Prismacolor pencil run across the top of all the metal components to rust them up a bit. And that about wraps it up. I put the trucks back on and these are ready to hit the rails.


The gondola could probably use a bit more work, there is a lot of grain visible in the side boards and I really didn't bring them out very well and I'm not completely happy with the interior drybrushing or the final coat of dust on the outside. On the other hand sometimes they just have to look good enough and this one definitely falls into that category.

I'm quite pleased with the boxcar although I'm disappointed that my grimy wash really killed the faded look I wanted. I'm not going to go back and do anything about it but I will keep it in mind for future projects and there are certainly a number of those coming up. 

I'm happy enough with my custom decals that I'll go ahead and bring out the passenger cars and get started on those which should be a pretty quick job. I'm still working on trying to perfect the Switzerland Trail of America logo for the C&N boxcars though. The C&N boxcars are going to get a little extra work as well. I thought that the ladder on the right side was molded on it looked like to much work to just try and shave off. However, I discovered that its actually a separate piece and can be pulled off without to much effort. I have some new grab irons ordered and I'll be installing those on C&N boxcars as the next step there.

So more work on those and of course there is a railroad station to get finished up as well. September should be another productive month as I continue work on the different parts of Calamity.