Quotes

Life is short, break the rules. Forgive quickly, kiss slowly. Love truly, laugh uncontrollably and never regret anything that makes you smile. - Samuel Longhorne Clemens (Mark Twain)
Showing posts with label Shingles. Show all posts

Thursday, December 10, 2015

Building Calamity 14 - Row House #2 - Roof Weathering

The stock shingles that I used from Builders in Scale were a bit to "out of the box" new looking to really fit into the character I'm imagining for Calamity. So obviously a little weathering is in order. Since these are shake shingles I was looking for that silvery grey color that unfinished wood tends to change to. Since these are actually wood I decided to try out a product that I had sitting on the shelf that was suppose to do just that. However, it did not work on these shingles which are cut from oak. I suspect that it works fine on basswood which is what most model railroad stripwood is cut from. It did, however, darken the shingles so they certainly didn't look new but I wanted them to look a bit older yet. So I pulled out my titanium white and carbon black Liquitex inks. I first applied a diluted solution of the white, by keeping it thin I was able to get a grayer look to the shingles. That was looking pretty good but I wanted to push it a bit farther. After the white ink had dried I went in and brushed over it with the black ink and I think I'm closer to the silvery grey I was shooting for. Not perfect but good enough.

I also finished off the fascia as well, base coated with a wood color and then applied some chipping affects from AK Interactive. After that had dried I applied the same mix of yellows from Reaper that I had used on the trim. I haven't peeled it off yet or faded it down either but I'll finish that off when I do the final weathering on the building. Hopefully I'll be able to get that done this week.


Its really washed out in this photograph but this is the roof with the white applied and drying.

This is the roof with just the white ink and a few streaks added with raw umber. Wasn't entirely happy with it so I opted to move forward and apply the black ink.

If you look close at the window on the side you can see that I managed to break it. I'll have to get in there with some glue and fix it.


Again, its hard to see the difference but I have applied the black ink and its actually more greyish in person and the streaks are a bit more prominent. I'm going to call this a successful experiment at this point.


Monday, December 7, 2015

Building Calamity 13 - Row House #2 - Getting the Roof On!

I managed to dig out the two packages of Truewood Shingles from Builders in Scale. These are O Scale Rustic Oak shingles (#704) and a pack covers up to 30 square inches. It took all of one pack plus 3 strips out of second pack. I think I could have spaced them out a little bit farther than I did and only used a single pack probably with a few strips left over, live and learn.

I like these shingles because they are wood and I can essentially stain them and they have a nice ragged look to them. On top of that they are self adhesive!

Pictures are better than words at this point.


The gussets are cut and I'm gluing them to one side of the roof. Important tip at this point I probably should have applied the shingles to the roof first. This would have made everything a little bit easier.

Gussets in place

Gluing the other roof panel in place


The basic roof is ready to go


Added the cap strip to cover the seam between the sides.


Added the end caps


The shingles I'm using for this project

The boring part. Like I said this would have been easier to put the shingles on before I glued everything together

One side down

Both sides are finished. Just need to paint the end caps and I can start the weathering.

Monday, November 9, 2015

Building Calamity 6 - Row House Roof

Its time to take a break from the building itself and hit the roof. I'm doing this mostly in the interest of being able to paint everything faster. While the roof shingles I'm using are grey that's not the color I want them to be. There is still some time to be spent on the roof as I want to do something interesting with the eaves to add further interest.

I want the roofs to be as interesting as I can make them without detracting from the overall scene. From a gaming point of view everything is seen mostly from above so I really want to have interesting rooflines that will help draw the players into the game.

The shingles I'm using for this roof are a bit on the fancy side as they have that neat hexagonal cut to them, These are the Laser-Art paper shingles from Branchline Trains. I have really come to like these shingles a lot and some of it has to do with the amount of material you get in the package. I have plenty left to do the second row house if I want to, but I have two packs of Truewood shingles from Builders in Scale that I might use to make that row house stand out as different.


I was almost done laying the shingles on the first side before I remembered to take a picture

All done

Its Elmers Glue (PVA) gluing paper to plastic I figured it wouldn't hurt to let it sit under some weight.

Finished the shingles on the other side

While the second side had a turn under the weights I went ahead and trimmed up the first side. Nice and neat now!

I figured I had the weights it may as well go ahead and give the first side some more time under the weights as well.

Roof sides trimmed and ready for the next step.

I love my square blocks. I went with the 1mm foamed pvc for the braces.

Added some stringers to strengthen the joint and added the fifth, thicker and shorter, brace.

So far so good! I kept the edge braces pretty tight to the walls to insure a reasonably tight fit.

Gluing the other side of the roof in place.

Added stringers and the basic form of the roof is complete

Looking good. Just need to deal with that gap on the peak between the two sides

I had just the right piece of dimensional styrene for that job.

Added the roof cap which forms the basic roof. I could finish it off with some plain edge trim but I think I'm going to go for something a bit fancier. They do have those fancy shingles after all.

Friday, November 9, 2012

Battle Flag Saloon - Adding some detail

I did get to spend some time working on the Battle Flag Saloon this week. Nothing groundbreaking by any means but its certainly looking more "finished" than before. I was at Caboose Hobbies here in Denver and picked up some "O" Scale shingles to try on the roof. The first is called Truewood (covers 27 square inches for $9.98) and comes from Builders in Scale. The pack I picked up is rustic oak and they really are made from oak. The other shingles came from Wild West Scale Model Builders (Shake Shingles covers 38 square inches for $10.95). These shingles are a heavy weight paper and have also been laser cut. I ended up using the ridge cap from one of these packs to go along with the Truewood shingles I used. Hopefully I can blend these together during the weathering process. If I can't I think I have enough leftover Truewood shingles to do the cap, and I might do it anyway since the "look" is just not growing on me.

After shingling the roof I grabbed some stripwood and added some trim to the Saloon. This covered up the joint where the walls come together. I also added some trim to the roof on the back side. All of this wood was scored with my razor saw first to create a deep grain pattern. Its hard to see now but will be much more visible after the building is painted and weathered. I have tried to distress the boards on the building itself with my razor saw which mostly just leaves fuzz behind and seems to want to remove a layer from the building rather than make the deeper grain pattern that I was hoping for. My order from Micro Mart that arrived yesterday has a tool in it that I hope will let me get that distressed look that I want. Hopefully I'll get to try it tonight.

Next steps are to go through this same process on the General Store and the Photographer's studio. I won't put the shingles on the roof of the General Store though. Battle Flag said that they could get me a new roof which means I won't have to mess around with the extra work to make it look right. Great guys at Battle Flag! Of course there are pictures to show the progress so far. If you were really sharp eyed you would have picked up on the changes to the Saloon in the pictures that were in the Aetherworks review yesterday.

First up the products I used

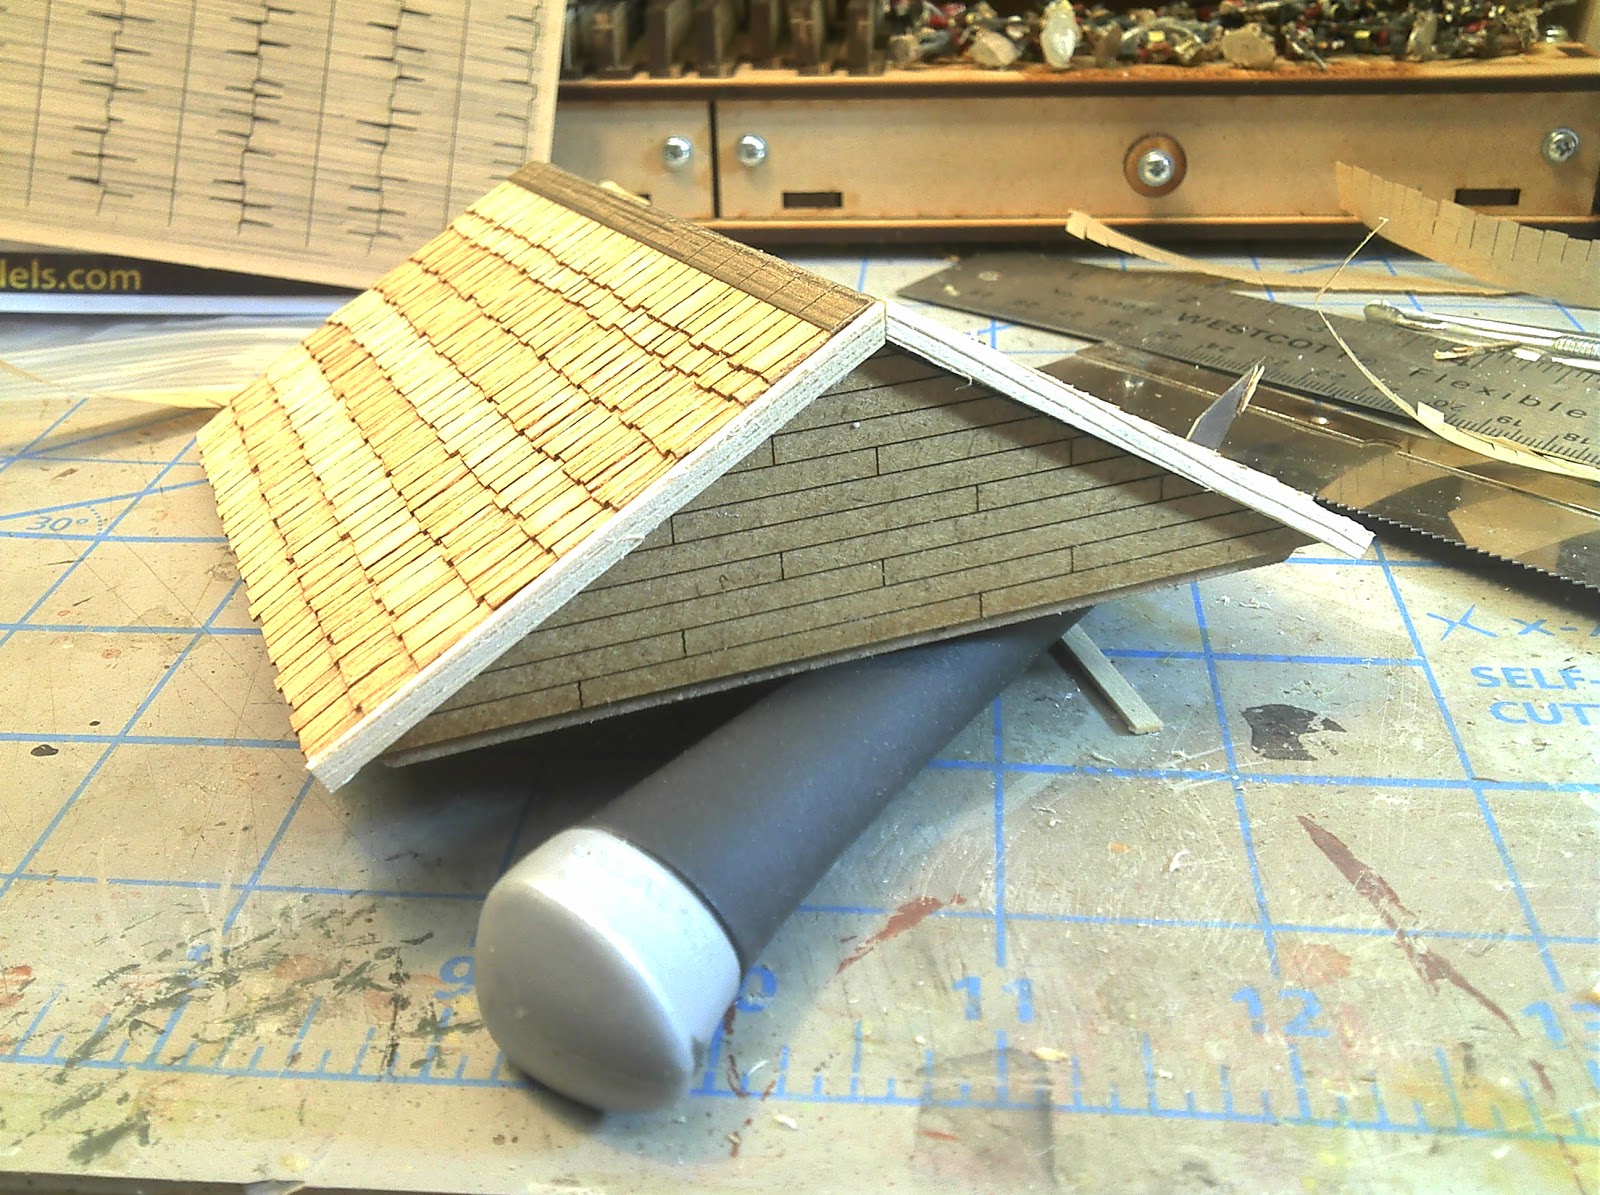
Shingles applied to the roof


Adding some trim to the building to cover the joints. Obviously not as thick as the MDF, but I don't think you will notice after painting and weathering.