Quotes

Life is short, break the rules. Forgive quickly, kiss slowly. Love truly, laugh uncontrollably and never regret anything that makes you smile. - Samuel Longhorne Clemens (Mark Twain)
Showing posts with label M4A1 76mm. Show all posts

Saturday, September 29, 2018

ReaperCon Projects - The Sherman Part V

I was going to call this one done, but now I have a problem to solve. I tried to finish this one on the road at Reaper Con but I didn't manage to pull that off. I just didn't have the time I needed although I did have the right tools.

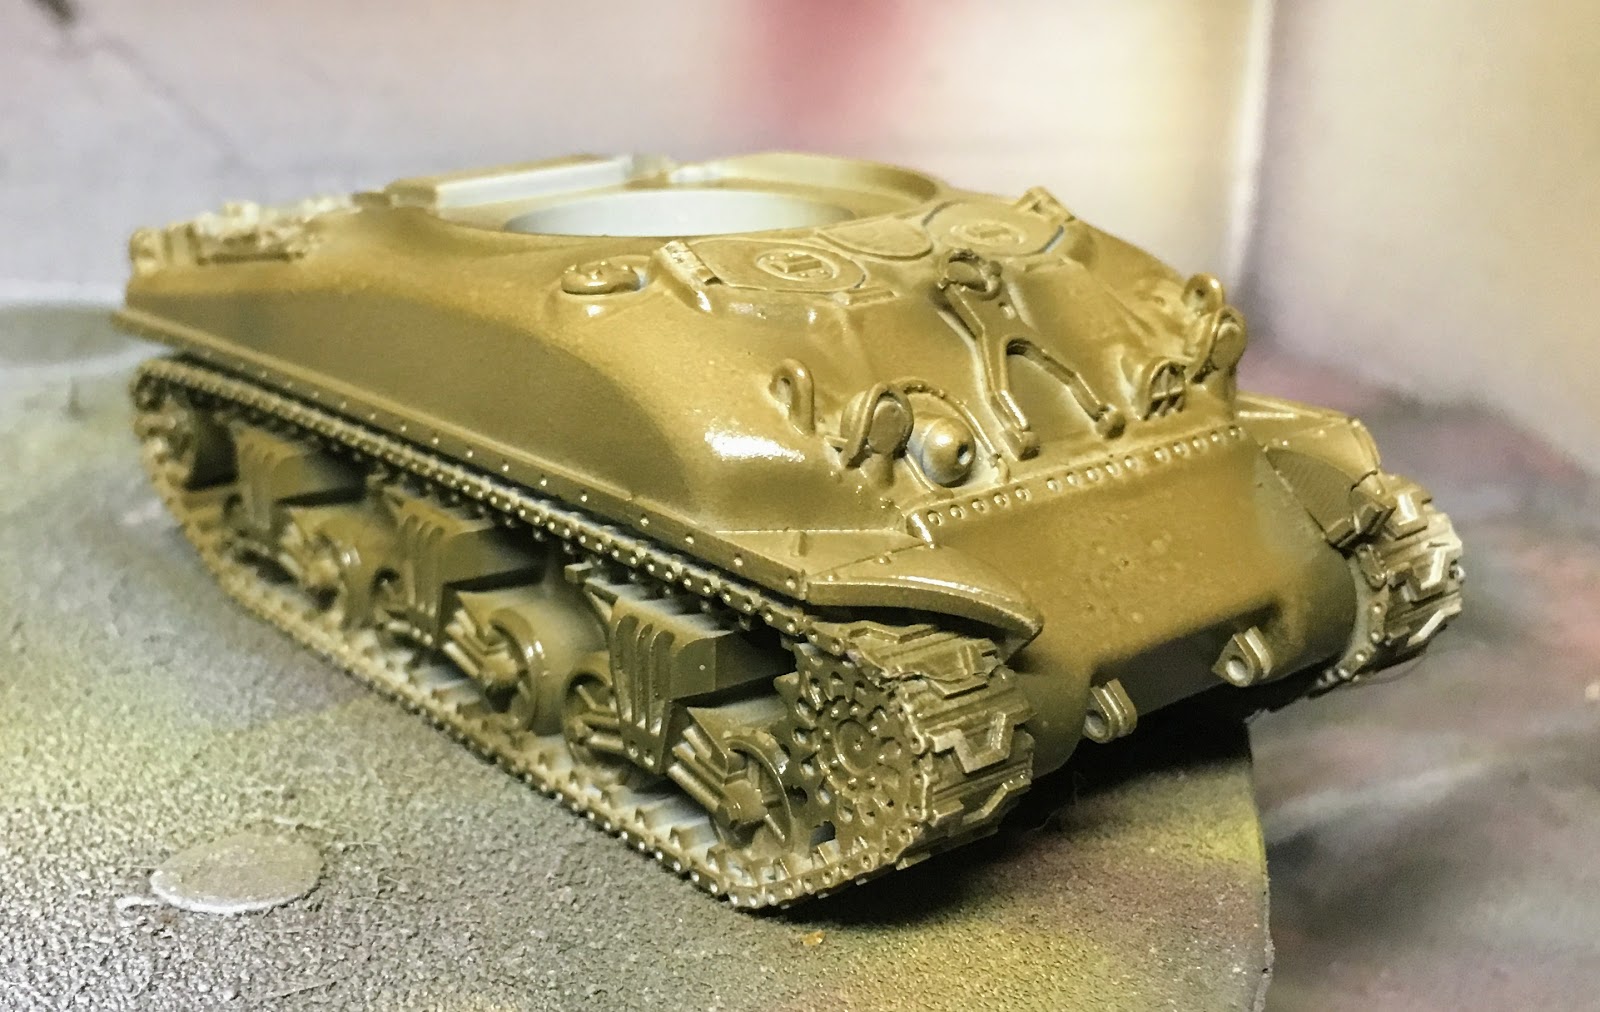
Last night I was able to sit down with the powders and finished it off and I was pretty happy with the result. I tried to over weather as spraying dullcoat tends to blow off the powders although I was hoping that the pan pastels would hold up better as they have a bit more "tooth" to them. 

Not only was that not the case, most of my powder blew off but the Army Painter Anti-Shine spray left a whole ton of white speckles all over the model. I'm not sure how to approach even fixing this at this point, but its to expensive a model to just discard. 

I think I'm going to go over it with just some pure mineral spirits and see what that does and I certainly won't be using that particular can of matte spray again. I have learned quite a bit with this project and hopefully I can apply all those lessons to the other Sherman that I have in progress. Also I need to remember to fix the powders in place first then apply the matte finish and the thing is I knew that and still didn't do it.


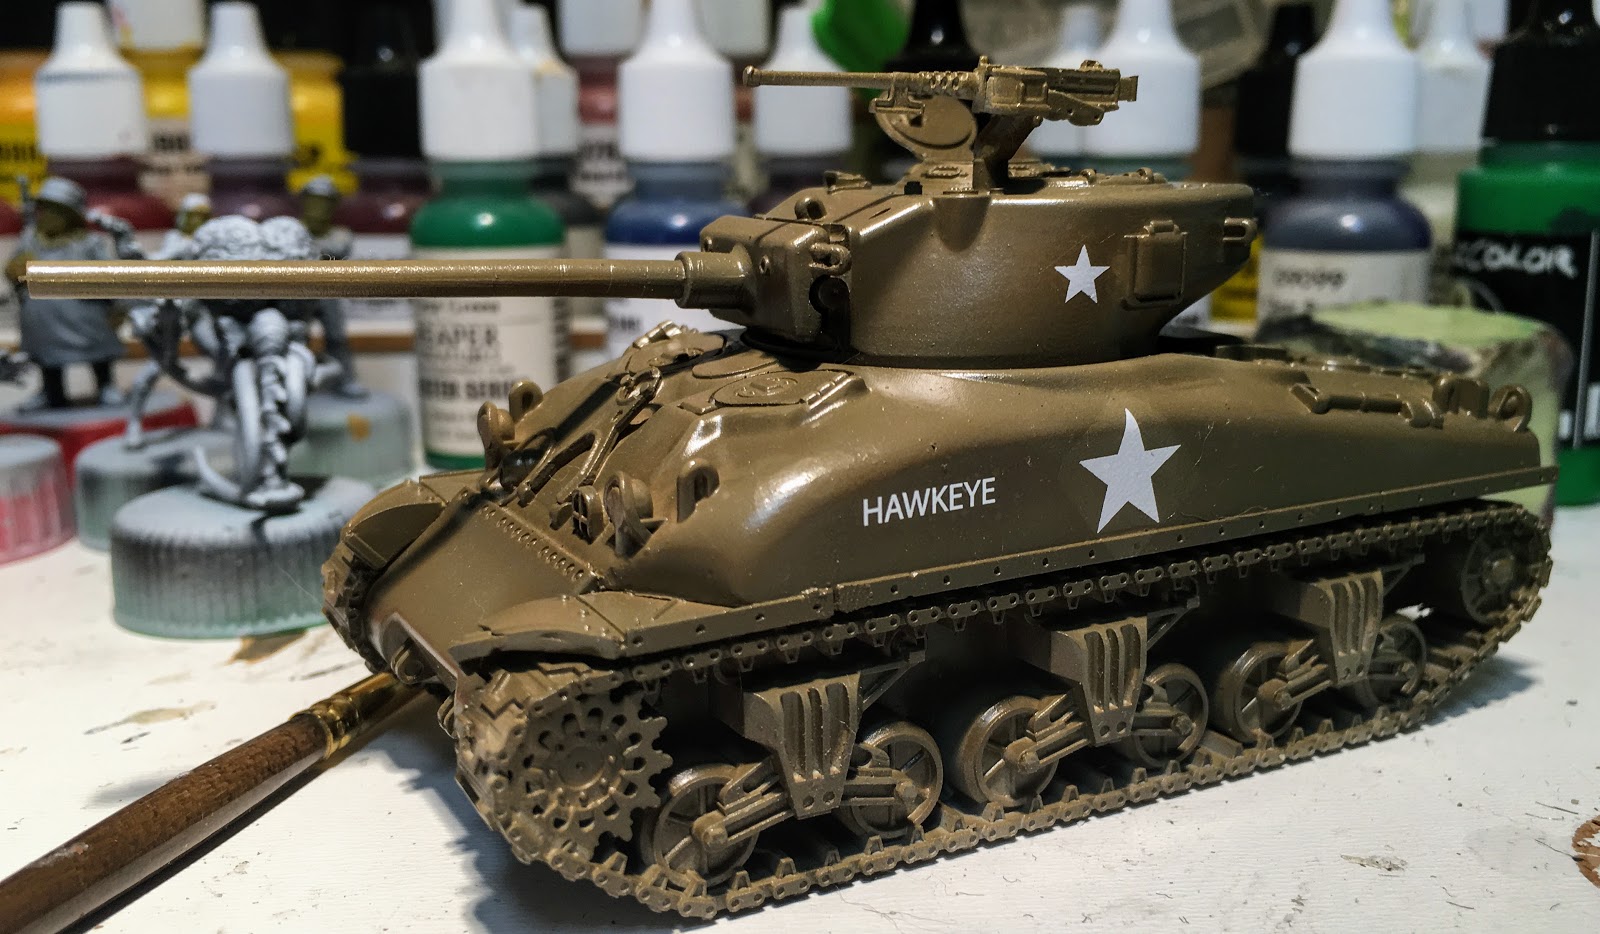
Pretty happy with this point, although some of the paintwork on the tracks has been covered. I anticipating losing some of this powder when I seal it. I used three different pan pastels and one MiG pigment. I don't remember the colors right now but I have them still sitting on the table so I'll at least record them for the next time.


And disaster strikes. While I lost a whole lot more weathering powder than I expect, I have also managed to add a ton of these white speckles. I have not idea how to fix this right now. I'll have to set it aside and think about it.


Monday, August 27, 2018

ReaperCon Projects - The Sherman Part IV

Sometimes life just conspires against you. While work has progressed on the competition Sherman, I'm not sure its going to make it. I have a couple of fall back pieces but this is the one I really wanted to enter. We shall see. The good news is that the Rubicon decals are much better than Company B and will definitely hold up through the weathering process. Its a bit farther along in the process now which you won't see in the few photographs I managed to take.


Monday, August 6, 2018

ReaperCon Projects - The Sherman Part III

More work was completed on the M4A1 76mm Sherman. It was time for the wash stage and a certain amount of cleanup that goes with it. This is a brown wash designed for a green base coated vehicle, i think its the AK one. Quite frankly I forgot to take a look at the bottle, it could also be from Ammo.

I figured that I would just go ahead and wash over the big stars which would pretty much completely remove them from the surface. I'll go back after these steps and reapply decals. The other issue I'm having is still on the driver's side of the tank. I have really messed up a section of the upper hull and I'm not quite sure what I'm going to do about it. I might try some steel wool and see what if I can change the finish enough to at least fix it. 

I applied the brown wash over the entire vehicle and then, using thinner, I slowly cleaned up the major surfaces leaving the wash, primarily, in the various nooks and crannies. It looked pretty good at the end of the session and I have gone in and started a little detail painting.

Just get it on there! I probably could have been a lot neater with this application and saved myself a lot of work


First pass at cleaning up the wash, looking pretty good and the tones added by the oils are starting to come back through.


Happy enough at this point to start a little detail painting
 
Of course on this side that spot is really showing up, I need to contemplate what to do here, I'm not going to strip down the whole vehicle at this point. I might strip this section, mask it off and reapply with the airbrush.

Wednesday, August 1, 2018

ReaperCon Projects - Small Steps II

I had the opportunity to get a little more work in on the M4A1 last night. I started with the oil process to add more tones to the vehicle. This is simply add spots of oil colors and streaking them down the sides of the vehicle. If the streaks are to evident you simple keep streaking them down with the mineral spirits. Its an interesting process but I made a huge mistake on the right side, and this shows the quality difference between the I-94 decals and the Company B decals. I accidentally drag a brush full of mineral spirits across the Company B star and it started to disintegrate, you can see the effects in the picture. The I-94 decal held up just fine, no ill effects.

Now I have some things to fix, as something is cockeyed with the paint on the left side. Not quite sure what I'm going to do about that but at this point I just need to continue forward.

The evening's paint selection


The initial streaking and the disintegrating Company B decal

To many green dots and to concentrated on the center and the driver's side

Ruined the star on the turret as well, both sides, but you can see how the streaking adds different tones to the surface


The palete at the end of the evening

Monday, July 30, 2018

ReaperCon Projects - Small Steps

With all the stuff going on with the renovation I'm finding it difficult to get any serious painting time in on these projects. I may be reduced to a single ordnance entry, although I will try to get at least a single painter entry done. Will see how it goes. Here is an update on the progress (or lack there of):


Getting a few decals on is all I managed to accomplish. And they are going to need more work. There are two brands of decals here. The name "Hawkeye" is from a set made by I-94 for 20mm. Those are great decals. The stars are from Company B, and I'm not pleased with those at all. I give them another treatment and see if I can get rid of the silvering but I'm not confident. I may swipe some Rubicon decals from the Jeep kits and get rid of these.


Friday, June 29, 2018

ReaperCon 2018 Projects - Starting off

While I have begun to work on the various miniatures for the dioramas, I decided I needed to make some progress on my armor entry; an M4A1 76 from Trenchworx.

I started with a grey primer and worked my way up through various shades of olive drab from Ammo by Mig using the airbrush. Not sure how I feel about it right now but at least it has been started. I will move on to the decals next and then follow it up with weathering and other effects.

Assembled


Primed


Dark Olive Drab Base


Mid tone, not pleased with the consistency of the mid tone paint, its almost to thin even for an airbrush


Light Olive Drab applied


Final highlight Olive Drab. Its hard to see the variations in tones under these lights they are so bright they tend to wash out the changes in tones.

After this a little brush work on some of the higher details and then I'll apply the decals and start the weathering.


Wednesday, September 13, 2017

World War II Project - Trenchworx M4A1 76mm Sherman

As Reaper Con continues to loom larger in the sites I decided that I would like to have at least two armor entries. I was going to bring the MadBob German armor that I finished some time ago but I think I can do better. For this effort I'm going to paint up the Trenchworx M4A1 76mm Sherman and the M18 Hellcat. I figured I could do these at the same time without much of a problem. While I know I just received a Company B M4A3 Sherman, I decided I should opt for a Trenchworx kit as I think its a better casting.

The resin casting on the Trenchworx kit is really superb, although I can still see the 3D printing bands from the master model. They are pretty fine though so I'm confident that the primer and subsequent paint work will make them disappear. The casting lines on these are pretty much non-existent and the method used to cast the tracks means there are no mold lines going right down the middle of the tracks. There is one channel mark and it was easily dealt with.

The white metal parts are, for the most part, very crisp and well cast. I did have issues with the .30 cal MG, which looks like it slipped in the mold. I cleaned it up but I really should contact Trenchworx about a replacement, I'm just not sure there is time for that so I'm going with what I got. Also the driver side front fender didn't cast well, it almost looked like it cracked while it cooled. I'm going to go ahead and break it off before I prime as damage to these fenders was pretty common. Since this part of the fender is pewter you could easily thin it out and bend it if you like.

During the assembly I found that the driver's hatch might be a little small and the radio operator's hatch is a little big, that one took a little work to get a nice fit. Other than that it went together quite easily. At this point it is by far the best resin tank kit I have assembled. 

So here is where today's work progressed:
The parts straight from the bag, look pretty darn good at this point. Just a little flash on the inside of the tracks, easily dealt with using a nice sharp knife.

Dry fitting, always dry fit first!


Some really nice detail on the back of the hull

The white metal parts all cleaned up

Starting the assembly. You have to glue on the front fenders before you glue the tracks in place. You can get them in there after gluing the tracks in but I found a needed to make a couple of small adjustments for a good fit so this was much easier to do before the tracks were attached.

Here you can make out the crack in the fender casting

Turret all assembled. I have a Company B commander to go in the open hatch


Rare earth magnets to help hold the turret in place. Got the polarity right the first time!


All ready for some primer. I'll build up the M18 before I do that though.