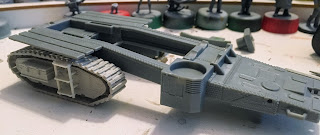
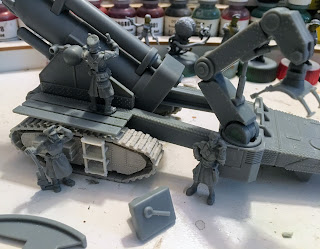
I know I need to dig up some of the missing parts but I'm moving forward with what I have. I have applied the pin wash, still needs to be cleaned up but that big step is done. After that I'll follow up with some chipping in a couple of different colors.
The Town of Calamity, The D&RGW RR Warehouse Row and Historical Miniature Gaming
Quotes
Friday, March 26, 2021
Tuesday, March 23, 2021
Sledgehammer BFG - Back to the bench
This bad boy has been sitting for at least 18 months on the back burner. Since it looks like ReaperCon 2021 might really happen I figured I better pull it out and get started so it has a chance of being ready for Labor Day weekend (Sep 2-5).
While I was fairly happy with the initial airbrush work at the time I am decidedly unhappy with it now. So back to the airbrush for some camo work. I essentially change the color of green I used and widen all the green and brown stripes so the dark yellow wasn't so glaring. I also cleaned up all the bad spots from the previous airbrush work. Which goes back to do it right the first time and you won't have to come back to it.
After looking at the pictures I realized that the crane is missing. I need to find out it and do a little work on that as well especially since I switched out the green!
 |
| The camo that was completed 18 months ago (or there about). The bright light over the airbrush booth tends to wash the colors out a bit. |
 |
| A new shade of green |
 |
| Widening the brown stripes |
 |
| At the end of the airbrush session. Note the missing crane which seems to have wandered off on its own. |
 |
| This session's colors. I may need to put in a paint order soon. |
Wednesday, February 6, 2019
Sledgehammer Project; Preparation Pt XVIII - BFG Sub Component Assembly
I took a bunch of assembly shots figuring that it might help others that are working on this little beauty at some point. First thing to remember is that I did a lot of filing and filling before this. Since some of the filling required is for gaps and injection marks that are very visible I would really recommend going through the filing/filling exercise before you begin any of the assembly.
 |
| Starting with the gun carriage, this is pretty straight forward. |
 |
| glued up and ready to go. |
 |
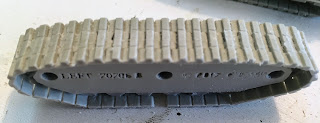
| I have opted to go with the tracks from Victoria Miniatures, rather than the kit supplied wheels. Again these are pretty straight forward and are conveniently labeled left and right on the back side. |
 |
| Some cleanup is required. The mold line goes right down the middle of the tracks. |
 |
| And of course on the bottom you will have to deal with the resin blocks. |
 |
| From the bottom, its evident that this is definitely a miscast, the mold was filled enough or may have slipped slightly during the casting process. |
 |
| The ladder attached quite nicely, although I did have to shorten the locater pins on the ladder a bit. |
 |
| The tracks all ready the extra detailing that will come later. |
 |
| Like this (looking from the bottom where the tabs are located) |
 |
| This is how it looks from the top |
 |
| Whew, it all fits together quite nicely. Note that I have not glued the tracks on at this point. |
 |
| Here I'm starting on the barrel assembly |
 |
| The hydraulics to the recoil. Note that the end cap needs a fair amount of filing and filling and its very visible on top of the gun. |
 |
| Getting it together, its a very large gun |
 |
| The front side of the breech block. I may scrape off the molded on handle, its very soft looking. |
 |
| Getting ready to do a little gluing. At this point just the counterweights since I need to work on the Fin. |
 |
| These are the cable reels with cable molded on. |
 |
| And the reels glued in place. |
 |
| The components for the crane |
 |
| You can glue this piece but I didn't. I wanted a little bit of swing to it since the diorama will feature the gun being loaded. |
 |
| All glued up. |
 |
| The upper piece for the shell carrier is glued to the the ring. I have not glued the base plate on yet, I'm not sure what position I will need to have it in so I can make it swivel appropriately. |
 |
| Mounting up the gun. Again, this has not been glued into place yet as it will be receiving a bit of extra detail. |
 |
| Test fitting the platforms. Again no glue, my intent is to use the supports underneath the three planks and replace it with a metal walkway on both sides. |
 |
| A first look at the whole thing |
 |
| Adding a few of the crew |
 |
| This is what I have left to deal with. I won't be using the two plates in the lower right side of the picture. |
 |
| Still a long way to go at this point. |


