
Wednesday, October 28, 2020


Friday, October 23, 2020
World War II Project - Back to the Stug - Debris Shield
Now that I have my spinner rack project out of the way I have had time to ruminate on how to deal with the debris shield on the STuG III. I kept trying to make this from three pieces and I now think that was a mistake. I went back to how I handled bending the top edge of the side skirts and thought that approach might work better. Well it actually worked, mostly. As you can see in the photo I have managed to get something that at least resembles the debris shield from the pictures and I might just call that good enough.
I only have three reference photos to work with. The first is from the Tank Craft book STUG III & IV, German Army, Waffen SS and Luftwaffe Western Front 1944 - 1945 (by Dennis Oliver) page 17 the second color plate has a photo reference. This is one of the better shots, although it is slightly different in appearance than the other photos. There are three photos of the same STuG in: Sturmgeschutz III on the Battlefield 2, vol 4 from Peko Publishing (by Matyas Panczel). These photos are full pagers, found on pages 99, 100 and 101. Of these the one on page 99 is the best and it is obviously at least slightly different from the one in the Tank Craft book. Its also a better photo in general. The picture on page 100 is not useful at all, but the one on page 101 you can sort of see the shield just over the top of the superstructure. Both of the STuGs in these pictures are from the 341st Sturmgeschutz-Brigade, 2nd and 3rd companies so it was definitely something peculiar to the unit along with the inward bend of the side skirts.
The thing that I'm puzzling over is how the shield was made. Did they just bend a piece of side skirt (it looks to thin to be side skirt material) or was it three pieces welded together and then bolted to something. I haven't been able to find anything that might help me on that score. However, if I continue with this method then I think I need to make it look like three pieces welded together. Without being able to find anything to contradict me, I think its the best way to proceed and finally get to the painting step on these STuGs.
 |
| I'm slightly concerned with the shield being to thick. It doesn't look that thick in the pictures. Its really just there to keep falling debris out of the gun mantlet. |
Wednesday, October 21, 2020
Something a little Different - Spinner Rack Assembly
It has finally all come together. I cut the center posts and the interior supports and moved straight into putting the spinners together. These actually went together easier than I expected and overall I'm quite pleased with them.
 |
| This is a stack of 4" lazy susan hardware (the spinner part). These just barely fit underneath the 5" diameter spinner racks and only because the corners have been rounded off. Unfortunately while there is plenty of space under the 6" spinner rack it does make it look a little tippy although it seems stable enough. I'll go look and see if I can find any 5" lazy susan hardware for the future. |
 |
| Everything stained, cut and ready to assemble. I only had to use the rubber mallet once. |
 |
| Step 1, Insert center post, and glue 3 supports to it. |
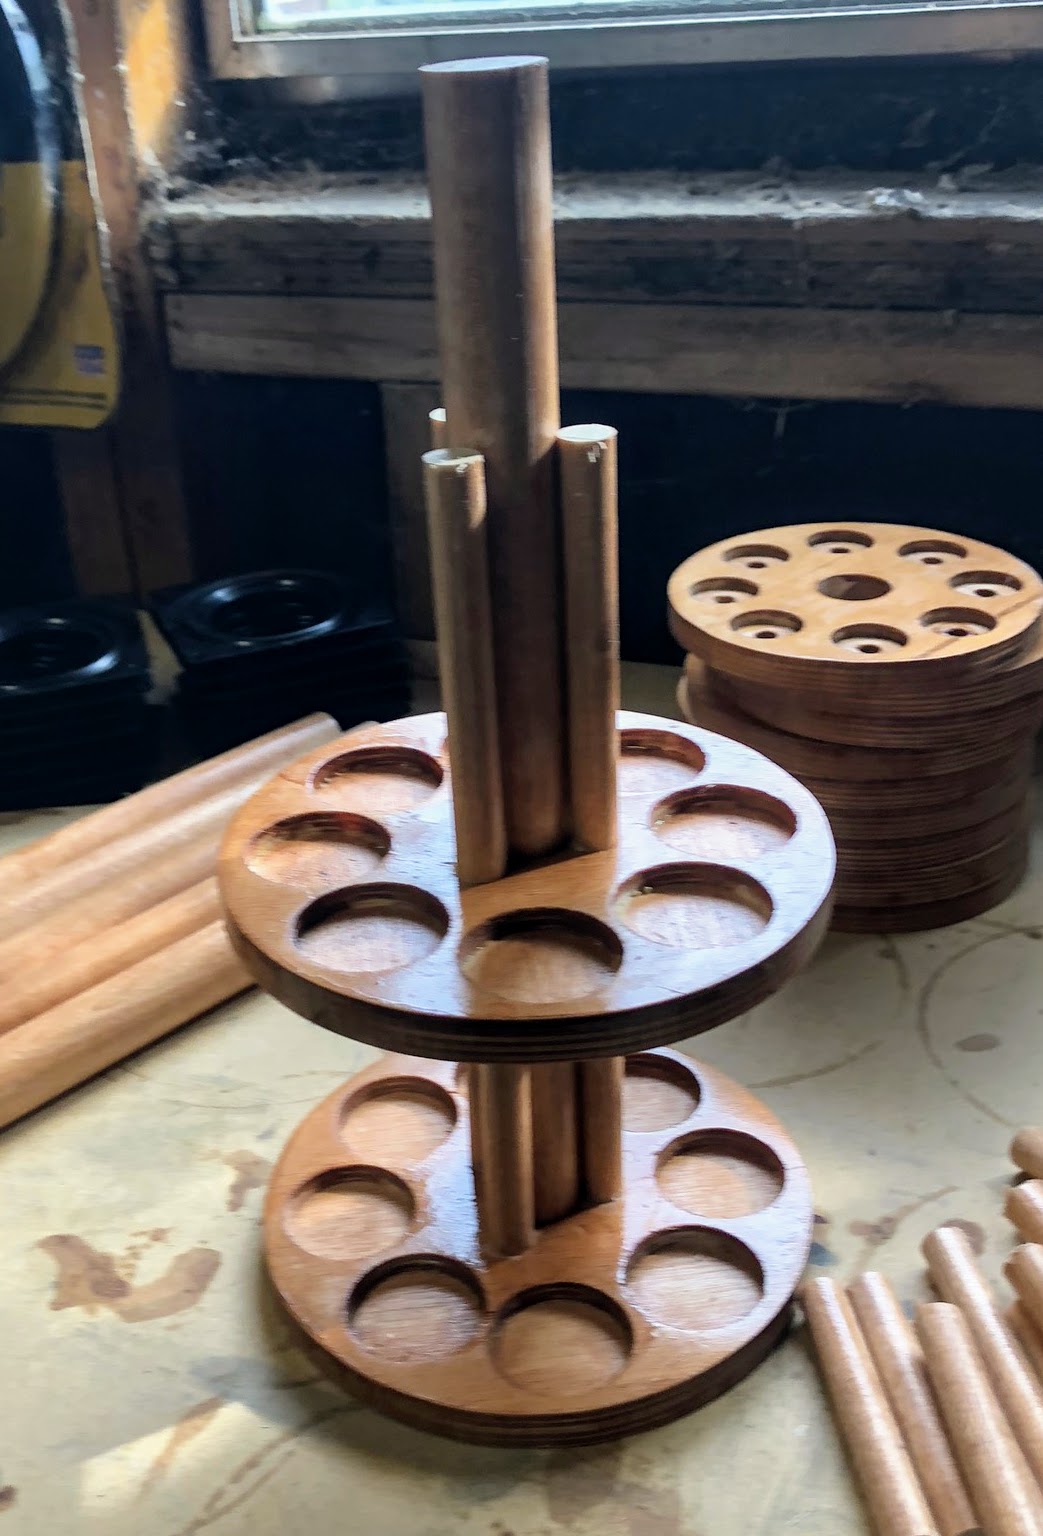 |
| In step 2, I slid the center tier down the center post and in to contact with the support posts on the bottom, this way I didn't have to constantly measure if I had the top tiers at the right heights. |
 |
| The tall racks all assembled and ready for spinner hardware |
 |
| And the group shot of all the racks |
 |
| It was getting late so I quickly attached a spinner to each of the 4 different sizes. Everything looks like its not standing straight in this and the next few pictures. That's because they aren't. Over the years the lamination has started to separate from this section of the counter top which is quite annoying since its the easiest spot to work at. |
 |
| The dropper bottle rack with a full compliment of paint. This will hold pretty much anything that comes in the standard sized dropper bottles |
 |
| The large jar rack with a full compliment of 24 jars. It holds the bottles from AK Interactive, Ammo by Mig and even a very old jar of MIG. |
 |
| The Oilbrusher rack with a full compliment of 8 tubes. Right now only Ammo by Mig uses these containers. I think with a little plotting I can get a future version to hold 12 tubes. |
 |
| The tool rack holds 16 tools. I modeled this after the rack from Micro Mark. The 1/2" holes are just to small to hold all the tools i wanted it to. Since I used a paddle bit there is a pretty deep center hole for some tools to slide into. While perhaps not an outright failure it needs to be reworked with a larger hole in the top tier. I could probably combine this rack and the oilbrusher rack together. |
 |
| The full time loaded up and ready for some modeling. |
Like any project I learned a few things that I would definitely change if I did another run of these racks.
1) Height. The bottle and jar racks are very tall, I wanted to make the bottles and jars very accessible, that being said I could reduce the height between levels by 3/4" and and 1" and achieve the same thing. On the plus side the bottle rack as built should fit my wife's craft paints.
2) The six inch diameter rack needs a bigger piece of lazy susan hardware for stability
3) The 1/2" holes on the tool rack are to small, make them the same size as the holes on the oilbrusher rack and reduce the hole count from 16 to 12.
4) The oilbrusher rack could have handle 12 holes up from 8 as built.
5) Staining was a huge hassle and it really meant that I had to stain every thing before I assembled it. I think I would prefer to paint the next run after I assemble it and do it with a rattle can. Staining just took forever
Other than that I think this was a very successful little project and I think I'll do another run of these with the improvements.
Tuesday, October 20, 2020

Monday, October 19, 2020
Something a little Different - Spinner Build Continues
Some more time stolen from other projects and put into the spinner racks! It sounded so simple in the beginning. At this point I have managed to drill more holes than I care to count (and I didn't) and cut squares into circles on the bandsaw. Some quick work with a palm sander and I was able to get the initial coats of stain on them.
At this point I need to apply another coat of stain to the edge and stain the bottom of all the discs. The dowels that will provide the center and interior supports are also finished although I'm debating doing another coat of stain on them. I was just going to do one but I think it would be better to give everything two coats. The 4" spinners that I will be using arrived on Saturday, although I do need to pick up some wood screws to attach them with.
Here is the progress so far (rapidly reaching the assembly point).
 |
| I think my hands are still vibrating from cutting out all the discs. You can see where the top layer of the plywood chipped out during the drilling. Those are the half inch holes and I probably should have used a regular 1/2 drill bit instead of a 1/2 paddle bit which would also avoid those little holes in the middle! |
 |
| Two coats of Minwax Pecan Stain on the top, one on the sides. I need another on the sides and one on the bottom. I used the Minwax that contained stained and polyurethane to provide a bit of protection from the abuse I expect to heap on these. |
Subscribe to:
Posts (Atom)