I decided that I would photograph the build this time in sequence with the assembly steps and try and give a few pointers. So here we go.
First up is today's work space:
 |
| My tool kit, cutting mat, drill bits (not really needed, but good for starting to drill out gun barrels), a bottle of liquid cement (Testors Model Master and if you are using super glue for these kits you are using the wrong stuff) and the two kits that I was intending to build that would blossom to three. |
I didn't really experience any problems in this area. Everything fits together quite nicely.
Tip: when you are attaching the side plates with the running gear. Make sure you apply gently pressure downwards so that the sides don't ride up. If they ride up the back plate (B8) will not fit properly. If that piece doesn't fit properly then the upper hull won't fit well either.
 |
| All the parts you need to build the lower hull and tracks. |
 |
| And all put together. For these builds I will leave the tracks off for some extra detailing and painting. I probably won't attach these till after most of the painting and weathering is finished. |
This portion of the build is also very straight forward. But there are a couple of gotcha moments, one of which took me all three builds to finally figure out the best way to do it.
Tip 1: Remember that the gun mount should not be glued or your gun won't elevate. I found that if I put piece C26 in first and pushed it so the back of the piece was pointed about 45 degrees downward it was much easier to glue piece C04 to the back of it. This should be the first part of Step 2 you do.
Tip 2: B11 was a nightmare piece for me on every build, I finally found a better way to attach it on the third build of the day. Make sure the make side of the piece is perfectly flat you need all the surface area you can get and there are no pins to glue into holes. This one just goes flat against the back of the upper hull. Look closely and you can see the spots where it should be glued. There are two injection marks on the back of this piece, this is what must be filed or sanded flat to get good contact. I put glue on the two ends and on the filter (which is in the center of this). I lined it up and then put pressure on the filter itself which seemed to be the only point where I could get good pressure on the end points. Once the glue has set a bit I could shift and place my fingers on the antenna portions and make sure they were firmly attached. A couple of actual attachment pins would make this a whole lot easier.
 |
| The parts, note the dreaded B11 piece that contains both antennas and the air filter for the rear hull |
 |
| And assembled |
Nothing terribly difficult here, just have to decide on the extra armor and the gun.
Tip 1: If you are going to drill out the muzzle (and it looks funny if you don't) this is the time to do it. I used a smaller bit (#63) first to get the holes started and then finished up with something closer to the shell size.
 |
| The parts with a choice between mantlets, muzzle brakes and armor. |
 |
| And assembled |
Important: The directions in my kits are all wrong in step 4, there is a correction on the Rubicon Website but I certainly didn't think to look there for anything like this. Three of my kits were just purchased from Rubicon Models so there are a lot of old instructions out there. Essential two of the diagrams are showing the incorrect roof. The Early Production roof should be B03 not B04 and the Mid Production roof should be B04 not B03 as stated. This kind of messed me up because I was trying to build at least one early, mid and late production version of the roof, fortunately since I ended up with four kits I was able to build all three variants.
Otherwise nothing tough about this build other than that there are no marks or pins for piece B12 which is optional. Just grab a reference from the web if you are a stickler for exact location which probably varied anyway.
 |
| The pieces, note that this is the mid production rough, which I thought was the early production roof because of the diagram in the instructions. |
 |
| And assembled |
There are a lot of different things you can do in this particular step. Just remember that there were probably dozens of different ways these vehicles came from the factories or were changed in the field. You can't ever by "wrong".
Tip 1: If you intend to use the rack and its extensions or even just the rack then its best to glue part B05 in place first and let it set. It has a tendency to slide while the glue dries. It does not have any locator pins or even slight indentations on the hull. The best indicator of where it should go is actually in the third little box titled Late Production. If you are going to add the extensions then its really important that this piece has set up so don't hurry. Once it is glued in place then I added the two extensions. Its easier to line up the the ends of the top crosspieces and let that guide the location of the back leg. Be patient.
 |
| Everything you need. Almost everything here can be considered optional depending on what year you are modeling. |
 |
| And assembled. I have left the spare road wheels off so they can be painted separately. |
Lots of misc catch up detailing in this step. Side skirts are optional, smoke launchers are optional, you just have to make a decision on the top hatch and the spotting binoculars. Look around at some reference pictures, there are a lot of ways to add these pieces.
 |
| The pieces |
 |
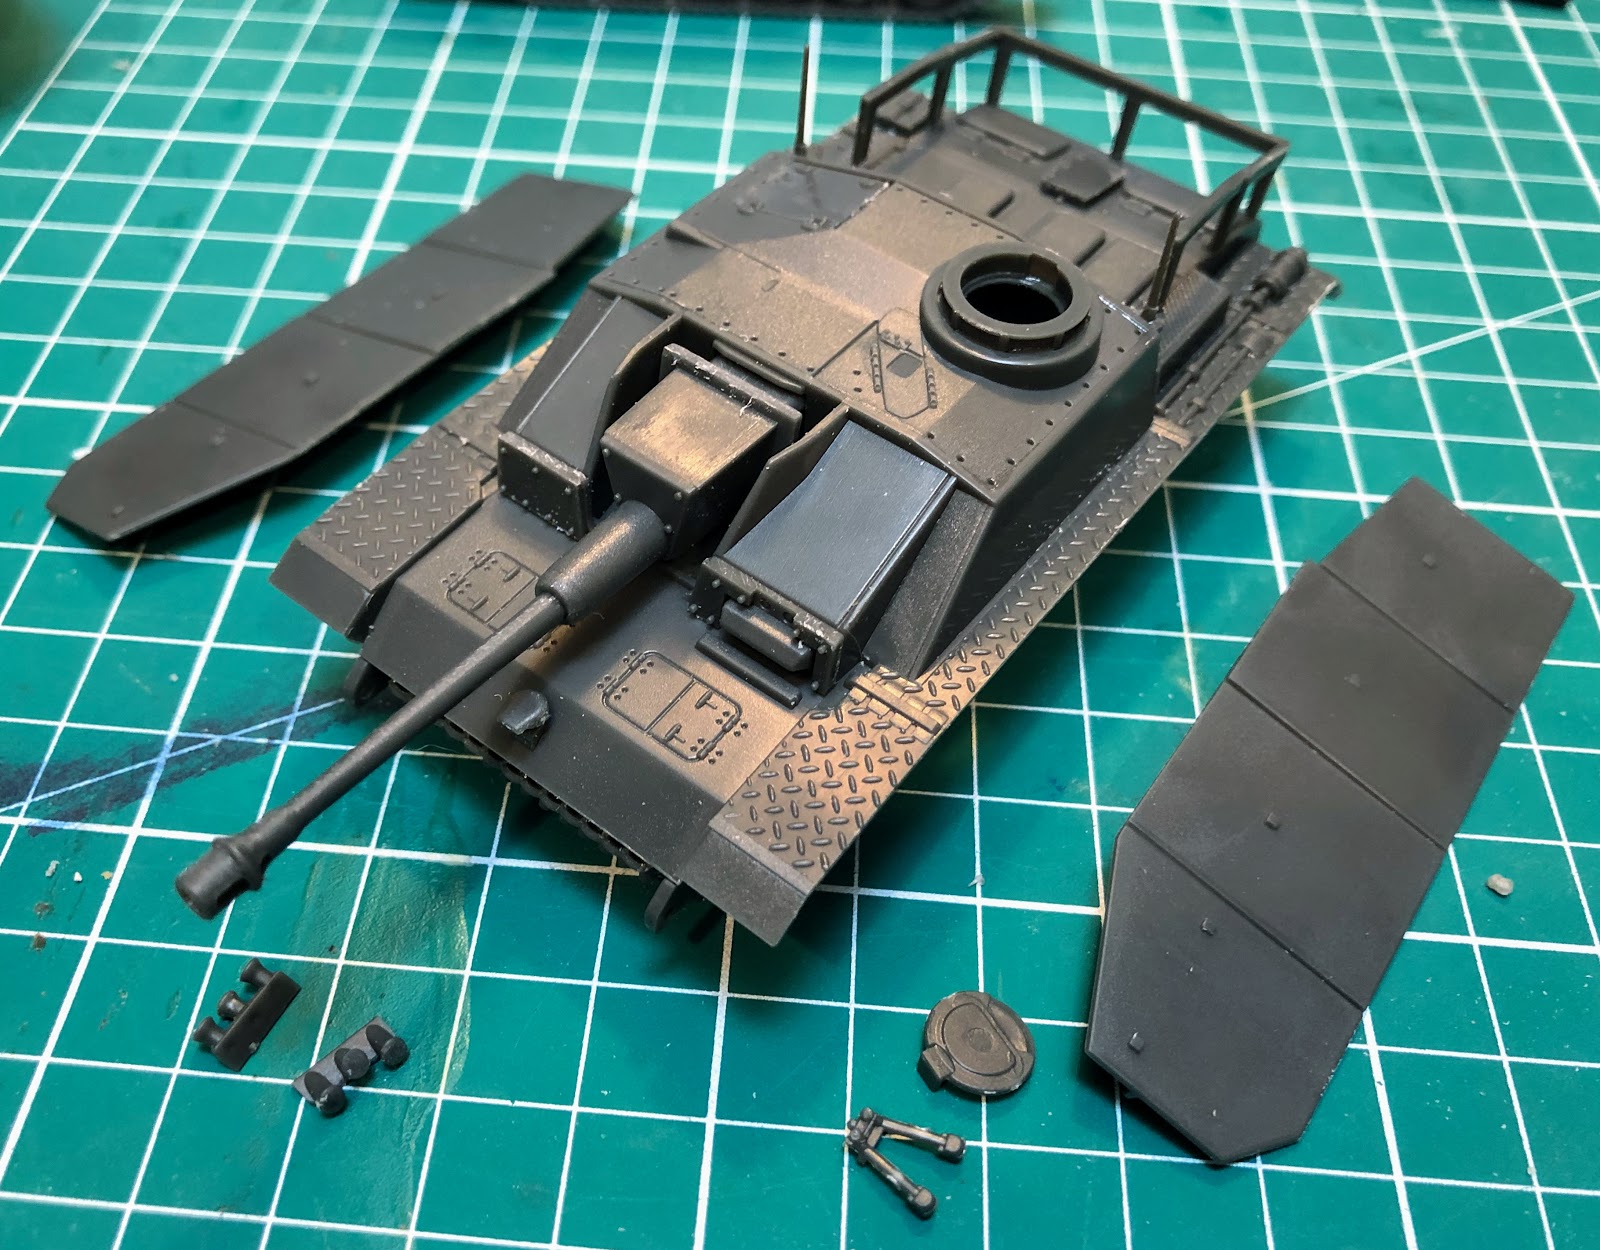
| And assembled. Again I'm leaving off the side skirts for now. This is the vehicle I made the roof mistake on so it really shouldn't have grenade launchers but I'm sure there were some that were issued that way or were added in the field. Also note that the tracks are still not attached. I just wanted to give you an idea of what it will look like at the end. |
 |
| Just about all the tools I used. Two drills so I don't have to change bits, two different clippers, set of tweezers, files and the ever faithful x-acto knife variant (Gale Force Nine I think). |
 |
| From left to right: StuH 42 early production with the saukopf mantlet, StuG III G mid production, StuG IIIG mid production (these two are very similar but have different muzzle brakes on the guns, not that anyone but an absolute purist could tell) and a StuG IIIG late production with the saukopf mantlet. |
The next step will be to separate the side skirts and add some damage to them. I'm going to go in and mess with the front and back fenders as well, can't have them looking to factory fresh at this point. I also intend to adding two cables to at least two of these and maybe all four. Fortunately I was looking at the German Stowage pack from Rubicon and it has the tow cable eyes so I just need to add the wire. Also stowage will be painted and added after the vehicles have been painted and weathered.
Those are looking great! I have a 15mm stug sitting on my to paint pile, and it is interesting to see the choices that were made in sculpting it, relative to the kit options you get in 1/56.
ReplyDeleteI like you tool kit, seems very practical to have it all bundled together like that.
If you are building StuG III Gs its a great kit, lots of variations that you could build. I don't see why they couldn't do some of that in the smaller scales, 15mm is not so small that you couldn't see the difference.
Delete