Quotes

Life is short, break the rules. Forgive quickly, kiss slowly. Love truly, laugh uncontrollably and never regret anything that makes you smile. - Samuel Longhorne Clemens (Mark Twain)

Friday, October 30, 2015

Building Calamity 1 - Row House

I am still working on the model of Calamity but I felt the need to try out the new materials I had collected together and build something "full sized". I pulled out the foamed PVC sheets and decided that I would make my own version of the Grandt Line Reese Street Row Houses. While I don't have a place in mind for this building I figure that I can probably fit at least a couple of them on to the board.

I have 3mm, 2mm and 1mm thick PVC foam. After I pulled it all out I think that the 3mm is a bit to thick for the row house. I decided to construct entirely out of 2mm foamed PVC board. I also experimented with glues and discovered that the Plastruct Plastic Weld General Purpose Plastic Solvent will works just fine.

I found that the sheet PVC cuts very easily, much easier than sheet styrene, I didn't have to exert nearly as much force as I would have for sheet stryene. I did you some Evergreen dimensional styrene for the edging around the interior windows, doors and floor boards. I did remember to inscribe some interior detail this time so I can assemble it and not have to worry about adding anything extra beyond some furniture.

I should be able to get the interior painting done along with the assembly the next time I can sit down at the workbench. I cut the basic roof structure so I can start adding shingles to that anytime.


I started by cutting out the floor. Made some deeper grooves with the knife to form the planks and then ran the razor saw over it to create some wood grain.

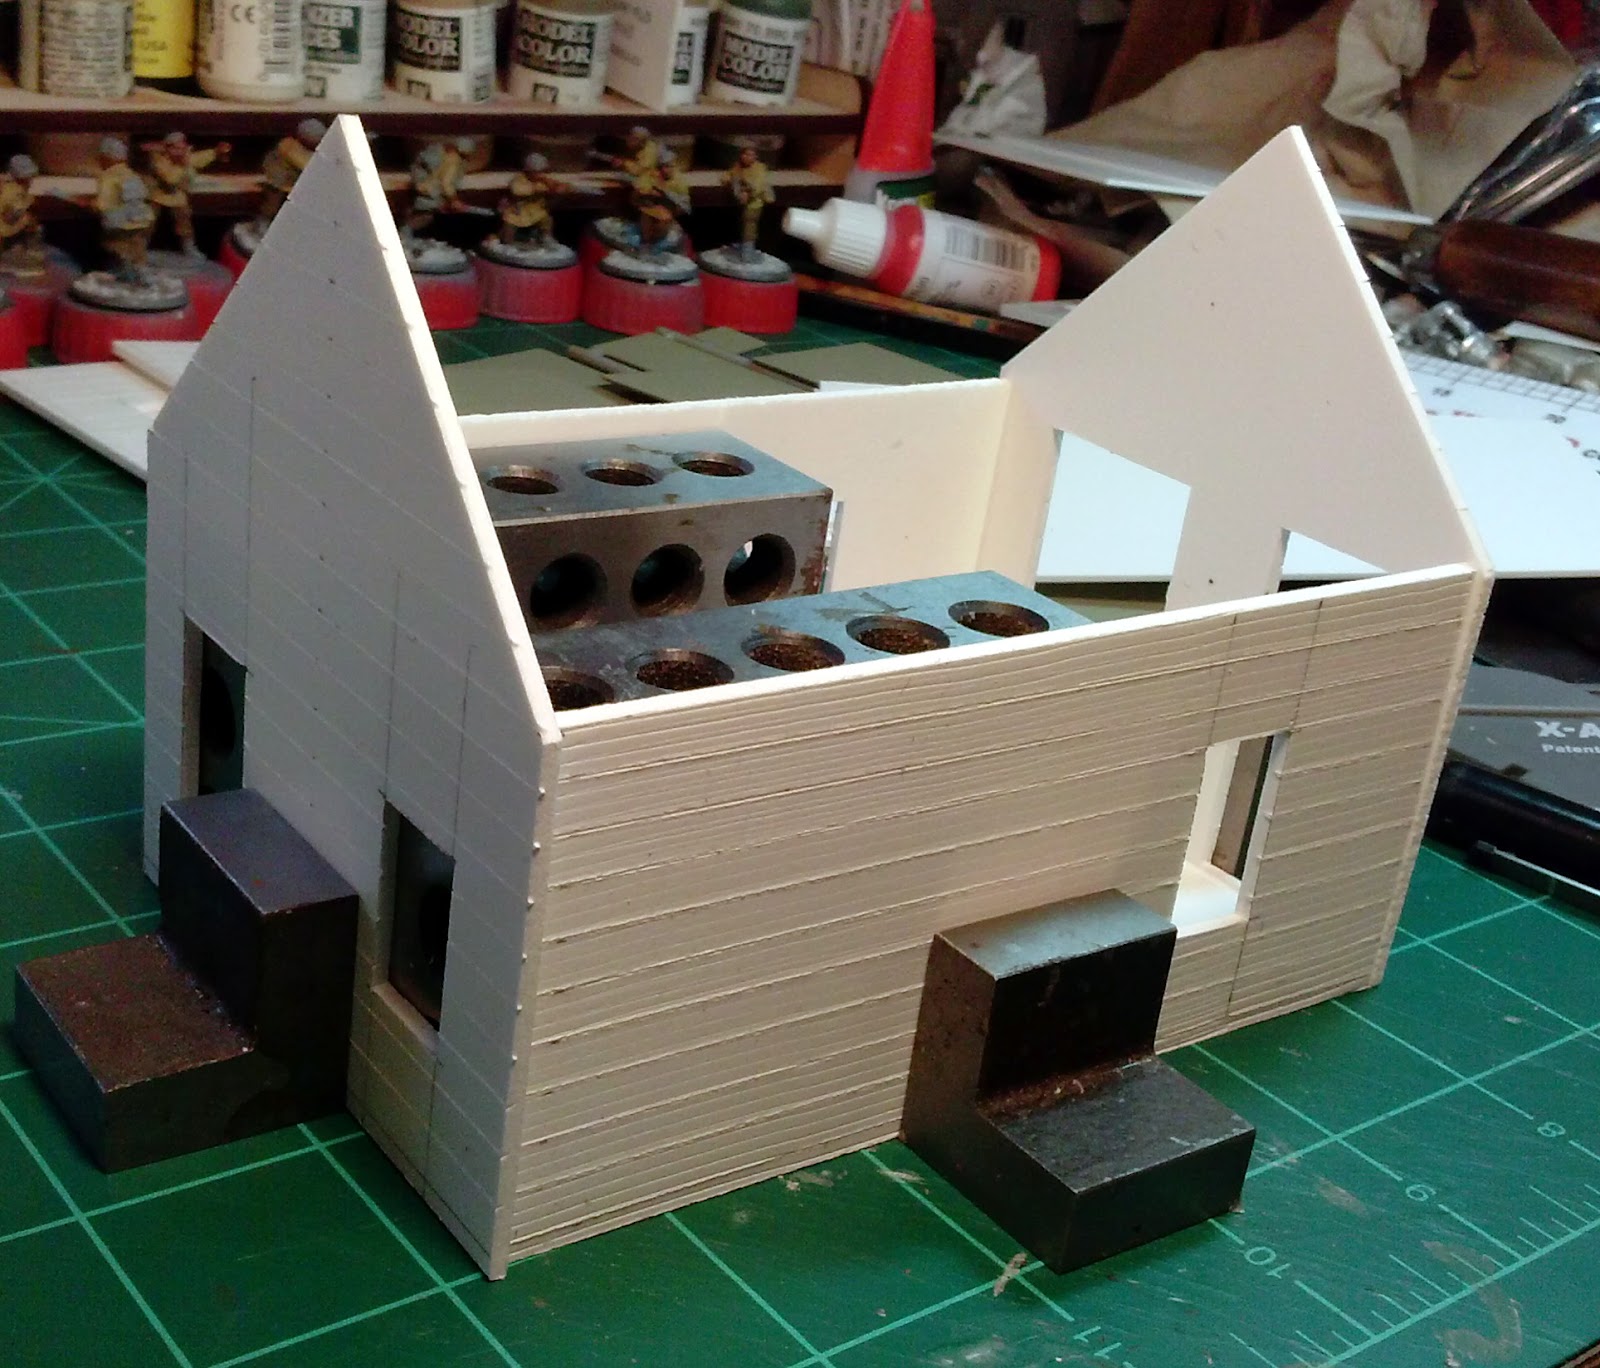
The sides. I opted to go with vertical planks on the exterior. The interior received horizontal planks.

I'm actually cutting the parts for two houses at the same time. Here is the front of one of one house.

Here is the front and back of the second house

After I cut the windows and doors out I cut the two pieces apart.

Dry fitting everything together just to see how it looks

From the back right.

From the front right.

Laid out for priming

Priming is done, just waiting for the pieces to dry.

Thursday, October 29, 2015

Basing the British Airborne Red Devils

Since the Warlord Games bases had arrived I figured I would get them based up and ready for the table. This did interrupt the work I have been doing on the second section which includes the 3" mortar crew. I felt like I needed to get section 1 and the MG out of the way so off to the side went the 2nd Section. I haven't done this style of basing for quite a while so I figured it would be worth recording so that somewhere there is a record of how I did this.

I do consider bases to be part of the scenery for the tabletop. Since the British paratroopers really only fought in Europe I decided I would go with a base with a bit more undergrowth than I have been using for my Calamity bases and its definitely a far cry from my North African bases. Much like my style of painting I like to layer textures on to a the mini's base. It adds a lot of character and depth and while the bases are obviously related none of them will be exactly alike.

The first thing I did was to gather up my basing materials (which tend to scatter) and see what I had to use.


There is more but I just grabbed what I thought might be useful for these bases. I didn't really use much of what is in the picture though.

I like to add rocks whenever possible. However, model railroad ballast is to uniform so I prefer something like this from the Arizona Rock & Mineral Company (Great folks by the way, I highly recommend them).

This is a good choice too, and maybe easier to get a hold of for most people.

This is something new that I wanted to try. Dead Fall Forest Debris from Scenic Express. (I was looking for this stuff specifically because it was mentioned on another forum) I was fortunate that Caboose Hobbies is now carrying a small selection of Scenic Express stuff now so I didn't have to mail order it. I did have to drive down and browse through the largest train store in the world (and acknowledged by the Guiness Book of Records). Oh the sacrifices we make for our hobby. Straight up this stuff is not going to work for the bases though, most of  it is just to big.
It was mentioned on another forum that it needs to be sifted to be useful. I decided to give it a try and see if there was enough smaller material to work with. There certainly is!
This is the pile of larger material. I put this back in the jar and put the smaller stuff into a ziplock. I filled the ziplock with the smaller material so well worth the effort.

Ground cover from the Driftwood Scenery Company which doesn't seem to be around anymore. I may well start hording this supply.

I pulled out this package to use as the first layer on the bases. Sheet Moss is very cool stuff

I couldn't find any of my basing goop, so I made up some more. This is Golden Extra Course Pumice Gel. I mixed in some additional rocks and added water to thin it down a bit.

Basing Goop #2 is made from Liquitex Modeling paste, and more rocks and water. This is the mixture I went with for 1st Section's bases.

 After gathering up the potential materials I started in on the actual basing process.
Super glued the minis to the Warlord bases. I used the 25mm round and the 25mm x 50mm ovals.

The MG and two of the crew went on a 40mm round while the third crewman remains on his own 25mm roun.d. Because the fit was going to be tight I glued the MG down first, applied a layer of basing goop and then glued on the second crewman

Basing goop completed. I might be able to use this straight up for a snow base too.

Vallejo Umber Brown for the base coat

A little highlighting. I do this in case some of the base doesn't get covered by ground cover. The highlighting step was probably unnecessary .

I'm missing a picture. The first step is to apply matte medium to the whole base and cover it with the sheet moss from Driftwood. After that layer has dried I sprinkle on the smaller debris material that I sifted out from the Forest Dead Fall Debris so its laying on top of the sheet moss. I thin add drops of matte medium (thinned with water) and soak the base pretty thoroughly with the stuff. The whitish areas on the bases is the drying matte medium. It dries clear. I should have added a bit of flow improver to help it sink in, but this worked just fine.

Here the matte medium has dried (I let it set over night) and I have neatened up the edges with a file.
The ground cover is all in place so its time to pull out the brushes for the last step.


I paint all the edges with Vallejo German Camouflage Black Brown (822/150). I will also use Reaper Master Series Blackened Brown (9137) for this step. The two colors are almost identical. 

The prone Bren Gun team really shows how effective my version of the Denison smock is. I could see misplacing these guys on the table.


So the 1st Section of the platoon along with a supporting Machine Gun is now ready to do battle. I'm back to being charged up to get the 2nd Section finished now too.

Tuesday, October 27, 2015

Weekend Care Packages

To say that this past weekend was a rough one would be a serious understatement and I'm just going to leave it at that. Upon finally getting home today, I had not one but two packages waiting for me. Now one of these was expected the other was totally unexpected.

The bigger package was from Warlord Games US. I need bases for the Red Devils and they had a lipped small profile base. Looked good for my purposes so I bought a variety of sizes. The 60mm round bases are probably a bit to big for my purposes although I could easily place three minis with a support weapon on it. The 40mm round bases may be usable, it would provide a quick identification for NCOs and Officers (senior and junior leaders for Chain of Command purposes). Then there are the standard 25mm round bases that most of the minis will be mounted on. I had hoped that the lip would be high enough to cover that cast on base, but its not quite high enough. Still should be quite usable since they are low profile. I might start using these for western minis for Calamity as well.

The second package was quite interesting. It contained a 12" 1/56th scale ruler from Rules of the World. He sent it to me in thanks for my last post about receiving the 6" rulers. Now that's service! And if you are in need of a scale ruler you definitely need to check out Rulers-of-the-World.


The Unexpected Package

How many handwritten notes do we receive anymore.

And the ruler!

The package from Warlord Games US

A bag of basing goodness and a few extras

25mm lipped rounds

60mm lipped bases

A little of everything. Another sprue of 25mm rounds, 60mm rounds this also includes 40mm rounds and 25x50mm ovals.

Contents of the bag

They tossed in a Bolt Action Quick Reference Sheet and a pair of dice! Can't have two many dice!

The low profile 25mm round. I had hoped that the lip would go all the way up to the top edge of the cast on base. I can either cut it off or file it down. Either way I'm likely to mess up my paint job.

The 25mm x 50mm ovals, I think its about perfect for the prone Red Devils

The other option I have are these bases from Reaper. A bit thicker than I like.
Warlord Games on the left, Reaper on the right

You can do this! Turn the Reaper base upside down. This lip gets a lot closer to the height of the cast on base. But it gives me a much higher base than I was hoping for.

The base lip is almost the perfect height. Just makes the base more obvious than I like.

Warlord Games 60mm base

Reaper 50mm base

There is that high profile again.