

I'm part of a wargame group known as LEG (League of Extraordinary Gamers). In a bout of insanity several years ago we decided to run a LaSalle tournament at Genghis Con and some how figured that we would have upwards of 32 players sign up. It was based on a somewhat reasonable assumption at that time. The FLGS couldn't keep the rulebook in stock and had sold over 60 copies, 15mm Napoleonics were flying out the door and there was a lot of buzz on the net. To accommodate 32 players we needed 16 6x4 game boards. We had been playing for a years on a couple of felt boards that the owner of the FLGS had made. He had painted them up and flocked them and we forced him to reveal his secrets. There are two key items to making this work; high quality felt and matt medium. Somehow I managed to volunteer to get the boards ready while the rest of the club worked on the scenery.
A couple of decisions were made before we got completely stuck in.
1) Semi-Geomorphic. The club occasionally puts on big games, the FLGS had 6 6x4 tables and it was just possible to arrange them end to end in the room. They were also on wheels, that could be locked down, to make them pretty easy to move around. Semi-Geomorphic boards let us create an gaming area where the roads and streams at least looked like they went together. To that end I created a 4x4 grid map and layed out the road net and river courses.
2) Easy to Store. This was big we didn't have space to actually store 16 boards so we turnedto the felt board as something that could be rolled up and stored easily. This would make them much easier to transport as well.
3) Good Looking. Since this was to be our signature event we wanted something that was definitely a step above a piece of felt layed out on the table. We matched the colors of the hills as closely to the board colors so that they looked like that went together.
We were able to purchase the felt in bulk, we were fortunate in having a fabric expert in the club and she was able to handle this purchase for us. I went off to Walmart to purchase acrylic craft paints. Regular model acrylics were going to be way to expensive for this project. There were two goals as far as paint went. We wanted to break up large expanses of green and I wanted to be able to try and give some visible depth to the rivers when there really wasn't one. I purchased a couple of different greens, browns and blues to get started. This project would certainly prove that you can push darn near anything through an airbrush.
Rather than cut them up into the individual boards right off the bat, we basically cut them into four sections essentially representing one row of the 4x4 grid. I marked out the spots where the roads and rivers would enter and exit each board. Since I would be going through a lot of paint I bought some big cups to mix paint in. I thinned the paint with Windex starting at 50:50 paint to Windex and then thinning more from there if necessary. In the end most of it was probably thinned down closer to 40:60. I started off by creating blotches of green and brown across the entire section. I then moved on to the streams. I reversed the way you would usually try and show deep water and went for something that would show up better. I layed down a wide swath of dark blue and then came back down the center with the teal. This made it look like there were wet banks and "framed" the lighter blue. Not quite the effect I originally wanted but it looks good on the boards and helps the rivers stand out a bit more. The base for the roads was laid out in a single color of brown, a bit lighter than the brown I used to splotch the board with. I did this painting over the course of a couple weekends at the FLGS as it was the only space big enough to lay out the felt. I struggled through a lot of airbrush clogs trying to get the mix right. I certainly learned how to tear down and clean my airbrush pretty quick though. It was a good experience from that standpoint, it was still quite frustrating on more than one occasion though.
With the painting completed over the 4 "strips" I was ready to start flocking. I used the finest grain Woodland Scenics flock I could get my hands on. Fortunately the largest model railroad store (Caboose Hobbies) in the US is right here in Denver so I didn't have any problems getting what I needed. Again I wanted a number of different colors to help break things up. I purchased a couple of different medium to light greens and a couple of brown/sand colors for the roads. Step 1 was to sprinkle the flock on to the boards using a strainer. You must keep the layers of flock as then as possible, this is critical! Once you have finished flocking the board its time to apply the matte medium. Matte medium is a foggy white fluid available at your local art or craft stores. The brand we used for this was Liquitex. I'm not sure what artists use it for but its about the best glue in the world for scenery! Again I cut this down 50:50 with water. I then sprayed this over the entire board and I laid it on thick, you should just be able to see it almost puddle on the surface. You need it this thick to make sure it penetrates the flock all the way through to the felt and then into the felt itself. If it doesn't get all the way through the flock it will just form a crust that will peel off later. I let this layer dry completely. Fortunately I live in a high, dry climate and the drying time was somewhat reduced. This first layer of matte medium will slightly adhere to the surface underneath. I was able to peel it right up without a problem and we haven't had any residual stickiness problems. After the first layer had dried I applied a second coat of matte medium just to be sure everything was going to stay in place. Of that didn't help those areas that had formed a crust so it may not have been necessary.
Once that had dried, we cut the boards up into their final pieces. I used some stencils and airbrushed a number on to the back of each board in each corner. The numbered represented its place on the original 4x4 map. Then a copy of the map with the section of board inside outlined in red was taped to the outside of the tube. This makes it easy to look at the original map and figure out which board you want to use and which boards will easily connect up with it. Since we kept the road entry and exit points consistent there are a lot of possible combinations other than the combinations shown on the map.
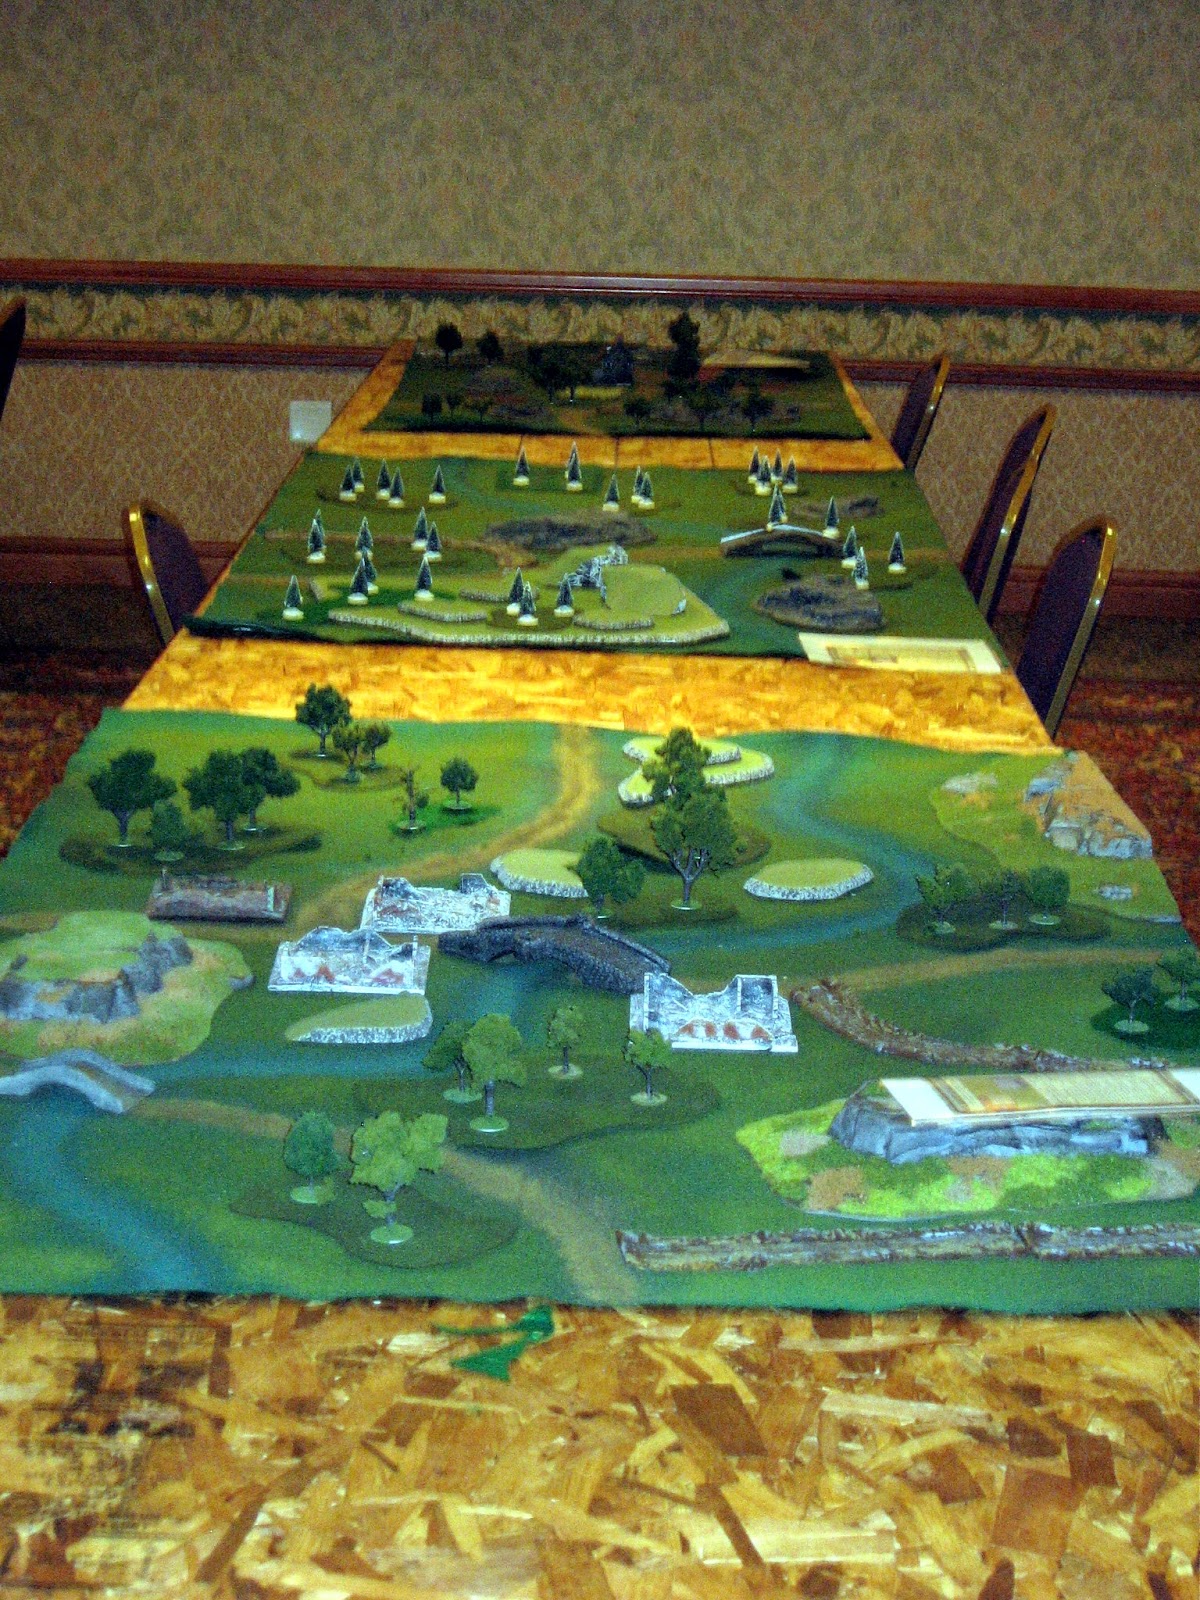
Overall we have been pretty happy with this little project. The boards get a lot of use and have held up really well over the last couple of years. The only problems we have encountered are with those areas where a crust of flock formed rather than getting glued all the way down. I have some recent shots taken by Ian Darley showing some of the boards in use for the FOW tournament at the Feast of Blades convention here in Denver.


What can you say....epic!!!
ReplyDeleteIt certainly felt that way when I was making them. I didn't think I would ever get them done.
DeleteLooks great!!!!
ReplyDeleteThey do! And I'm pretty proud of them.
Delete