Quotes

Life is short, break the rules. Forgive quickly, kiss slowly. Love truly, laugh uncontrollably and never regret anything that makes you smile. - Samuel Longhorne Clemens (Mark Twain)

Sunday, January 31, 2016

Building Calamity 28 - The "Hardware" Store - Painting, the weathering layer

Like most of my other structures for Calamity, the first layer I paint is the weathered wood layer. I typically paint the entire exterior like this since I'm not always sure where I want to show peeling paint. I started out with the splatter ink technique but as I worked my way around the building I found that it was just as easy to "paint" the ink on instead of splattering and the pushing the ink into place.

Once this stage was complete I let it dry and then applied a coat of matte varnish. Instead of it Vallejo Model Color Matt Varnish through the airbrush this time I opted to spray it with Testors Dullcote from a rattle can. That should protect the weathered paint layer better than the acrylic matte varnish I have been using. I'll let all that dry and hopefully move forward to finish the painting.


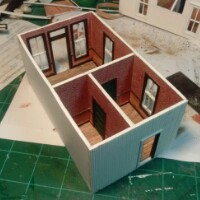
I used some scrap mattboard to help protect the finished interior work


On the upper floor I started with the splatter method. Definitely messy


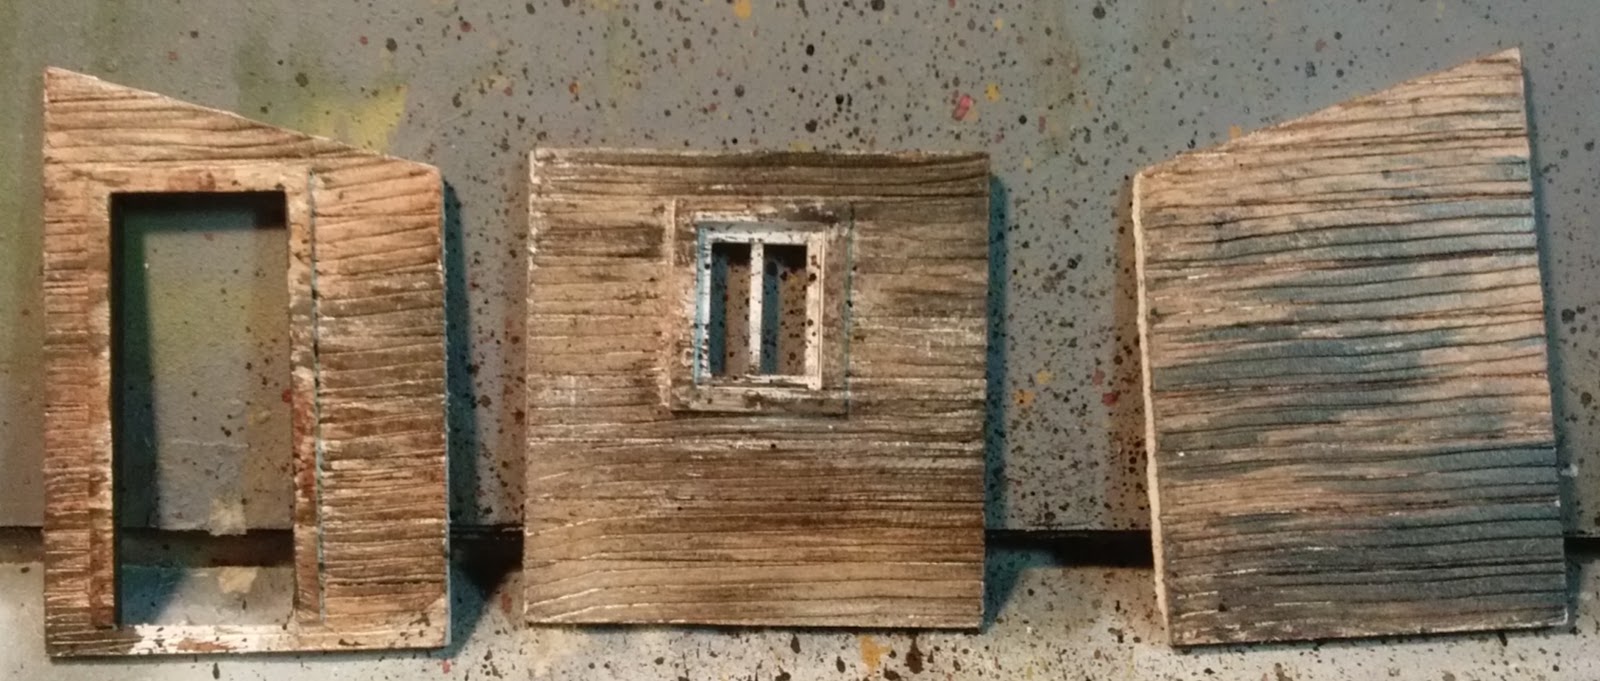
On the ground floor I applied ink randomly and then streaked it down with the brush, moving with the grain of the boards. Here Burnt Umber and Carbon Black have been applied.

Followed that up with Raw Sienna

Straight Burnt Umber

Carbon Black and Raw Sienna


A fuzzy picture of the front

And from the back.

Thursday, January 28, 2016

Building Calamity 27 - The "Hardware" Store - First Floor Assembly

I didn't post anything for a few days and I lost six followers! Seems like that mystical 200 follower barrier will remain intact a while longer.

I was able to finally find some time to get back to work on the Hardware store and I'm quite pleased with the results so far. The first floor went together without to much trouble. I have to make sure that I trim wainscotting and baseboards correctly so that the walls come together at the corners better. The interior wall that runs across the width of the interior is actually a little long and bowed the sides out a bit. I considered trying to fix it and then decided that, really, it just adds character.

I added the corner trim to help hide the seams. I need to prep those a bit and then I'm ready to do some exterior painting. But first I think I need to bow to the inevitable and start work on the roof itself. The dormers certainly add character to the building but they definitely add a level of complexity that I have kind of shied away from. I also need to build the stairs up to the second floor so I need to think about that for a bit. I want to paint the building before I add the stairs so its a bit lower on the priority list. The stairway side and the back will be left "unpainted" so they will get the silver wood treatment. The front and the window side will be "painted" and will get a bit of the peeling paint treatment. I'm not going to overboard with this affect though, I don't want the building to look to old.

Here is the result of the evening's work:

The small pictures are ones I accidentally deleted and recovered. Here I'm gluing a long sidewall  to the floor. I'm using my magnetic jig for this one.

Adding in the bagwall

The other long side in place plus a look at the front

the interior as from the front

And the back

the three components. This was shot was taken after the ones below and they have the corner trim

I took these shots before the corner trim was added. The top and bottom lined up pretty good. Not perfect which actually confuses me a bit. All I can figure is that the two floors aren't quite the same size/

A shot from the other side. Some how I managed to completely forget to photograph the front. 
The little shack that will go on the back.

The exterior door for the second floor is finished but I haven't glued it in place yet. I'll wait till the exterior is painted to do that.


Wednesday, January 20, 2016

Building Calamity 26 - The "Hardware" Store - Doors and Floors

I'm pushing a little bit on this build right now since I can see the light at the end of the tunnel. It might be a pinprick but its there. I'm at the point where I can start actually assembling things which is pretty exciting because I think its taken a month to get to this point. But that also means that I needed to at least build the interior doors. Building doors became the evening's project. I had one false start, I started on one door and realized that I really didn't know what the door should really look like and the framing pieces were just to narrow. I did a little searching on the internet and found something that I liked and went with that.

Doors are time consuming and of course had to be built specifically for each opening so I have to get better at making sure all the door openings are the same size. After that I went ahead and assembled the top floor and after that had dried I inserted the interior wall complete with its painted green door (Reaper HD Dragon Green, love it. It hasn't been released yet it showed up in one of my Reaper orders that I made during their paint promotion). So far I think its looking really good, but that roof line is starting to scare me!


First I finished applying the wallpaper to the ground floor front door. Of course I have managed to get paint where it doesn't belong.

Assembling the top floor, you wouldn't think that five pieces of plastic would be that difficult to get together.

Looking pretty good

A bit of a color shift from this angle

The door blank for the top floor interior wall. This is cut from a piece of 1mm thick foamed PVC to serve as a base for the framing.

A the outside framing on the door in place

That's a finished door. Not exactly straight but close enough/

Unpainted doors in their respective walls

Now with a little paint applied. I really like this green

Interior wall in place


A "Ground" level look from the front

And from the back. The roof line is starting to look a little daunting. Oh and I have to build those stairs too or no one is going to be able to get up there.

Tuesday, January 19, 2016

Building Calamity 25 - The "Hardware" Store - Wallpaper on the First Floor

I did a little more experimenting with the ink washes and then went back and looked at my original posts about weathering buildings for Calamity and I basically reinvented the wheel. So the post using the Vallejo Washes its very similar to what I was doing a couple of years ago which I can attribute my basic technique to a model railroad site. The real key to making it work is that you need to prime in white so the black ink goes gray as you spread it with the brush. The splattering of the ink on to the surface is what makes it different from my original weathering style and really gives it that nice random weathered look. I think this will be my go to technique for the initial weathered wood layer. Its relatively fast so once you get going it doesn't take long to finish it. It is messy though so be prepared! I use two brushes for the technique now, the first one I load up with ink and use that as my splatter brush, then a I take another brush to create the streaks. Get out your terrain brushes for this technique.

I went in and finished the small add on shack at the back. I still need to assemble it but it wasn't getting "paint" so I could apply washes on both sides. You can really make a difference in the color of the wood on the ink colors you choose. I really like the oxide yellow for a real soft new wood look. It has a very "piney" feel to it.

This is the interior side of the add on.

This is the exterior side of the add on. I did go back in and apply some more weathering to the window frame. The window frame will get my chipped paint technique.
After doing a that bit of weathering I went back and added the wallpaper to the interior walls of the first floor. The only piece that I have left to finish is the front wall which is rather complicated with the doors and windows. Its going to take a bit of cutting and fitting to finish that piece off. After that I'm considering the interior to be finished and I think I can start assembly the building. I want to do that before painting since I need to add some trim pieces to the corners after its all glued together.

Each wall with a door takes three pieces. I don't worry about seams showing as that would be pretty normal.

Three walls at once. I love my steel weights!

This one is almost done, the last two pieces are being glued into place.

The wall with no windows, this one was easy!

Checking out how things look.


A view that we won't see again once the building is glue together. Although this does remind me that I still need to make some doors!

A bit of an overhead look. This will be the most common view, I think its looking pretty good!

Friday, January 15, 2016

Building Calamity 24 - The "Hardware" Store - More Interior Work

I have had a lot more time to work on the hardware store than I anticipated so I feel like I'm making progress. I'll feel a lot better when I can go in and glue things together! I started working on the interior of the first floor last night mostly because I was excited about trying out a new technique for painting wood. As originally posted it used washes and since it features Vallejo products it may have come from the Vallejo site. I'm somewhat embarrassed that I forgot to note the blog I pulled it from and the actual author. If someone knows please let me know in the comments section so I can give proper credit.

There is going to be a fair amount of exposed or unpainted wood on this model so I thought I would give this technique a try utilizing what I had on hand which are my Liquitex Acrylic inks. I selected Burnt Umber, Burnt Sienna, Yellow Oxide and Carbon Black as my colors. I have used the umber and sienna for raw wood before so I was comfortable with these choices. The yellow looked like a close match to the Vallejo yellow wash in the picture but the carbon black ink is really, really black so I was a little hesitant with that.

An important thing to remember with the inks is you must use them on a primed surface. Straight plastic or, in my case, foamed PVC is definitely a hydrophobic and tends to make inks bead up and not adhere properly. So keep that in mind if you give this a try. I would think you would need a primed surface if you used the Vallejo washes as well.

On to the pictures


I decided to start with the floor, its big and doesn't have any complicated corners to deal with.

First I splattered on burnt umber and then it spread it, with the grain, with another brush. This is messy! I forgot to put the paper down and splattered ink all over my cutting surface. No harm done for me but you would never hear the end of it if you did it on the kitchen table!

Applied the Burnt Sienna, Same deal, splattered drops of it and brushed with the grain and over lapping areas of Burnt Umber

Without adjusting the white balance you can start to see the build up of color, bringing character to the floor.
Here I have added the oxide yellow. Shifting the white balance really made this starker looking that it really is.


With the yellow and no white balance

Adding some more burnt umber

Adding the black and playing with the white balance

Not quite so stark 

The two floors finished

Using burnt sienna on the wainscotting

Painting in the dark trim, BEFORE I add the wallpaper

Sealed up with a solid coat of Vallejo Matte Varnish.
I like the wash technique but its a bit time consuming and a little messy because you splatter the paint on. I am also a bit worried about miniatures scratching the floor during play. I may go with printed cardstock floors instead and just glue them down to a base. Still thinking about that, although I have already found a number of really nice looking flooring styles that I can just print out from a color printer of some kind.

With the way the ink is splattered on and then brushed with the grain I think this technique will work to get the silvered old wood look on the exterior as well. On the other hand my old weathering technique of using the Scribbles black dye is still quite valid and now that I think about it there really isn't a lot of difference between the two techniques.