Wednesday, November 30, 2022
Tuesday, November 29, 2022
Christmas Productions- Puzzle Progress
I think I have made pretty good progress to this point on cutting out the puzzles on the scroll saw. Overall I'm pretty pleased with them. I still have some difficulty with cutting the "whimsies" but that's really to be expected at this stage of the game. Like anything else it takes practice to get really good at this kind of thing.
Here are some pictures to of the current progress
 |
| This is the first one I finished. Its a picture of Roxborough Park looking to the north. There are only a couple of whimsies in there. One is an awful rendition of caboose and the other is three mountain peaks. I'm leaning towards this one as being my signature piece that would appear in every puzzle I cut. |
 |
| This should be a fun one lots going on with colors and patterns. More cat whimsies in this one. |
 |
| You can see the cut lines better here. I use the frames to keep the puzzles together while I cut them. |
 |
| This is, kind of, the final step. We found some wooden boxes at Michaels we just need to give them a bit of finish work. Puzzles will go into a ziplock bag and then in to the box, the picture will be glued to the top of the box and we will put a label on the inside of the lid with all the pertinent details. |
 |
| Here is the next puzzle up. This shows the "templates" I make for the whimsies. I trace the design on to the white tape and then cut them out as I get to them. |
I don't cut in the traditional grid pattern you would find in a stock puzzle. Its more random and tricky than that. Its what you would find in most wood puzzles whether they are cut by hand or laser.
Wednesday, November 23, 2022
Saturday, November 19, 2022
New Carousel Project - The Hippo
As some of you may remember my dad carved carousel animals, mostly horses. At one point he had decided that doing the full size ones was not as fun and they took up a lot of space. So he tried a couple of smaller ones just to see how he liked doing those. There ended up being two; an Ostrich and a Hippo. My sister will eventually get the Ostrich, just another one on the painting list.
I painted the Hippo following my dad's directions and with the paints he specified. The titanium white was old was actually pretty lumpy and it really affected everything I used it in, which was mostly the blue skin color that he insisted on (I have no idea why, it doesn't match the Hippo pictures he had on his workbench). The neat part of the Hippo is that the mouth is actually hinged.
At one point it was sitting on a furniture mover which was a simple frame with four wheels just to make him easier to move around. Someone let a rambunctious 5 year old ride while it was on this frame and the whole thing tipped over, smashing the Hippo's mouth and breaking the hinge. About six months ago my mom found someone interested in fixing him and it just came to me a couple of days ago. We have decided to completely repaint it in a more appropriate color and get rid of the weird surface texture from that titanium white paint that I used.
I still need to finish Chester the Rooster so this one will probably be sitting in the shop for at least a couple of months before I can sit down with him.
 |
| The Hippo after repairs. If it wasn't for the fresh primer I wouldn't have been able to tell he had any work done on him. In the background you can see the box with my new Bosch 12" miter saw. It was on sale. I don't really have room for it right now but it was to good a deal to pass up. |
Friday, November 18, 2022
Holiday Work - Christmas Gifts
With the new shop, more or less, up and running we will be able to turn some gifts again. So pens, keychains and the like and something new. Technically the biggest wood gift this year is not turned wood but at least it is mounted on wood.
After working on a number of Liberty Puzzles (Liberty Puzzles) and watching a ton of YouTube videos I decided to try my hand at cutting my own puzzles. Far more involved than you might think. In some ways the trickiest bit was attaching the picture to the wood blank (1/4" Basswood Plywood, couldn't find Baltic Birch in the right size for a reasonable price).
I have cut two prototypes and I'm confident that I won't completely screw up a Christmas present at this point so I hope to start cutting the real thing this week. Each puzzle will be numbered and include the piece count on the back. The traditional method of custom puzzle cutters.
 |
| I'm doing 8"x10" photos. Ideally they should end up between 150-180 pieces. The little iron is used to take the dry mount tissue to the back of the image. Then the photo is placed on the wood and the whole thing is put in the Dry Mount Press (I bought a used one, the temperature on mind seems to be a little off) |
 |
| I tried to show the pieces from the back (which has to be sanded after the cutting is finished). There isn't quite enough contrast to see it easily. I built two little jigs to serve as trays to hold the pieces as I cut them. |
 |
| Here is the front. Its easier to see the puzzle shapes here. This is prototype #2 and is a 163 pieces. Prototype #1 was only a 137 pieces so I needed to concentrate on making the pieces a bit smaller. Ideally I need to cut 2.5 pieces from each square inch of puzzle. |
While this is fun to do it is time consuming so I'll be turning to the laser cutter to see I can make a go of it that way for the next time around.
Thursday, November 17, 2022
Holiday Work - Christmas Cards
It always seems to happen at this time of the year as my posts start to drop off quite a bit (not that this has been a stellar year for posting to the blog). The holidays increase our hobby workload tremendously as we like to hand make our Christmas cards and at least one or two of the Christmas gifts we hand out.
In light of that the first side of the Christmas cards has been started. I managed to rattle out the front of 24 cards. I need to probably need to do two more runs like that, likely in different colors (most like a red and possibly prussian blue)
The fly in the ointment is that this year we would like to do a print on the back as well. That means the fronts have to be completely dry before we do that and that we need to allow drying time for the back print as well. Nothing like adding a little more time to everything!
 |
| Here is the first run of cards with the dark green. Overall pretty happy with them. They are stacked in back to back pairs in the drying rack plus a couple of spares just hanging out in the back. |
 |
| And this is how I get there. It starts with the jig which gives me a square corner that I can rest the printing block which is also tall enough to make sure the cardstock is square to the block. I use a piece of plastic to spread the ink on, pick it up the brayer and ink the block. Then the cardstock and I run an old wooden spoon on the back of the cardstock to apply enough pressure to transfer the image. Nothing to it! |
 |
| This is the negative image of the back print. I'll either cut it by hand or get a least a helping hand with the laser. Never forget to reverse the image when you are cutting your printing block! |
Wednesday, November 16, 2022
Thursday, November 10, 2022
Introducing Roxy
Its been over a year since we lost Lani and in the last couple of months we have been looking for an older dog to give a home to. We have been turned down a number of times because we have dogs already and they want these older dogs to be the only one. That lead my wife down a dangerous path that ended up with us adopting this sweet little girl.
 |
| Here is Roxy sporting her new collar and seeing how well it matches the roses in the background. She is already a little ham. Note that both ears only go up half way at this point. |
Roxy is an Australian Cattle Dog, the Blue Heeler variety. She was just 8 weeks old in this picture and she is now 11 weeks. Smart as a little whip and more than happy to jump into the dog free for alls that happen everyday in our backyard.
 |
| Not sure about this whole new home business. |
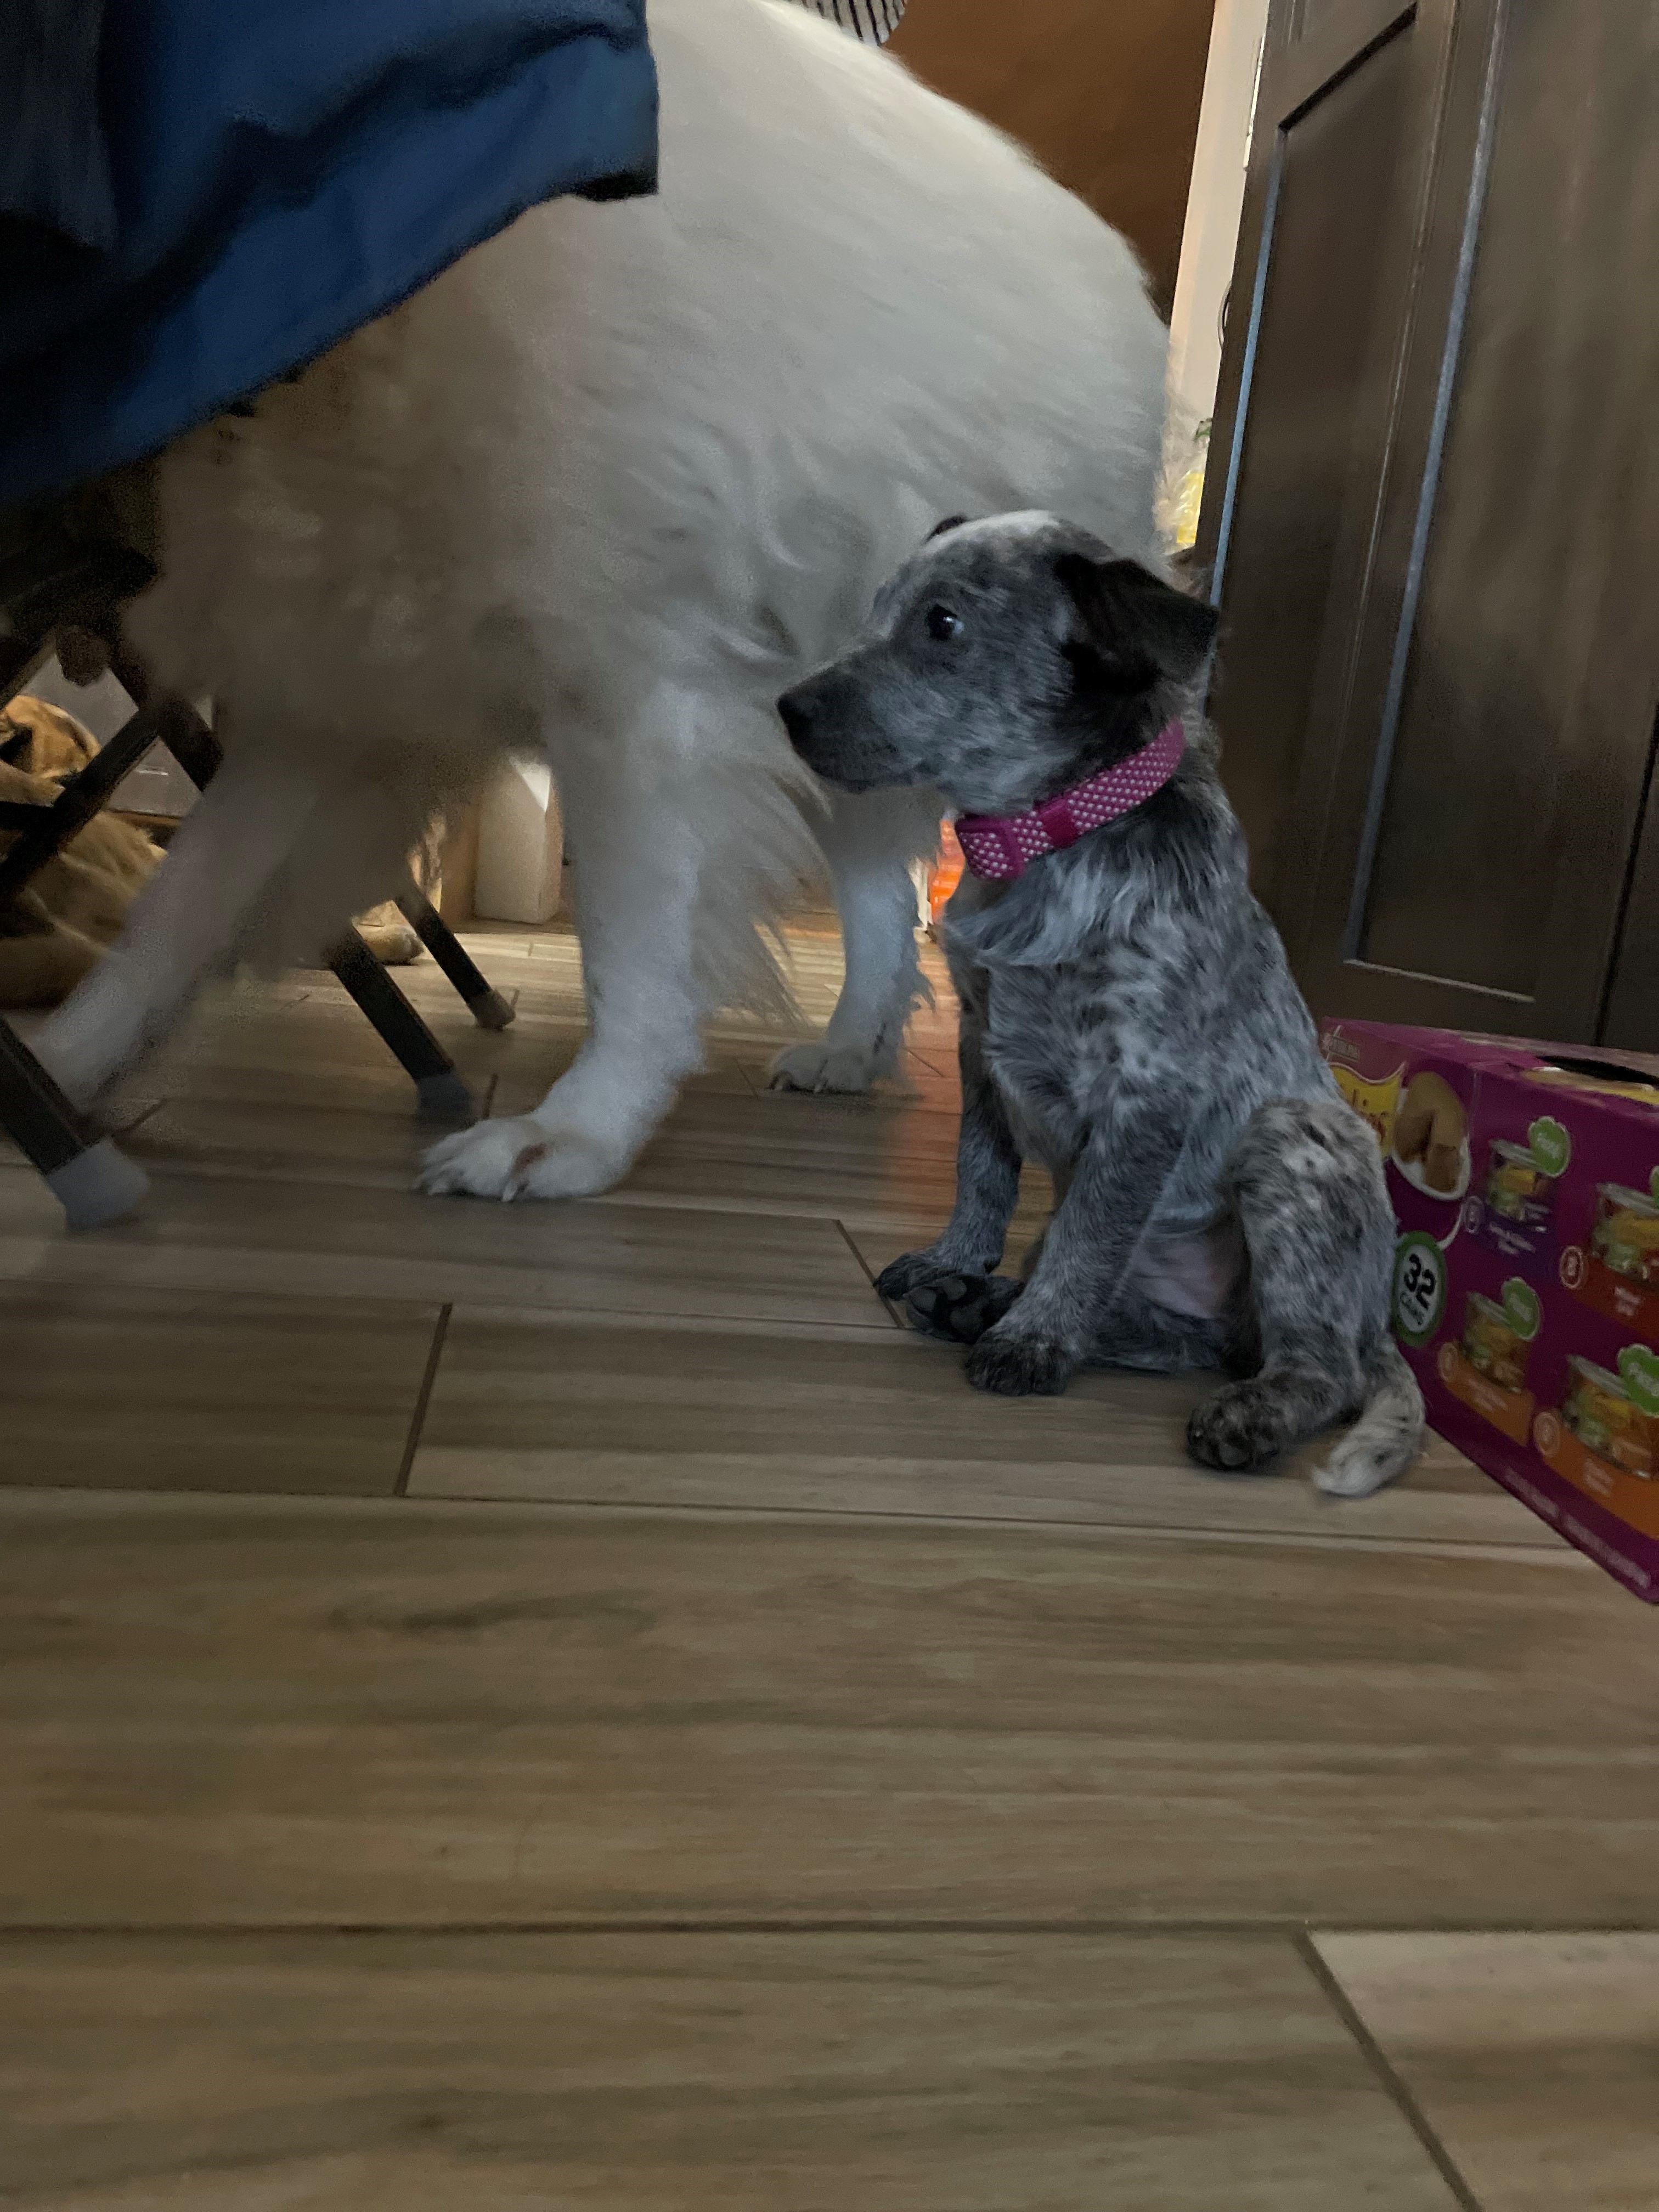 |
| The house seems okay, but Phoebe is so big! (120# vs 10#) |
 |
| At least I have my own bed. |
 |
| Having my own bed is nice, but its warmer snuggling with Morgan (1/2 German Shepherd, 1/2 Great Pyr) |
 |
| Its nice sharing the big bed with Daisy (classic mutt, black and tan) |
 |
| Even better sharing it with warmest dog in the house! Phoebe is big, warm and soft. For those that haven't guessed Phoebe is the current big dog, a Great Pyr weighing in at 120# (which is really big for a female GP). |
 |
| One ear is up, one is still half mast |
 |
| Both ears up at 10 weeks. She looks like a bat now. |
Wednesday, November 9, 2022
Wednesday, November 2, 2022
Subscribe to:
Posts (Atom)