Quotes

Life is short, break the rules. Forgive quickly, kiss slowly. Love truly, laugh uncontrollably and never regret anything that makes you smile. - Samuel Longhorne Clemens (Mark Twain)

Thursday, April 29, 2021

World War II Project - Rubicon Models PzKfw III H - The build continues

I managed a bit more work on the PzKfw IIIH (variant 2). Although the STuGs are ready for some more paint work I decided that I really needed to get moving on this. I finished off the lower hull and the upper hull . I have pictures below so you can see the progress. I'm having issues at the moment with the back end of the chassis. After I did a test fit to the lower hull I found a big gap at the back end. It looks like one of the pieces should slide in a lot farther than it does to cover that gap and I'm not quite sure what I'm doing wrong. I'll need to experiment with it and see what I need to do, something is definitely not right.

When I as assembling the track and wheel sub-assembly I ran into an issue where the spokes on the return wheel were not lining up correctly. I simply cut the tab until I got it to fit the way I wanted. Still not sure if that's an actual problem with the kit itself or I built something wrong. I'll pay more attention on the next build.

At this point all I need to finish off is the turret and its ready to go. The build is actually pretty easy and the number of options covered is almost mind boggling. Not quite sure what I'm going to do with all these extra pieces!

If you look close at the back you can see the gap I'm talking about just above and to the right of the post for the return wheel

The back end, but you can't see the gap!

The front end

Working the upper hull, I'm using clamps because there is a lot of surface area that needs glue and I don't want anything to spring apart on me!


Again, a lot of area that needs to be glue, so the clamps came in handy to make sure it all stayed flat.


And here the upper hull and chassis are being glued together. Now to figure out why I have a gap in the back!


Thursday, April 22, 2021

World War II Project, STuG Project - Chipping complete

My wife had a meeting the other night and I was able to sit down for some un-interrupted painting. I finished the chipping on the STuGs and went back and did the back side of the skirts which I had forgotten to do. I also did chipping on the wheels and painted the rubber rims with Dark Rubber from Vallejo from their Panzer Aces collection. I really like this color for rubber.

Going back and looking at the photos I probably over did the chipping work but once I start adding the weathering that will start to get obscured a bit and after I add the baggage to the rear deck a lot more will get covered. I do realize that it seems rather pointless to paint something that will not be seen but I need the practice and it makes me happy knowing that its there even if no one else does.

An overall look at the progress, chipping finished on to more weathering!


The back of the skirts that I had forgotten to do the first time.

There is certainly a lot more work to be done to the tracks but at least I finally managed to get started on them.


Thursday, April 15, 2021

World War II Project - STuG III Chipping - Getting Started

I managed to steal a little time and started the chipping work on the STuGs. I  finished the light chipping on the STuGs and the skirts and finished the dark chipping on the skirts. So I'm calling the skirts done at this point and hopefully can find a little time to at least start the dark chips on the STuGs this week.


I tried to add some long scratches to the skirts. Not perfect by any means but not bad either.


Tuesday, April 13, 2021

New Tool - Neje Master 2s Laser Engraver/Cutter

I have been debating over three new tools for about a year now; CNC machine, 3D printer or a Laser Cutter/Engraver. After some pretty serious evaluation (at least for me) I decided that the Laser Cutter/Engraver was going to be the most useful from a modeling standpoint.

Neje just released a 30w laser for their Master 2s machine which put it over the top for me. These small units are really meant for engraving but the higher powered laser (although its not 30 watts of laser output by the way) will make it reasonable to cut the thinner stock that I typically work with especially the PVC foamed core material and 3mm plywood.

All I have done at this point is unbox it and put it together. I need to find some time to get the software downloaded and the firmware updated before I can put it through its paces. But I'm certainly looking forward to "firing"it up!

It certainly came well packaged

The "instruction" book. It you can put it together but that's about it. Fortunately it includes the link to the website in the form of a QR code inside.

While it looks like a mess here, you really only have to attach the laser arm to the base and the laser to the laser arm.

All assembled and ready for some power


Tuesday, April 6, 2021

Renovation - Interior "Barn" Doors.

Our house had been added on to a couple of times over the years before we purchased it. There are a couple of places were doors used to be that are now just openings and now there is no way to mount a door in that spot. There are three such openings, one between the dining room (former kitchen) and the living room, one in the basement that separates the family room from the utility/craft room and the last between the new kitchen and the dining room (essentially from the old house to the new addition).

These openings allow drafts through these areas and we have been discussing the best way to cover them, short of sealing them up (not even an option between the kitchen and the dining room). We opted to jump into the barn door fad since these run on tracks above the door rather than on hinges. In both spots there is room to run the tracks and allow the door to slide to one side.

There is a reclaimed wood store on the way to Boulder that we pass by when we visit my mother. A couple of side trips later I have a store of reclaimed lumber to use in the creation of these two doors. I did get to buy a planer for this project which adds another tool to the woodworking arsenal.

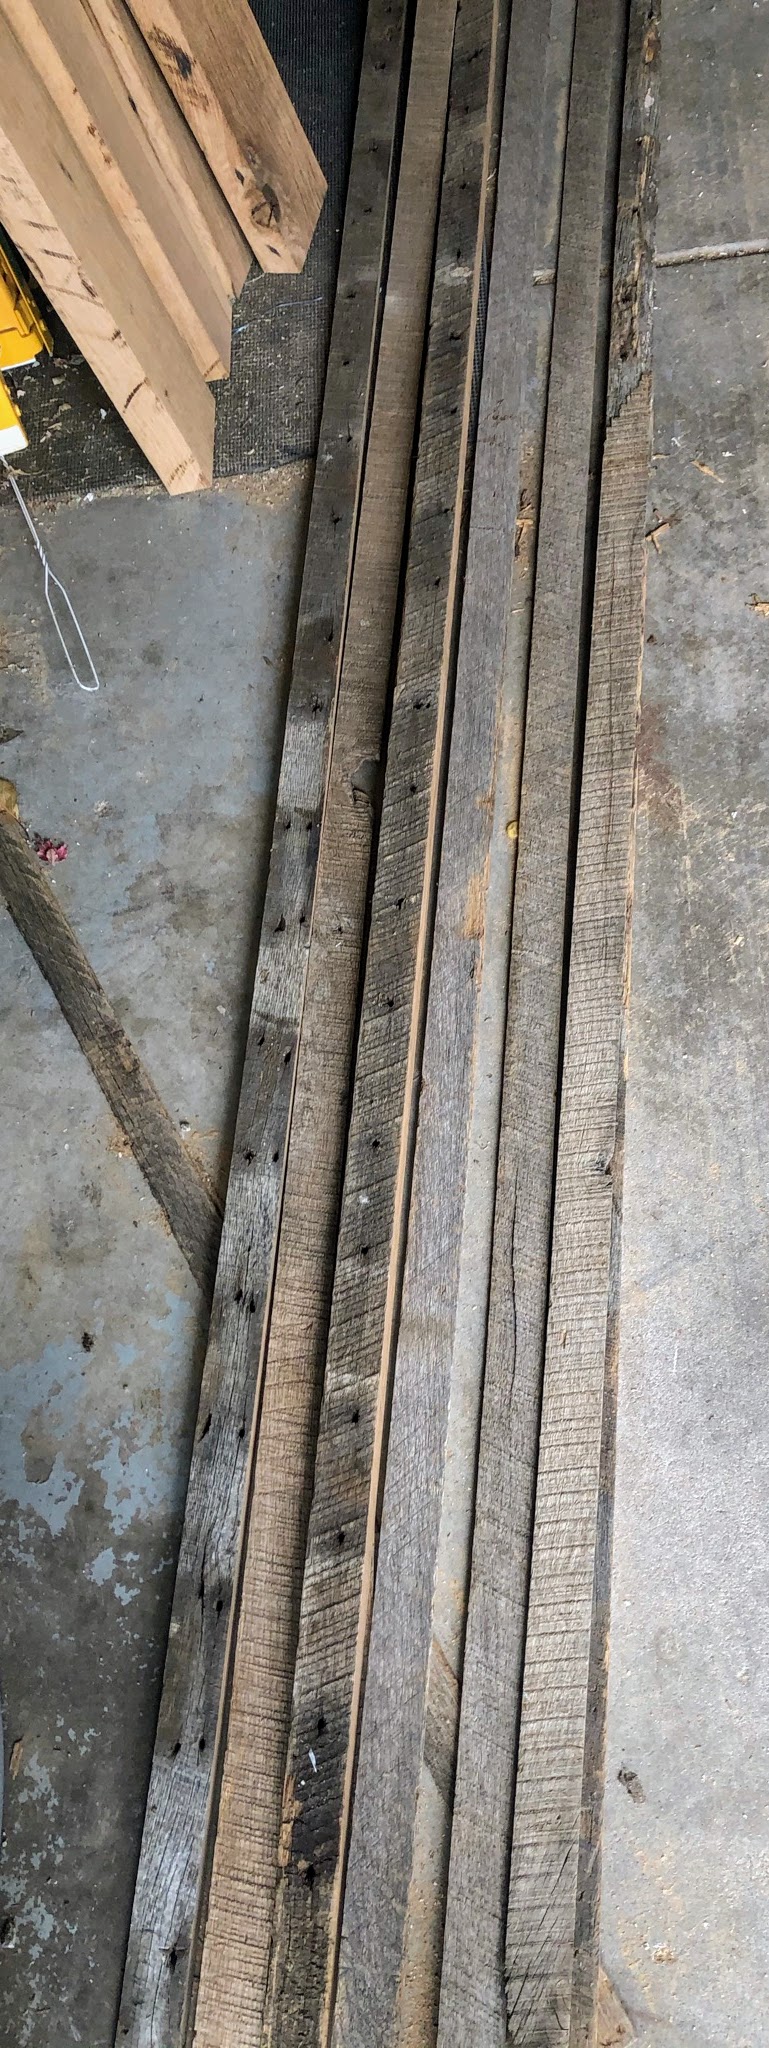
These are the strips left over from the planing and cutting of what will be the framing pieces for the doors.

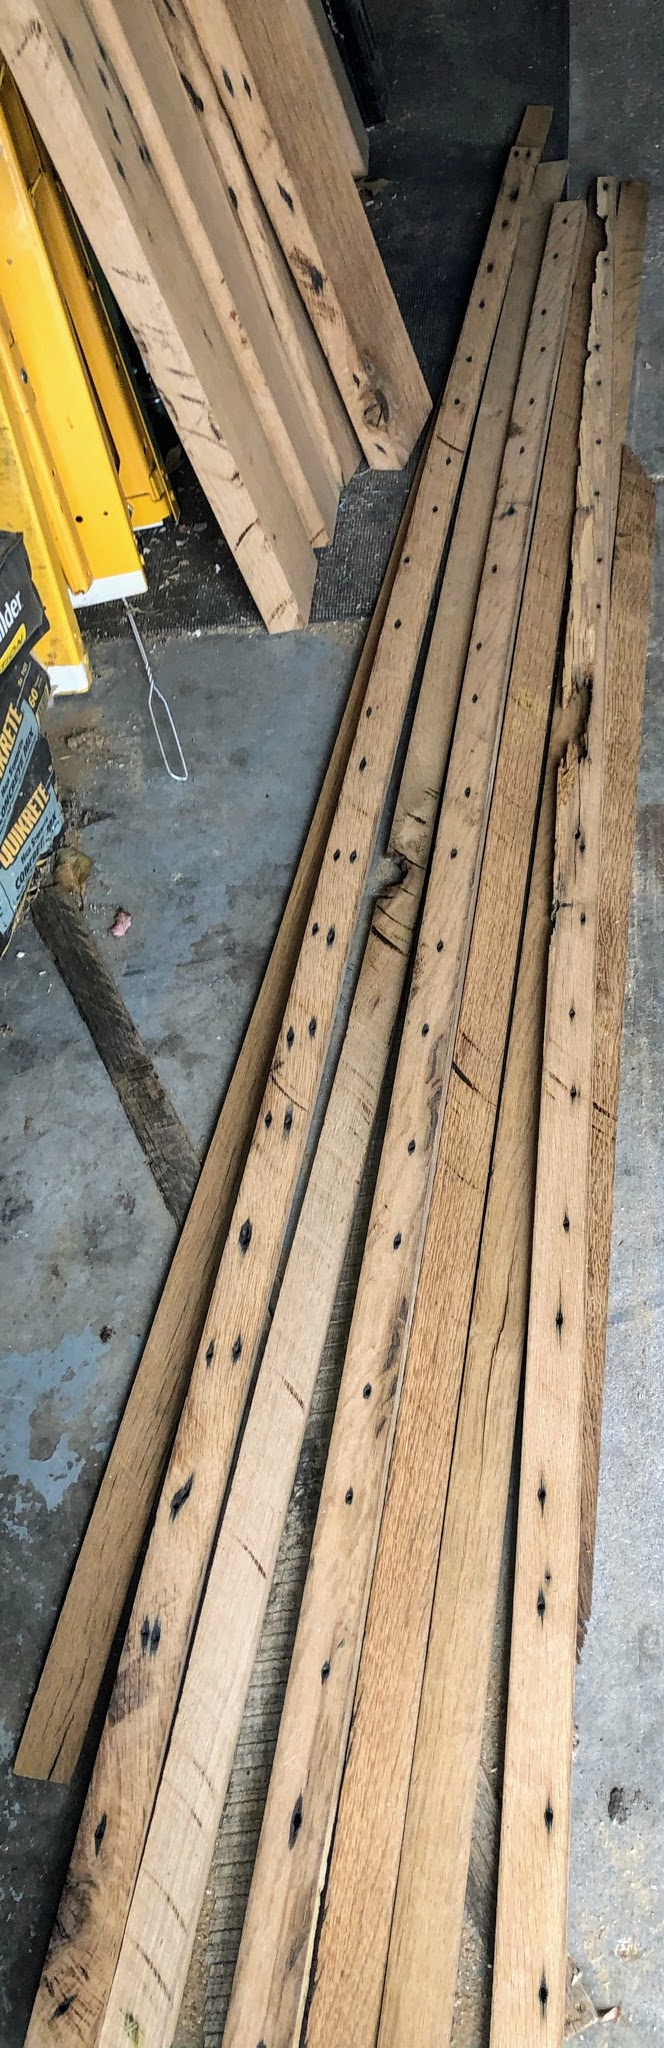
The back side of those same strips, the difference from the exposed side to the inside is quite dramatic. 

The finished framing pieces, and the realization that I didn't have enough linear board feet to finish both doors. I really don't have much experience with wood beyond pine and plywood, I think these are oak. The grain is very tight and they are quite heavy.


Laying out the door just to make sure its going to go together the way I think it will. The side and bottom pieces are 4 1/2" wide after the planing and cutting work. I haven't done anything to the planks beyond a quick trip through the planer.

At this point I felt like the planks were just to thin. Since one side is "unweathered" I figured I would try glueing them back to back to get a more substantial plank.

Pulling out the clamps, I really don't have enough.

Clamping them all together. Unfortunately this means that we had to go buy more planks. I also realized that I was going to come up short for the cross pieces. 

After a second stop at the reclaimed wood place. During this stop my wife decided she needed a table top to provide some extra workspace by using the top of Morgan's kennel. So we also came home with 12 linear board feet of 12" wide maple cargo floor planking (not pictured) which will need some work. The boards on the left will be cut down and will become the cross pieces (top, center and bottom) and then the rest of the planking on the right. More Glue! More Clamps!