Quotes

Life is short, break the rules. Forgive quickly, kiss slowly. Love truly, laugh uncontrollably and never regret anything that makes you smile. - Samuel Longhorne Clemens (Mark Twain)
Showing posts with label Rubicon Models. Show all posts

Thursday, June 3, 2021

World War II Project - Rubicon Models - PzKfw IIIJ (Short 50)

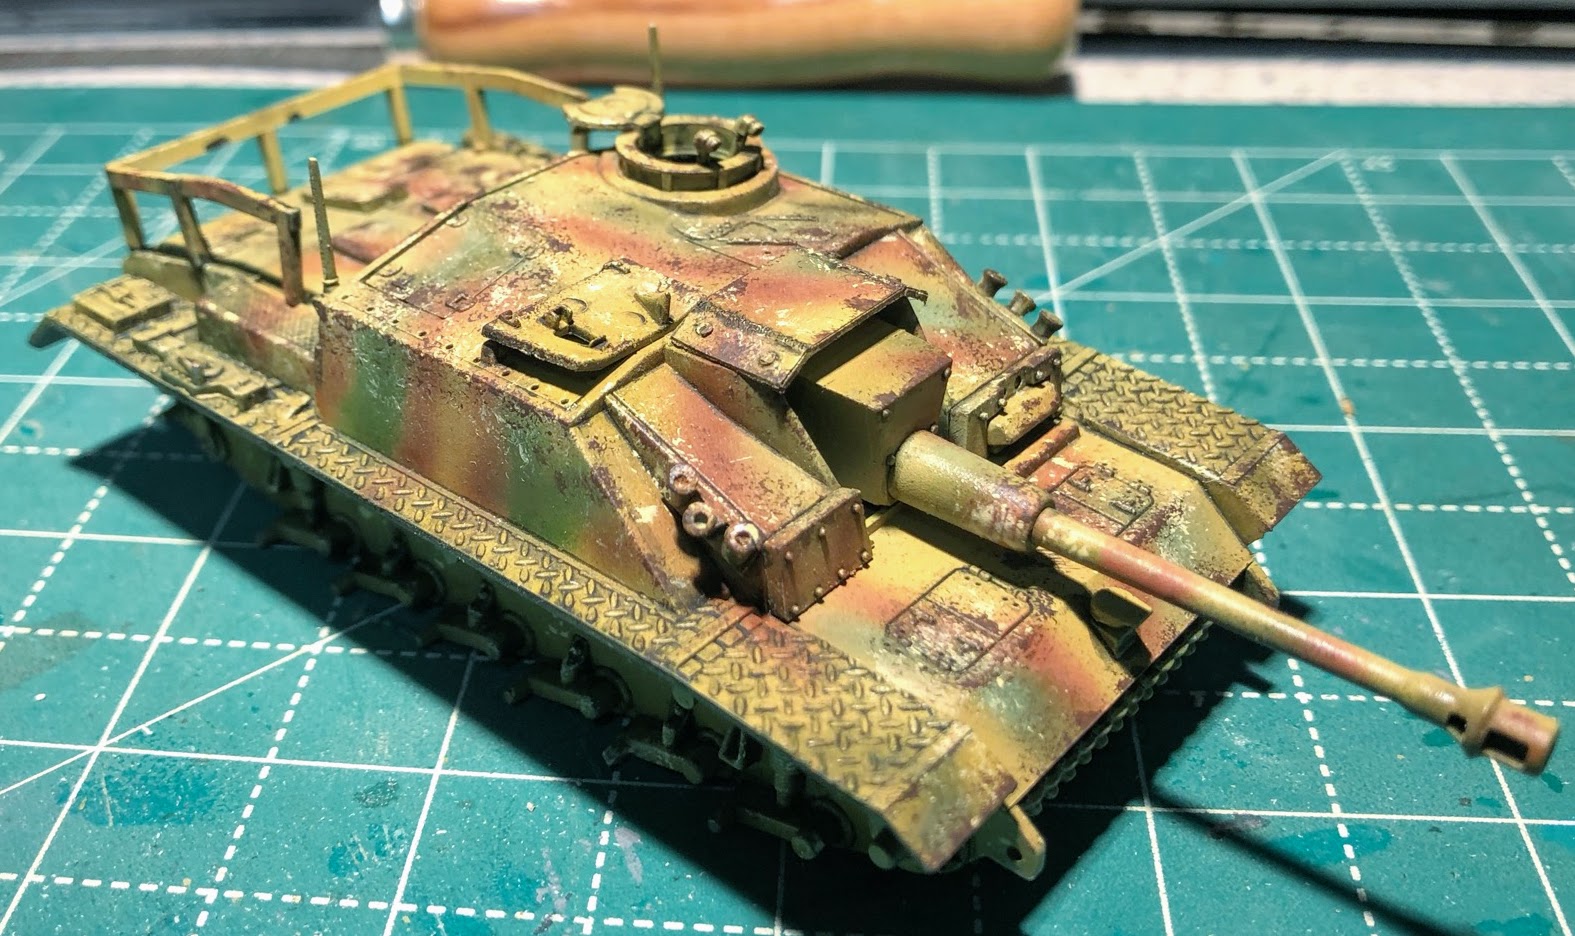
I broke out another Rubicon kit and built this one up as a PzKfw III J with the short 50 (Variant 1 in the instruction book). Again I'm impressed with the versatility of this kit and how well thought out it is. While I'm going to be left with a huge supply of tank bits at the end being able to build every variant from the auf H to the auf M is huge! I might even need to step back and grab the other kit so I can build a auf G version at some point. Since I already had one under my build this one went together much quicker and I didn't make any of the same mistakes (grumble, grumble, backplate bah!).

This keeps me on course to have field some Pz IIIs for North Africa with the next build destine to a III J with the long 50.

All the "common" steps completed. Essentially the core components around which all the variants are built.

Chassis and lower hull going together, can never use enough clamps.

The turret for the III J with the short 50 and open hatches on the top. The side hatches can be build in the open position as well.


Gluing the chassis to the hull and clamping them together. I added the tracks the turret to get an idea of what it will look like when its finished.


Thursday, May 6, 2021

World War II Project - Rubicon Models PzKfw III H - The build complete

Since I'm apparently stalled on painting anything...again, I thought I would try and finish up the Rubicon PzKfw IIIH (with the 50mm KwK 38/L42). As you may recall from the last posting on this I had discovered quite a gap at the rear of the vehicle and I finally diagnosed the issue. I was pretty sure that someone at Rubicon or the hundreds of others that have built this kit would have noticed such a gap. When I glued on the back plate (part C25) I wasn't paying enough attention and instead of slipping neatly into place I managed to hang the top edge over the tab on the lower hull so it wasn't sitting flat. In addition this covered up the two slots for the tabs on part C26. Since I didn't attach C25 correctly in the first place it was easy to "break" off and glue in correctly. Of course I figured that out after I had cut the two tabs off of C26 and modified the back plate to get the right fit. Since the kit is so well engineered you can't even tell that I screwed it up even after I cut off the tabs and snipped away some detail on the back plate (C25).

The final part of the build was finishing off the turret. This went together quite easily and really was a pleasure to put together, the fit on all the parts was perfect (well I admit that I was not happy with the way the cannon barrel [A03] seated into the first portion of the mantlet [A07] it just kind of sticks in there and I really had to pay attention as the glue set to make sure it wasn't crooked) .  In the enlarged view of the turret I see a couple of little gaps but a little putty will take care of that, heck just priming the vehicles would probably take care of it. Let there be no mistake I'm a big fan of Rubicon Models, but this kit is probably the best one I have put together so far. 

Current progress on my collection German Rubicon kits (from most complete to unbuilt):

1) STuG IIIG (x3) weathering in progress

2) STuH IIIG (x1) weathering in progress

3) Jagdpanther (x3) ready for decals

4) PzKfw IIIH (x1) ready for priming

5) PzKfw III (H-N box) (x2) unbuilt

6) PzKfw III Befehlswagen (x1) unbuilt

7) PzKfw IV (x6) unbuilt [This are from the first production run with the missing gun so I also have  bunch of the replacement sprues to compensate for the incorrect one in the kit)

8) PzKfw VIB Tiger II (x2) unbuilt

I have obviously have developed a bit of back log!

Let's take a look at the pictures:

This was my first clue that I had messed up something. I was test fitting the fit of the upper chassis to the lower hull and found quite a gap at the rear and piece 26 (part of the muffler system)

From the side you can just make out piece C25 in the middle of the gap. That's the piece that I didn't quite get into the right position

A couple shots of the large locator tabs on C26, which I subsequently (and erroneously) cut off.


The turret assembled with the short 50mm cannon

A good overall look. As per my usual method the wheels and tracks have not been glued into place.

Lot's of opportunity to detail the rear hull with racks and stowage. I won't start the painting till I have built and installed the racks. Its probably the one extra that would have been nice to include.


Thursday, April 29, 2021

World War II Project - Rubicon Models PzKfw III H - The build continues

I managed a bit more work on the PzKfw IIIH (variant 2). Although the STuGs are ready for some more paint work I decided that I really needed to get moving on this. I finished off the lower hull and the upper hull . I have pictures below so you can see the progress. I'm having issues at the moment with the back end of the chassis. After I did a test fit to the lower hull I found a big gap at the back end. It looks like one of the pieces should slide in a lot farther than it does to cover that gap and I'm not quite sure what I'm doing wrong. I'll need to experiment with it and see what I need to do, something is definitely not right.

When I as assembling the track and wheel sub-assembly I ran into an issue where the spokes on the return wheel were not lining up correctly. I simply cut the tab until I got it to fit the way I wanted. Still not sure if that's an actual problem with the kit itself or I built something wrong. I'll pay more attention on the next build.

At this point all I need to finish off is the turret and its ready to go. The build is actually pretty easy and the number of options covered is almost mind boggling. Not quite sure what I'm going to do with all these extra pieces!

If you look close at the back you can see the gap I'm talking about just above and to the right of the post for the return wheel

The back end, but you can't see the gap!

The front end

Working the upper hull, I'm using clamps because there is a lot of surface area that needs glue and I don't want anything to spring apart on me!


Again, a lot of area that needs to be glue, so the clamps came in handy to make sure it all stayed flat.


And here the upper hull and chassis are being glued together. Now to figure out why I have a gap in the back!


Thursday, April 22, 2021

World War II Project, STuG Project - Chipping complete

My wife had a meeting the other night and I was able to sit down for some un-interrupted painting. I finished the chipping on the STuGs and went back and did the back side of the skirts which I had forgotten to do. I also did chipping on the wheels and painted the rubber rims with Dark Rubber from Vallejo from their Panzer Aces collection. I really like this color for rubber.

Going back and looking at the photos I probably over did the chipping work but once I start adding the weathering that will start to get obscured a bit and after I add the baggage to the rear deck a lot more will get covered. I do realize that it seems rather pointless to paint something that will not be seen but I need the practice and it makes me happy knowing that its there even if no one else does.

An overall look at the progress, chipping finished on to more weathering!


The back of the skirts that I had forgotten to do the first time.

There is certainly a lot more work to be done to the tracks but at least I finally managed to get started on them.


Thursday, April 15, 2021

World War II Project - STuG III Chipping - Getting Started

I managed to steal a little time and started the chipping work on the STuGs. I  finished the light chipping on the STuGs and the skirts and finished the dark chipping on the skirts. So I'm calling the skirts done at this point and hopefully can find a little time to at least start the dark chips on the STuGs this week.


I tried to add some long scratches to the skirts. Not perfect by any means but not bad either.


Thursday, March 25, 2021

World War II Project - STuG III Pin Wash - Complete!

Finally have finished off the pin wash on the STuG fleet. Now I can move on to something a bit more interesting; chipping!


Monday, March 22, 2021

World War II Project - STuG III Pin Wash - Vehicle #211

 Found some time to at least get started on the third STuG. This is really dragging out but things just keep cropping up and taking me away from the painting desk. As it stands the pin wash on this STuG is still not finished. All the initial lining work is done but the clean up is only about 1/3 done. So it continues to sit on the desk.

This is a reminder to myself to apply the wash neatly. Sloppy application requires more time to clean up and time is a precious commodity.

My brush selection for most of my weathering work. Lots of nylon and taklon and couple of poor (and double ended) kolinsky sables (those are from the Games & Gears Kickstarter, worst kolinsky brushes I have ever bought).

Today's wash of choice, Dark Wash from Ammo by Mig

An unsung hero my Badger paint mixer, which I can only use in wide mouth jars which is a shame.

Sloppy application of the wash leads to a lot of time spent cleaning it up. Be neat the first time!