Quotes

Life is short, break the rules. Forgive quickly, kiss slowly. Love truly, laugh uncontrollably and never regret anything that makes you smile. - Samuel Longhorne Clemens (Mark Twain)

Thursday, February 28, 2013

Building Calamity - Marshal's Office Finished

Well the exterior is finished, I'm still deciding what to do with the interior. But it should look just fine on the table right now. This is definitely not a blow by blow account on how I finished this one. It is the only brick structure that I have so it should stand out a bit. There are a couple of details that I'm not fond of, one of those being that the corners are wood for the brick exterior walls. I would have preferred to see a more standard brick corner. Overall its fine though and I'm pretty happy with the way it came out.

I haven't added any kind of dirt to it yet. I'll save that for when its mounted on its sabot. I'll want to match the ground cover as closely as I can with all the other buildings. So there is work to be done but for now it can sit on the completed shelf and I can move on to another building. The railroad station is nearing completion as well. It needs some touch up paintwork and the roofs need to be shingled, probably a little work on the chimney as well, but its getting close and I'm much happier with it at the moment.

The front, the roof is off in this shot, the interior is not lighted, however, that is an interesting idea.
The brickwork was done with a combination of pigments and isopropyl alcohol which creates a  paint like pigment paste. 
I may go back in and do more with the brickwork. I like the dark mortar lines but they don't show up very well.
You can't really see the paintwork on the roof, but it looks good. Pretty pleased with the way the roof came out.
Back to the front. The whole thing needs a shot of dullcote now to seal it up and provide some protection

Wednesday, February 27, 2013

Building Calamity - A Question of Proportions

I'm in the midst of finishing a couple of buildings for Calamity this week. I have shown off the progress on the Sarissa Railroad Station a bit and I have another one that is close to be finished as well which I'll show off when its done. I have had a couple of things kind of digging inside my head through this project. Originally I really only expected to have two or three buildings from each manufacturer and I would create a little town big enough for a shoot out or two. The whole  project has kind of taken on a life of its own at this point. I know longer have concerns that the buildings are going to look right with each other because I am realizing that your average gamer is going to sit down to play the game (what ever that may be) and have a good time whether the buildings match up or not, or whether the miniatures match up or not. If the board looks really good and the miniatures are painted then that's just a bonus. They don't care if one company's doors are the right height or if the windows have the proper number of panes in them. In the end if it looks good they will be happy with the board I stage my games on.

So its not so much a question of scale but of proportions. Do the proportions of the buildings and the details look right? I realize that this is kind of a vague and nebulous concept but a well designed building is pleasing to the eye, there are natural proportions out there that look right to us as human beings. I know that there are reasons why I am drawn more towards one company's western buildings than another or why I won't touch certain kits in a given line. Its not because they are out of scale (which, unless you are a model railroader, is ill-defined at best) its because their proportions aren't right, they are not pleasing to the eye. Even the simplest, run-down shack looks good if the proportions are right. Our perception of proportions is also affected by what we know or at least think we know. Most of our own basic architectural knowledge only comes from the places where we live and work, the proportions of that space affect how we view things.

An 8'ceiling is relatively standard in suburban homes in the US built during the 20th century. Granted ceiling heights have increased but more as a prestige thing as you find these in more expensive homes and not in your average everyday suburban tract house. Now the setting for Calamity is about 1870 - 1890, the exact date isn't really important, you will find that the ceiling height is typically 10'and often as high as 12'. Of course, this varies a lot from place to place but 10' is a reasonable standard to work with. This tends to give you a building that looks taller and narrower than what we are used to seeing. The proportions are off when you apply a modern sense of proportion to an old west building. This can be seen in the approach some manufacturers are taking when constructing their buildings, they are taking the proportions from today, and applying them to buildings that existed 100+ years ago and those proportions "look" wrong. And really it wouldn't take that much research to get things right.

I think the laser has taken some of the creativity out of the process of designing a building. A certain amount of laziness intrudes because its easy to modify and existing template for a building to create a second one after all there were standards weren't there? And the answer would be sort of. There really were not any building codes during this period at least in the west and then usually imposed after the first major fire swept through town leaving most of it a charred pile of ash. Except for hurry up affairs in boom towns buildings were built based on proportions, for instance the narrow end (not always the side, more often the front) of a building would be 1/3 of the length of the building. The dimensions would be determined based on this type of rule of proportion. So if you have a 30' length then your width will be 10' and the narrow end will contain the front entrance. With a 10' ceiling you will need taller windows which are going to be relatively narrow because of the width. This gives us that tall, narrow look. Again its a matter of proportions, if the proportions look right, then we have a good looking building, if the they are off, its going to feel a bit off kilter. The design process for the laser cutter means that if our basic core structure is off, then it will be off for every building design that we derive from it. Now, granted, this is also a matter of taste, what looks good to me may well not look good to you. Which brings us back to our kits, there are just kits that proportionately look "wrong". As a gaming piece they are fine, no one but me is likely to notice. However, I'm far more likely to put effort into a building that looks "right" than one that looks "wrong". A little research even just looking at pictures would go a long way in making buildings look right. Through out the standard building template and create each building fresh and new rather than modifying the details a little bit (although to be honest if you have a template that has nailed the proportions then I have no objection to it being used to create 3 or 4 similar looking buildings by varying the details). 
Now I do realize that we only have so much space to work with. Let's take an example. You want a building that is 4" wide, based on my previous proportion it should be 12" long well, that's a lot of space on the table and then there is packaging and materials to consider as well. However, if we take we can still make it look right even if we don't have the length the proportion says we need. We can play with those dimensions to get a proportion that still looks "right". We may have to shorten the length, but we can play with the height and other details like windows and doors quite a bit and still get the "right" feel to the building.

Do a little research even if you are just looking at pictures. I have one really good reference book like this; The Great American Bars and Saloons by Kathy Weiser. There are lots of exterior pictures of some of these places and you can see the variety of buildings and construction styles that go into making them as well as the neighboring buildings. Great book I highly recommend it if you can find a copy. Check out the various books on buildings from the model railroad publishers, although a lot of these are focused on the 1950 period in the US, you can still find information on the wild west, a lot of designs, like  railroad stations didn't change that much.

So which manufacturer gets it (and remember this is my opinion, your opinion may be different, and that's okay)? 

Battle Flag:  For the most part have a really good look to them, I think they could be a bit narrower and a little longer but overall they look right on the table. Their exterior stairs look a bit clunky, but I think that's more a factor of those stairs being proportioned to that bases we put our miniatures on. I really like their big hotel, it just looks right.


Sarissa Precision: To my eye the folks at Sarissa have pretty much nailed the proportions of their buildings. Unfortunately, I think they have lost some of their creativity because after they established the core template they produce 5 kits from that template with minor variations. I think they really need to sit down and address the details again, but their proportions are spot on. I think I like their small and large heroic buildings the best.


Knuckleduster/Tri-City Laser: These buildings just look short and squat to me and I feel like everyone will be ducking their head on the inside. If they increased the height by an inch I think all of their buildings would look a lot better. I think I like the hotel the best, but please write some assembly instructions.


Aetherworks: Much like Battle Flag, I really like these buildings but they could be a bit narrower and longer and that would improve their appearance a lot. They look great on the table though. I'm hoping that they will be reworking their two-story kits to add a second story floor. I have only built the the brick building so far so its hard to give an opinion on what looks best.

Gamecraft Minatures: These are kind of hit and miss. Overall I think these need to be a bit narrower over all. Some buildings look really good, especially their two story buildings and others just make me shudder, like the large corner saloon. These are really meant to be terrain pieces and take some extra work to get a workable interior going.

I know there are a couple of other manufacturers out there that I haven't purchased yet. One of those I keep looking at and wanting to buy but can't pull the trigger, its probably because the proportions really look off to me. There is another company who should have kits on the way to me shortly and a new offering coming in April for the Dead Man's Hand rules from Great Escape Games. I'm eager to see those buildings and to see who is making them.

Tuesday, February 26, 2013

Citizens of Calamity - The Longhorns

I acquired a herd of longhorns to stampede through Calamity on eBay. These are 1/64th scale (or S Scale) so they are going to look a little small against some of the larger miniatures like Black Scorpion. However, there are 25 of them so sheer mass should make up for it. Apparently the cheap 25 pack went out of production some time ago and now you can only buy them in groups of 8. But a good auction came up and the price was right so I was able to get the whole herd from one place. I think I will need to at least repaint the skin tone tan ones, they look a little disturbing.


The Thundering Herd!


Saturday, February 23, 2013

Building Calamity - Painting the Sarissa Precision RR Station

Production pretty much stopped on the Calamity scene while I was getting ready for the convention. The process on painting the building started about three weeks ago, not long after it was weathered.

The first step was weathering the building. After working with the MDF a bit more it appears that if you need to prime it Kilz is by far the best thing to use. The MDF just seems to soak everything else up and ask for more. I managed a much smoother coverage with the Kilz and used a lot less of it than the two other regular primers I tried. Before I started up the airbrush I thoroughly taped up the building so I was only painting the surfaces that I wanted to paint and not worry about overspray.


The next step is to take the rubber cement and dab it on in patches on the building. Pay some attention to where you are applying it. It should be mostly on the lower exposed surfaces rather than on more protected areas. It can be higher up on a wall as long as its in an exposed spot. Take a look at other 9as in real life!) buildings and see where the paint is peeling. Trim is really susceptible to peeling paint. If you don't like the rubber cement then you can try the same hairspray technique that is used on military models. The hairspray you want is the pump spray type, and it should be applied with a brush, rather than an aerosol can.


One you have applied the rubber cement to the weathered surface its time to paint the whole building or at least the surfaces that you intend to have paint on them. It wasn't uncommon for only the front of a building to get paint. So I painted this a nice red as you can see in the photos, and then I couldn't decide on the trim color so I decided to go back an paint it yellow instead. Then I thought it would be interesting to show both coats of paint so before I applied the yellow I dabbed on some more rubber cement and then sprayed on the yellow. I did use my airbrush for both the red and yellow coats.


Once the paint had dried I went in with an eraser and started to rub it gently over the surface. The eraser will remove any paint that has a layer of rubber cement under it. The eraser I had was to hard though and I managed to get all the way through the weathering to the primer in a couple of spots. So be gentle with this technique whether you used rubber cement or hairspray and use a softer eraser. I have a couple of big pink erasers at work and I think I'll try one of those next time.


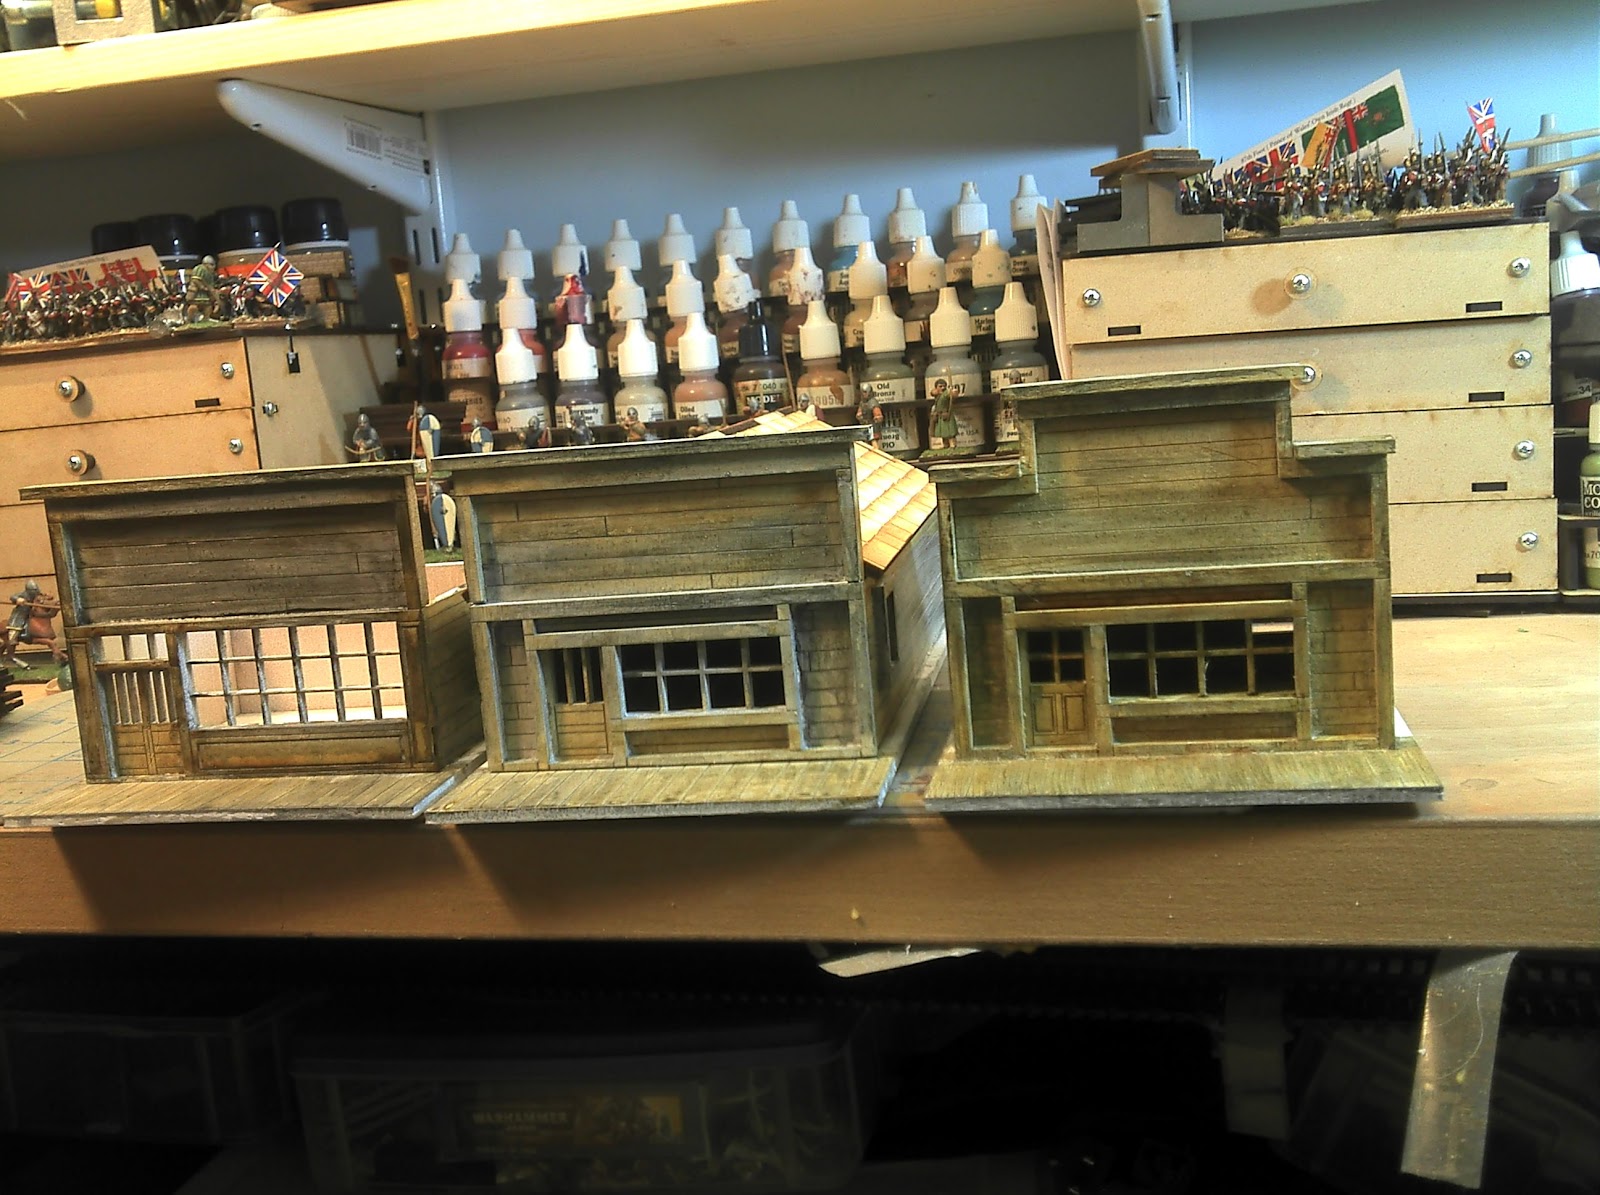
Then I waited for it to dry and started painting the window and door trim with a nice green. I left the tape on the building so I could get a little sloppy with areas near the platform. I still need to do the side trim and I'll apply some weathering to that but I'm going to keep it fairly light as the green tends to high the exposed weathered areas.


I'm not completely happy with the way things are going at this point though. The problem with the out of spec MDF is really becoming more noticeable as I move forward with the finishing work, particularly at the puzzle cut corners. I am hoping that when I add the trim to hide the puzzle cuts that it will also hide the poor fit in a couple of places. The eraser removed to much of the weathering that I exposed and its harder to see than I thought it would be. On the plus side I think I can go in sort of redo that and make it more apparent. It didn't help that I managed to erase all the way down to the primer in a couple of spots, which muted it more than I wanted. The inside may be tougher to deal with at this point too.

I'm going to finish this building. I think I'm going to chalk this up as a test piece and consider replacing it. Of the five manufacturers: Battle Flag, Knuckleduster/Tri-City laser, Aetherworks, Gamecraft Miniatures and Sarissa Precision, Sarissa is the only one that makes a railroad station. I may replace this one with a scratchbuilt station as that would make me happier about some of the inaccuracies in the structure itself. Not that the gaming group is going to notice those details but I do. I would definitely salvage the platform if I go the scratchbuilt route.

Thursday, February 21, 2013

New Family Member

Both of my Great Pyrenees passed away in 2008 within about 5 months of each other. They were 12 years old which is definitely on the high side for the breed. My oldest son has his own dog, Sadie, and its nice to have her around the house but she's not my dog. I have been haunting the various Pyr rescue sites off an on since 2008 and a couple of weeks ago I found one that really spoke to me. A requirement by the rescue is that you need to bring any dogs living in the house down to visit first to make sure that everyone will get along. Well, this certainly made me a little nervous since Sadie doesn't really like other dogs. She had arrived in the house just before my second Pyr (Porthos) passed away. I remember her coming into the house very excited and still on the leash when Porthos came lumbering around the corner, she practically levitated into my son's arms, I swear there was no jumping involved.

I drove down with Sadie and was waiting at the house, I had managed to beat the caregiver there. Up on the balcony was this huge Pyr just looking down at us, easily the biggest Pyr I had ever seen. Sadie seemed totally unfazed, even when the current pack of Pyrs gathered at the fence to bark at us (its what they do) she didn't care. When the caregiver got back with the current rescue we went into the "greeting" enclosure and they brought the Pyr they were calling Boregard, Sadie went nose to nose with him and didn't have any problem, he didn't have a problem with her so it was off to the races!

Boregard is now Hobbs and seems to be settling in nicely. He's still a little nervous about some things but he seems to be starting to accept that this is home now. Its nice to have a dog of my own again.

Whatdya mean another dog? I'm not enough?
Sadie is a mix; half Catahoula Hound and we think Blue Heeler.
You can't see it in the picture but her eyes are an icy blue
and the left one is marbled with brown.
Okay, I'm here. Do I get to stay?
Despite the apparent blue eye color he has the standard,
Pyrenees brown eyes and is look a bit sad at the moment.
He is not pure white, he has a mix of wolf and tan markings.
Dibs on the couch!

Wednesday, February 20, 2013

50,000 and Genghis Con XXXIV convention ramble

While I was heads down at Genghis Con XXXIV my blog rolled over the 50,000 mark for hits. Compared to some of the other gaming blogs out there 50,000 is pretty insignificant number. For me I still find it pretty exciting, it means people are coming and finding it worth reading. I'm getting better about staying on target on at least one project and I hope that continues as I push forward with my old west town of Calamity. What I do find interesting is that it took almost exactly 10 months to get the first 25,000 hits but it only took 5 months to get the next 25,000. I'll try to keep everything moving and maybe I can hit 100,000 in 2013.

The main reason I didn't notice rolling over the 50,000 mark was I was curled up in the fetal position while I came off that convention high. I do love going to Genghis Con though and I haven't missed a single one and in fact I have managed over a third of them over the years. I think the first one that I was completely in charge of was Genghis Con IX, we only had a $1,000 left in the bank and the convention was down to about 250-300 attendees and there was a very real chance that this would be the last show. For some reason we hit a chord with the RPG folks and attendance shot up to about 800 or so. I managed all the shows from Genghis Con IX through Genghis Con XXI. We also started the second convention, Tacticon, in 1989 and I ran those from 1989, through about 1999 or so. The peak attendance for Genghis Con while I was running it was 2100 or so (that's unique individuals), I think they are starting to close in on that number again.

These days I'm happy to just run the auction and the painting conference and competition. I'll try and get pictures posted of the painting competition shortly some here but mostly on the CMPA website. The top end was very, very good, but the competition seems to be growing again and I saw a lot of new people take that first step into competition painting. I also got pressed into teaching a blending class this year. I don't normally teach at conventions but everyone seemed to be picking it up and enjoyed the class. I didn't have any entries in the competition itself, nothing was inspiring me on an individual level and the key component I needed for my vignette didn't arrive until the week before the con and there just wasn't enough time to get it done properly. Hopefully, that will be finished for ReaperCon which will be in April this year (18th-21st)

Which brings up some thoughts about the differences between conventions here in the US and those in the UK. I am just amazed at how truly different they are. Genghis Con is a 4 day convention, featuring lots of boardgames, RPGs, and table top miniature games of all kinds. Most of the miniature games are run by individuals rather than clubs. We also have a lot of tournaments as well as one-off games. Of course there is an exhibitors' hall but most of the dealers are catering to the role-players and boardgamers and only to a few of the miniature gamers. Typically if a dealer has miniatures its going to be Flames of War from Battlefront or Games Workshop. The UK shows seem to be opposite in just about everyway. Yes, there are one-off games but most of what I see are demo games setup by clubs to show off stunning scenery and miniatures not necessarily to play. The exhibitors' hall though is just stacked to the gills with different miniature companies hawking their latest releases. I need to go someday just to experience the difference for myself. Oh, and near as I can tell we have a lot more women at Genghis Con than any show in the UK, must be the RPGs!

So thank you to everyone that has stuck with me through this first year and a big welcome to those that have joined up recently. Hopefully there will be more good stuff to come!
A shot from ReaperCon 2012 of the Warlord Tournament in progress. I didn't take my camera to GC XXXIV this year and I just have a couple of poor shots on my phone.

Friday, February 15, 2013

Another Kickstarter - Critical Mass Games - ZAS 15mm Mercs

CMG has decided to take their ZAS mercenaries and expand them into a full range through Kickstarter. Talk about bad timing for me! With Traveller5 getting ready to ship by the end of February I know I'll need some kind of major military force (not really) to go along with the miniatures that I have been slowly working on for the RPG campaign. And then there is the Tomorrow's War rules that have just been sitting around gathering dust but I have been itching to crack open and work up a game or two. So I'm jumping in on this Kickstarter. I'm in at the mechanized company commander level, which includes £56 of vehicles, so its looking like a pretty good deal especially as stretch goals get hit and more stuff is added.
And because you know you want to look: CMG ZAS Kickstarter

Wednesday, February 13, 2013

North Star Military Figures - Nickstarter - In Her Majesty's Name

I received an email newsletter last week that definitely got my attention. North Star Games is essentially doing an inhouse version of a Kickstarter which they are calling a Nickstarter for a new, licensed, miniatures line that will support the release of Osprey's In Her Majesty's Name Steampunk Skirmish Gaming by Craig Cartmell and Charles Murton.

What's the difference? First off this is not a Kickstarter but it is, in its own way another form of crowdfunding. This is not being done through Kickstarter it is a pre-order for the miniatures and the rules. The core miniatures for all of the factions have been completed and additional "Nickstarter" only miniatures are being sculpted based on stretch goals based on the amount of pre-orders raised. Basically you are seeing a pre-order system setup like a Kickstarter project. Its a neat idea and we will see how it goes.

I like the project, I'm not sure I will jump in on it but it lets North Star take advantage of the Kickstarter mania and still maintain control over everything.

So far they have already achieved their first goal of adding another adventuring company; the Scotland Yard Company, and the second goal of adding a miniature for a master criminal. The Nickstarter closes on April 18th


Here is the link to the site so you can check out the details. In Her Majesty's Name

Sunday, February 10, 2013

Building Calamity - Tinkering with the board

I have a ton of buildings at this point, 24 built, 12 of those have received their initial weathering treatment and 1 has actually received paint. The remaining 12 have been primed and are ready to be weathered. Now that the painting stage is rushing towards me I need to think about the board.

There are a few things I know already:
1) 6'x4' table (I have two tables rescued from the closure of Attactix, which I had designed and built for the store).

2) Semi-modular; only in the sense that I want to be able to transport and store the boards so I will build it in 3 2'x4' sections. This will also give me the ability to expand if I want to.

3) Buildings will be removable; Right now I'm thinking that each building will be built on its own 'sabot'. If I can keep the sabots down to a couple of different sizes I should be able to re-arrange the buildings to a certain extent and introduce new ones. That will change the look of Calamity. Maybe I'll take it as far as having brick building replacements for when the massive fire sweeps through town (not an uncommon occurrence in western history).

4) A river or stream; mostly to provide a terrain feature below the level of the table surface. This requirement will be the one that really determines the thickness of the foam I'll need to use for base. If the sabots are on 1" foam I'll need at least another 1" layer underneath that, maybe just go for 2" for a 3" thick board.

5) A railroad; Since I have already been acquiring S Scale equipment and track the railroad is definitely in.
6) Bridge; The citizens of Calamity are going to be a frugal bunch so rather than build and maintain a gallows they will be hanging folks from a the railroad bridge as a cheaper expedient.

7) Alignment and locking mechanism of some kind. I don't want the boards to separate during play and I want them to stay lined up correctly. This especially important since a number of the buildings are going to be located across the seams. Right now I'm thinking something simple like pegs to handle this job.

8) Hide the seams. I know that players aren't likely to be disturbed by the seams very much but I'm looking at a lot of seams if I go with the sabot concept. I'll definitely have to work in scenery to hide those as much as possible.

And here are a few concepts that I have been doodling with:


Friday, February 8, 2013

Poor Research Rant - The Switzerland Trail of America

Engine #30 of the Colorado and Northwestern Railway. She is cosmetically restored  but not to the original condition she  was in for the CNW. This is the final configuration she was in when working for her last employer as #74 for the Rio Grande Southern (RGS). Incidentally the RGS is the railroad that developed and built the seven Galloping Goose rail cars.

I was reading, with great interest, this morning about the City of Boulder sending Engine #30 and the rest of its rolling stock to the Colorado Railroad Museum for display. I was doing a little research on the Colorado and Northwestern's livery colors (Red, Light Blue and White not the prettiest colors by any means) when I stumbled across this. Now, I already knew the equipment had been moved since I had seen it there when I was at the Goosefest in 2012. What interested me was the pdf on the site that gave a brief summary of the history of Engine #30, the passenger car and the Rio Grande caboose. Then I read it and was appalled at the number of gross inaccuracies about Engine #30 (#74 on the Colorado and Southern and #74 on the Rio Grande Southern). I don't know who wrote it but I imagine it was an employee of the Boulder Parks and Recreation department. There is entire book (The Switzerland Trail of American, Forest Crossen) written about this railroad by a local resident and the last time I was at the Boulder library (something like 30 years ago granted), there were three second edition copies that could be checked out and three first edition copies in the rare books section. Even the information available on the net is more accurate than this abomination of a document! Okay, I feel better now.

Thursday, February 7, 2013

Building Calamity - Weathering Update

This past weekend I sat down and applied the weathering techniques to about a dozen buildings. There were some successes and some lessons learned during this long session. First the original article that I consulted used Kilz as the primer, this is a very strong white primer. I ran into some issues with it where the water based fabric dye and the inks were actually repelled by the primer in spots. You can see this effect on in a number of the buildings, most notably on the railroad station, they look like little white blotches. It didn't happen on a consistent basis either, one building wouldn't give me any problems while another would drive me to frustration. I tried roughing up the surface before applying the fabric dye and that didn't seem to help. What worked in the end was rubbing in the first coat and sometimes subsequent coats in with my finger. I have no idea why but I'm not going to question it either. I think the problem may stem from to thick a coat of primer. The Kilz really comes out in quite a strong burst and you only want a light coat of primer on these buildings. My preferred priming technique (which I use for my miniatures as well) is to spray from right to left starting the spray of primer before I get to the building and not releasing until I have passed beyond the other edge of the building. This avoids a heavy coat of primer right at the leading and trailing edges.

Overall, I'm pretty pleased with the results. I'm going to go back in and fix the areas where I have the white splotch problem and darken up some areas that I feel came out to light. I haven't done much work on roofs at this point either. I love the wooden shingles from Builders in Scale but they are a bit expensive, so are the paper ones from Wild West Scale Model Builders. I downloaded some texture files from Clever Models that I can print out on my color printer and I would like to try those. In the long run I think printing my own will be cheaper, despite the cost of the ink! I purchased S Scale texture downloads for the roofs along with some other textures to be used on the inside, particularly for floors for the Knuckleduster and Gamecraft models. I probably won't work on these again, at least in any significant form, until after Genghis Con XXXIV which is coming up next week running from the 14th - 17th of February.

I took some pictures during the process over the weekend, but the light wasn't very good. I took some replacements the other day on my desk where the lighting is much, much better. At this point I can't get all the buildings lined up on the workbench, I'll have to find a place with better lighting and a table and try to lay out the town. I have been doing some sketching on what I want the boards to look like, but I haven't stumbled on anything that says "build me" yet.

On to the pictures!
Battle Flag - General Store and Gunsmith's Shop

Battle Flag - Saloon and Sheriff's Office. The Saloon is definitely lighter than the Sheriff's office, I think  I will go back and darken up the Saloon, Gunsmith and General store.

Battle Flag - Photographer's Studio, Undertaker's Building


Gamecraft Miniatures 

Old West One Story Building - 28MWEST006


Gamecraft Miniatures 

Old West One Story Building - 28MWEST006

Knuckleduster/Tri-City Laser Inc - Barbershop, General Store, Small  Shop

Sarissa Precision - Railroad Station, the white blotches are particularly evident on this building. I'll have to go back and fix that.

Sarissa Precision - Railroad Station, more white blotches and the freight door  is way to light and needs to be darkened.

Sarissa Precision - Railroad Station - shot of the platform
Sarissa Precision - Mix of  Small Heroic and Medium Heroic buildings . From the right, Small Heroic Plus, Small Heroic Plus, Medium Heroic and Small Heroic.