Thursday, June 30, 2022
Thursday, June 23, 2022
Outbuilding Construction - One Wall Done
I'm trying to approach getting the shop and the greenhouse done by what I have on hand combined with what I need to do next. With seven boxes from Omniwall taking up space I figured I should get the west wall in the shop done next. This way I could at least sort out all the Omniwall stuff and make sure we received what we ordered.
Unlike the greenhouse the shop is big enough I could do all the cutting inside. Here is the west wall before I got started:
 |
| Here the west wall is on the right and you can see the rafters and the power outlets in place. The light switch is out of sight by the 4' door which will become the main entrance to the shop as soon as I get a gate built on that side. The six foot double door opens up onto a driveway for the lot located directly behind ours and its only meant to get large items in and out of the shop. Once the fence is up we would have to walk all the way around the property to get to this door. |
 |
| This is an earlier pictures before rafters and electricity. That's a 4' double door on the right side, the future main shop entrance. It opens directly into the back yard. |
Five sheets of underlayment later it looked like this (there was some tricky piecing together around the door):
 |
| The left side towards the six foot door. |
 |
| Looking towards the right and the 4' door. It is fully insulated as well. That's a double light switch panel, one for the lights and one for the exhaust fan. |
And then I was able to put up the wall of organization (actual tool arrangement is likely to be an ongoing process):
 |
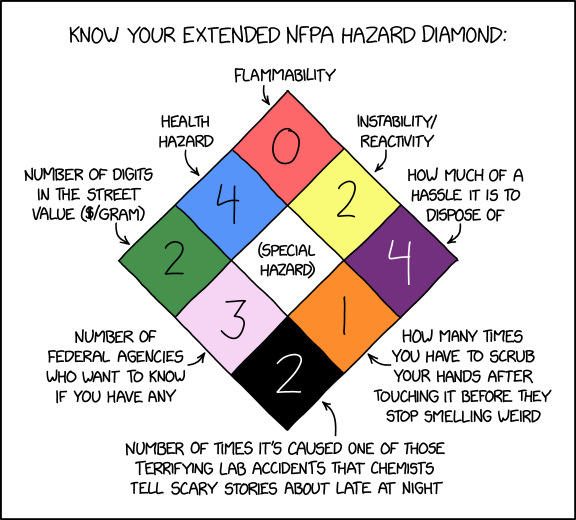
| This is the Weekend Warror XL kit, measuring 8' long and 4' high. Those very top shelves, right underneath the rafters are 12" wide. I just kind of throw all the bits and pieces up on it to get a feel for it. Expect to see things shift quite significantly as tools start to migrate from the garage to the shop. |
 |
| Looking more towards the north end, you can see that two of the power outlets are right underneath the bottom cleat. There's about a 1/4" clearance there. As close as I could get it. We went with silver on silver and now I'm thinking we should have done either the panels of the various hooks and shelves in a different color. |
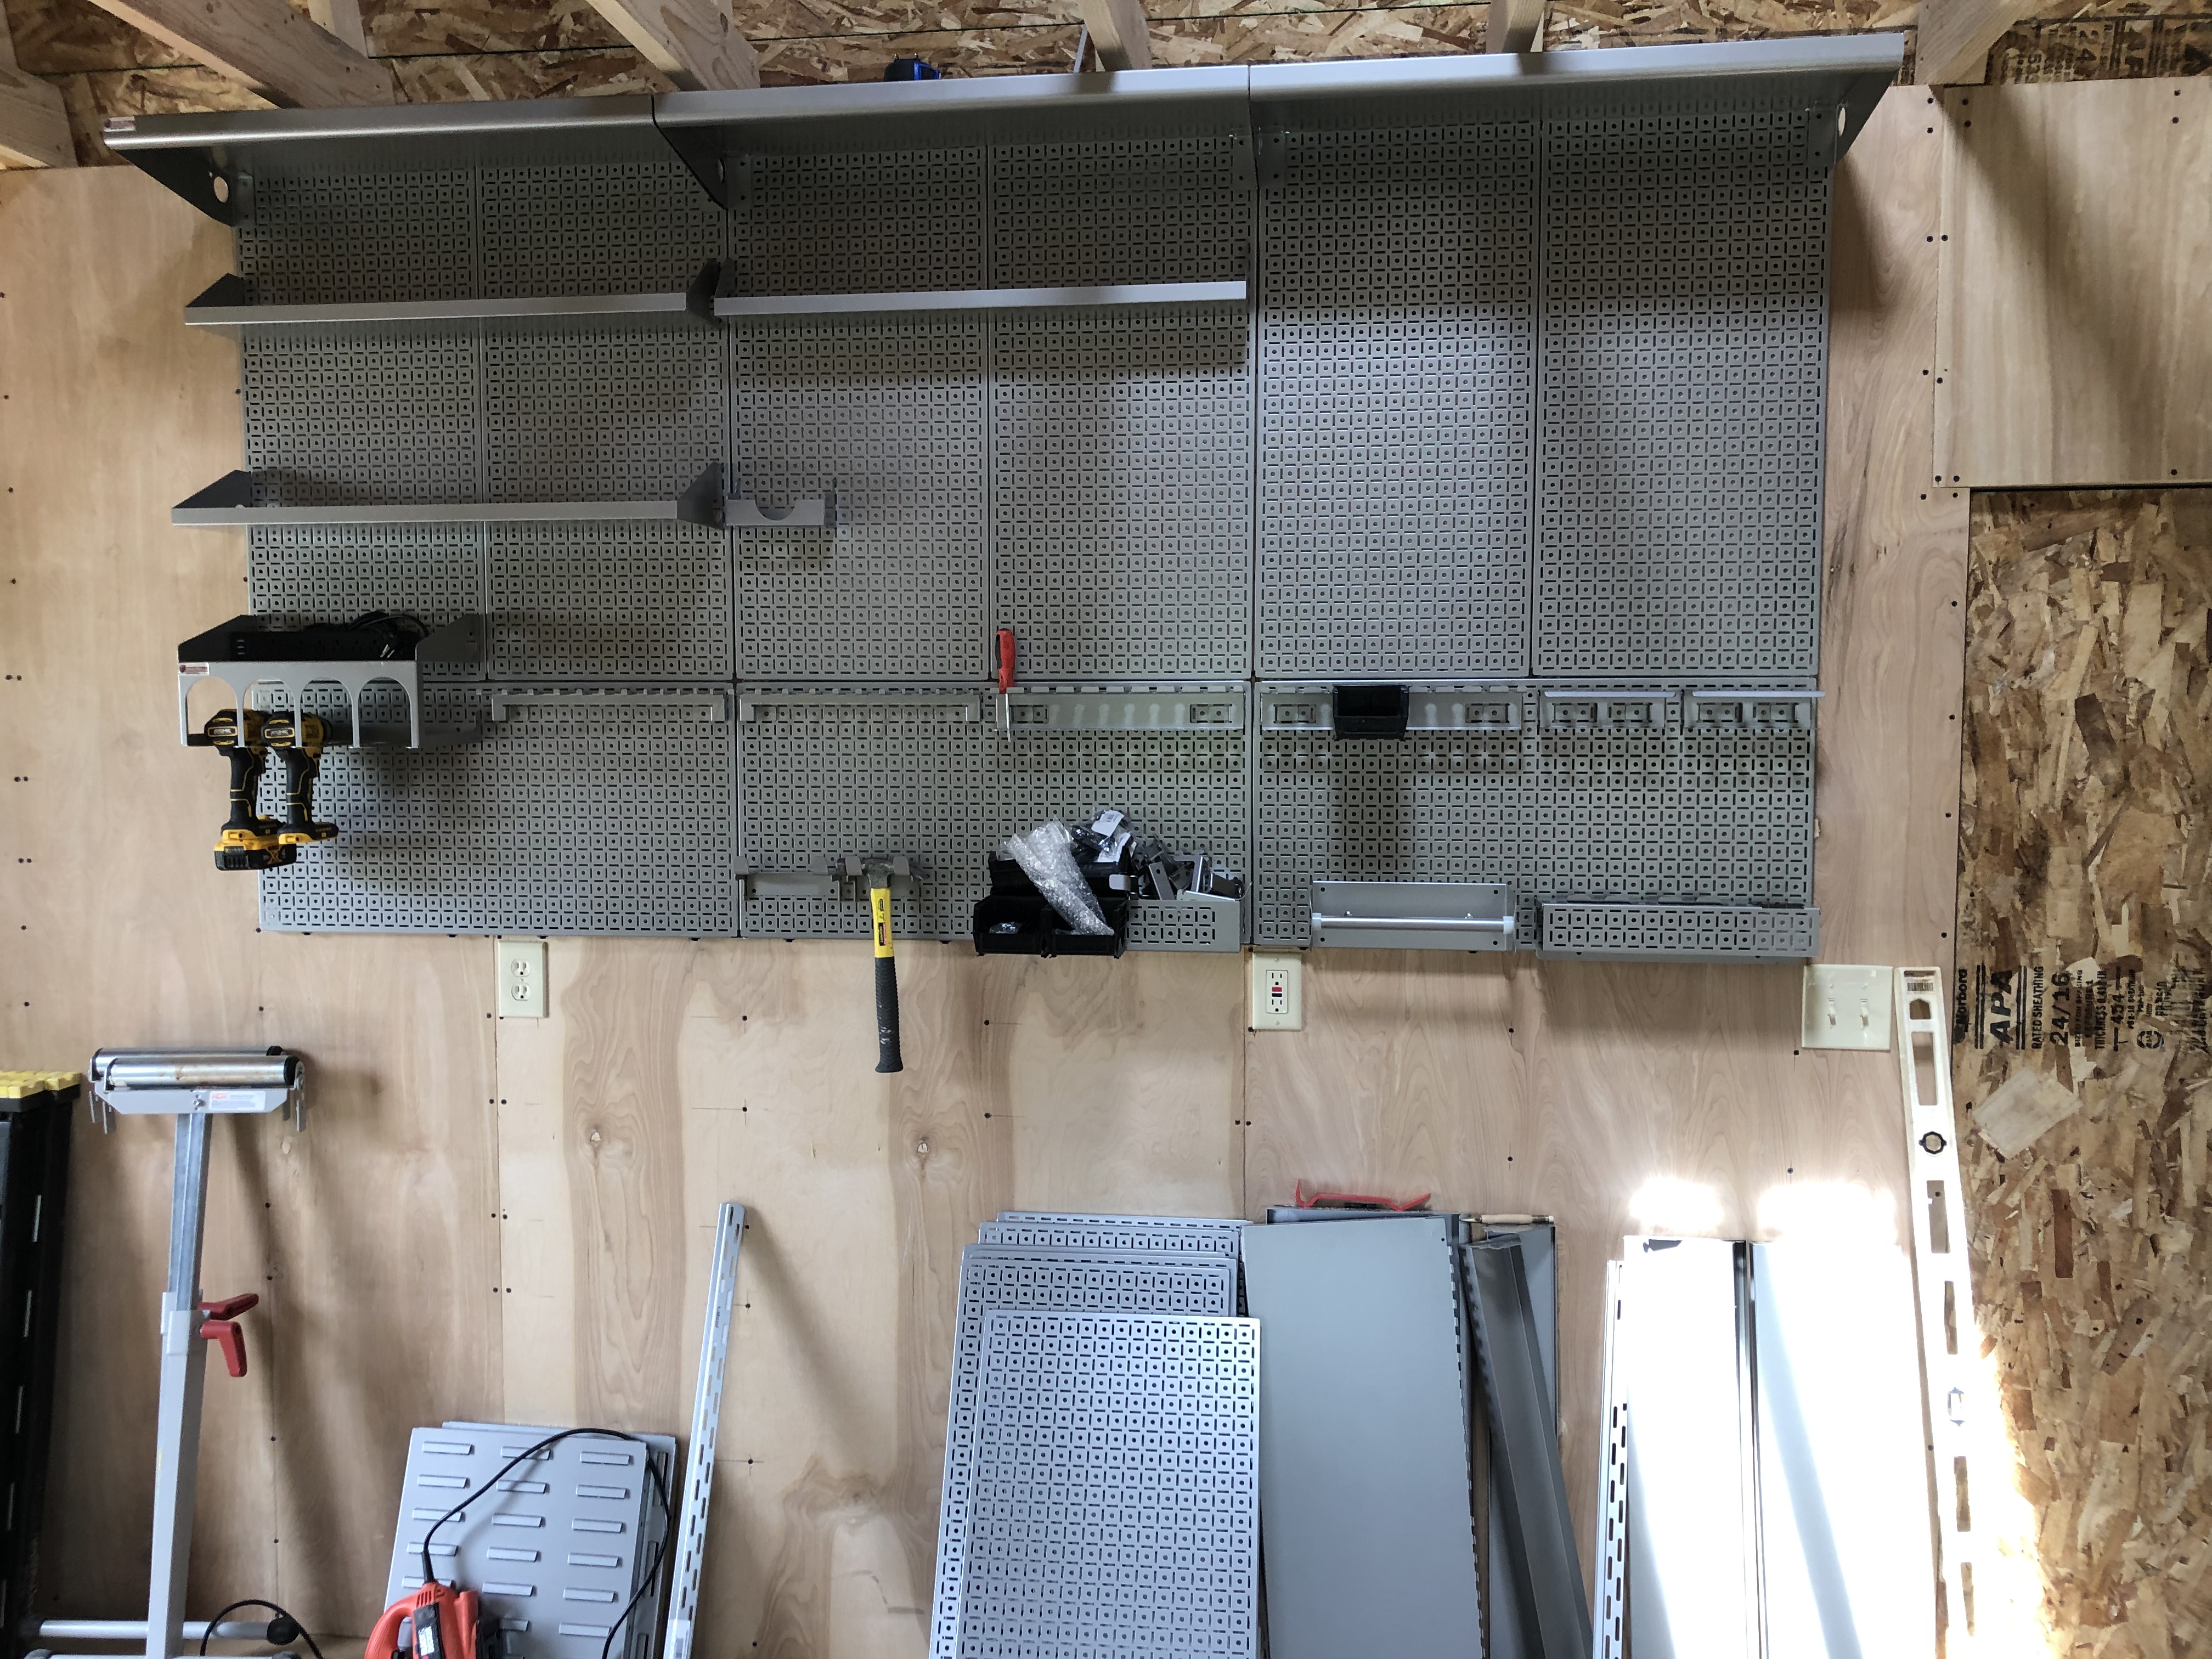
Now you should note those rafters right at the very top of the OmniWall. I ran into a couple of problems that I hadn't really anticipated. The first was the level we placed the light switches and the power outlets. I didn't want any floor level outlets so we wouldn't need to be reaching under things to get to power. I also need 4' of height for the OmniWall. When I went over what I wanted with the electrician I simply measured 4' down from the top of the wall. Based on that he could set the light switch at the standard height along with all the power outlets that would put them well above, the more or less, standard benchtop height of 35" (typical range in the US is 34-36").
Stud location really determined where I could place the OmniWall. The first issue I ran into is that I couldn't set it more than 1/2" below the top of the wall otherwise it would run into the outlets. Okay, no problem, and I merrily went on my way of setting the top cleat for the wall system. The OmniWall wasn't quite as easy to put up as I had hoped. Their instructions have you start with the top cleats and go down. That works just fine if you are dealing with a single panel but the large wall consists of two levels of panels, the top row made up of 6 panels hung vertically and a bottom row made up of 3 panels hanging horizontally which are then held together with some interesting pegs. If I was doing a multi panel install like this again I would start with the bottom cleats, everything would go together cleaner because what they don't mention is that those locking pegs create about a 1/16" space between the rows and if you measure exactly you will be 1/16' short. Plus with the bottom cleat in place first you can do a quick assembly of the two rows and a more precise location for the top cleat.
My second issue cropped up after the wall was in place and I wanted to put the top shelves in place. Well to correctly install the 12" wide shelf you need 12" of clear space ABOVE the top of the panels. Well my rafters were only 1/2" above the panels which meant I had to temporarily dismount the offending 4 rafters put the shelfs in place and then remount the rafters. Fortunately it wasn't terribly difficult but the space available meant I had to cut two of the rafters I little shorter to get everything in place. I might go back and add a little reinforcement to those two.
In the end everything is in place, although the OmniWall is a bit higher than I would have like to have it but its a compromise I can live with. The organizers that will go on the east wall are all single panel so they should fit just fine. Its more important for the tool station organizers to be at a more normal height. I'll tackle that wall next.
Wednesday, June 22, 2022

Monday, June 20, 2022
Greenhouse - Interior walls done...mostly
Once more into the ... greenhouse. I finally managed to get the last three panels for the north wall in the greenhouse cut and put up. The remaining greenhouse tasks are to purchase and install the exhaust fan, purchase and install the solar and then insulate the ceiling. Insulating the ceiling is looking a little tricky at the moment but I have some ideas (dangerous, I know). I do need to do some trimming out just to give things a more finished look and to knock down the splintery edges of the plywood.
 |
| West wall and the door, note the gardening tools starting to migrate inside already. |
 |
| East wall with a magnificent view of the...fence. Those windows are there to let light in rather than gaze out of anyway. |
 |
| The north wall finally sealed up, I unfortunately managed to cover up the vent with a spare piece of wood before I took the photo, but its there. This will mostly be the storage wall, a few shelves up high and a tool racks for all those garden instruments of destruction. |
 |
| The south or window wall. I still have my tools strewn across the bench top they will be gradually shifting over the to barn now, although there is still a lot of ceiling work to be done. You can just make out the baseboard vent on this side down in the lower right corner. |
Friday, June 17, 2022
Outbuilding Construction - Organization
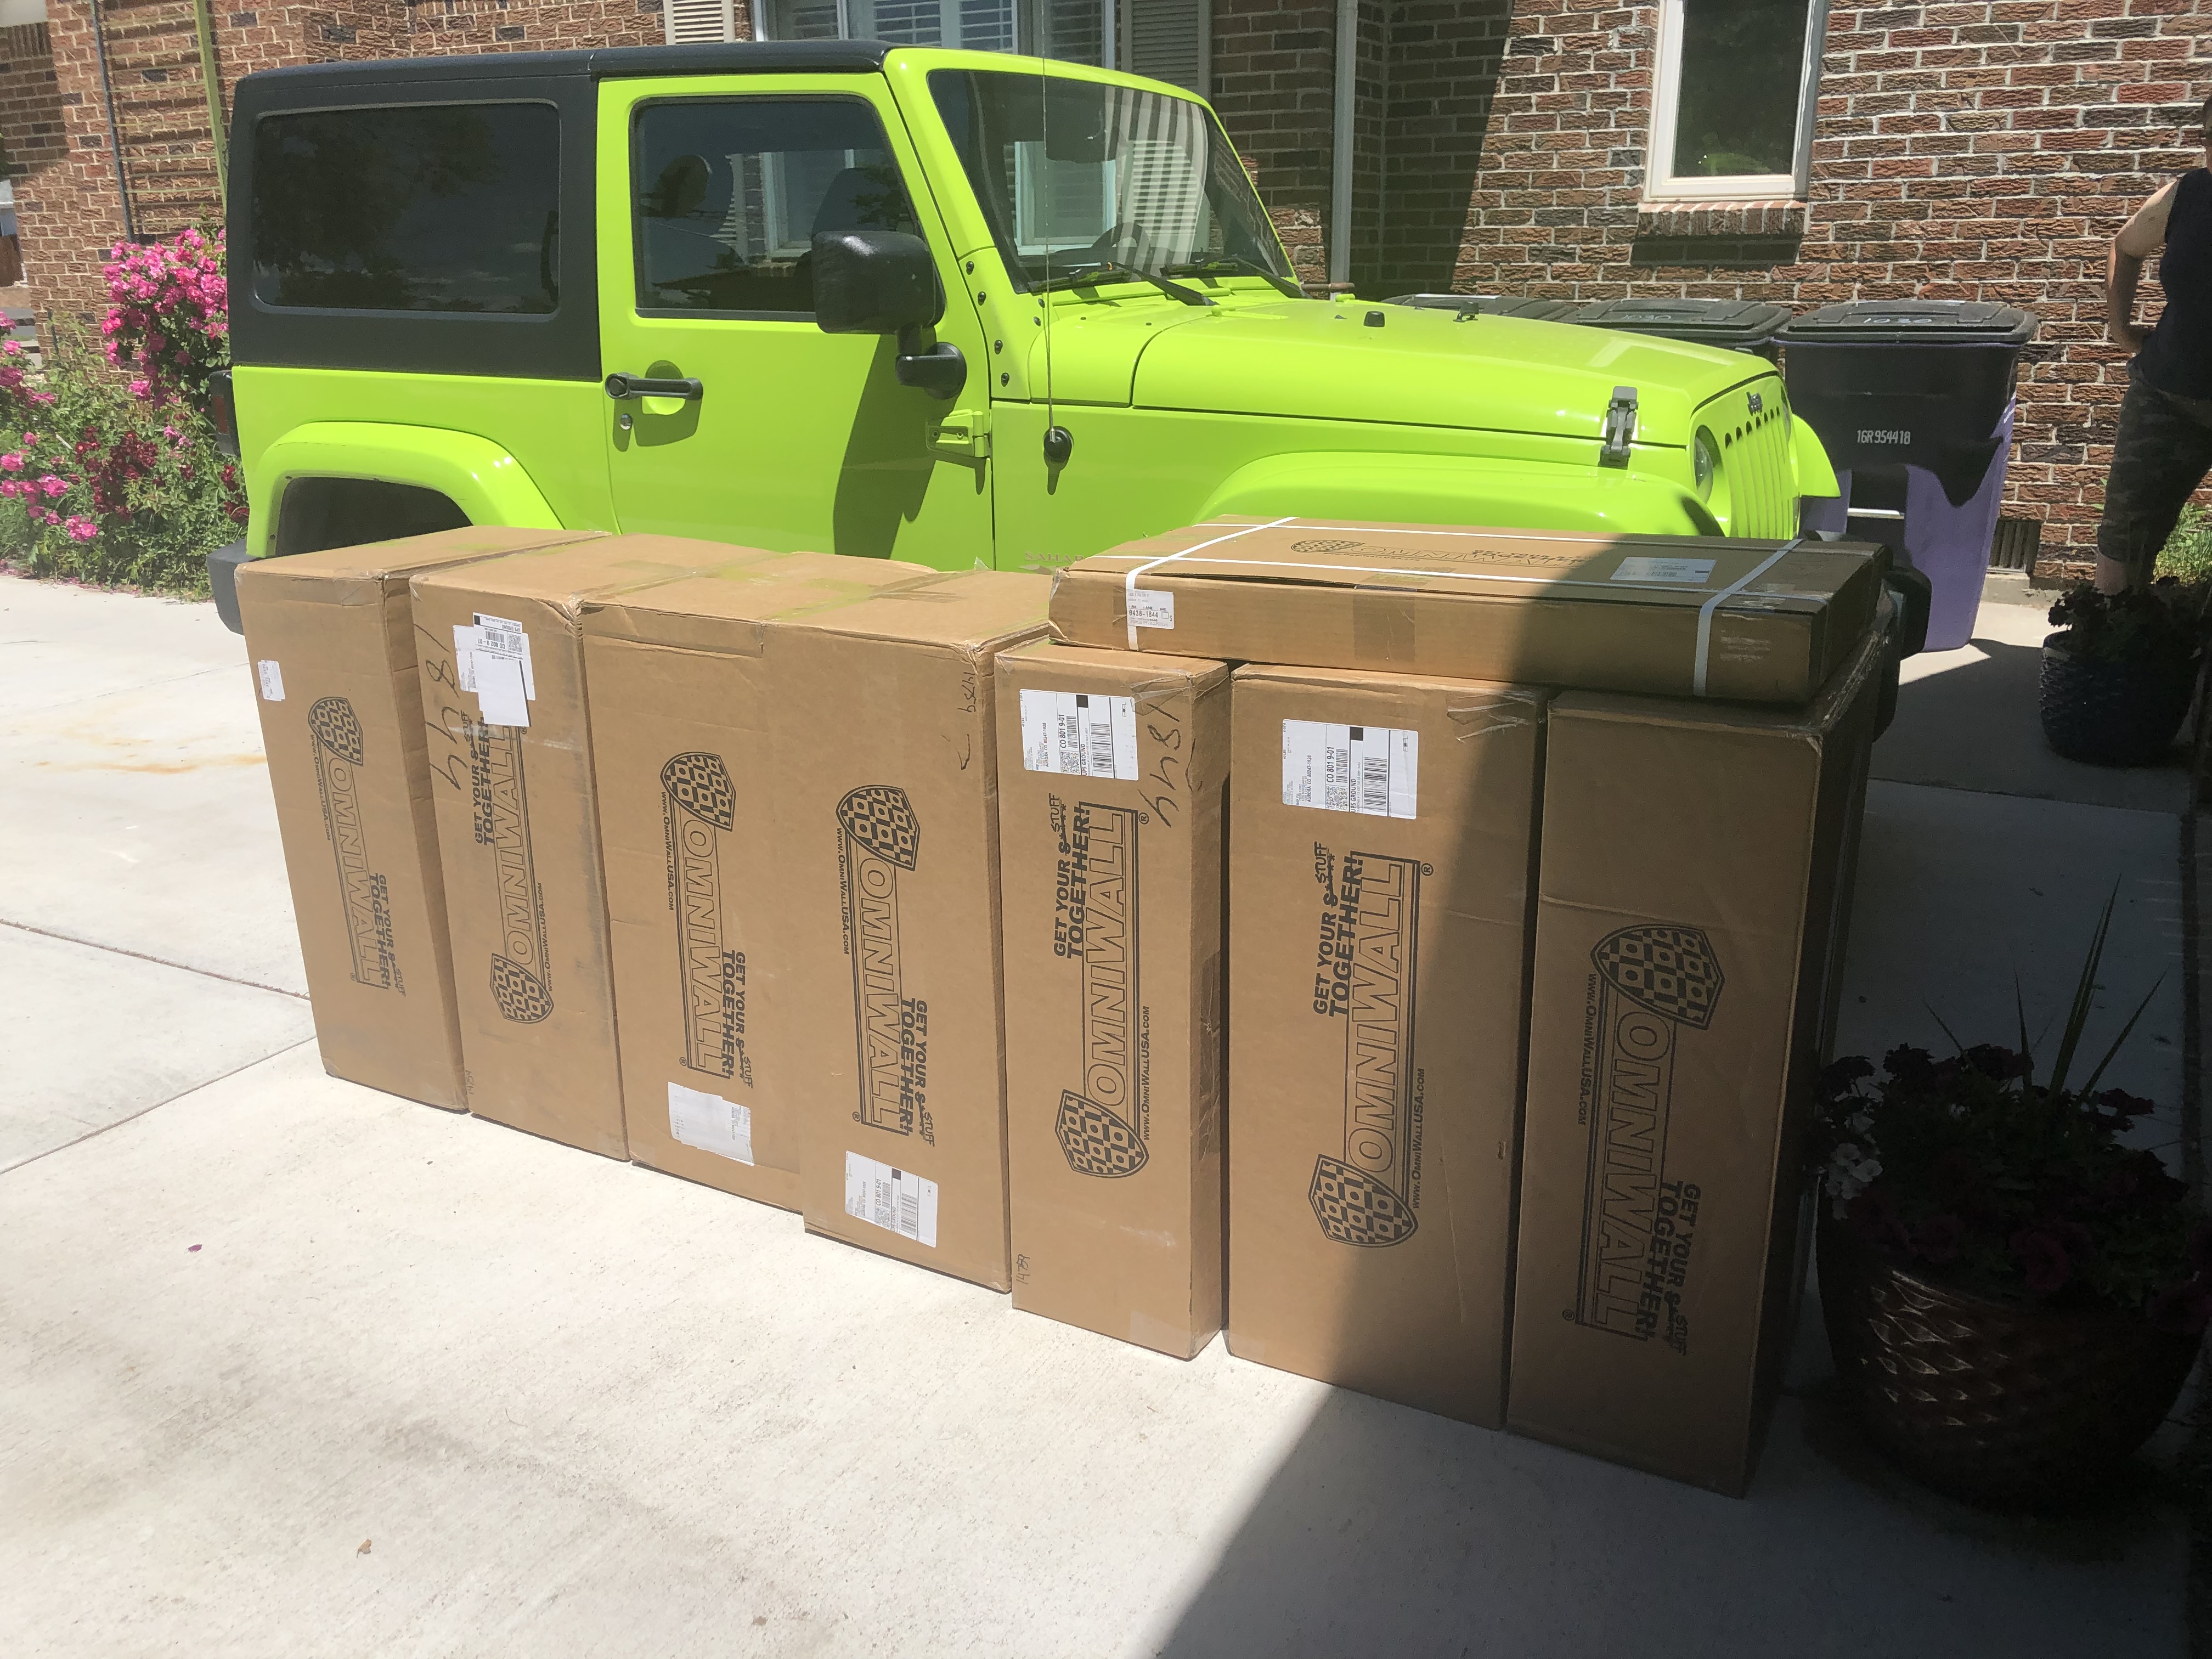
I was watching one of the many woodworkers that I subscribe to on YouTube. He works out of two car garage and needed some better ways to organize tools and what not. He went with a company called OmniWall (probably on a sponsor deal I'm sure). I was impressed with it enough to do some research and decided that this would be a good way to organize the tool stations in the shop.

And then there was a sale, a good sale so we pulled the trigger and made a pretty big order. It has arrived and of course we aren't even nearly ready to deal with this but now there is added incentive to get construction rolling and get this stuff out of the boxes and up on the walls!
Thursday, June 16, 2022
Outbuilding Construction... and there was Light
The electrician finished up his work and we now have full power in the shop building. Currently there are three lights on the lighting circuit. Two flat panel LEDs under each of the lofts and a single porcelain fixture in the center of the ceiling (about 13' up) that has a Quad Burst LED light in it. This is a variation of the "corn-cob" LED lights but in this case there are four panels that extend out from the center and focus the light down rather than to the sides and straight down like the most "corn-cob" lights do.
There are three 20 amp circuits powering 10 outlets. That should cover everything that we plan on using in this building. There is a possibility that some tools will remain in the garage because we don’t use them very often.
Of course now the pressure is on to finishing the green house and being able to move on to finishing the inside of the shop.
 |
| A couple of before pictures, the only light here is the partially open door and the skylight. Really not bad. |
 |
| And the same looking to the north. The door on the left will be the main door and the light coming through it is very limited because its only 4' away from the back wall of the garage. |
 |
| Doors closed and lights on. Note how the flat panels provide really good light under the north end loft. The Quad Burst LED is providing excellent coverage even though its 13' up and it provides light into the top of each loft, although not perfect by any means. |
 |
| And the same looking to the southeast. We won't have any problem working in the shop at night and with the rafters in place we can easily add more light if we need to. |
Wednesday, June 15, 2022
Tuesday, June 14, 2022
Outbuilding Work Continues
The garden is planted, all six beds, looking forward to fresh vegetables from that later this summer. The roses are in full bloom as are all the other early summer flowers so the backyard is quite colorful. All of that is thanks to my wife because the last thing you want is me trying to plant anything, I am cleared to water though!
The greenhouse still has one wall to seal up but the baseboard vents have been cut in and framed. Really just need an hour or so to finish that wall and then I can turn my attention to the exhaust fan and figuring out how to setup the solar power. That means insulating the ceiling will need to wait.
If you were paying attention to the interior pictures of the shop you would notice that the only rafters present are at the ends supporting the lofts. Since there is a distinct possibility of carousel animals coming in for repair at this point I have added a complete set of 2x6" rafters. The ability to add a pulley system of some kind to lift horses and what not up and off the poles is important, for instance the lion weighs in at close to 700 pounds and he needs a new base as the current one is beginning to sag.

In addition this will allow me to add can lights over the workstations if we need to. It will also make insulating that ceiling a whole lot easier. Getting those rafters up took most of a morning, a very hot morning. That building is definitely going to need a good exhaust fan as well. Now it just needs power!
 |
| The north end toward the northwest corner. I got a good deal on insulation so I bought everything I could and now have to work around it. |
 |
| Looking north towards the east corner. That swatch of sunlight is from the skylight, wish there had been on option to add another one. It let's in an amazing amount of light. |
 |
| Looking south towards the western corner. I added a total of seven rafters 2x6" beams. |
 |
| Looking south towards the eastern corner. I doubled up the rafters where the lofts were built. That will give me ability to add more flooring up there if we need to. I'm mostly thinking a strip around the edges in case we need to add can lights above the tool stations. |
Wednesday, June 8, 2022
Friday, June 3, 2022
Greenhouse Progress
While we wait for the electrician to get the shop wired up I managed to make a little progress on the greenhouse. Three walls are now insulated and sealed up and both baseboard vents are installed. I also managed to get the insulation in place on the remaining wall, I just need to put the plywood up on that now.
 |
| I saved the easiest wall for last. The opposite wall is the one with all the windows that took me days to finish. |
This should make it, mostly, workable at this point. What remains is a fan in the east side gable to pull air through (apparently that will help the plants) and keep it from becoming stuffy. That will require power and the greenhouse is just to far away from the main panel (which doesn't have any room left on it anyway) to put in a power line. So this building will go solar, I just need enough power to run the fan, possibly a small heater (when or even if needed) and charge batteries for the various battery powered lawn tools. The solar kit I was looking at initially is 400 watts not sure I need that much. The most expensive part of that system is the battery storage that will costs more than the whole solar kit!
Excited about getting to the work on the shop, a lot of work in front of us there as well. I'm opting to go with the Omniwall system to create tool stations for the lathes in particular. So much to do!
Wednesday, June 1, 2022

Subscribe to:
Posts (Atom)