Quotes

Life is short, break the rules. Forgive quickly, kiss slowly. Love truly, laugh uncontrollably and never regret anything that makes you smile. - Samuel Longhorne Clemens (Mark Twain)
Showing posts with label Sarissa Precision. Show all posts

Thursday, February 22, 2024

February Doldrums

I'm sure you can tell that February has not seen a lot of production from me. Its been a stressful month for a number of different reasons. I think the biggest was the whole Hippo episode. I'm glad I was able to get it done and delivered to my brother but I didn't get to enjoy the process and I didn't get to do everything I really wanted to do. He was more than a little demanding about the whole thing and said a couple of things that really upset me quite a bit. It happens in families sometimes and I'll get over it.

It did affect my desire to work on anything this month not that I lack for things to do. I currently have 3 projects (it could be stretched to 4) on my bench that I need to do something with. Finish is probably the word I'm looking for.

#1 - The Church. The church is at that awkward stage. There is light at the end of the tunnel with this one but what is left is tedious. I need to finish getting the stained glass in the windows. I need to get all the corner strips cut and glued into place and finishing textures applied. The roof, at least, is in place but there is a lot of paint work going on there. Enough that I'll probably pull out the airbrush to get the base coat on and then get the final weathering on the whole thing finished after that. I wouldn't be surprised if there isn't another 10-15 hours left to go.
So close and yet so far.

#2 - HO Scale Minis. There are 13 of these guys just waiting to be finished off. Just need to pull out the blues again and it should be reasonably quick. Maybe a couple of hours here.

#3 - O Scale Minis. There are 7 of these guys in exactly the same state as the HO minis. I stretching this into project number 3 since I really paint them all at the same time.

Just crying out to be finished even though I don't have either an HO or O scale layout at this time.

#4 - O Scale Gunsmith. The reasons I want to do this are mixed. This is a kit my wife actually started with just to see if its something she would enjoy doing. She decided it was not something she liked and further commented that the instructions required a translator (she is an IT person and while she is a director now she began her career pulling network cables, setting up servers and pcs). I consider this particular kit to be pretty basic. Its the Gunsmith kit from Stoney Creek Models and was part of the Crossroads Collection which Roger Malinowski envisioned as kits that he would keep available as opposed to his annual limited run kits. The reason I have pulled this out is because I recently learned that Roger had passed away from cancer. I have seen this announced on any of the model railroad forums that I frequent. I decided that I was going to build every Stoney Creek kit that I own, about a dozen, even though I don't currently have a layout for them to live on. This is the obvious first candidate since it has already been started. I plan to add an interior to this since there is the potential it might occupy real-estate that's right up front. While it has been started I wouldn't be surprised to see this one eat up another 20 hours or so of time to build and finish.
I think its been sitting in this box for about 6 years at this point.

Again its not that I lack any projects to work on. I just can't quite get up the enthusiasm to work on anything at the moment.

Thursday, September 28, 2023

World War II Project - 28mm Village Church - Sarissa Precision - The Walls Part 9

I finally figured out what to use for the window sandwich, paper! Specifically some heavy weight drawing paper. I tried it out and was mostly pleased with the result. I used the stained glass cut out for each window as a template and cut out the outline. I then held it in place and marked the areas I needed to cut out from the other side.

I glued the plastic stained glass panel in place with CA and also used CA to glue the paper on top of it. There is a "stain" on the paper from the CA soaking through a bit but paint will cover that. The paper sits lower than the built of "frame" around the window so it looks pretty good. It is a bit tedious with all of the cut and fit involved.


Cut to fit

Cut outs marked

Glued in place

Looking good so far. A little paint it should pass muster.


Monday, September 18, 2023

World War II Project - 28mm Village Church - Sarissa Precision - The Walls Part 8

As work continues mistakes get made. I have a couple of pictures below of the biggest ones so far. My next goal is to figure out how to best sandwich in the stained glass into place. When I started this stretch I was more worried about cutting the stained glass to fit. That turned out to be much easier than expected. Its amazing what you can do with a sharp knife. Now I need to figure out how to cut out the interior piece to hold it into place. That is proving to be a bit more difficult.

Progress so far:


This is what happens when your knife is not sharp enough.

Another mistake. While I was cutting this one out I miss-counted and cut the wrong pieces out on the left side.

I trimmed off the offending pieces.

And then I glued replacements in. I literally had saved, accidentally, all the cutouts so I had plenty to choice from. Once I stipple on some texture you won't be able to tell I had made a mistake.

Cutting out the stained glass was easier than I expected.

Here is the whole wall

This is how it will look from the outside.


Monday, September 11, 2023

World War II Project - 28mm Village Church - Sarissa Precision - The Walls Part 7

After a bit of a break for ReaperCon its time to dive back into the Church. I can see a light at the end of the tunnel now so I want to push through this project and move on to a couple of others.

I'm continue moving forward with the walls. Again everything is easier when they are flat. Here I have added the exterior detail to the windows and started added the stone edging for the interior arches. At this point its just a lot of cutting, nothing terribly difficult. I also started adding the interior window detail, again I'm keeping this simple, its not going to get a lot of scrutiny during a game so I'm okay with it.

I have come to a bit of a stand still with the stained glass. I realized that I need something to sandwich them into place with. If I use the cardboard that I have been using then it will be slightly "higher" than the surrounding stonework. I have to decide if that's going to bother me or not. But I do need to cut out enough of those pieces to add match the configuration you see from the outside.

These are the interior arches, cut out and ready to be installed
The combination view. Exterior details visible while the interior arch stones are glued in place,
A couple of arches after the glue has set

And here is the arch all cut out, 


Tuesday, August 29, 2023

World War II Project - 28mm Village Church - Sarissa Precision - The Walls Part 6

Progress has been a bit slow. I'm in the process of getting ready to head out to ReaperCon, down in Denton Texas, for Labor Day weekend. I didn't manage to get anywhere with projects I had in mind so if I take an entry it will likely be something that I sitting on the shelf, likely one of those French Halftracks at this point. Since we have a pet sitter stay with the dogs rather than using  a kennel it means we have been getting ready for a visitor.

In the meantime I have set the steeple aside and moved back to the walls. First step was to make up some interior arches for the windows, like I did with the steeples, with a slightly different approach. I cut the upper arch as a single piece and the straight sides and bottom edge will be three pieces instead of a single piece like I did with the steeple. I also decided that the interior arches need a little help so I cut out some stonework to wrap around those as well.

Now here is the potential step to far. Since I'll be putting in stained glass (plastic) in the windows I was thinking about how to take a picture of the interior with light streaming through those windows. There are a couple of options.

1) Do not glue the short walls in place. This would allow me to remove a short wall for a photograph and I could remove any of the four short walls so this would be a very flexible solution The long walls are sturdy enough that I think this would work. Down side is that its likely that the short walls would just fall out of place on regular basis. They just are designed for that type of removal, plus the exterior quoins could be damaged from the handling.

2) Working door, now I find this idea intriguing. It would certainly limit the potential camera angles, but I'm probably really only going this series of photographs once anyway (which means I could do option 1 once and just glue it together when I'm done). I went ahead and cut out the door so I could play around with it and think about how  to make a set of working hinges, or just buy some hinges. I'm sure there are some out there. Again the downside to this the limited viewing angle, but I would always be able to take photos this way.

All of that means I'm thinking about some extra interior detail. This how snowball gets started.


Cutting out the small arches, the sheet of large arches and the strips are up towards the top of the picture.

Bunch of arches cut out, a few extras for mistakes.

Gluing arches in place on the short walls. Basically followed the same process on the long wall.

Working through the arches. I used the walls themselves for the initial template then used a ruler and compass to lay everything else out. I found this oddly satisfying work.

The group shot. Lots of pieces that have been scattered across my work surface all brought together for a group shot. Well most of them, some of the smaller stuff is in a plastic storage box.


Thursday, August 24, 2023

World War II Project - 28mm Village Church - Sarissa Precision - The Steeple Part 5

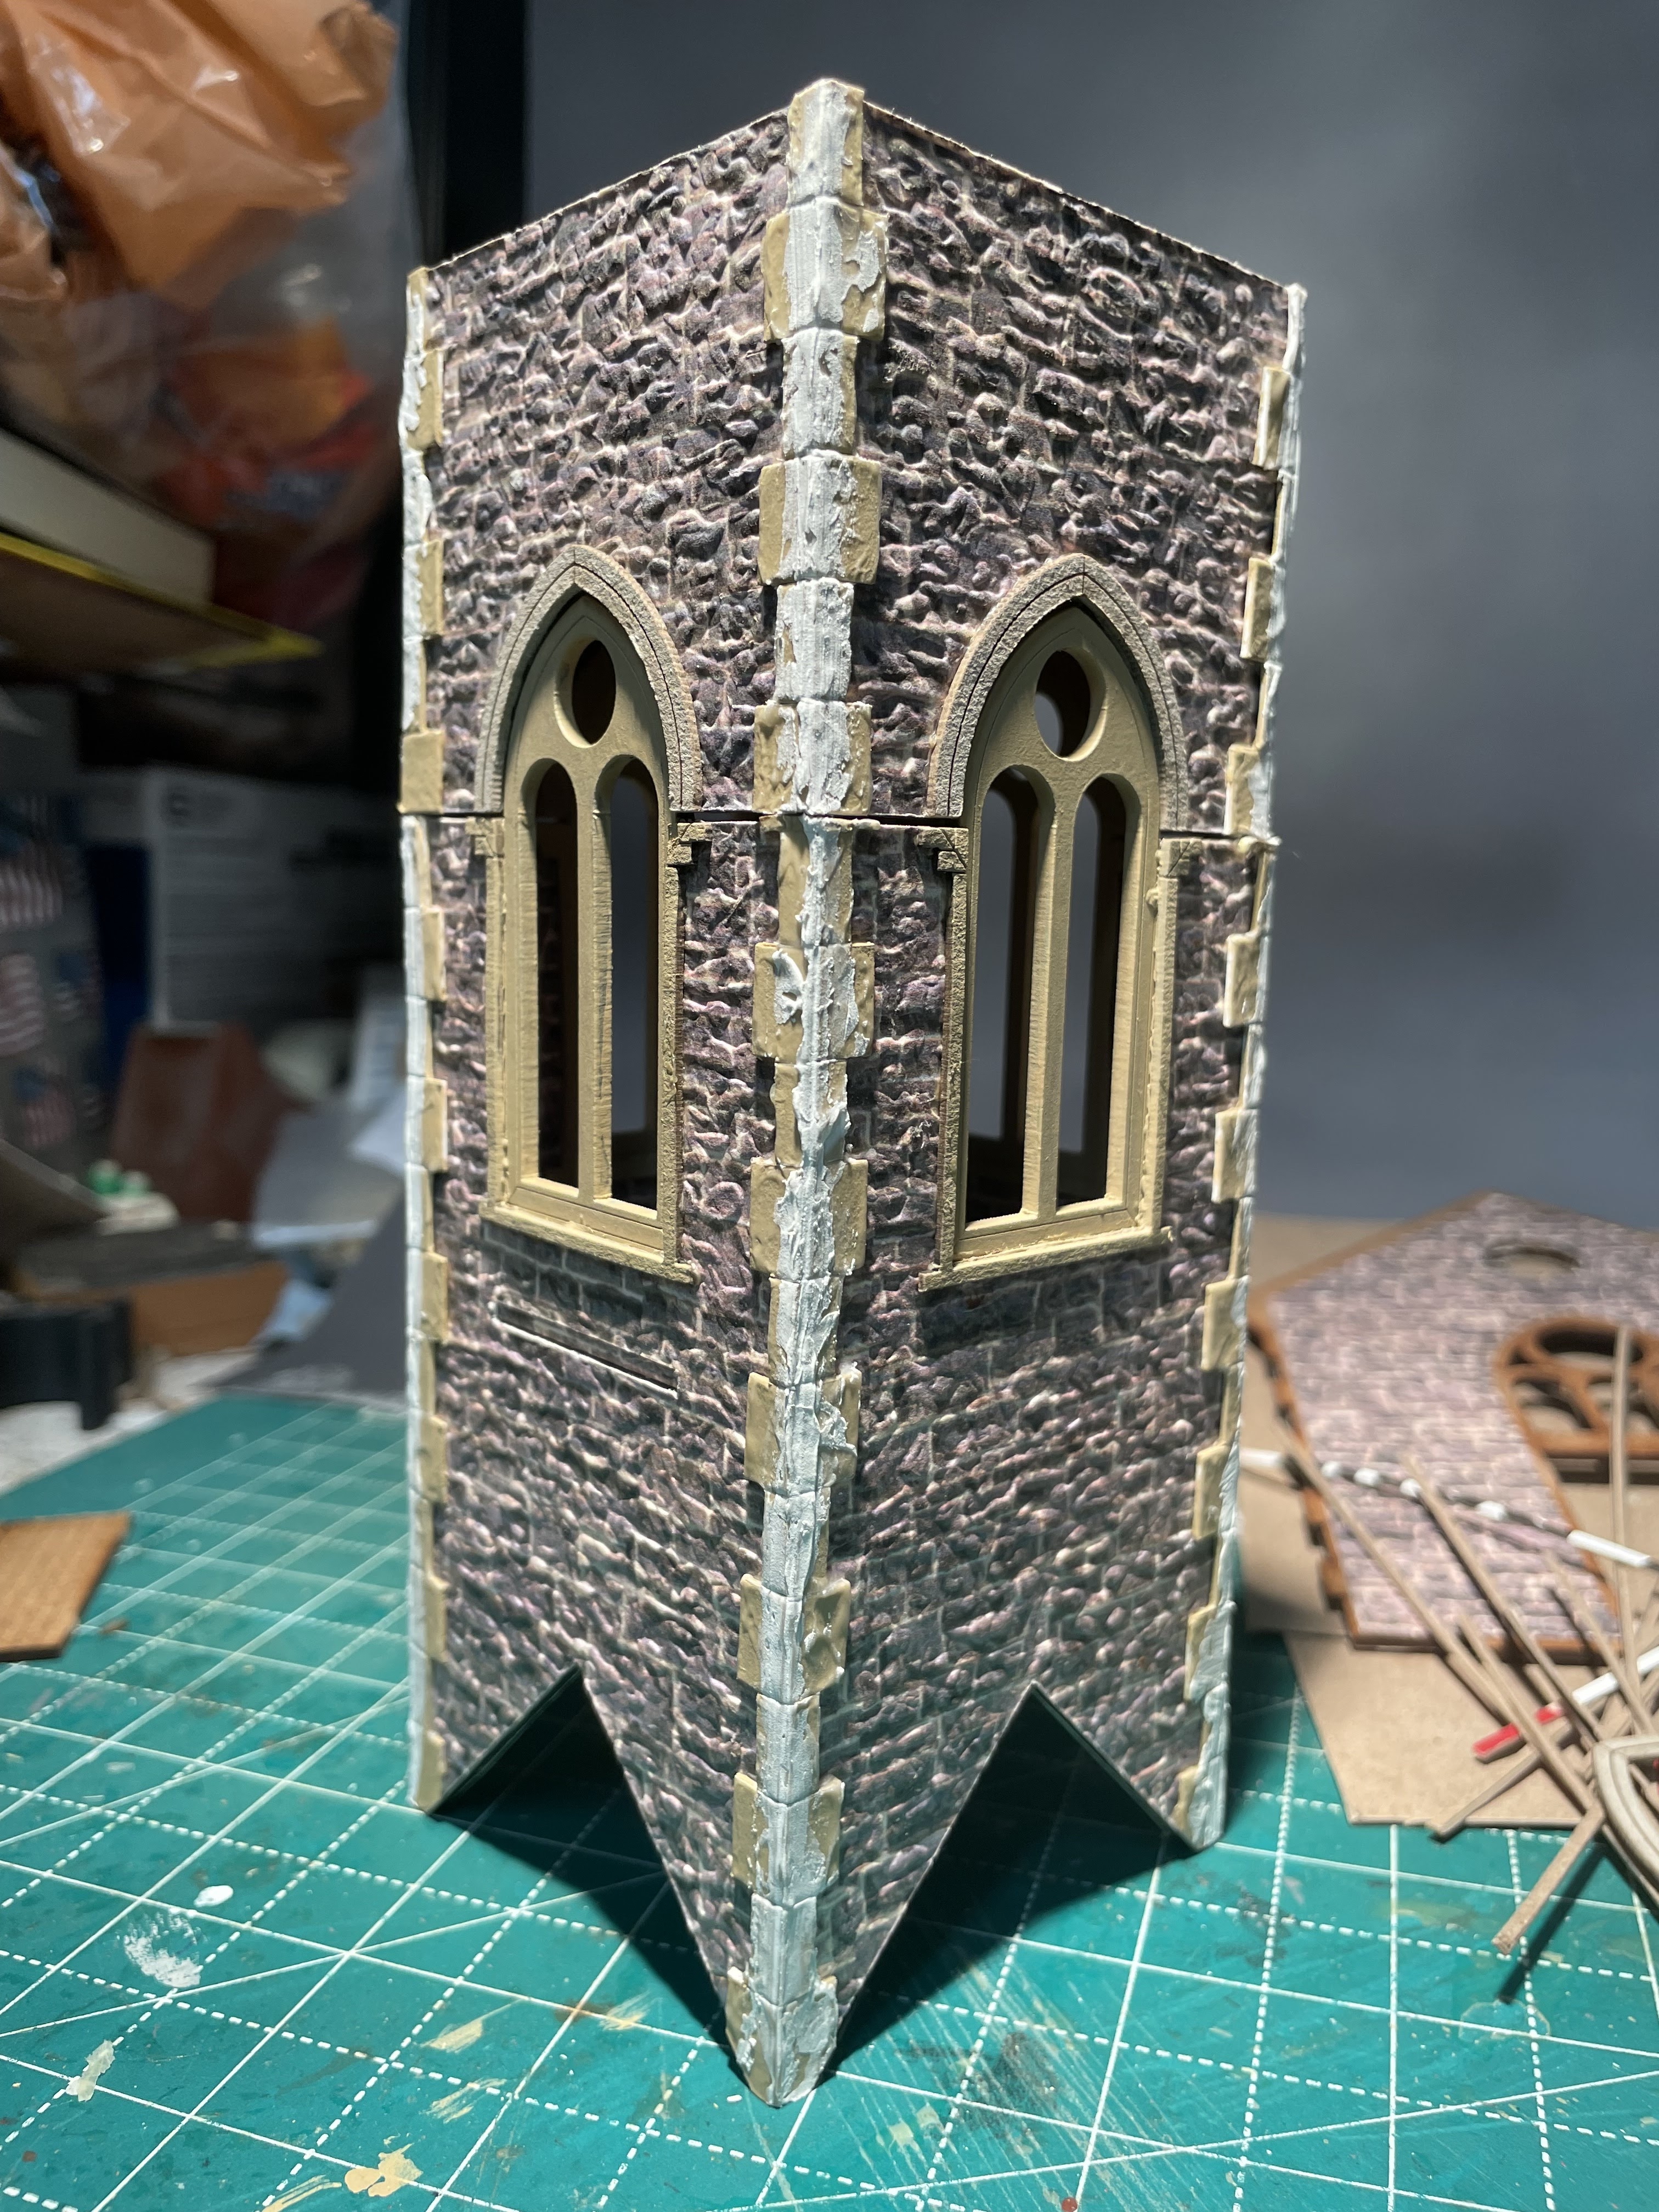
I was going to set the steeple aside till I was ready to add some extra roof detail that I haven't quite figured out yet. However, I was looking it over and felt like the stonework needed a bit of texture. I found some Liquitex mat gel in the cupboard and thought I would give that a try. 

It looks okay, however, it didn't really fill in the edges the way I wanted. I let it dry and went back in with Vallejo plastic putty, again something that I had near to hand, I applied that right along the edge and got a much better fill than the gel did. I think maybe some spackle would achieve the same effect.

Here is the top of the steeple, minus the roof

Here is the bottom, I like the soft texture that the gel added I just need a sharper edge.

Here we are after the putty has been added. Fills in the the edge gap and adds a bit more texture. I had to go back and add some separation lines between the stones.


Thursday, August 17, 2023

World War II Project - 28mm Village Church - Sarissa Precision - The Steeple Part 4

The steeple continues to move along. From a detail standpoint I wanted to try and keep everything relatively simple, made easier since these windows don't need any glass. I simple traced the frames for the exterior on to cardboard that was about the same thickness and glued those to the interior side of the windows. Its pretty dark so no real detail is needed beyond some suggestion. I did manage to reverse one side and managed to glue an exterior detail to the inside...oops.

I also painted all of this stone work with the "neutral" stynylrez primer. Again it took a couple of coats to get good coverage the cardboard really soaks it up. I think it sets off from the darker stonework without being to jarring. Then I finally glued the lower part of the tower together. I think its looking pretty good at this point. I also finished off shingling the steeple roof.

I need to work out the rest of the details on the roof at this point.


Gluing on the extra window details on both the exterior and interior sides.

Gluing on the last of the shingles. Had to get creative with the weights since I couldn't get a clamp in this spot.

A quick look at the tower all glued together before the quoins (my new word!) have been glued in place.


Just getting a feel for how things are looking at this point. It feels like the steeple is getting taller!


A few red devils sneaking in for scale. This is a big building.


Gluing on the quoins.

At this point I still contemplating trying to avoid cutting anything till after I had them glued to the top of the steeple.

After struggling with this, I opted to cut them off to make everything easier to work with

The interior of the quoins glued in place.

The mostly finished steeple. I'm contemplating adding some texture to the quoins at this point.

Adding the top, for another look

And another dry fit. just to see how it looks. Looking good, although the height of the steeple is really starting to bother me,


Monday, August 14, 2023

World War II Project - 28mm Village Church - Sarissa Precision - The Steeple Part 3

Moving forward with the steeple. I finished painting all of the edging stone and started to glue that into place inside the upper section of the steeple. I also added the decorative arch on the inside and another matching arch on the inside. I simply used the laser cut arch as a template for the interior arch and left off the centerline detail that appears on the exterior version.

I like to include the details but I'm trying to not go crazy with it. I used the cardboard from some milk bone boxes which is a pretty close march to the thickness of the laser cut cardstock. I also trimmed up the shingles on the two of the sides of the steeple roof and started to add shingles to the remaining two sides.

The first two sides trimmed. I didn't wait long enough and managed to tear the cardboard on one side.

Here you can see the exterior and interior arch trim. I'll need to go in and clean the inside of the arch  before I start painting.

While you can't see them I'm gluing in the edge stones in the corners. Lots of little clamps to help everything stay in place. So many clamps that I can only do two opposite corners at the same time.


Friday, August 11, 2023

World War II Project - 28mm Village Church - Sarissa Precision - The Steeple Part 2

I pretty much jumped into the steeple without looking first. I just started where I had with every other wall, gluing on the stone paper. Then I started thinking about the assembly sequence. The best thing to do when thinking is to do the monotonous so I drew out the stonework for the corners, both inside and outside  Then I searched for a color to paint this stonework which I will also use on the windows. I settle on Neutral Primer from Badger . Unfortunately the outside of the cardboard that I'm using has a very glossy finish and doesn't take paint very well. I should have thought about that before I  scored the centerline on every single piece I had cut out! I think if I run some sandpaper over the gloss finish that should give me enough tooth for paint so no harm done at this point.

Here's where things are landing at this point:

Dry fitting the steeple together after all the paper has been applied and trimmed.

Looking down to see the "wood" floor

A bit out of sequence but here is a dry fit of the whole steeple

I cut out a single piece of trim to see if I had the proportions right. Looks pretty good at this point.

Cut six pieces, four for the outside and 2 for the inside (with the aforementioned issues with the glossy cardboard). I think I'll glue each corner piece on as a single piece and then cut them.

A little close up.
Throwing in a couple of paras to see what they think. Probably that this position is very exposed.


A bit out of sequence. Here is the upper portion of the steeple that the roof will rest on. Note that I remembered not to paper the inside portion that will be covered by the roof!
Gluing in the interior stone work on the bottom half which is, more or less, going to be visible.


Since I felt like I had the proportions right, I went ahead and cut out a batch of "corner" stone. This still isn't quite enough to do the whole building, but it will get me started. I also need to figure out how best to do this type of edging for the four arches on the inside, something else that should be done before I start gluing walls together.

A start on the shingles for the peak of the steeple.