Wednesday, December 28, 2022
Thursday, December 22, 2022
Returning to Denver's Warehouse Row - Another Look
Our thoughts have turned to what room we will be renovating next. I'm pushing for the "library" room, a small bedroom that has a bunch of bookshelves plus our large craft cabinet in it. This would involve getting rid of the existing bookshelves (or at least moving them somewhere else in the house) and then painting the walls and probably the ceiling. Once that's done then we can start putting up new shelving.
There are couple of requirements for the renovation. First it has to provide some desk space, probably under the window. This is important as we both work at home now and while we prefer to be in the same room, however, when we are both on conference calls one of us has to move. Right now I'm moving into my workshop room in the basement which means I'm constantly putting away model projects because I need the desk space. Which further delays my model projects!
Second is to replace the bookcases with bookshelves. What do I mean by that? We need something that's more flexible than a standard bookcase. My intent is to line the walls with french cleats which will allow let us arrange the shelves as we need. While we would still be restricted by the location of the cleats we would not be restricted by height (other than the ceiling) or the width of a bookcase. In turn this would allow me to use the cleats to attach a layout to (the secret reason for using french cleats) directly to the walls without a lot of extra effort.
The third requirement is non-negotiable at this time, the craft cabinet must stay. While it is fairly compact when closed when fully open it occupies a 7' width. However, it would be closed the majority of the time and it doesn't have to be fully opened to use. I will capitalize on that aspect. Since the cabinet doesn't have to be tied to the wall I can leave a gap behind it to provide a limited amount of staging which would, again, be suspended on french cleats to a spot behind the door where cassettes for staging would reside. This would keep these hidden except when the layout is in operation.
I have been studying Warehouse Row on Wynkoop street for sometime now. Recently I asked a question on the D&RGW forum about what local or job switched Wynkoop street. A fair amount of information tumbled out (and may result in an article for "The Prospector" the Rio Grande Modeling and Historical Society's quarterly publication) in a fairly active discussion.
This is the discussion that unearthed a photo that showed a diamond crossing directly under the 15th street viaduct on the east side. This crossing doesn't show up on any Sanborn map that I have access to and it would be crucial to switching the area efficiently. In fact I had added such a crossing on the last plan that I had drawn but centered between 15th and 16th street.
 |
| Photograph by John Hill. A picture that I had not seen before. Its sometime after the 15th Street viaduct was put in and you can see some interesting trackwork right underneath it. This is the kind of information that can be found when you ask a question in the right forum! |
The amount of space available for the main section of the layout is 13' 9". I was messing around with scales and I think I can almost fit the entire area between the Speer Viaduct (across Cherry Creek) all the way down to 16th Street with very little compression needed. I have been doodling around with that concept for the past week or so. The problem I'm running into is the arc of the curve needed to move trains in and out of the staging area. So nothing final by any means but I think I'm getting closer. Close enough that I have a bought a some freight cars off of eBay (great deal on that one) and I'm looking for some motive power. The 1958 period allows a lot of leeway there; Alco RS3, Alco S2, Baldwin VO660, Fairbanks-Morse H10-44 and H15-44. I don't know exactly what was used in the area but all of those are available, on way or another, in HO scale. I do know that these area was handled by the 7th Street Yard and I think in that long discussion it was determined that it was probably not a specific job just handled by the yard crews probably at night or early in the morning. Still information to uncover.
 |
| Picture is a little small, but this map is pieced together from three different Sanborn maps. If you slide the map further to the left the edge of the 16th Street Viaduct just goes over the edge of the space. Without doing to much measuring I think I don't need to lose more than a couple of inches to get the whole 16th Street Viaduct on the layout. This makes for a great LDE that fills the space without any major constraints to deal with. |
Wednesday, December 21, 2022

Wednesday, December 14, 2022

Tuesday, December 13, 2022
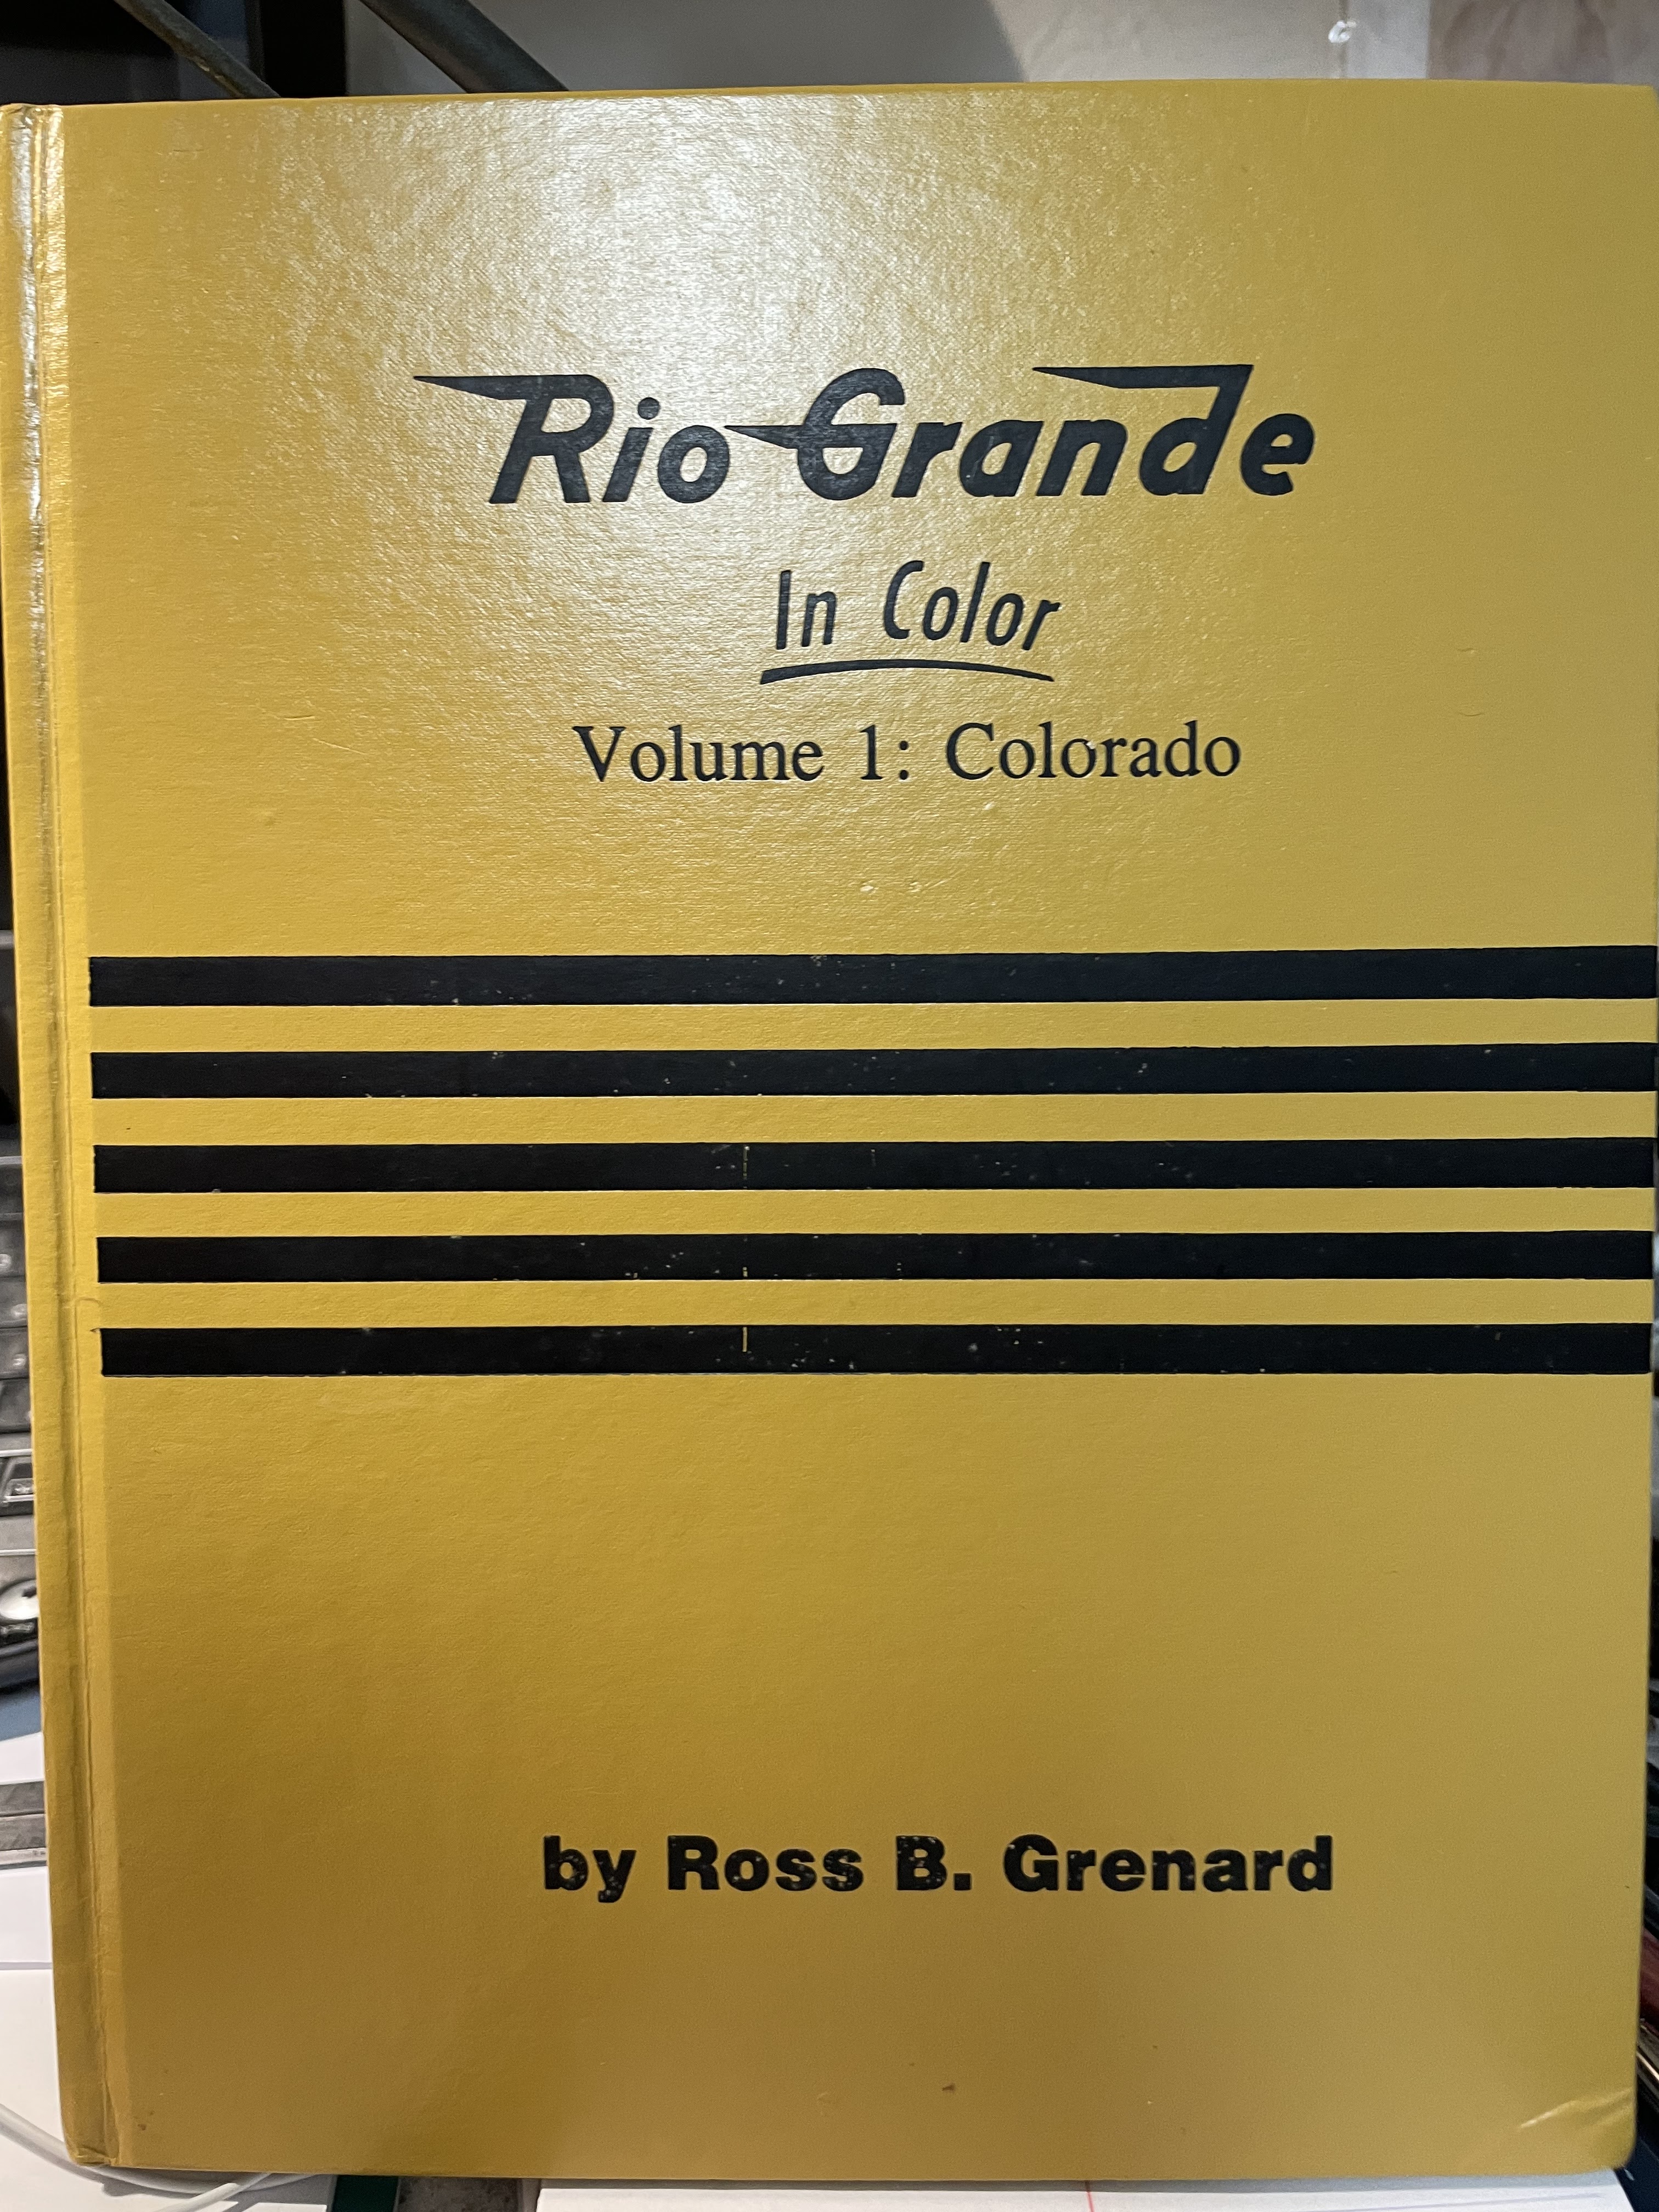
Acquisitions - Railroad Book (another one); Rio Grande in Color Vol 1: Colorado
I continue to build up my collection of D&RGW reference books. This one is out of print and missing the dust jacket but the price was pretty good compared to what I have been seeing so far. This one was written by Ross Grenard and it is a 1st printing.
I have thumbed through is a little bit and the pictures are great and its pretty much confirmed that I could use Alco RS3s to switch the Warehouse district. There are other options as well, but I think I'll concentrate on trying to acquire and RS3 in Rio Grande colors.
Monday, December 12, 2022
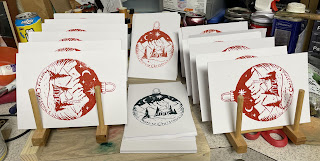
Christmas Productions - Complete
Everything is done! We were running into issues with the ink drying fast enough so we elected not to put a print on the reverse. My wife did a little bit of calligraphy on the backs instead and that's how they are going out. Most are already in the mail, plenty of time for Christmas.
I also finished all of the puzzles. I have cut 9 of these over the past month or so. Two will do service as "demo" puzzles, just something to have out on the table when we do a craft fair. The other seven are for family and are done in plenty of time to be wrapped without stressing over getting them done!
 |
| The two on the left are the prototypes, the six in the middle are for my family and the one on the right is for my wife's. I tried to select pictures that had some meaning for the recipient. The exception to that is the mountain shot. That's a bit more generic but its one of my favorite photographs so I guess it has meaning to me! |
Thursday, December 8, 2022

Wednesday, December 7, 2022

Saturday, December 3, 2022
An Early Christmas Gift - Railroad Books!
On the D&RGW forum (an IO group) a gentleman was starting to sell off some of his extensive railroad library. I was a day late and I missed a couple of the books that I would really have liked to acquire but I still did pretty well, especially at $10 a piece.


Colorado Railroad Annual #11
Colorado Railroad Annual #18
Trains in Transition - Lucius Beebe
Highball - Lucius Beebe
Highliners, a Railroad Album - Lucius Beebe
And the best one, for me anyway
George L Beam and the Denver & Rio Grande - Jackson Thode


A bit of a treasure trove for me.
Friday, December 2, 2022
Christmas Productions - Progress on the Roscoe Puzzle
There is a bit of history behind this picture of Roscoe, who passed away about six months after this Christmas picture. Its the last Christmas we celebrated in my Mom's condo in Boulder CO, just west of the Pearl Street Mall. Roscoe was my Dad's Portuguese Water Dog, when he passed (Oct 2015) away Roscoe and my Mom moved into the Boulder condo. Going from 5 1/2 acres of backyard was a little tough on Roscoe and my Mom just couldn't keep up with his energy. He did adapt pretty well to condo living though. So my sister took Roscoe to live with her in Seattle. She had a condo about 3 blocks from the Space Needle and he had a grand time living there. He had been ill just before Christmas and they were still doing tests, if you look closely you can see that his right leg has a shaved spot for an IV. He spent a very energetic Christmas with all the people he loved and he passed away about six months later.
It should be a pretty special picture for my sister, I don't think she even knows I took this photo at the time. It took about another hour or so to finish cutting this one up. I wanted to be sure to capture his eyes as a single piece otherwise they would be lost in all that black fur. I cut the nose and mouth as a single piece as well. The piece count on this one is a bit smaller than the last few I cut; 163 pieces down from about 180. My goal is to hit about 185 or so which is 2.3 pieces per square inch for an 8x10 puzzle, I figure anything over 160 is pretty good at this point. The number of pieces directly affects how difficult the puzzle is and you increase the difficulty by disguising corners and using a non-grid cutting technique (usually just referred to as random) but adding whimsies reduces the difficulty, a bit, because it gives the solver something pretty specific to build from.
There are a couple of things that I'm working on the most; cutting the whimsies (typically involving some pretty extreme changes in direction) and making sure that I'm cutting good interlocks so the puzzle doesn't completely fall apart while you are putting it together!
Here are the final steps finishing up the Roscoe Puzzle:
 |
| I had finished the edge previously and this is my second time around as I work to the inside. If you look close you can see that a couple of whimsies have already been cut out. |
 |
| This is probably my third or fourth pass, I think all the whimsies have been cut out at this point. |
 |
| Here is the part that still needs to be cut out after that last round of cutting. |
 |
| Down to the last bit here. |
 |
| The three important pieces I want to be sure to cut; eyes as a single piece, nose and mouth as a single piece and his dog tag as a single piece. |
 |
| All cut out! Time to flip it over and sand the back down. This is why I have to of this little jigs with only two sides. Its easy to sandwich the puzzle between them and flip the whole thing over without creating a huge mess. For sanding I start with 180 grit followed by 220 and then 320. The both sides of the plywood (basswood in this case) were already sanded down to 320 before I started but all the cut out from the cutting has to be sanded down after I'm finished. |
 |
| The most fun a person can have, counting puzzle pieces. I do stacks of five and just line them up till there are no more to stack! 163 pieces for this one. |
Thursday, December 1, 2022
Christmas Productions - Puzzles and Cards
I have finished a 50 card run of the Christmas card in red ink. These will need to dry before I can do the black on the reverse. That should give me time to at least carve the block for the reverse side now!

On the puzzle front here are a couple of in progress shots just to show a little of how I go about doing it. I don't know if other puzzle cutters approach it the same way or not. There are a fair number of them out there that do this as a business.
 |
| Again, I use a frame to keep it all together and place each piece as I cut it. Here the edge is all cut out. |
 |
| That leaves a a large middle piece to keep moving forward with. |
 |
| I skewed it here just to show a bit more of what is going on. On the second pass I'll probably start cutting out at least a couple of the whimsies based on their locations. I also want to use as few pieces as possible for the face, I don't want to cut up poor Roscoe to much. |
Wednesday, November 30, 2022
Tuesday, November 29, 2022
Christmas Productions- Puzzle Progress
I think I have made pretty good progress to this point on cutting out the puzzles on the scroll saw. Overall I'm pretty pleased with them. I still have some difficulty with cutting the "whimsies" but that's really to be expected at this stage of the game. Like anything else it takes practice to get really good at this kind of thing.
Here are some pictures to of the current progress
 |
| This is the first one I finished. Its a picture of Roxborough Park looking to the north. There are only a couple of whimsies in there. One is an awful rendition of caboose and the other is three mountain peaks. I'm leaning towards this one as being my signature piece that would appear in every puzzle I cut. |
 |
| This should be a fun one lots going on with colors and patterns. More cat whimsies in this one. |
 |
| You can see the cut lines better here. I use the frames to keep the puzzles together while I cut them. |
 |
| This is, kind of, the final step. We found some wooden boxes at Michaels we just need to give them a bit of finish work. Puzzles will go into a ziplock bag and then in to the box, the picture will be glued to the top of the box and we will put a label on the inside of the lid with all the pertinent details. |
 |
| Here is the next puzzle up. This shows the "templates" I make for the whimsies. I trace the design on to the white tape and then cut them out as I get to them. |
I don't cut in the traditional grid pattern you would find in a stock puzzle. Its more random and tricky than that. Its what you would find in most wood puzzles whether they are cut by hand or laser.
Wednesday, November 23, 2022
Saturday, November 19, 2022
New Carousel Project - The Hippo
As some of you may remember my dad carved carousel animals, mostly horses. At one point he had decided that doing the full size ones was not as fun and they took up a lot of space. So he tried a couple of smaller ones just to see how he liked doing those. There ended up being two; an Ostrich and a Hippo. My sister will eventually get the Ostrich, just another one on the painting list.
I painted the Hippo following my dad's directions and with the paints he specified. The titanium white was old was actually pretty lumpy and it really affected everything I used it in, which was mostly the blue skin color that he insisted on (I have no idea why, it doesn't match the Hippo pictures he had on his workbench). The neat part of the Hippo is that the mouth is actually hinged.
At one point it was sitting on a furniture mover which was a simple frame with four wheels just to make him easier to move around. Someone let a rambunctious 5 year old ride while it was on this frame and the whole thing tipped over, smashing the Hippo's mouth and breaking the hinge. About six months ago my mom found someone interested in fixing him and it just came to me a couple of days ago. We have decided to completely repaint it in a more appropriate color and get rid of the weird surface texture from that titanium white paint that I used.
I still need to finish Chester the Rooster so this one will probably be sitting in the shop for at least a couple of months before I can sit down with him.
 |
| The Hippo after repairs. If it wasn't for the fresh primer I wouldn't have been able to tell he had any work done on him. In the background you can see the box with my new Bosch 12" miter saw. It was on sale. I don't really have room for it right now but it was to good a deal to pass up. |
Friday, November 18, 2022
Holiday Work - Christmas Gifts
With the new shop, more or less, up and running we will be able to turn some gifts again. So pens, keychains and the like and something new. Technically the biggest wood gift this year is not turned wood but at least it is mounted on wood.
After working on a number of Liberty Puzzles (Liberty Puzzles) and watching a ton of YouTube videos I decided to try my hand at cutting my own puzzles. Far more involved than you might think. In some ways the trickiest bit was attaching the picture to the wood blank (1/4" Basswood Plywood, couldn't find Baltic Birch in the right size for a reasonable price).
I have cut two prototypes and I'm confident that I won't completely screw up a Christmas present at this point so I hope to start cutting the real thing this week. Each puzzle will be numbered and include the piece count on the back. The traditional method of custom puzzle cutters.
 |
| I'm doing 8"x10" photos. Ideally they should end up between 150-180 pieces. The little iron is used to take the dry mount tissue to the back of the image. Then the photo is placed on the wood and the whole thing is put in the Dry Mount Press (I bought a used one, the temperature on mind seems to be a little off) |
 |
| I tried to show the pieces from the back (which has to be sanded after the cutting is finished). There isn't quite enough contrast to see it easily. I built two little jigs to serve as trays to hold the pieces as I cut them. |
 |
| Here is the front. Its easier to see the puzzle shapes here. This is prototype #2 and is a 163 pieces. Prototype #1 was only a 137 pieces so I needed to concentrate on making the pieces a bit smaller. Ideally I need to cut 2.5 pieces from each square inch of puzzle. |
While this is fun to do it is time consuming so I'll be turning to the laser cutter to see I can make a go of it that way for the next time around.
Thursday, November 17, 2022
Holiday Work - Christmas Cards
It always seems to happen at this time of the year as my posts start to drop off quite a bit (not that this has been a stellar year for posting to the blog). The holidays increase our hobby workload tremendously as we like to hand make our Christmas cards and at least one or two of the Christmas gifts we hand out.
In light of that the first side of the Christmas cards has been started. I managed to rattle out the front of 24 cards. I need to probably need to do two more runs like that, likely in different colors (most like a red and possibly prussian blue)
The fly in the ointment is that this year we would like to do a print on the back as well. That means the fronts have to be completely dry before we do that and that we need to allow drying time for the back print as well. Nothing like adding a little more time to everything!
 |
| Here is the first run of cards with the dark green. Overall pretty happy with them. They are stacked in back to back pairs in the drying rack plus a couple of spares just hanging out in the back. |
 |
| And this is how I get there. It starts with the jig which gives me a square corner that I can rest the printing block which is also tall enough to make sure the cardstock is square to the block. I use a piece of plastic to spread the ink on, pick it up the brayer and ink the block. Then the cardstock and I run an old wooden spoon on the back of the cardstock to apply enough pressure to transfer the image. Nothing to it! |
 |
| This is the negative image of the back print. I'll either cut it by hand or get a least a helping hand with the laser. Never forget to reverse the image when you are cutting your printing block! |
Wednesday, November 16, 2022

Thursday, November 10, 2022
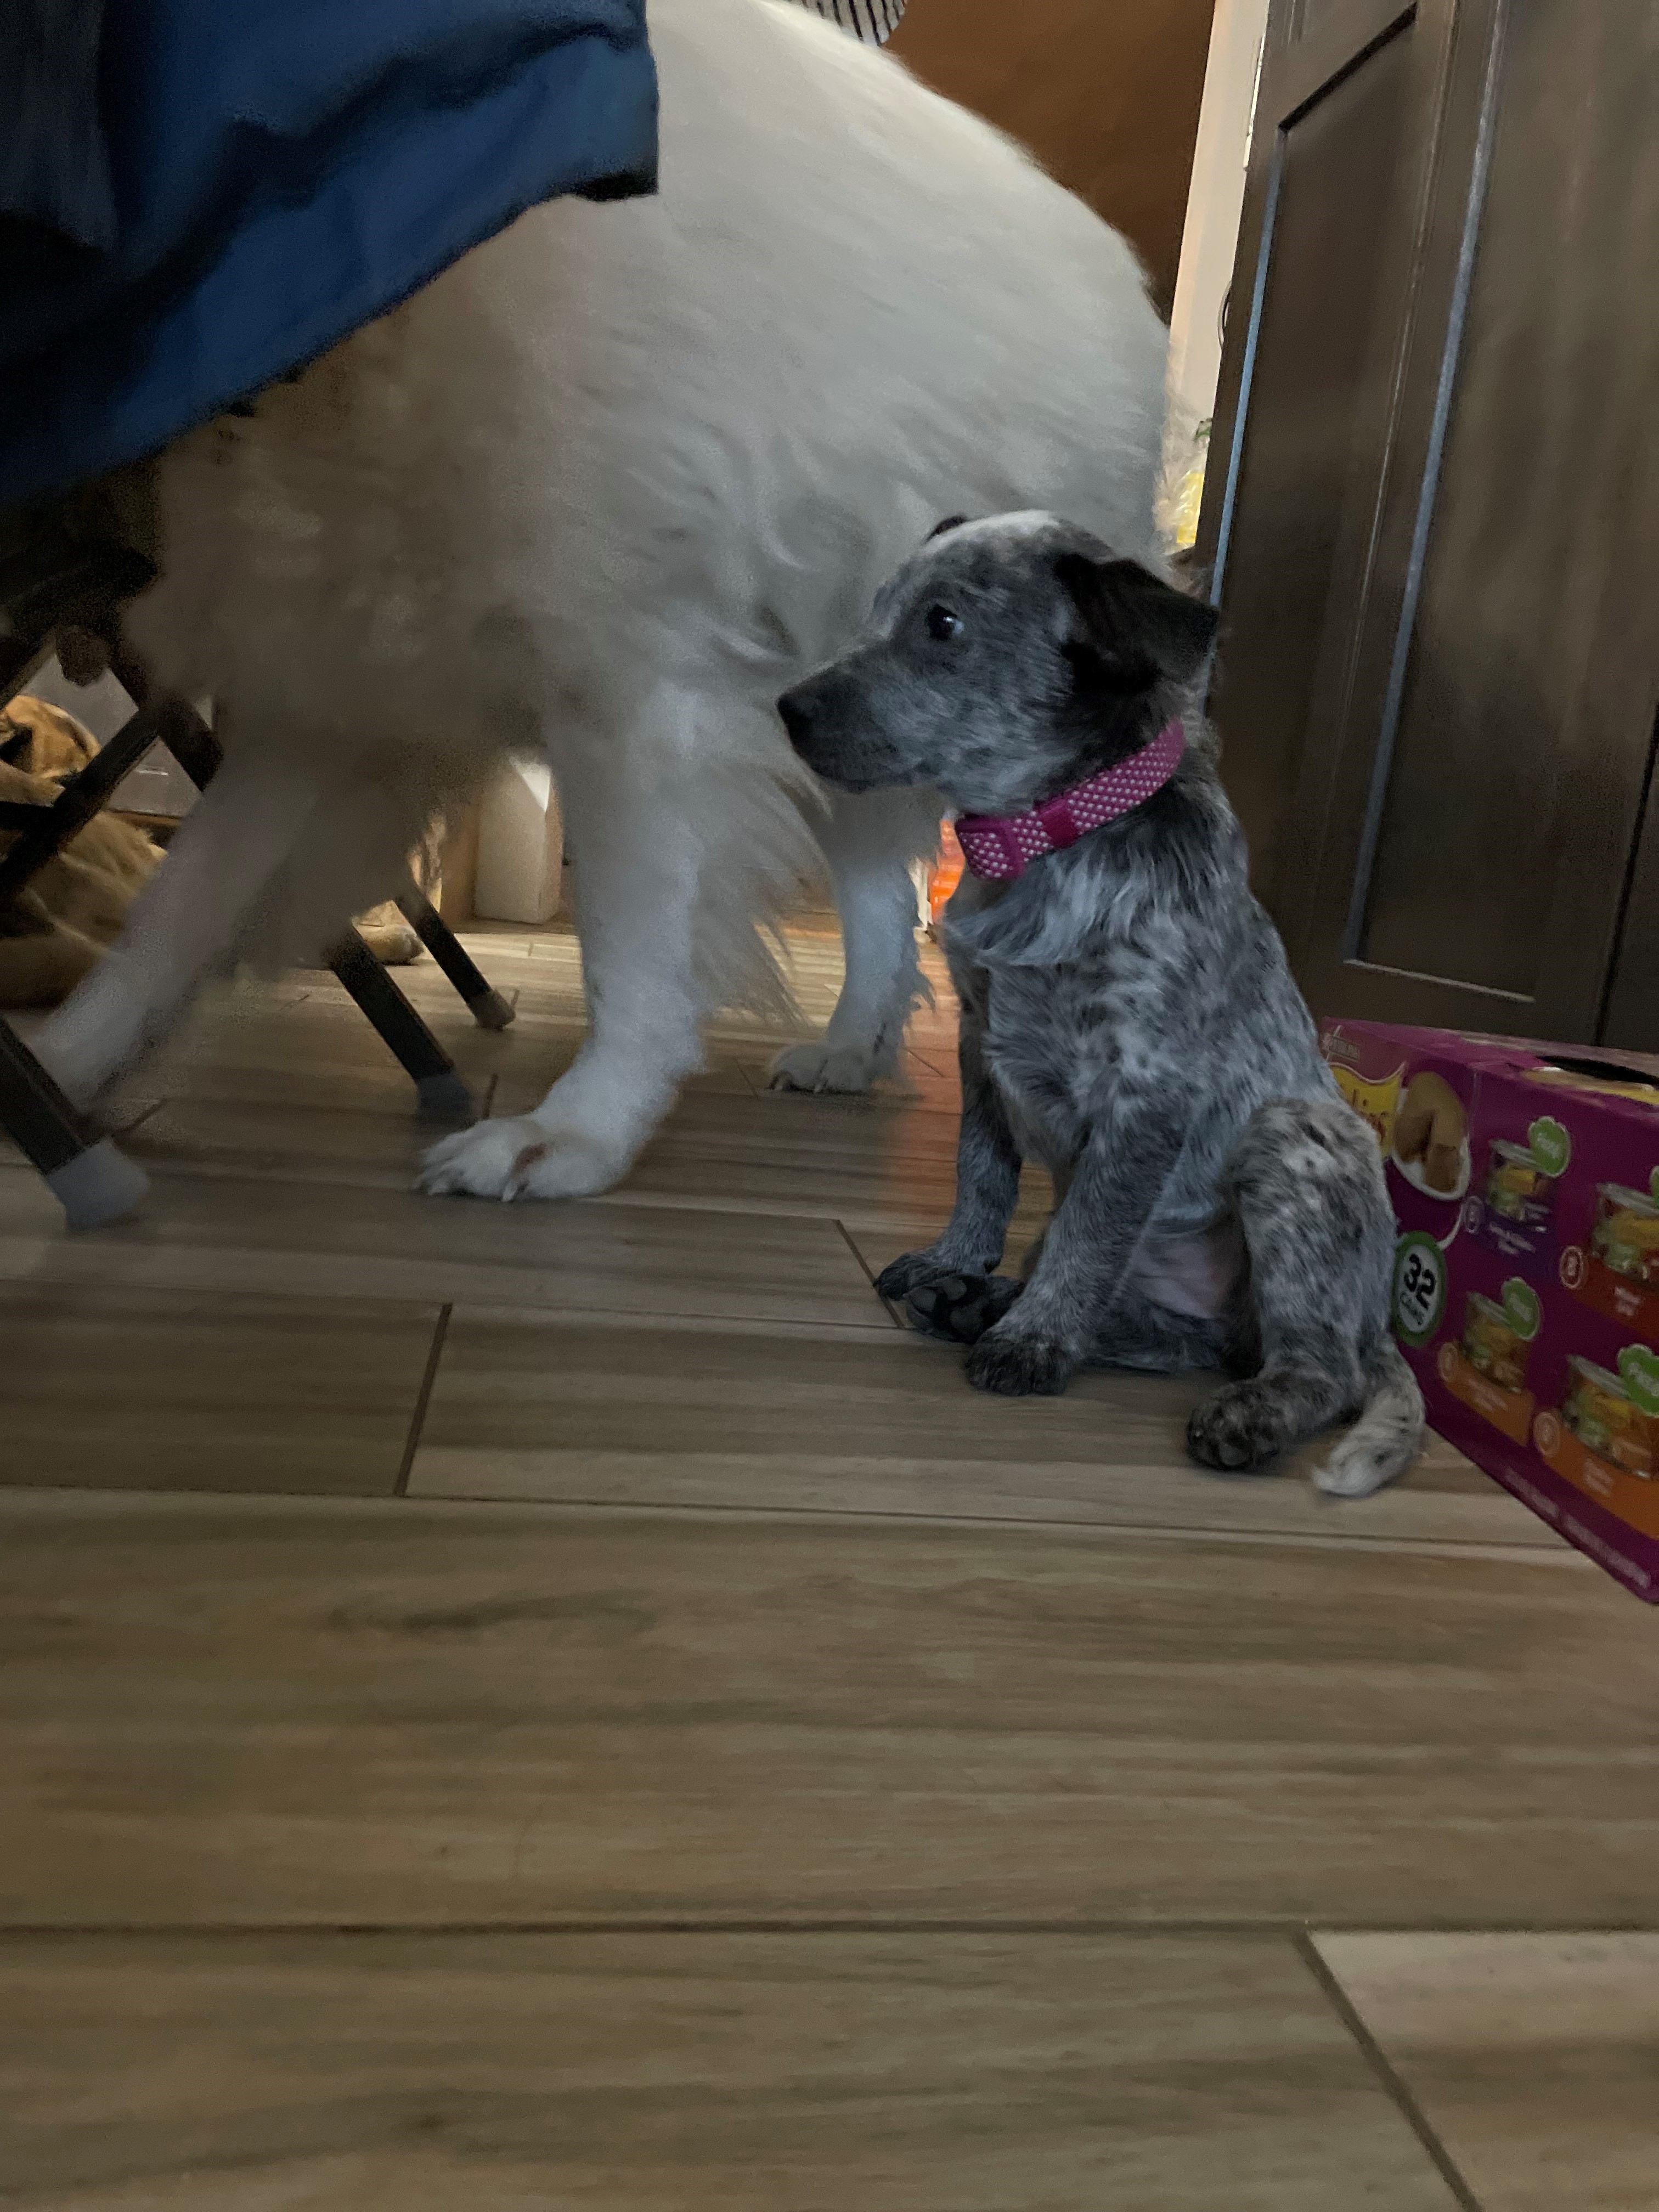
Introducing Roxy
Its been over a year since we lost Lani and in the last couple of months we have been looking for an older dog to give a home to. We have been turned down a number of times because we have dogs already and they want these older dogs to be the only one. That lead my wife down a dangerous path that ended up with us adopting this sweet little girl.
 |
| Here is Roxy sporting her new collar and seeing how well it matches the roses in the background. She is already a little ham. Note that both ears only go up half way at this point. |
Roxy is an Australian Cattle Dog, the Blue Heeler variety. She was just 8 weeks old in this picture and she is now 11 weeks. Smart as a little whip and more than happy to jump into the dog free for alls that happen everyday in our backyard.
 |
| Not sure about this whole new home business. |
 |
| The house seems okay, but Phoebe is so big! (120# vs 10#) |
 |
| At least I have my own bed. |
 |
| Having my own bed is nice, but its warmer snuggling with Morgan (1/2 German Shepherd, 1/2 Great Pyr) |
 |
| Its nice sharing the big bed with Daisy (classic mutt, black and tan) |
 |
| Even better sharing it with warmest dog in the house! Phoebe is big, warm and soft. For those that haven't guessed Phoebe is the current big dog, a Great Pyr weighing in at 120# (which is really big for a female GP). |
 |
| One ear is up, one is still half mast |
 |
| Both ears up at 10 weeks. She looks like a bat now. |
Wednesday, November 9, 2022

Wednesday, November 2, 2022
Thursday, October 20, 2022
Solar Power in the Greenhouse
This earlier this summer we had a custom shed built that will perform, somewhat, as a greenhouse. The south facing side, which is pretty much sun facing all year round, is just made up of windows. We didn't go with a full blown greenhouse because we needed a place for all the garden tools. You can see the initial progress here: Greenhouse Construction. I still need to insulate the ceiling but the rest of it has been insulated and paneled.
 |
| The new greenhouse at the back corner of our lot. Its on the same concrete pad, which we extended a bit, as the old shed. Note the large pole, that's a power pole. The electrical supply for the neighborhood is above ground and runs along the back. Ironic that we had to use solar power for the greenhouse since its within about 3' of that pole. The solar panels will generate 600 watts of power. I wasn't thinking when we decided to up the wattage and bought to 100 watt panels instead of a single 200 watt panel and made my life a tad bit more difficult. |
Power was a requirement (need to charge those batteries for electric tools), however, its just to far away to hook it up to the house, at least not without some significant trenching and laying of conduit. Since we get a lot of sun all year round we decided to go solar. Definitely an easier said than done statement. But as of this afternoon we are fully hooked up and running off of solar energy in the greenhouse.
We started off with a kit from Grape Solar, although calling it a kit is being very generous. It basically came with the solar panels, the battery controller and some (but not all) cabling. There were not enough brackets to mount the panels to the roof and the website doesn't really help if you want to expand the system like we did (from 400 watts to 600 watts). I probably could have gotten everything if I had actually talked to someone at Grape Solar, so chalk some of that up to my own stubbornness.
Oh and one of the key components that you must have if you want to run anything that needs AC current is not included; the (now) infamous power inverter. This is purchased separately and without it you are only running on DC current through the battery controller. The whole thing was a bit of an exercise in how many ways I could be frustrated, it doesn't seem to matter how much research I did something was always missing at the end of the day. I would think that a "kit" would contain literally everything you would need to set things up, nothing else to buy, well except the batteries. It doesn't come with the batteries, which I totally understand.
 |
| Its a bit messy now but at least its running. I'll take some time this weekend an neaten everything up. The key components here are the battery charging controller (the white box) and the power inverter (blue and silver box up high). The power inverter is mounted high up on the wall to keep it in the shade. I could have mounted under the workbench but that makes it a pain to access. I might move it anyway but I'm going to let everything simmer for a week before I rearrange things. |
That brings us to the batteries. I opted for 12V 100A Lithium batteries and they cost a pretty penny. Two of these cost more than the whole solar system itself and we are using three (which may be overkill but its hard to say how much power we are going to need to keep things warm in the winter out there). These are, basically, what you might find in an electric golf cart. They should be good for 10+ years so hopefully we won't be replacing them anytime soon.
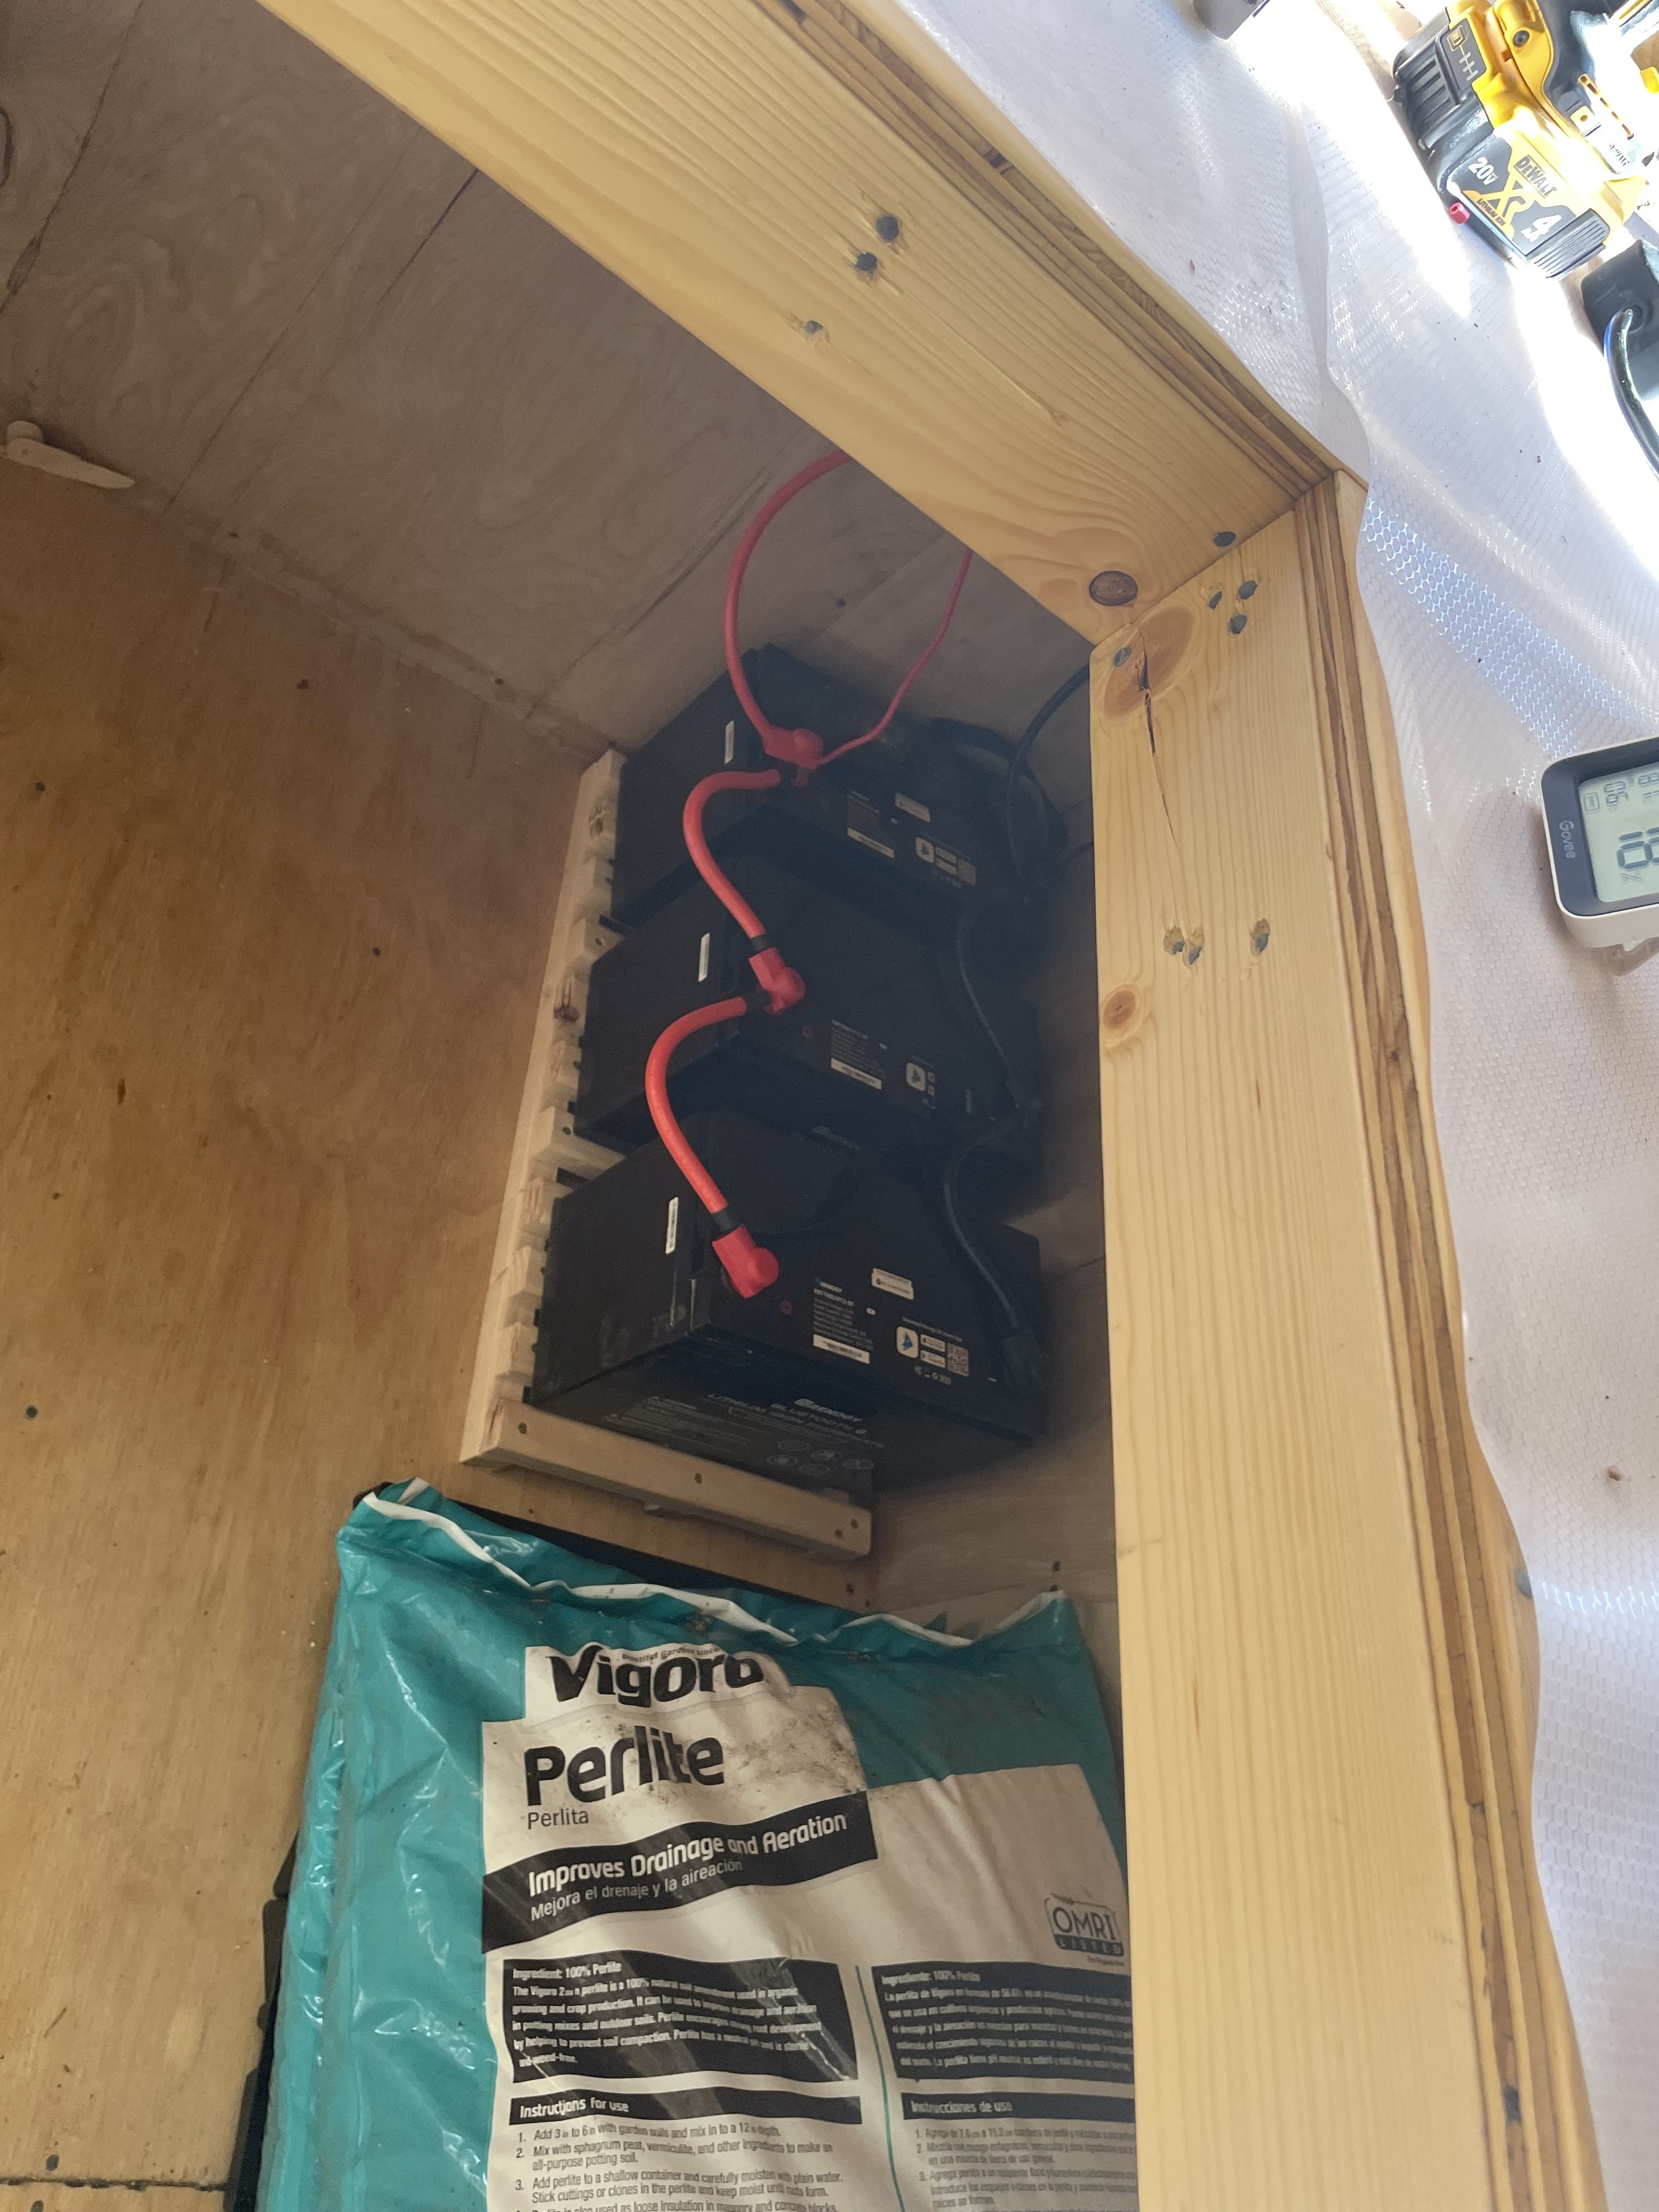 |
| The battery charger controller dictated how to setup the batteries. Our controller needs the batteries in parallel so that's what you are seeing, each battery linked to the next the same connection (positive to positive, negative to negative). The other option was in series which would have linked them positive to negative. |
As of yesterday, the fan and the heater were both running from power being collected through the panels. We only anticipate needing the heater in the winter to maintain a somewhat even 60 to 70 degrees and the fan runs when the temp is above 78 and we need to cool things off a bit. I was quite excited to have everything running as expected today.
Subscribe to:
Posts (Atom)