Quotes

Life is short, break the rules. Forgive quickly, kiss slowly. Love truly, laugh uncontrollably and never regret anything that makes you smile. - Samuel Longhorne Clemens (Mark Twain)

Saturday, February 27, 2021

Dare Mighty Things - Perseverance lands on Mars

I know this is old news at this point. I have just been to busy to really dig deep into the details. It seems that NASA created a message in binary code on Perseverance's parachute, "Dare Mighty Things" what a fantastic easter egg!

The red and white in the parachute helps the engineers see if the parachute is twisting. They took the opportunity to write a coded message and challenged folks to decode it.

The phrase "Dare Might Things" appears as part of a speech "The Strenuous Life" that Roosevelt gave to the Hamilton Club in 1899.

“Far better it is to dare mighty things, to win glorious triumphs, even though checkered by failure, than to take rank with those poor spirits who neither enjoy much nor suffer much, because they live in the gray twilight that knows neither victory nor defeat.”

Perseverance being lowered down to the Martian surface

First high-res photo from Perseverance


Friday, February 26, 2021

World War II Project - Rubicon Models PzKfw III H - Common Steps

Since this build is for the PzKfw H 2 variant (essentially the late model H) I started off with Section 2 of the instructions. I managed to get the basic build complete for the turret, lower chassis and the upper chassis. The lower hull is still clamped together so I wasn't able to glue the rest of the components in place and I didn't have time to start the tracks and roadwheel assemblies.

I used some of the  drilled out holes is on the lower chassis. I discovered that the holes were a tad to small for the antenna trough and the shovel (these were drilled out with the  #59 drill bit) so I widened them slightly with a #58 drill bit. That resulted in a really tight fit so the #58 drill bit might be a better place to start, except on the other side where a small box is glued in place the #59 holes were actually a little large so the fit was looser than I had hoped.

This is what the build looks like so far:

I still need to finish step 2a, 2e and 2f

I am a firm believer in clamps and and I wanted to be sure there won't be any gaps after the glue has set.

The turret assembly is straight forward and goes together quite easily.

The upper chassis. Again there is a lot of area for the glue to cover with the side panels. So more clamps to make sure there aren't any gaps.

The lower chassis. The antenna trough and the shovel are on the upper right, those holes were widened with the #58 bit. The little box in the center of the bottom was a little loose with the original holes made with the #59 bit.


Thursday, February 25, 2021

World War II Project - STuG III Pin Wash

I find the pin wash to be a very tedious technique, however, its an absolutely necessity for me as it really makes the vehicle pop. I have complete one and unfortunately I didn't let the fading dry long enough and I wiped some of that effect out when I cleaned up the wash. The next three will have had a couple of days to dry so they should be fine.

This step is to time consuming to just churn out on all four vehicles so the other three will take a little longer to complete.

Initial application of the wash. I try to be as neat as I can here, otherwise the cleanup takes forever.

Its really hard to be neat on that tread pattern though! I got a little sloppy at the end.

And after I have clean it up. I used odorless thinner with a brush to do this. You do have to be careful you don't want to flood it with thinner you will lose all your work.

STuG 212 looking pretty sharp at this point. Three more to go.


Tuesday, February 23, 2021

World War II Project - Rubicon Models PzKfw III H - The new kit

Its almost imperative to have something else to work on while going through the weathering steps, everything takes so long to dry! Instead of applying the decals to the Jagdpanthers I decided to start on a PzKfw III. I have two divisions that I would like to model, the 21st in North Africa and the 6th in Russia. North Africa is a bit more appealing to me, at least at the moment, as I can build three different marks and still have them in the same platoon without a problem. I want them all to have the 50mm cannon but I'm going to go with 2 short and 1 long. I'll start off with the H variant and in the case of the Rubicon kit it will be the H2 variant in the instructions.

The Rubicon PzKfw III kit is pretty amazing, you can build just about every variant I can think of from H to N. That ability to select means you need to read the instructions all the way through before you start working on the kit. There are a lot of components and you certainly don't use them all on every mark. For instance the differences between the H1 and the H2 are somewhat subtle but Rubicon captured those variations which means I'm going to have a number of extra engine covers right off that bat. I went through the instructions and basically crossed out everything that wasn't specific to the H2. What is a little confusing is that the H1 is the first variant in the instructions (I'll call that section 1) and shows all the pieces necessary to build it. Section 2  shows the components that are common to all the variants and in my mind really should have been Section 1 and in Section 3 is the specific instructions for the H2 variant (and everything else follows each with its own section). Minor quibble on my part.

One thing that you must pay attention to is the first page which shows where to drill holes in four of the components. Its not as simple as just drilling out all the holes. You need to know which variant you are building and only drill out the necessary holes. Here is where I get a bit OCD. Rubicon does not state what size drill bit to use, they just say to drill out the holes. These are to deep to just punch through with the tip of a hobby knife you need a drill bit. I have a complete set of #61 - #80 size bits which are all to small (remember the bigger the number the smaller the bit so a #61 drills a larger hole than a #80). This lead to my previous rant when I ordered a set of larger drill bits from Micromark which turned out to be missing some bits and duplicated others. I wanted the drill bit to match the hole or at the very least be a little to small so I could enlarge it if necessary. Drilling to big a hole will result in a loose fit. 

In the end the #59 bit is the right one to use, you can use a #60 if you want to go a touch smaller and then do test fittings and enlarge as necessary. You could get away with a #58 but you then risk drilling to big a hole. I used the #59 and will see how that goes with this build.

At this point that's all I have managed to drill is a lot of holes in the four parts. I'll now move on to Section 2 the common components build and then to Section 3 which is specific to the H2 variant which will build a late version of the H with bolt on armor and the 50/L42 cannon.


The first page, a must read!

I have circled all the holes that I need to drill. Follow the legend on the right side of the page and read it carefully! Otherwise you will end up filling holes that you don't need!

The four components awaiting surgery

Hard to see here, but the holes have all been drilled out and I didn't make any mistakes (might be a first). Again I used a #59 drill bit which seemed to be an exact match for the hole. The #58 was a touch to big and the #60 a touch to small.


Monday, February 22, 2021

World War II Project - STuG III Fading

I think I'm on the verge of breaking out of my painting slump and I started the next step on the STuG IIIs. Decals are on and sealed with a satin finish, I used a satin finish rather than a gloss to give a bit more tooth for the weathering steps. In theory that will make the washes a little easier to manage, we will see about that!

I decided I would give fading another shot on these. I'm still experimenting with this technique and I'm still on the fence about using it. If I keep the rest of the weathering relatively light then it will stand out. If I go heavy on the technique then the effect is lost. I suppose I could come back and redo it after the rest of the weathering. I might give that a go when I get back to the Jagdpanthers. After these have dried I'll do the pin wash.

Here are a few step by step shots (sort of) of my process:

A couple STuGs and my oils of choice for this task. A couple of oilbrushers and a couple of tube oils. The oilbrushers are much easier to use but I don't like the selection of greens that they come in hence the need for a couple of tube oils (Abteilung) for the greens.

The dunkelgelb has been done, mostly on the top surfaces, the dots or streaks are the first step to lightening the brown.

The mostly finished skirts. I went back afterwards and darkened up the green and brown on the bottom edge a bit more.


And a parade shot of with the fading finished on all 4 StuGs.


Technically this is STuH since it has the 105mm cannon


Tuesday, February 16, 2021

New Tools - Micromark and a Rubicon PzKfw III

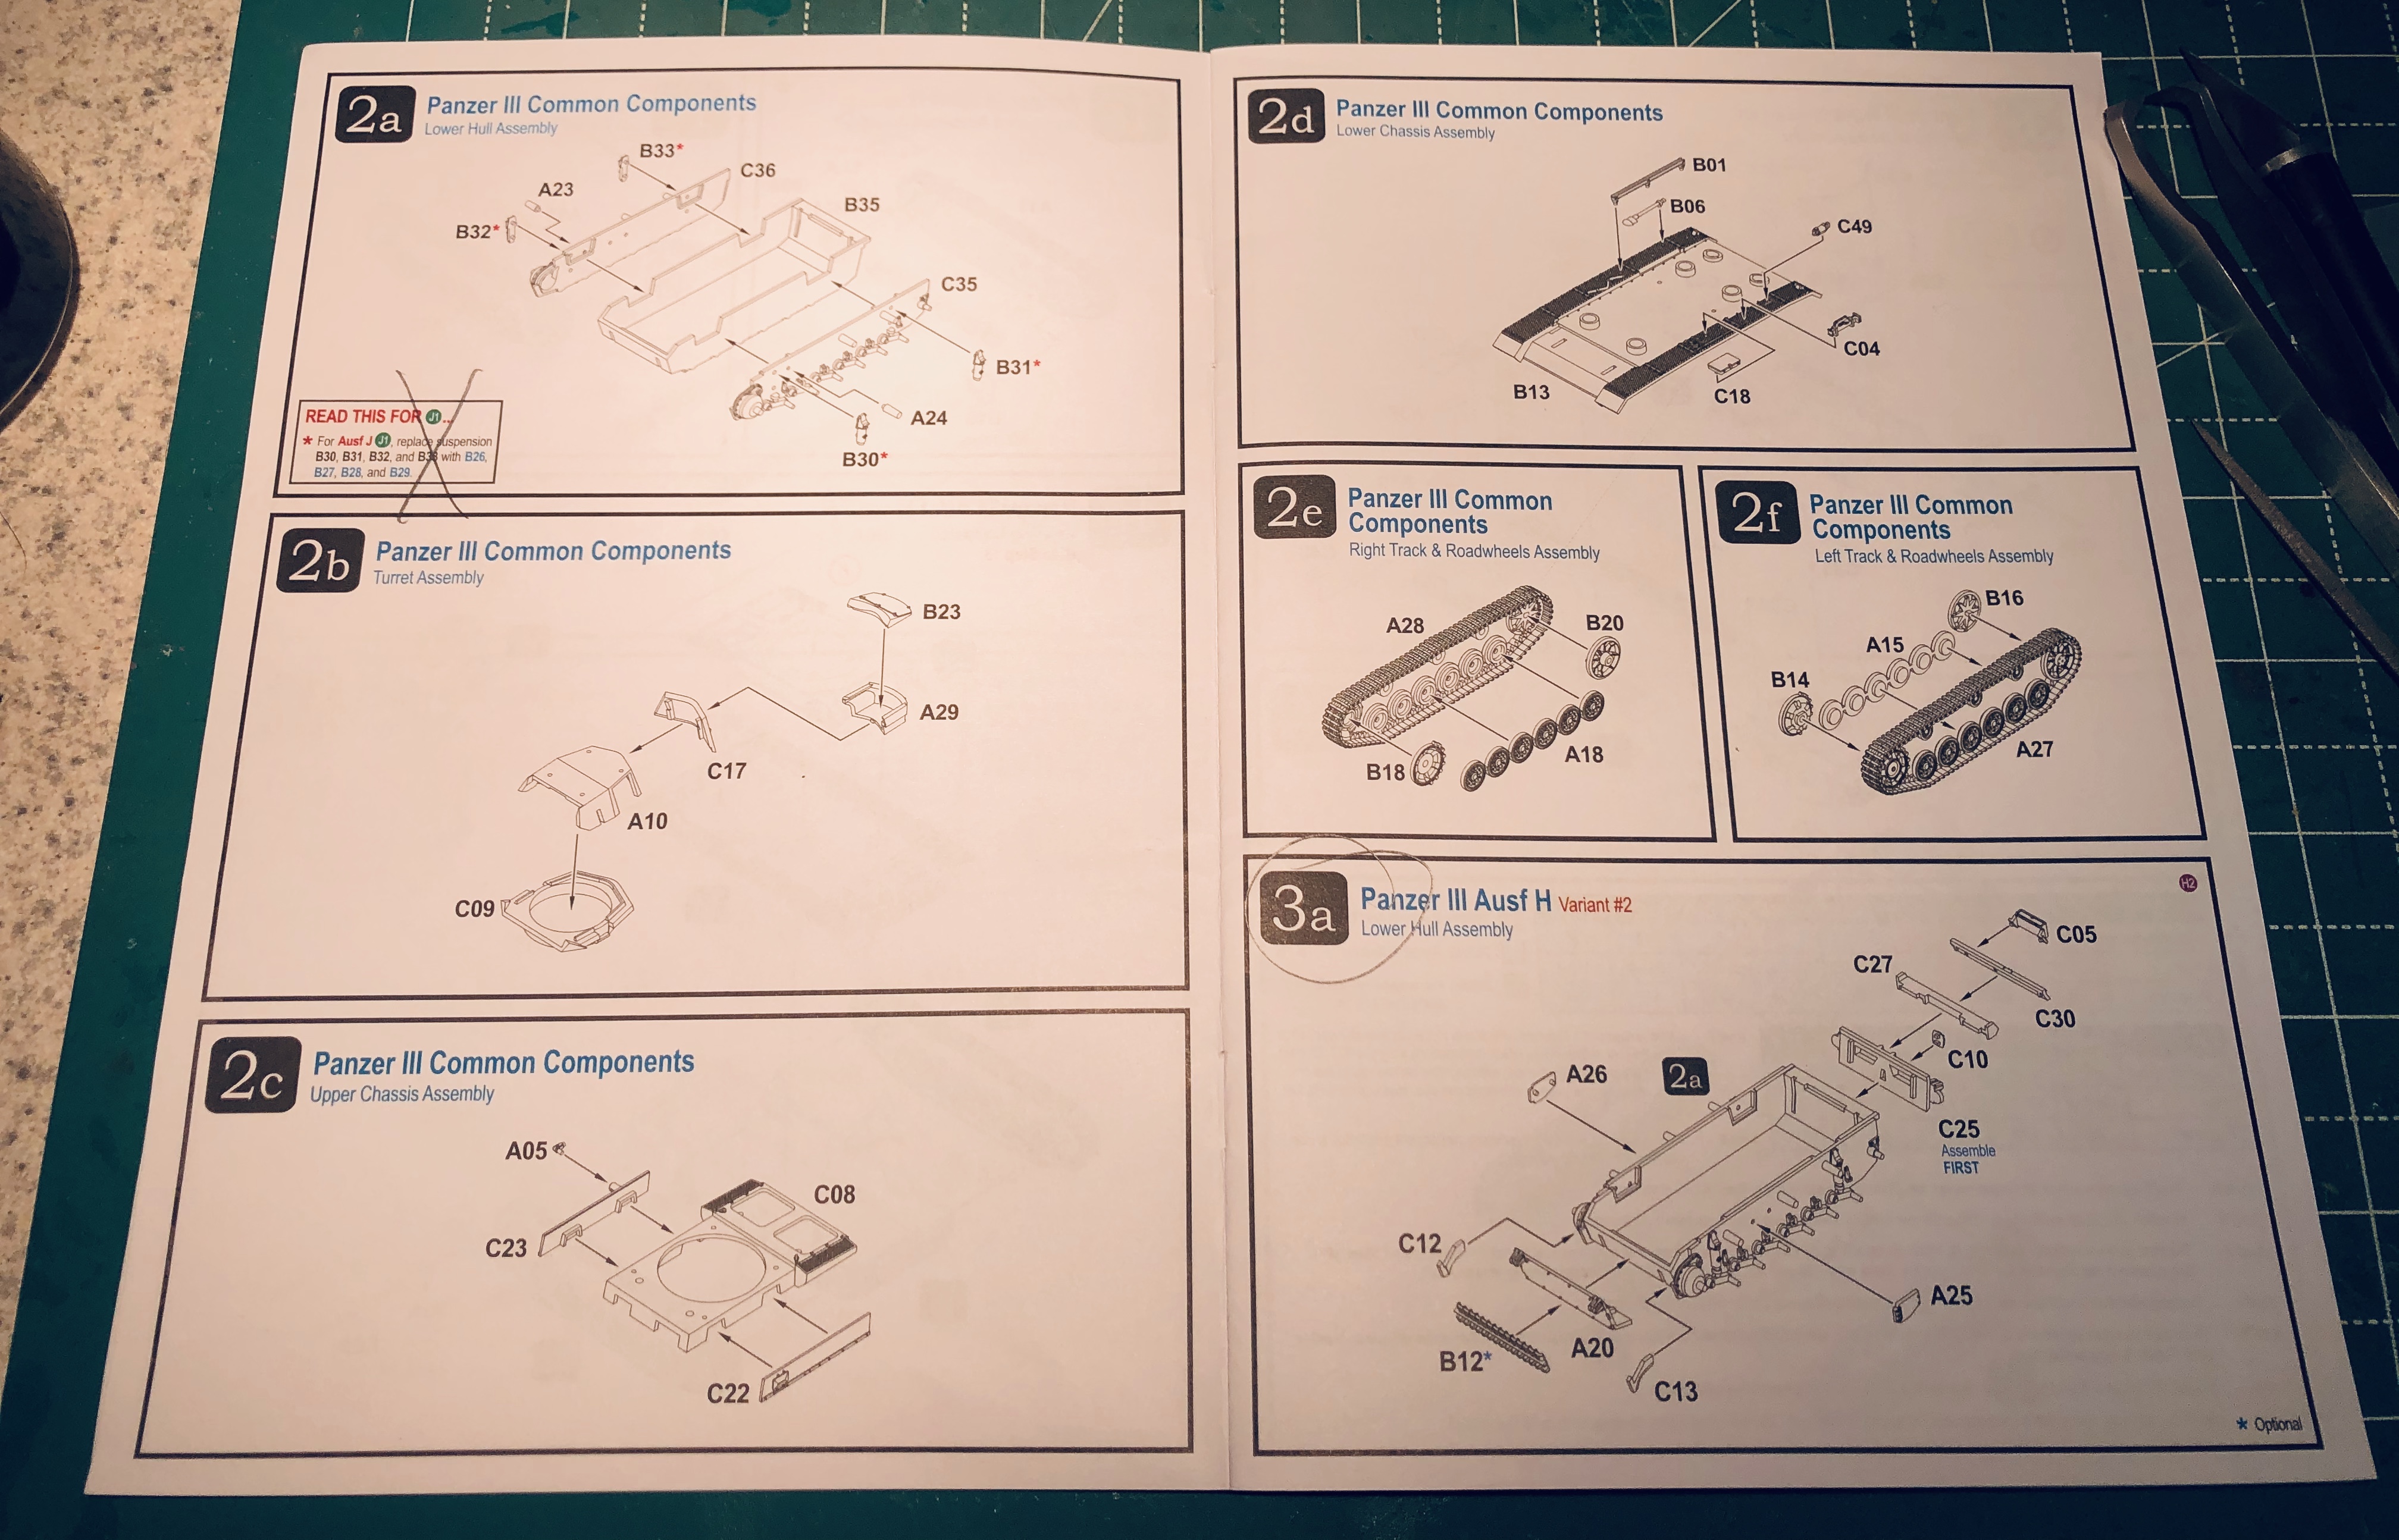
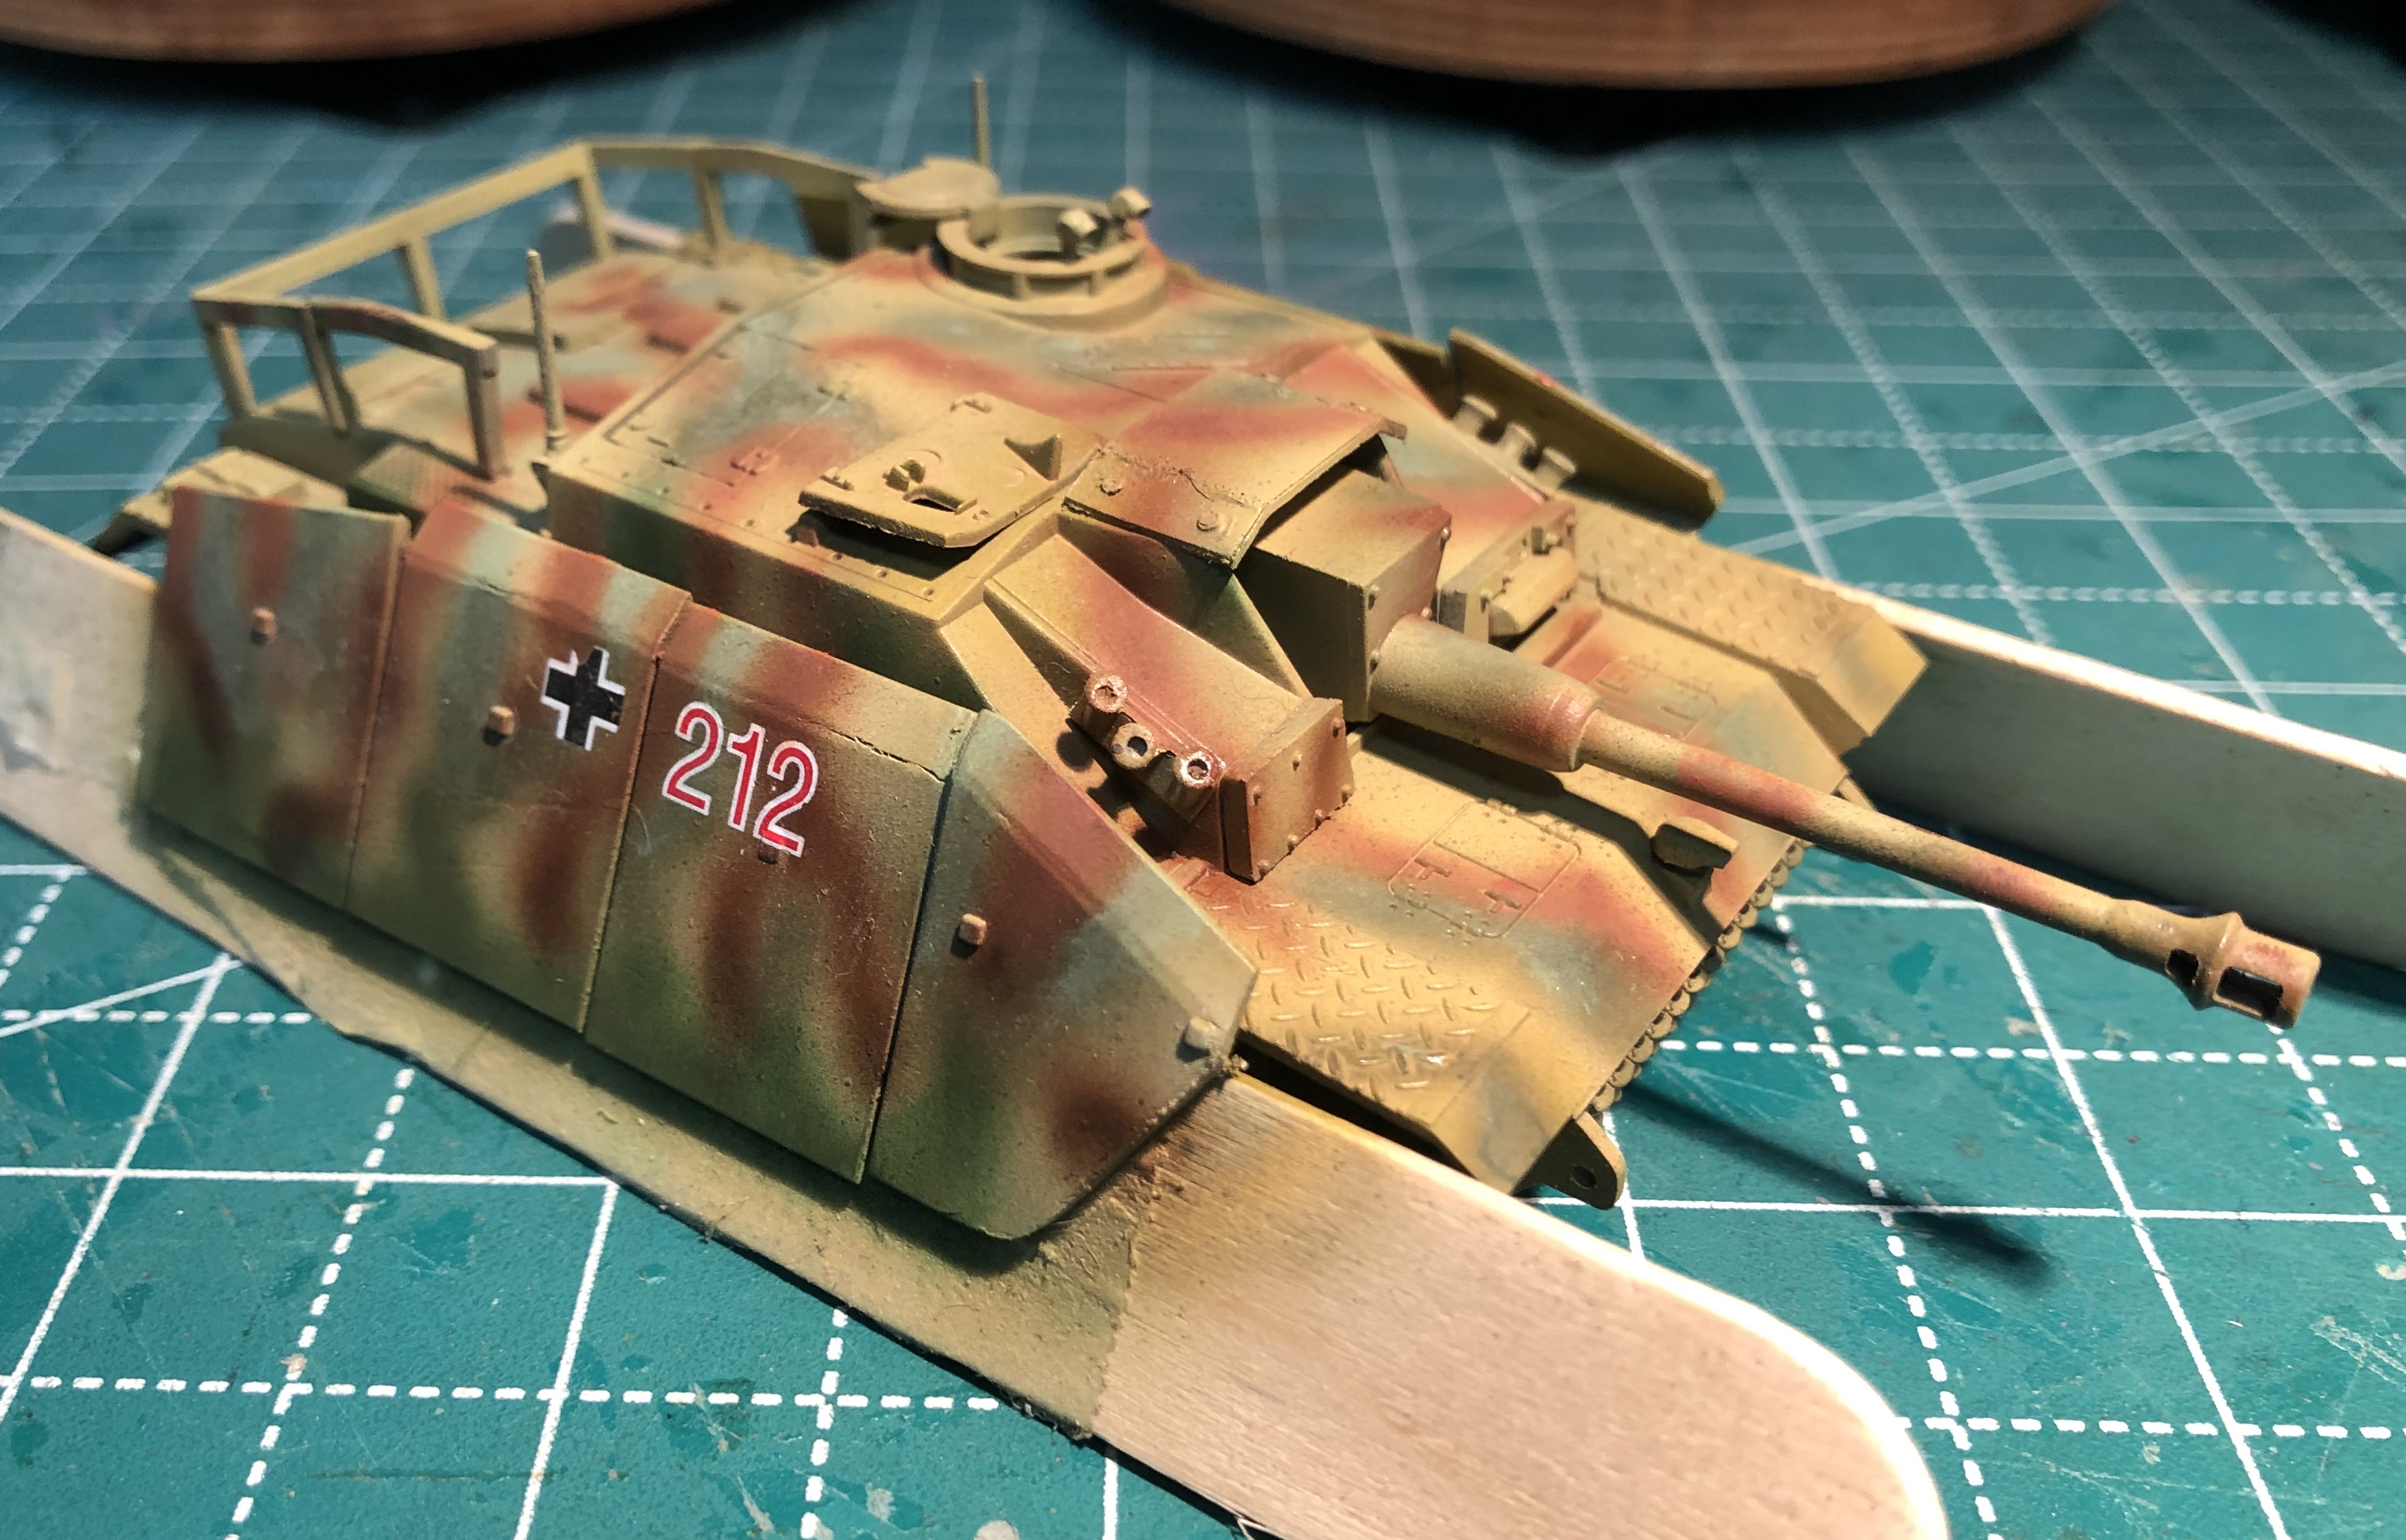
I admit that Micromark is a indulgence, but every now and then I manage to find something that I can really use (well maybe more often than that). While I haven't managed to get any paint on anything for almost a month now I have been toying with starting one of the Rubicon PzKfw III kits. I pulled one out and went through the instruction book. Since you can build anything from an ausf H to and ausf M the instructions are extensive. I really, really recommend going through the whole booklet and even highlighting the sections that pertain to which ever variant you decide to build.

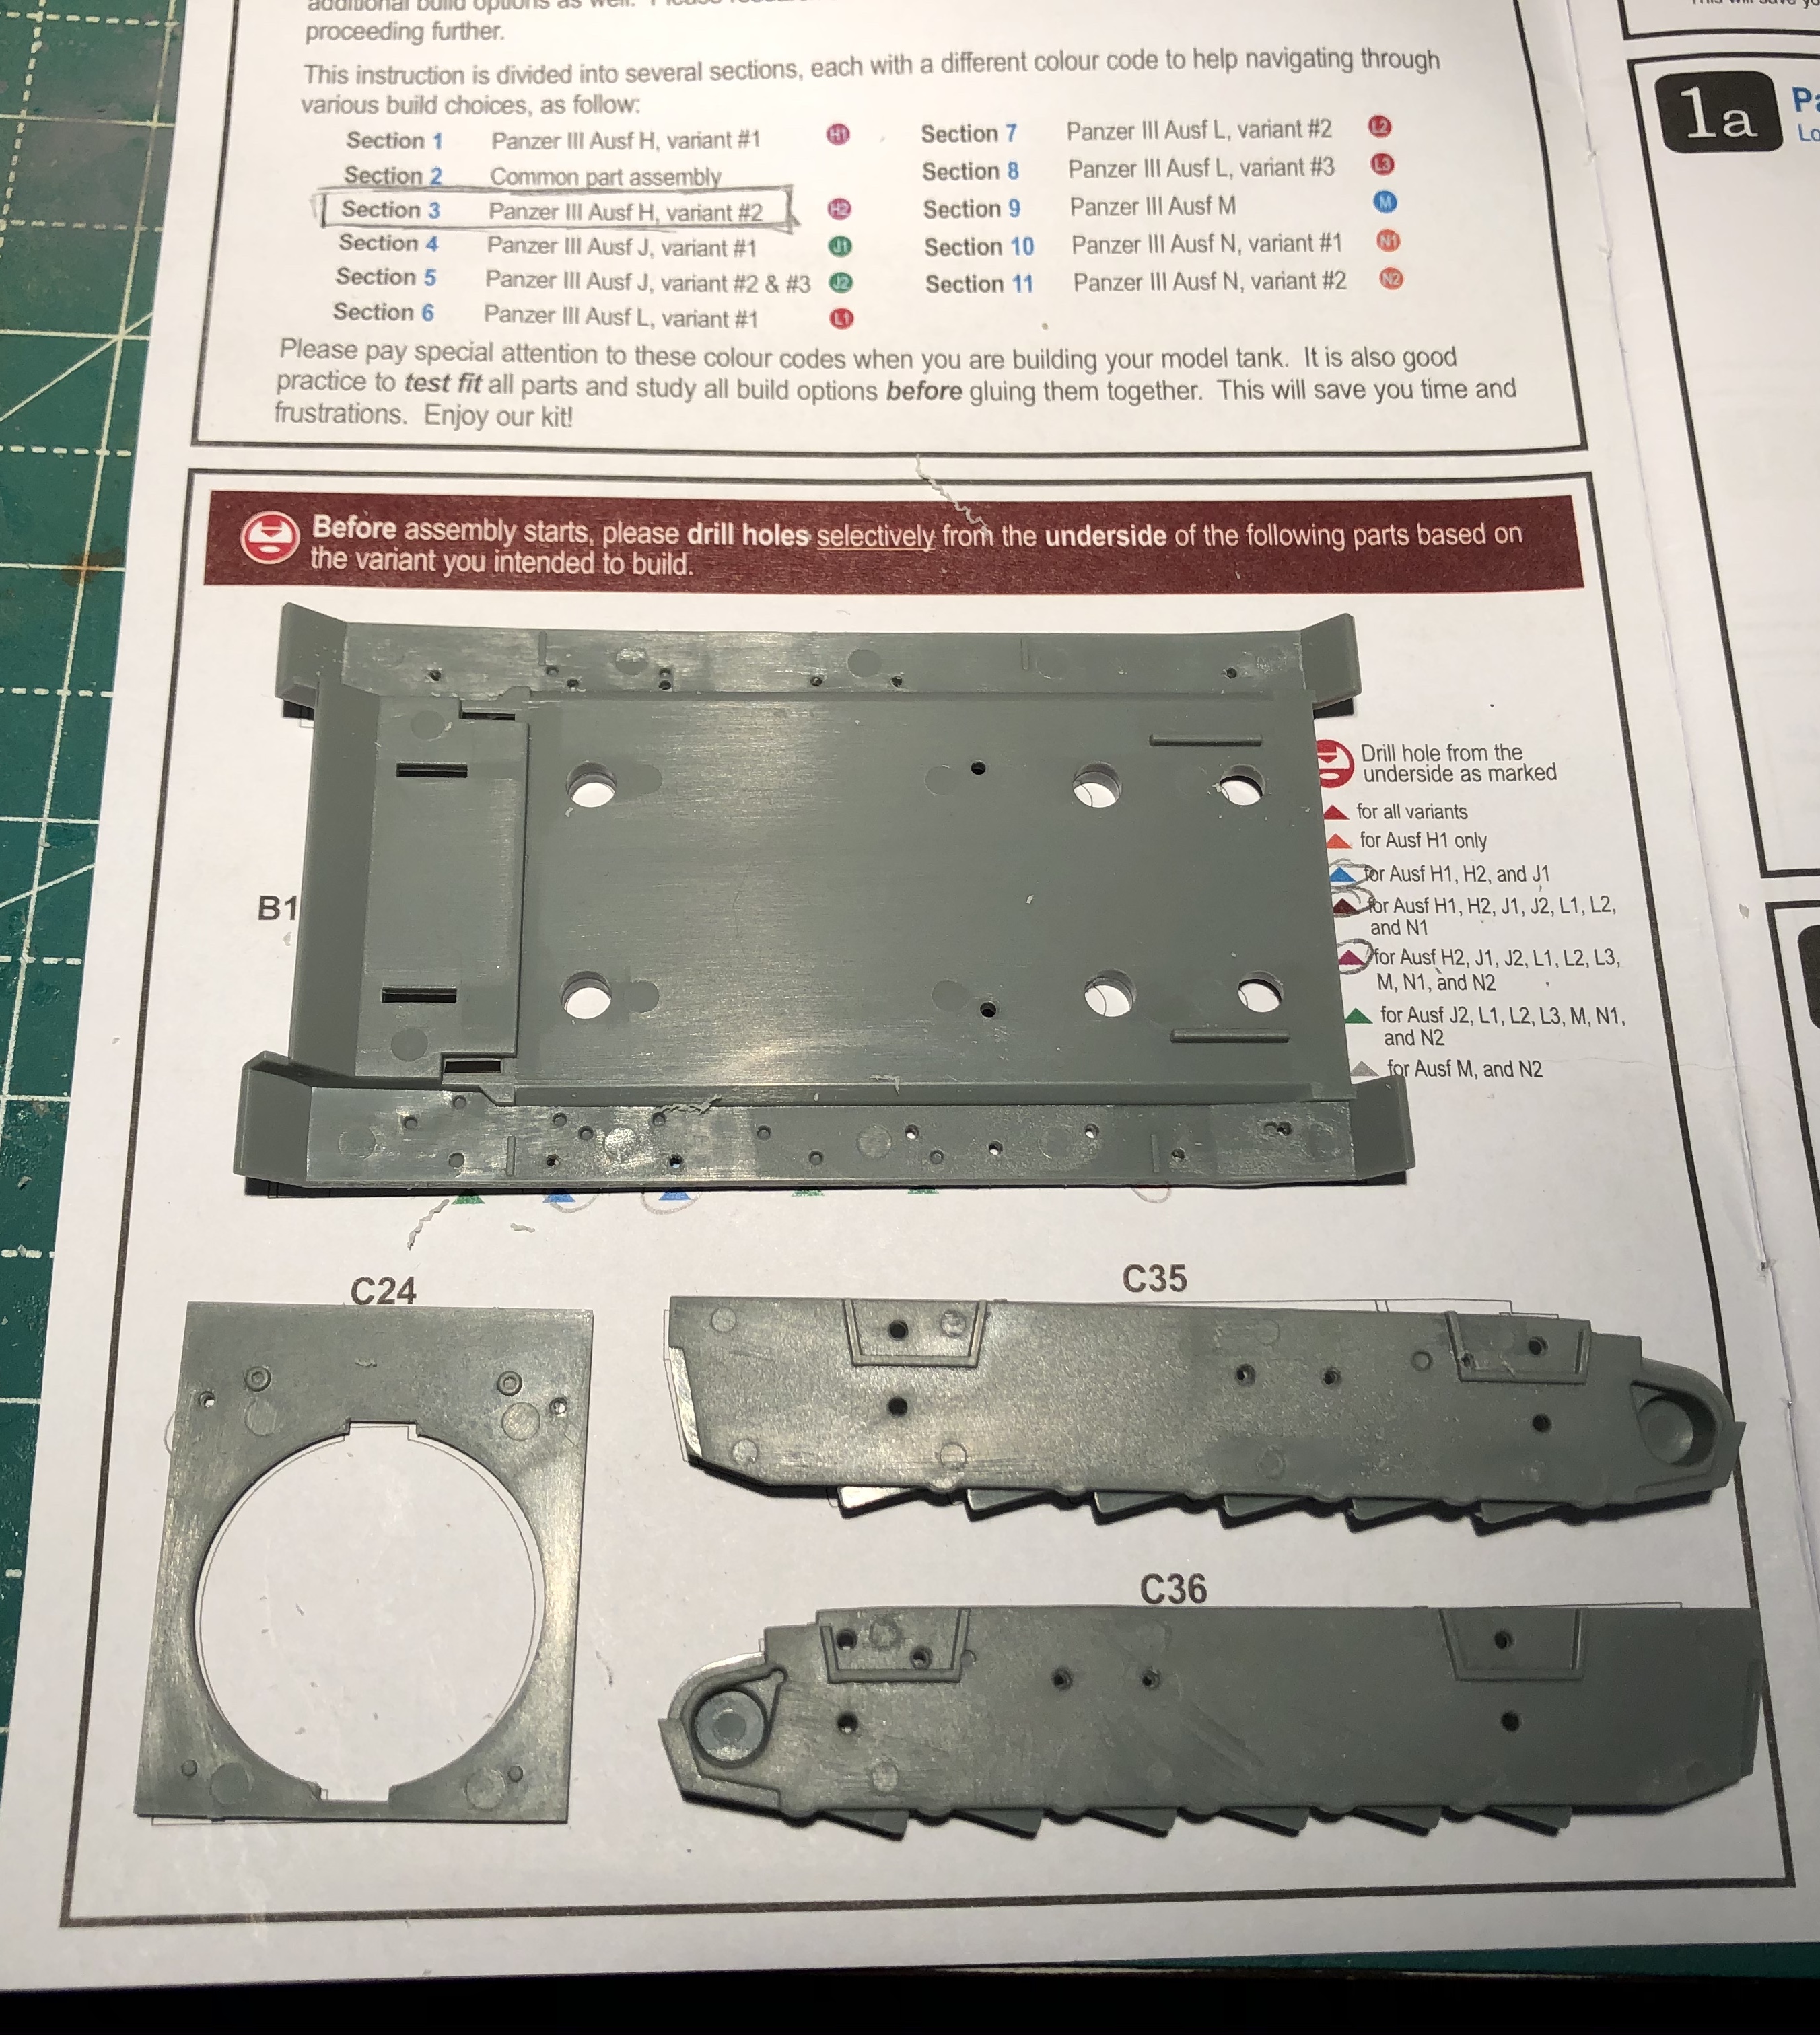
One of the problems you run into with a kit that allows so much variation is the need to drill holes, a lot of holes. Now they are all clearly marked you just have to know exactly which ones to drill out and which ones to leave alone, hence why reading the instructions are so important. This is the point where Micromark comes into play. I don't want to drill the holes to big or to small and all the holes are much bigger than any drill bit in my #61 - #80 set I felt the need to cover the other side of the spectrum and cover #1 - #60.

I eagerly headed to the website and ordered the high speed drill bit set and a twist drill gauge (to help sort things after I leave screw bits scattered across the work surface). That arrived over the weekend and I was eager to get started on the kit when I noticed something odd about the drill bits in the first row from #41 - #60. I pulled them all out and checked them with the gauge, as I suspected, 5 of the bits were duplicates and of course that meant that 5 were missing. So off went an email to Micromark and the kit was set to the side while I resolve it because one of the missing numbers was the match for the holes I needed to drill out!

I do apologize for the lack of posts since mid January. I ran full tilt into that Covid-19 depression that seems to be going around. Combined with some issues at work (nothing personal just project issues), house fixes and some serious vet bills. Lani, the largest of our dogs 1/2 Great Pyrenees and 1/2 Anatolian shepherd she weighs in at 130#, has developed a cancerous tumor on her nose. She had surgery and is recovering just fine but the vet found that the cancer has dug into the bone and she couldn't remove all of it. Now all we can do is cross our fingers that it doesn't come back to fast.

I think the tools were a way just to break things up and get me out of this bit of depression and now that the drill bit set didn't have what I wanted I feel like I have taken a step back. I have plenty of projects ready to go though so when I can get some traction I have plenty to keep me occupied.