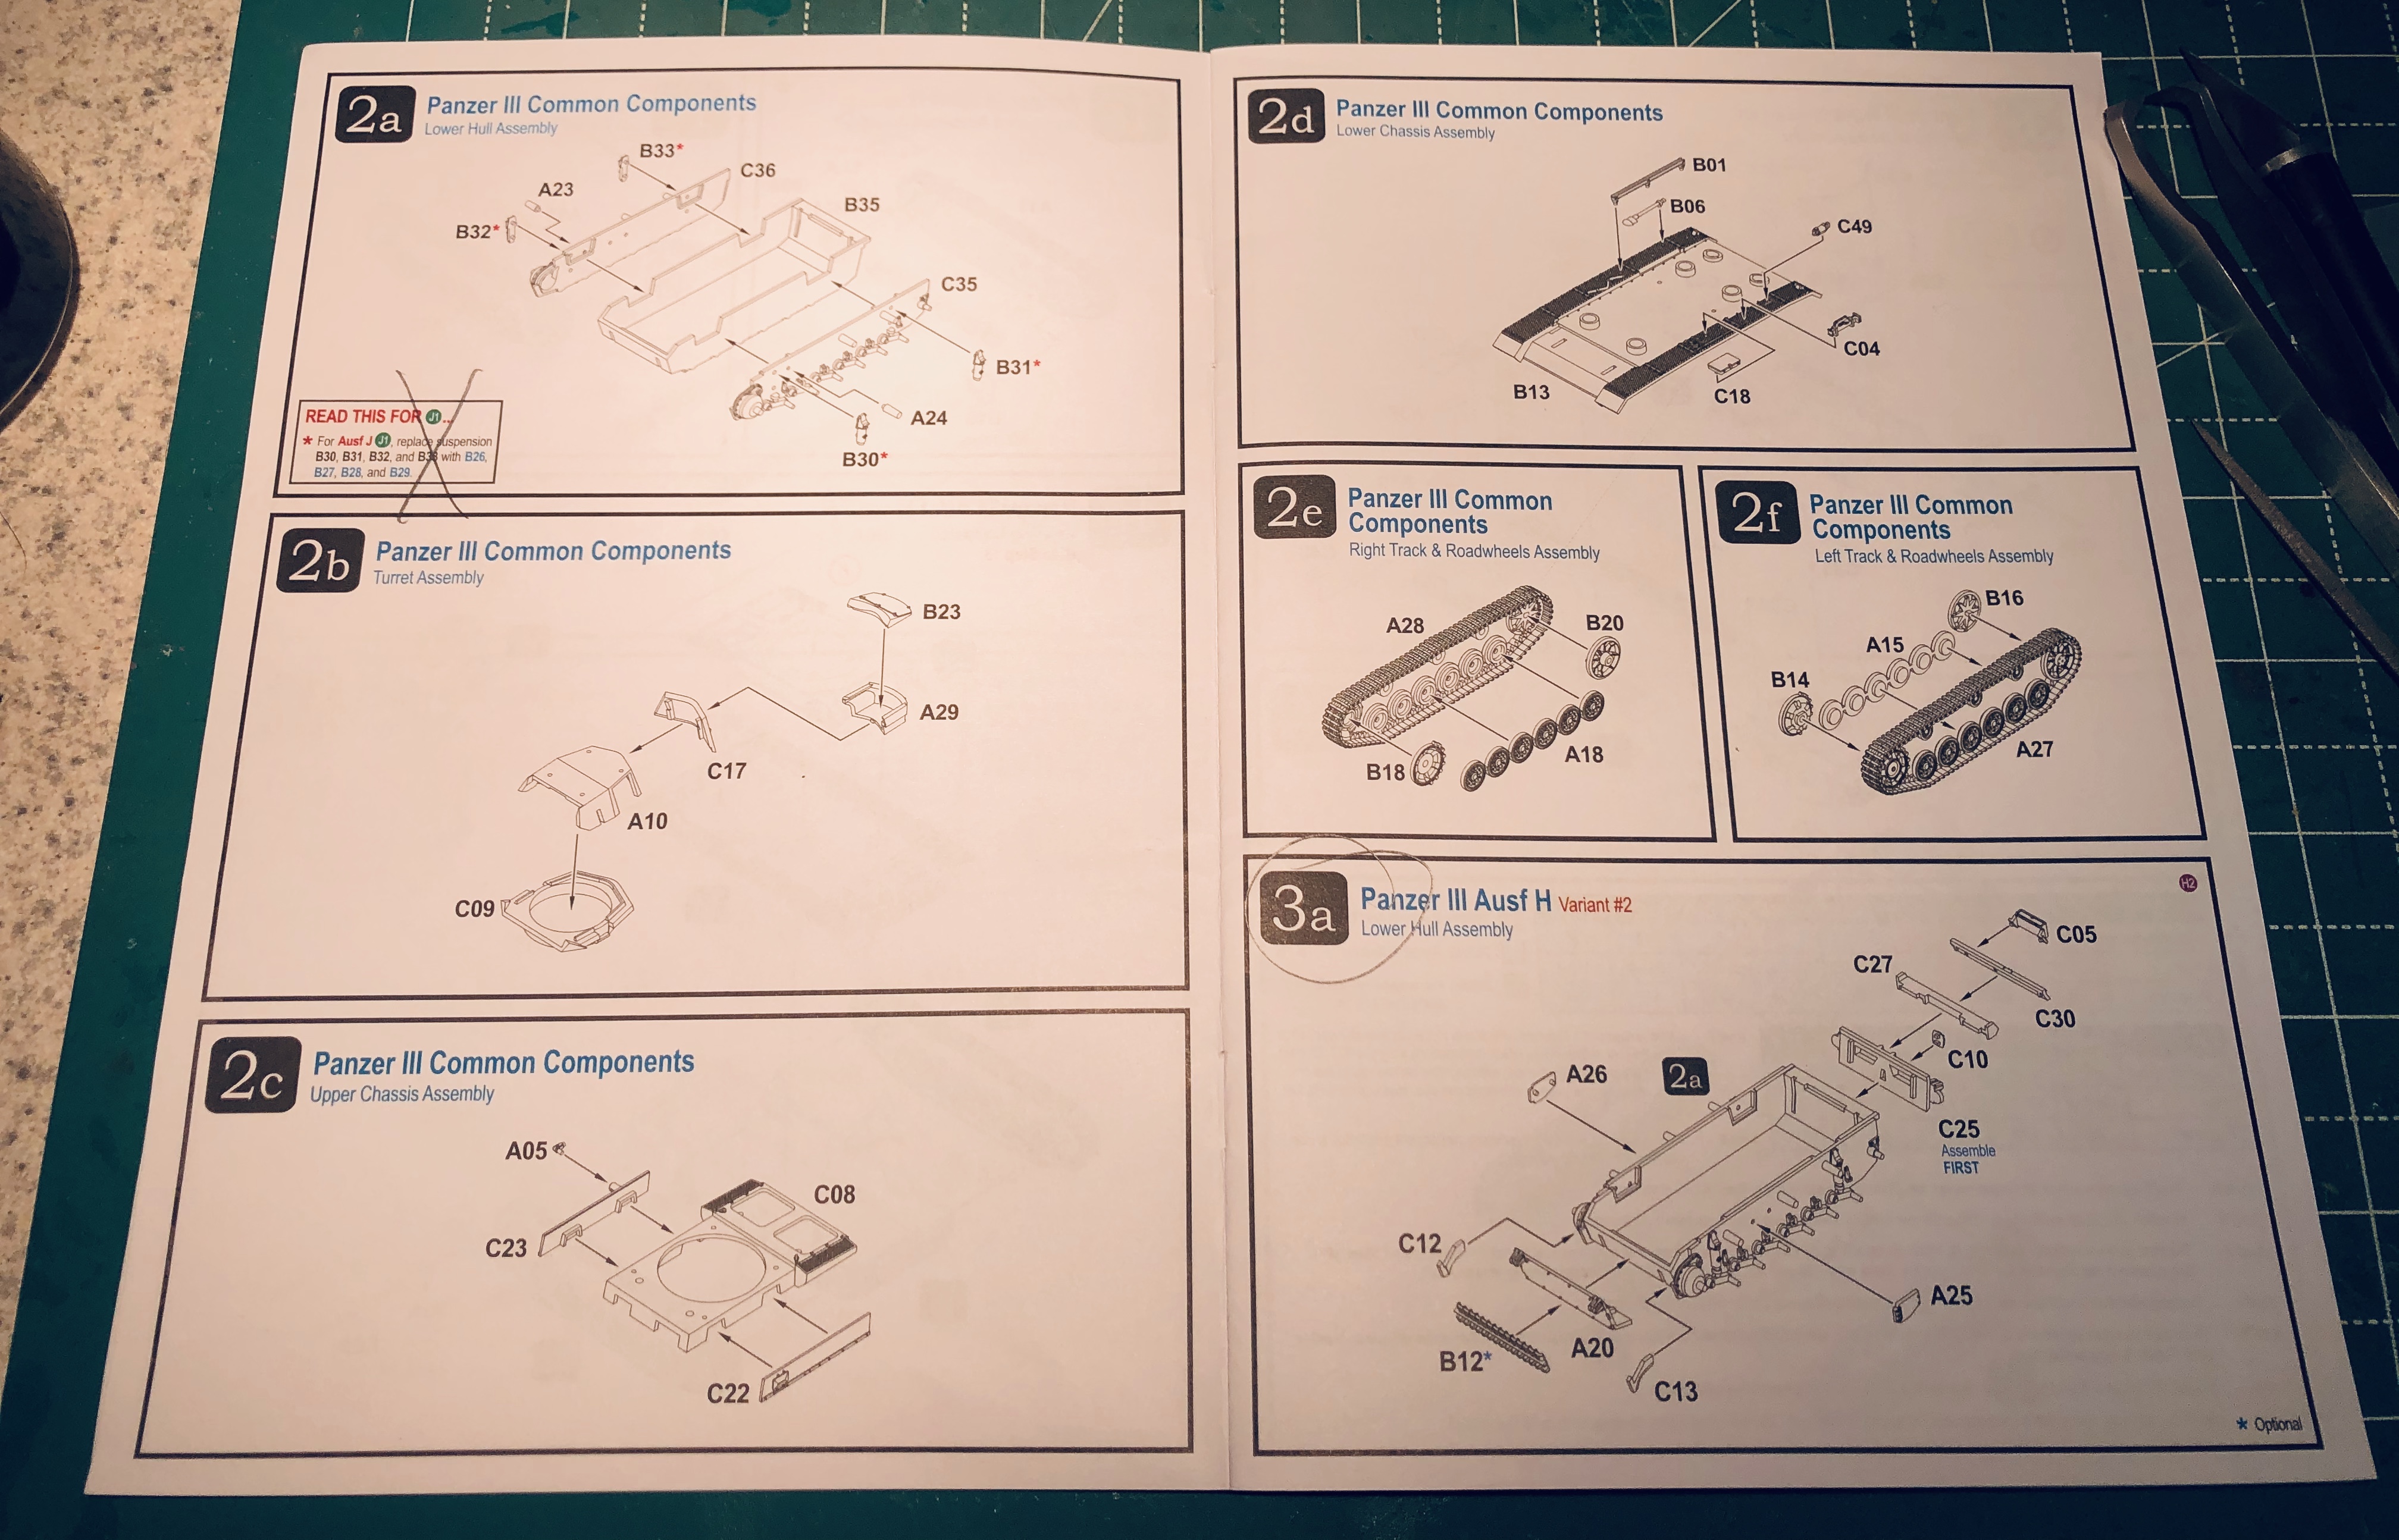
Since this build is for the PzKfw H 2 variant (essentially the late model H) I started off with Section 2 of the instructions. I managed to get the basic build complete for the turret, lower chassis and the upper chassis. The lower hull is still clamped together so I wasn't able to glue the rest of the components in place and I didn't have time to start the tracks and roadwheel assemblies.
I used some of the drilled out holes is on the lower chassis. I discovered that the holes were a tad to small for the antenna trough and the shovel (these were drilled out with the #59 drill bit) so I widened them slightly with a #58 drill bit. That resulted in a really tight fit so the #58 drill bit might be a better place to start, except on the other side where a small box is glued in place the #59 holes were actually a little large so the fit was looser than I had hoped.
This is what the build looks like so far:
 |
| I still need to finish step 2a, 2e and 2f |
 |
| I am a firm believer in clamps and and I wanted to be sure there won't be any gaps after the glue has set. |
 |
| The turret assembly is straight forward and goes together quite easily. |
 |
| The upper chassis. Again there is a lot of area for the glue to cover with the side panels. So more clamps to make sure there aren't any gaps. |
 |
| The lower chassis. The antenna trough and the shovel are on the upper right, those holes were widened with the #58 bit. The little box in the center of the bottom was a little loose with the original holes made with the #59 bit. |


No comments:
Post a Comment