Its almost imperative to have something else to work on while going through the weathering steps, everything takes so long to dry! Instead of applying the decals to the Jagdpanthers I decided to start on a PzKfw III. I have two divisions that I would like to model, the 21st in North Africa and the 6th in Russia. North Africa is a bit more appealing to me, at least at the moment, as I can build three different marks and still have them in the same platoon without a problem. I want them all to have the 50mm cannon but I'm going to go with 2 short and 1 long. I'll start off with the H variant and in the case of the Rubicon kit it will be the H2 variant in the instructions.
The Rubicon PzKfw III kit is pretty amazing, you can build just about every variant I can think of from H to N. That ability to select means you need to read the instructions all the way through before you start working on the kit. There are a lot of components and you certainly don't use them all on every mark. For instance the differences between the H1 and the H2 are somewhat subtle but Rubicon captured those variations which means I'm going to have a number of extra engine covers right off that bat. I went through the instructions and basically crossed out everything that wasn't specific to the H2. What is a little confusing is that the H1 is the first variant in the instructions (I'll call that section 1) and shows all the pieces necessary to build it. Section 2 shows the components that are common to all the variants and in my mind really should have been Section 1 and in Section 3 is the specific instructions for the H2 variant (and everything else follows each with its own section). Minor quibble on my part.
One thing that you must pay attention to is the first page which shows where to drill holes in four of the components. Its not as simple as just drilling out all the holes. You need to know which variant you are building and only drill out the necessary holes. Here is where I get a bit OCD. Rubicon does not state what size drill bit to use, they just say to drill out the holes. These are to deep to just punch through with the tip of a hobby knife you need a drill bit. I have a complete set of #61 - #80 size bits which are all to small (remember the bigger the number the smaller the bit so a #61 drills a larger hole than a #80). This lead to my previous rant when I ordered a set of larger drill bits from Micromark which turned out to be missing some bits and duplicated others. I wanted the drill bit to match the hole or at the very least be a little to small so I could enlarge it if necessary. Drilling to big a hole will result in a loose fit.
In the end the #59 bit is the right one to use, you can use a #60 if you want to go a touch smaller and then do test fittings and enlarge as necessary. You could get away with a #58 but you then risk drilling to big a hole. I used the #59 and will see how that goes with this build.
At this point that's all I have managed to drill is a lot of holes in the four parts. I'll now move on to Section 2 the common components build and then to Section 3 which is specific to the H2 variant which will build a late version of the H with bolt on armor and the 50/L42 cannon.

 |
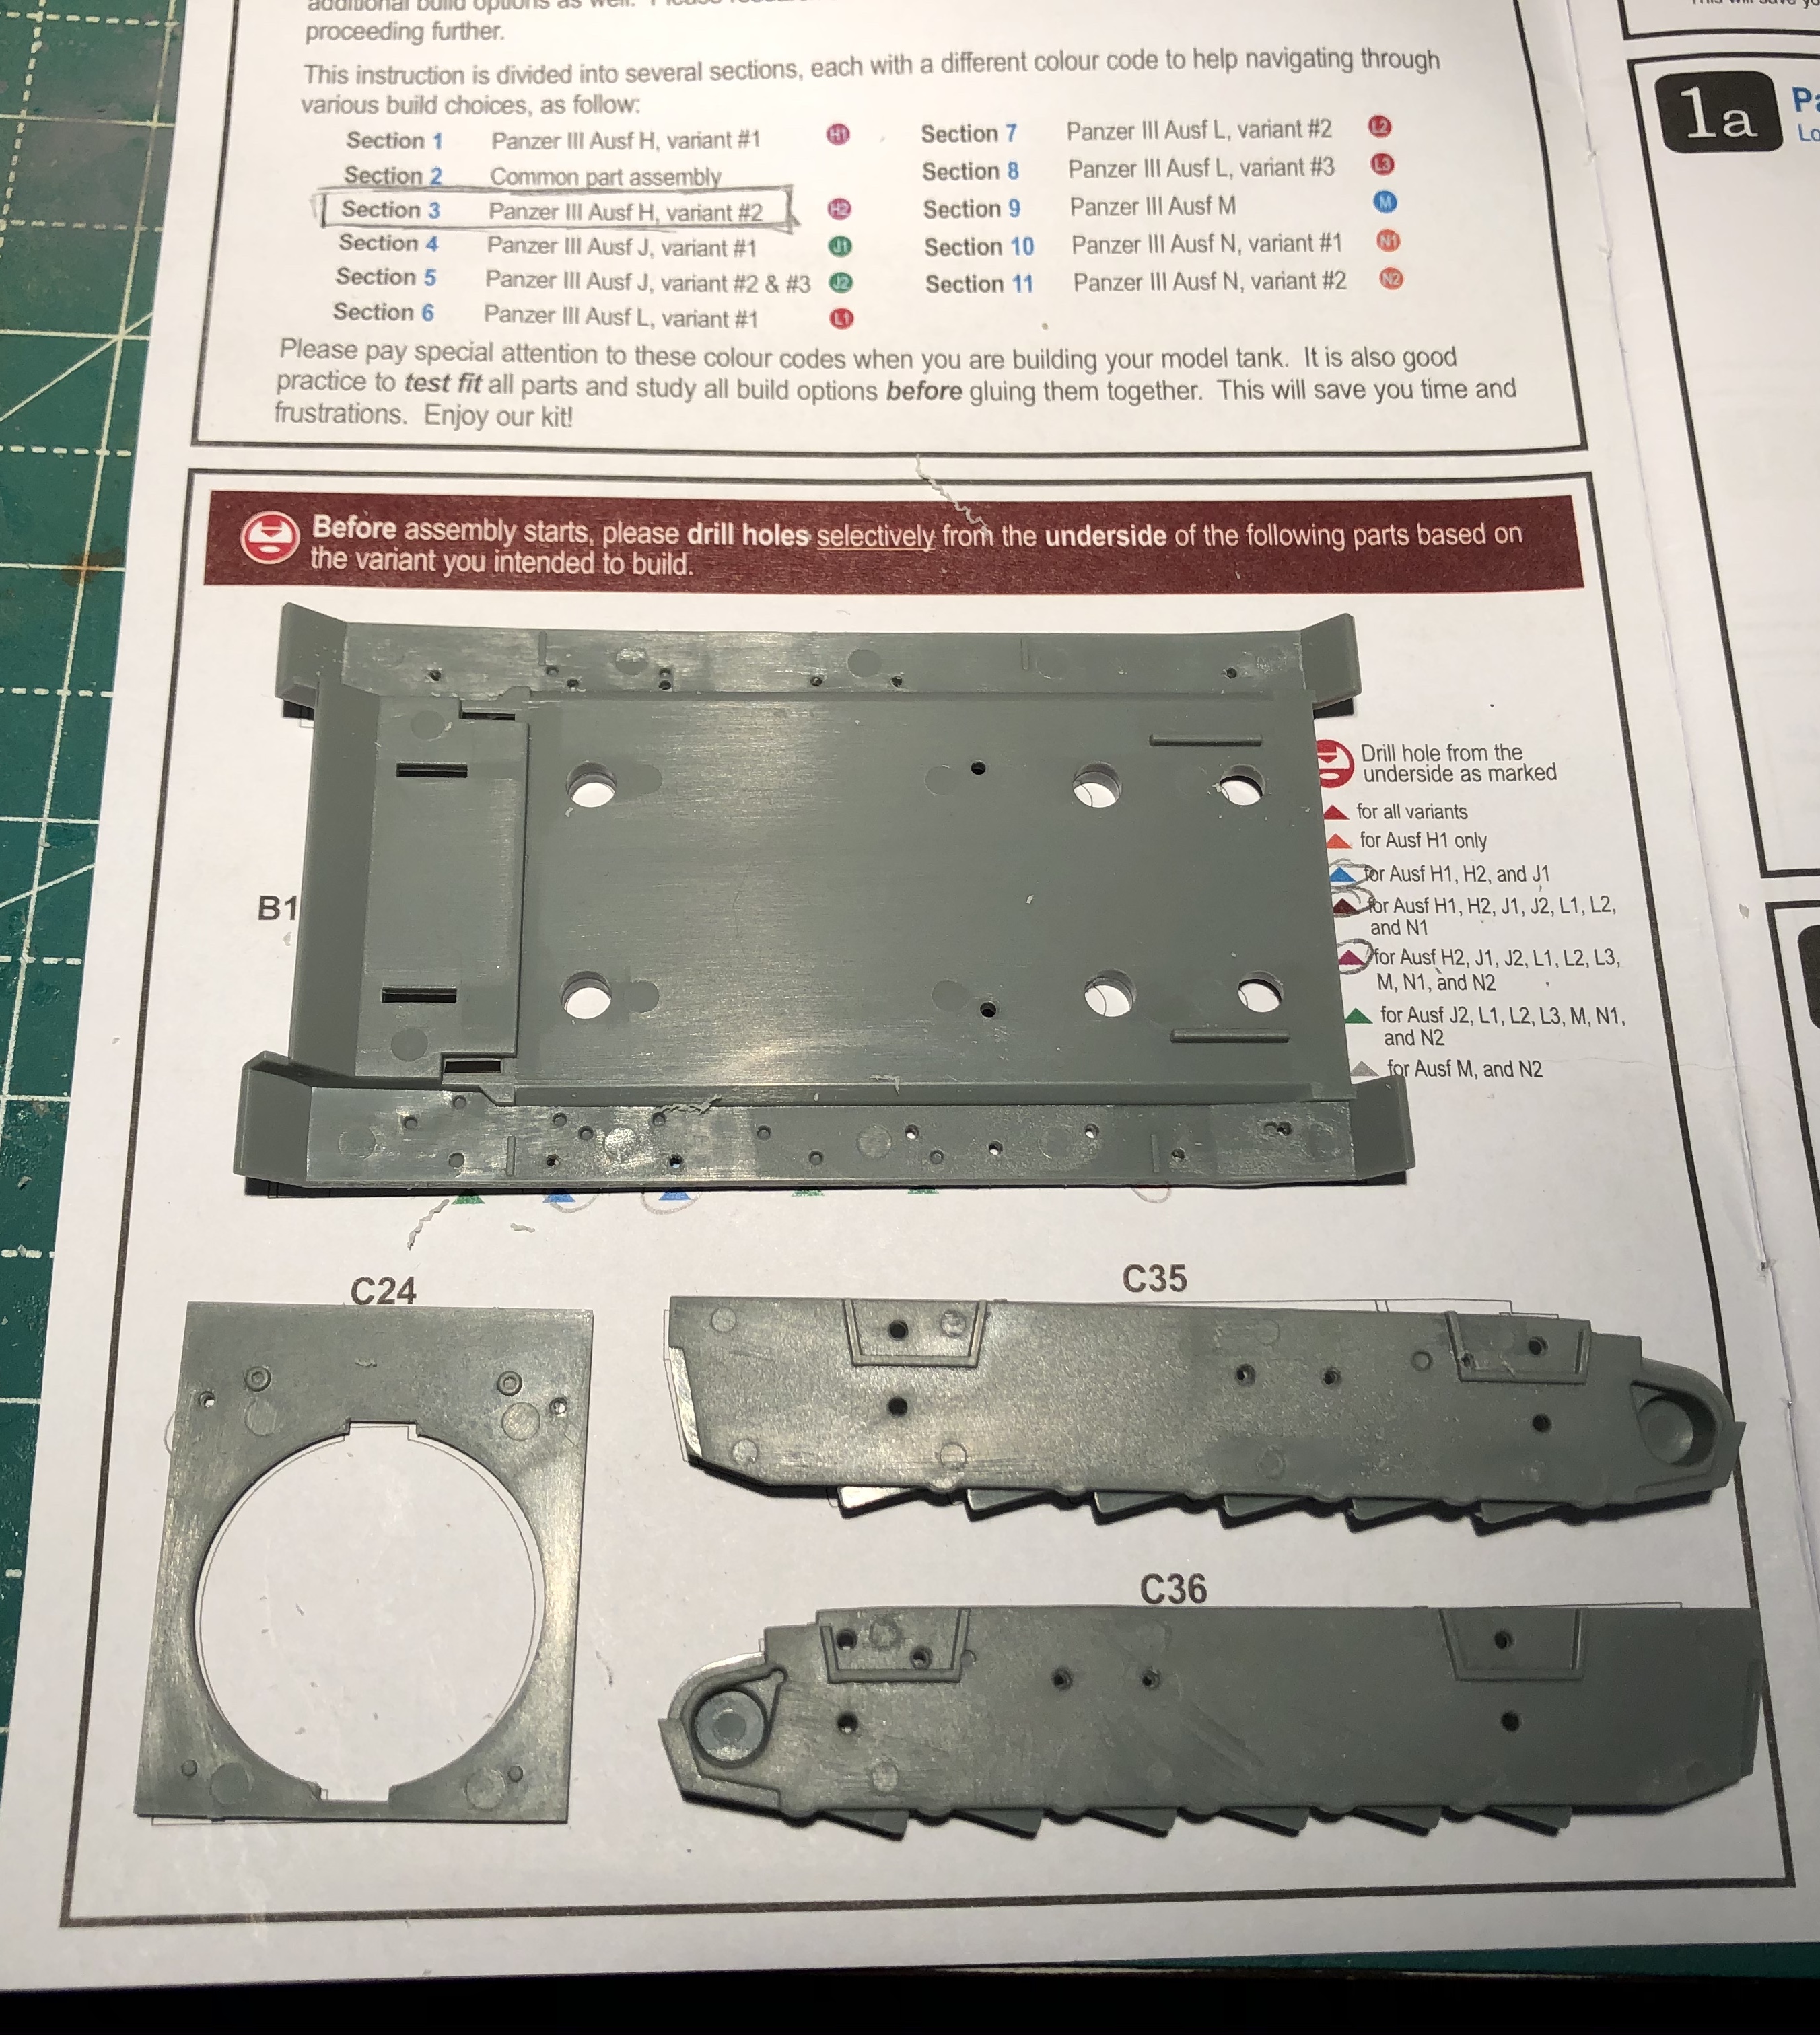
| The first page, a must read! |
 |
| I have circled all the holes that I need to drill. Follow the legend on the right side of the page and read it carefully! Otherwise you will end up filling holes that you don't need! |
 |
| The four components awaiting surgery |
 |
| Hard to see here, but the holes have all been drilled out and I didn't make any mistakes (might be a first). Again I used a #59 drill bit which seemed to be an exact match for the hole. The #58 was a touch to big and the #60 a touch to small. |
No comments:
Post a Comment