Wednesday, December 27, 2023
Friday, December 15, 2023
More Railroad Figures - ScaleHumans on Shapeways
In my quest to find better modeled railroad figures I hit Shapeways and quite frankly was a bit disappointed by what I was finding until I worked my way through the truly massive list and found ScaleHumans.


He does a lot of figure modeling and has a selection of railroad figures available in a variety of scales (much like Modelu). This aren't scanned they are 3D sculpts. Screen resolution being what it is I figured they only way I could get a good idea of what they might look like was getting an order placed. And off an order went. At the time I ordered three sets, 2 in HO and in O. I ordered everything in a tan plastic and that was probably a mistake. One set of the HO figures ended up being canceled because it wouldn't print in that material. I emailed back and forth with the sculptor and all of his stuff should only have been available in the Clear Ultra Fine Detail Plastic.
The sets arrived this past week. Off the bat they looked pretty good, one O scale engineer had a broken hand and two had hat brims that didn't completely print. One HO scale engineer also had a broken hand and that sucker slipped right out of my hands and disappeared forever. Most of the hat brims didn't really print very well either. The O scale ones were all fixable without to much effort, the HO we will have to wait and see. The two HO sets are interesting. The set that did print in the tan plastic are definitely bigger than the ones printed in the ultra fine. I may re-order than tan set in ultra fine to see if they come out the same as the tan or smaller like the ultra fine. Don't hold your breath it will be awhile.
Here are the sets I ordered (these are how they appear on Shapeways):
HO Engineers and Crew Pak II (7 figures)
6 Figures HO Scale 1:87 Scale
1-48 Fig pak 2 Engineers and crew
The HO Engineers and the O scale Engineers are the same figures. The other HO set is not currently available in O scale.
 |
| The O scale engineers getting their pins. |

 |
| The front of the brim is missing on this one. |
 |
| And a good chunk of the side is missing on this one. Both relatively easy fixes at this scale. |


 |
| Quite the difference in size between the HO engineer pack and the other HO pack. |
Wednesday, December 13, 2023
Tuesday, December 12, 2023
Jigsaw Puzzle -A Big One
There is light at the end of the tunnel for the Christmas Jigsaw puzzles. This is my first larger puzzle. This is a an 11x14" version of the Spanish Windmills, a photograph taken by my Dad on one of their trips to Europe. My goal was to create a puzzle somewhere between 385 and 400 pieces. I missed the goal by a bit with the final count being 370. It should be occupy my Mom for a couple of hours (who routinely does a couple of 1000 piece puzzles a week).
 |
| This is where it all starts. Photo is dry mounted to a piece of 5ply baltic birch plywood. Then I decide where the Whimsies will go. |
 |
| Because of the size I made the first cuts down the middle to keep things easier to work with. |
 |
| Working from left to right, here I have finished cutting the windmill. I put the puzzle together as its cut. |
 |
| The next section to cut |
 |
| Its been a bit of process but progress is being made |
 |
| Left side is done, ready to move to the right. |
 |
| Taking a slight different approach I'm working from the bottom up. |
 |
| Puzzle is finished, here you can see what it looks like from the back side. I sand all of this down again so its nice and smooth. |
 |
| Here is the finished 370 piece puzzle. |
Monday, December 11, 2023
Thursday, December 7, 2023
On30 Portable (sort of) Layout
I have way to many hobbies and, obviously, I tend to jump back and forth a lot. While my main railroad focus is on the HO Scale Warehouse Row (D&RGW) switching layout. That moves slowly because the space where it will live is not ready, so I do a lot of research and planning. But I also have been contemplating an On30 layout and if you look back through the blog you will see a lot of reference to the On30 C&N railroad out of Boulder.

Original concepts have been for a switching layout based on the Sunset station area where the line from Boulder split, one to Ward and the other to Eldora. I have messed around with this a lot and I just can't quite solve how to work around the wye which is the major component of the area. Then the thought occurred to me that maybe I really needed to go in a different direction with this one, especially as the HO layout is a switching layout, do I really need two? The answer is yes, I need two layouts and no I don't need two switching layouts.
With that in mind I was thinking of something I could put up and take down without to much of an issue. 4x8 seemed a little small though even though, in theory, everything I own can handle 18" radius curves. The issue is more that everything else in O scale is just going to take more space. So I opted to stretch it to the space I could set it up in and it will be 4x10.
This is very much a round the loop layout so there will be a lot more of just trains running than switching. So think of this one more as a display layout that I can just play with.
Operationally it will work just fine but with the mining theme there won't be any intensive switching like there will be on Warehouse Row.
Layout design is not my forte by any means, so I went looking for designs that caught my eye. This design is mostly a stretched version of a design by Dave Meek (Thunder Mesa Studios) he called the Rio Lobo and Western Railroad (in HO Scale). It features four good sized bridges reminiscent of John Allen's original Gorre & Daphetid RR. and room for a little action moving cars around and, hopefully, room for plenty of scenery and buildings.

The turnouts are the Peco On30 ones. I took the template I downloaded from the Peco site and then reduced it down to the scale of my drawing. Hopefully I did that right. Its still pretty much a work in progress design wise. My intent is for it to break down into four sections for storage and lot of the elements will need to be removable because of that which will certainly increase the construction difficulty level, especially making sure that the track aligns properly between the sections.
Wednesday, December 6, 2023
Tuesday, December 5, 2023
Jigsaw Puzzle - Mistakes!
I have been working on my jigsaw puzzle cutting skills. There is an idea in the back of my mind that this could be my retirement "job". We will see if that comes about, retirement is starting to creep up on the horizon though.
From Oct - Nov 2022 I cut 9 puzzles. I consider two of those to be prototypes and I put out for people to put together. Seven of those were family gifts. This year we have expanded things a bit. I'm cutting 14 puzzles this year, including two that are 11x14 rather than the 8x10s I have been doing. One of those I made a mistake on and I don't feel right giving it out as a gift so it will become another display puzzle,
I start with a picture and a piece of 5 ply baltic birch plywood I then use a dry mount press to mount them together. We purchased a smaller used press last year and it works okay. This year I used it on the first two puzzles and I just wasn't getting a good bond. Out of frustration I went looking for another used one that was in better shape and I found one on eBay that was local and we could pick it up. These presses are heavy and I really didn't want to try and have it shipped. This one is a bit bigger and worked like a charm. However, there was a bit of learning curve with it. I used the same settings and timing I used on the original press and that didn't really end well.
This is what happens when you apply to much heat for to long a period of time:

I think this particular image is cursed. This is the same image that I messed up a cut bad enough to tear it and thus making it only good for a display puzzle to put together on the table.
Monday, December 4, 2023
Jigsaw Puzzles for 2023
One of the things that has been occupying my time is cutting jigsaw puzzles for Christmas. I actually started cutting in October because we are expanding how many we are giving out for gits. Here is what is on the list for this year:

Unfortunately with all the puzzle cutting I forgot about printing Christmas cards this year so we are going commercial with those!
 |
| Here is the first batch of 8x10s |
 |
| The next batch, including three bigger puzzles. 1 is 11x14, the bright orange one is 10x14 and then a panoramic photo that is 8x20. |
 |
| I had already finished three puzzles so these are not included in the first two photos. |

 |
| This one was going to be for my wife, but she decided she would rather have the Spanish Windmill shot instead. I'll end with with three of the Spanish Windmills in 8x10 and one 11x14. |
Wednesday, November 29, 2023

Monday, November 27, 2023
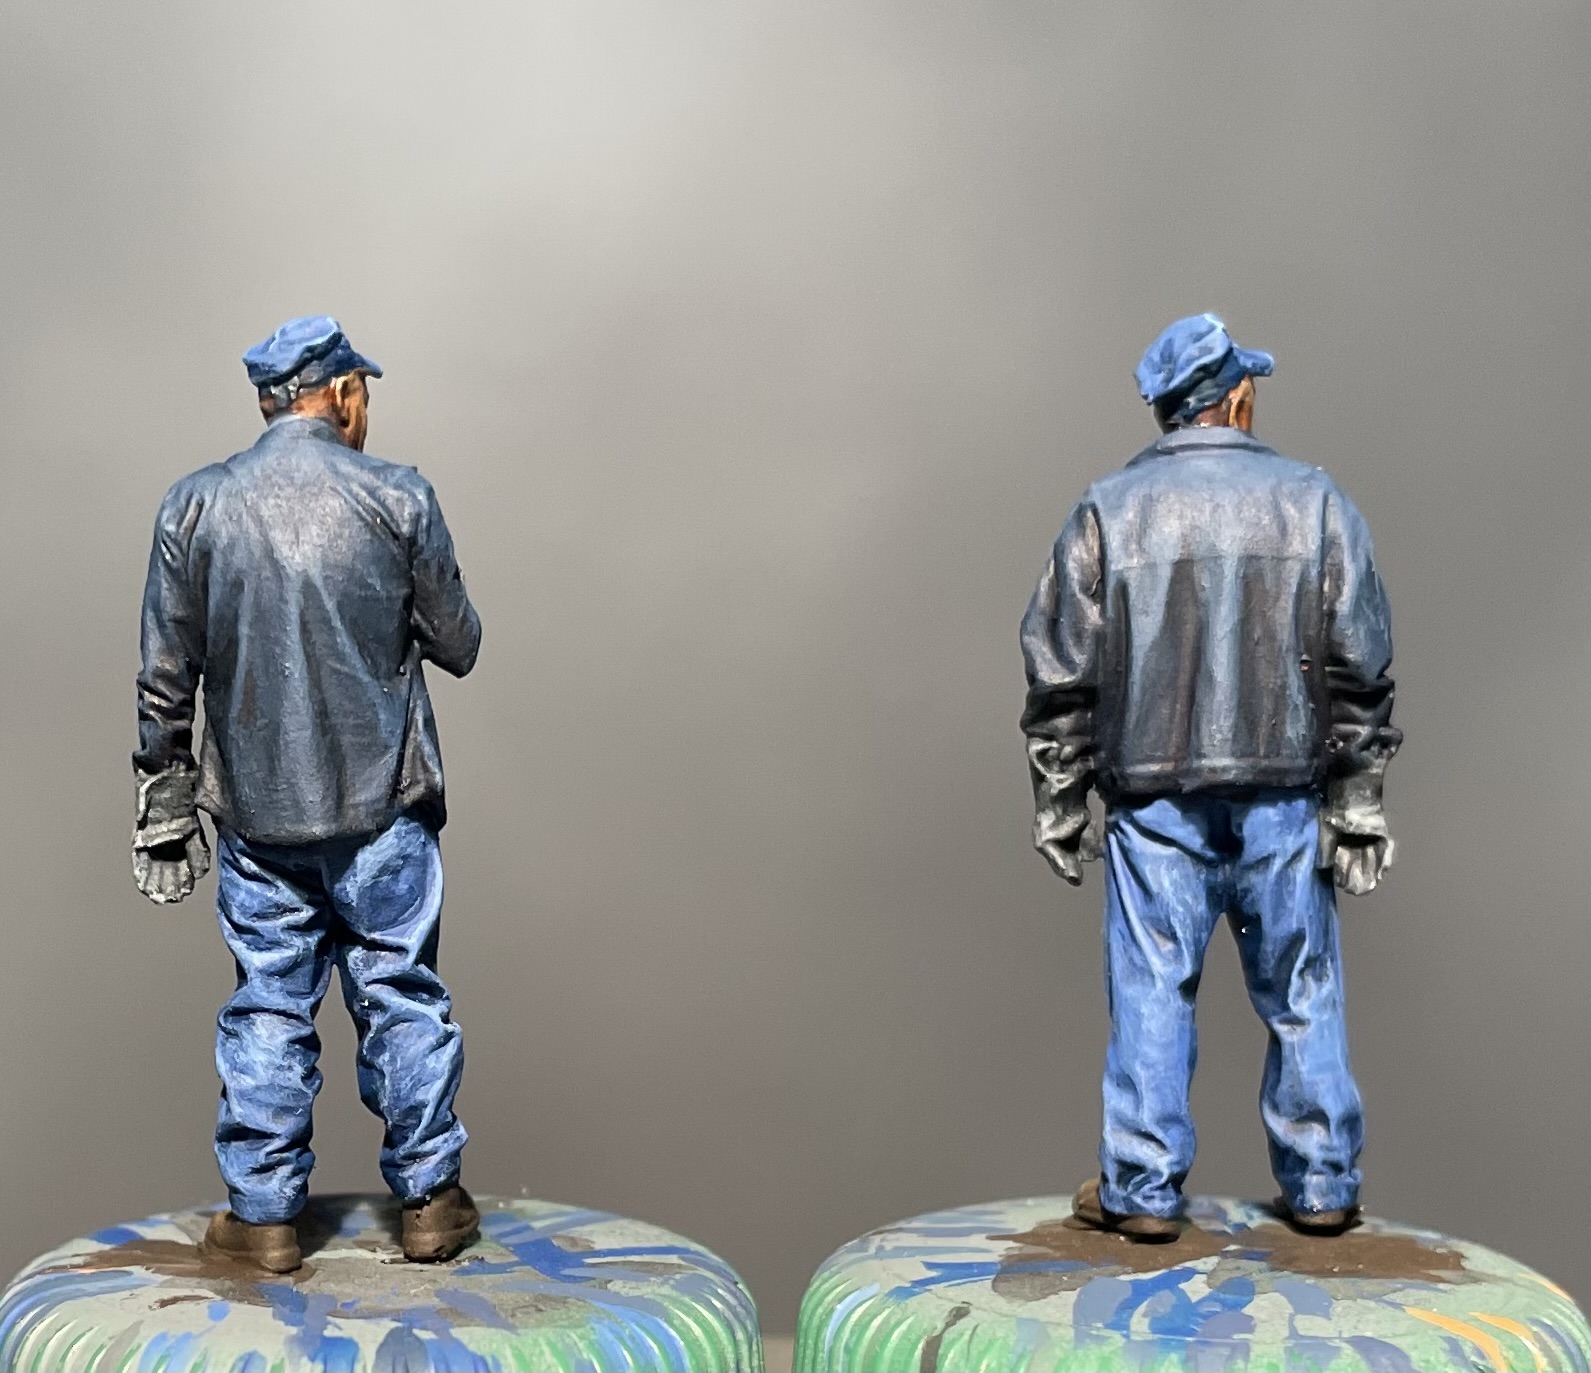
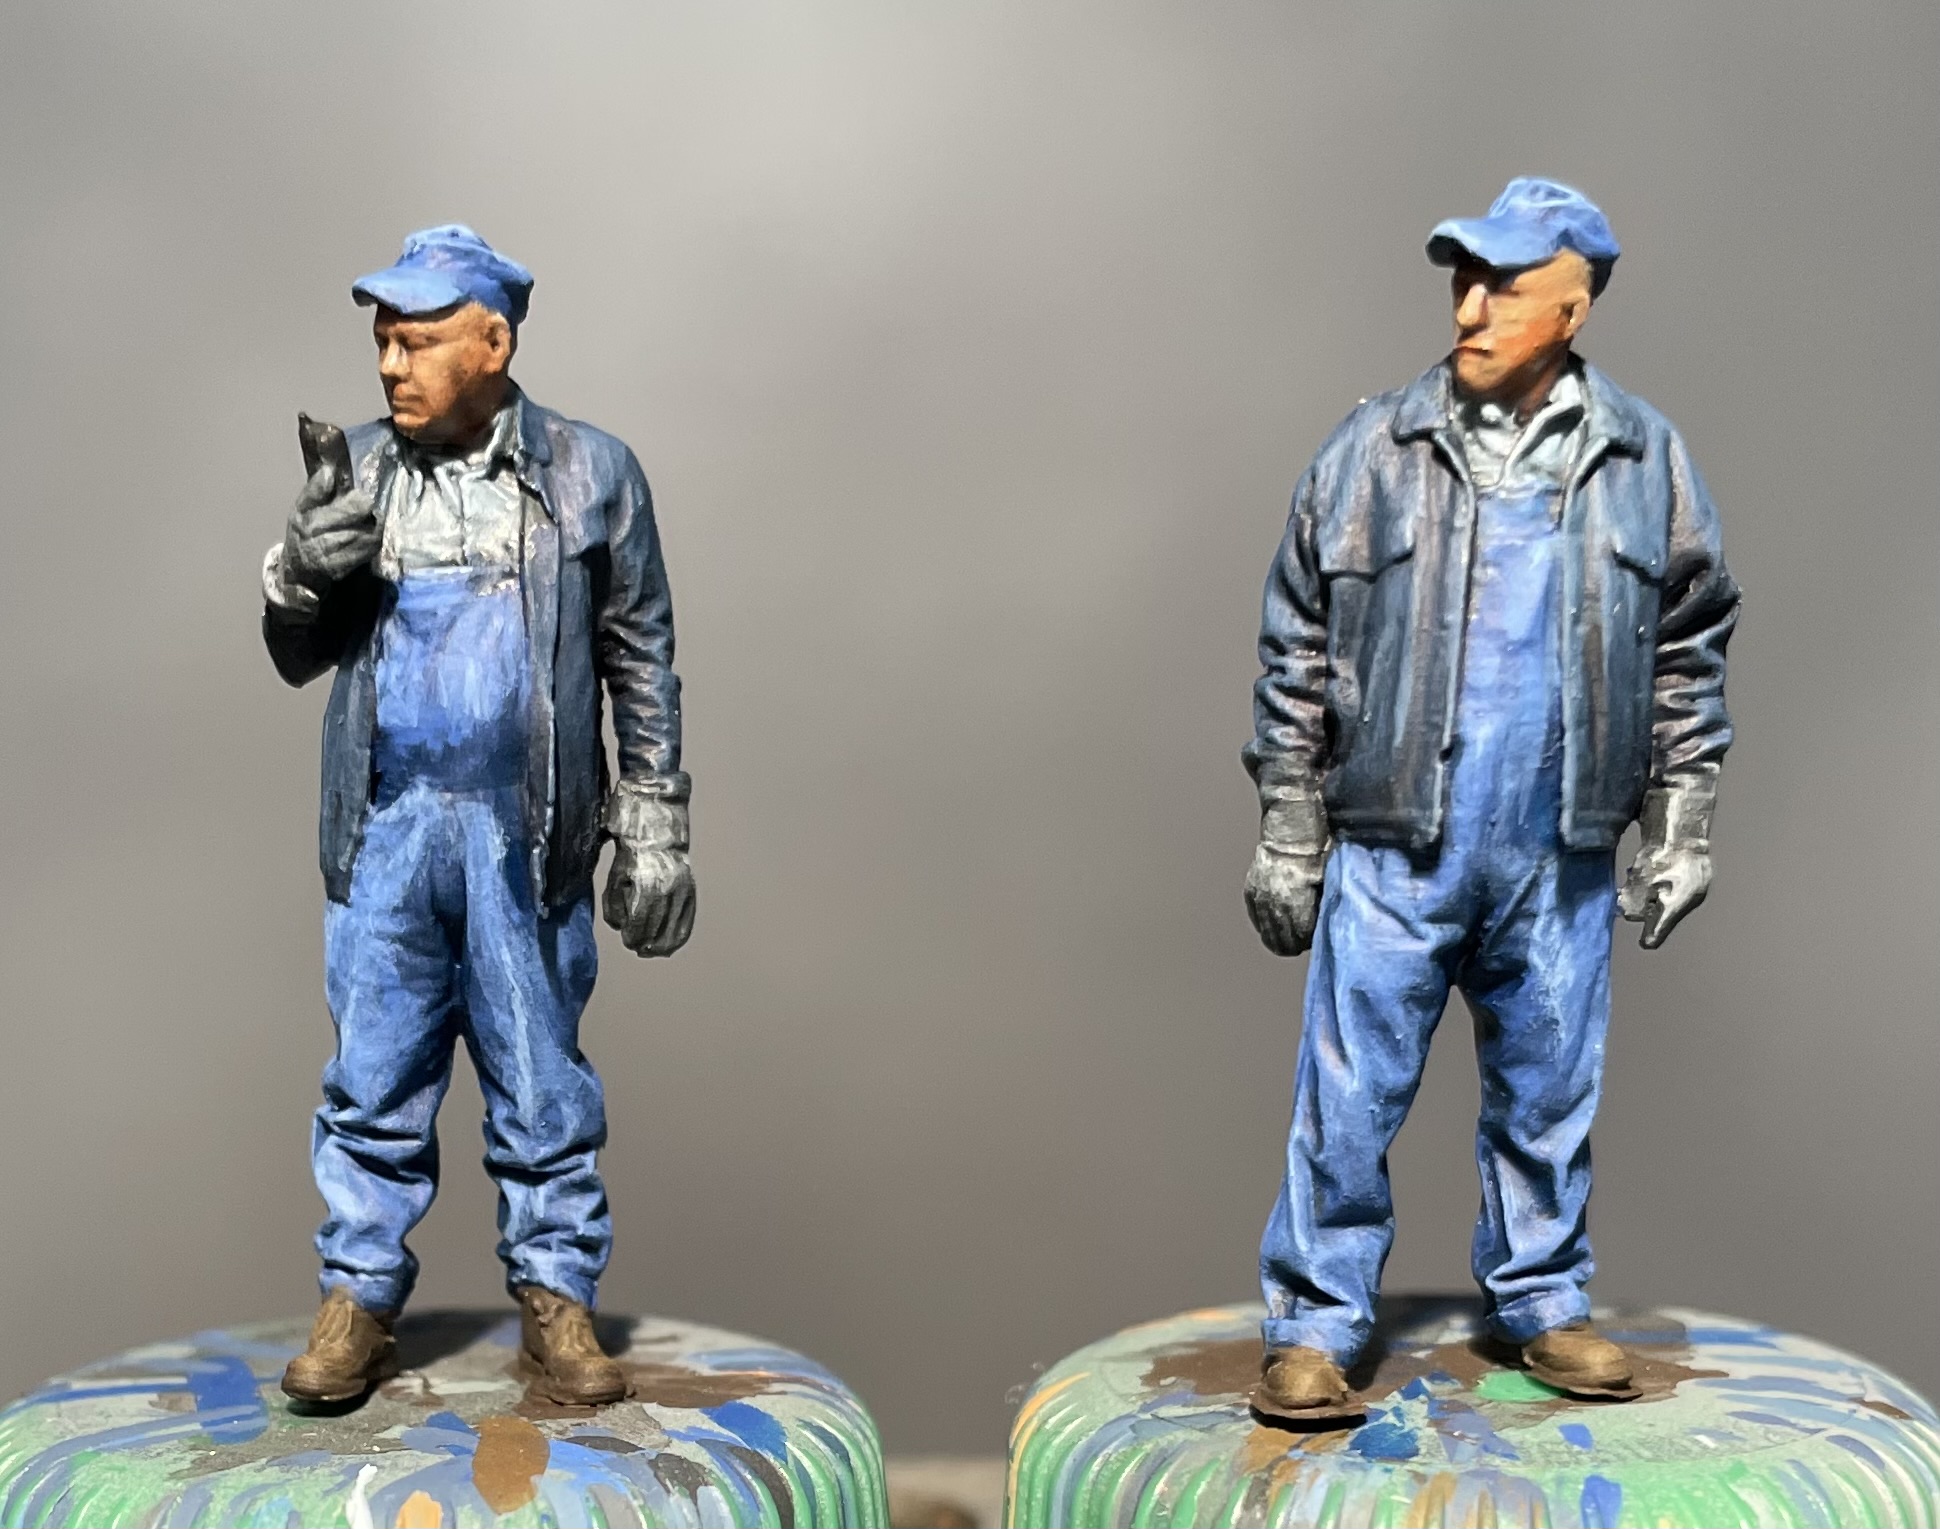
Painting the Modelu O Scale Transitional Era Crew Bundle - Part 7 Finishing up
Time to wrap this up. These are relatively simple figures from a painting perspective. After the overalls, jackets and caps its just down to gloves, boots and touching up the skin a bit.
To start off I wanted to try something to try and bring out the features on the skin a bit more. I took some Army Painter Strong Tone and thinned it down about 50:50 with their glazing thinner. I painted all of the skin and the shirt with this mix and let it dry. It feels like it added quite a bit of depth to the face and filled in the eyes better than my initial effort, however, my highest highlight was really emphasized and looked very odd at this point. Didn't work as I had hoped on the shirt though, I think the detail is just to fine there to really take advantage of this technique. It also dried pretty glossy, but I expected that. So to bring some life to those shadows on the shirt I took some Reaper Brown Liner and made a wash and essentially did a pin wash along the folds of the shirt. That helped things pop a bit.


I went in with my mid-tone skin color. Ammo's Burnt Sand (A.MIG-0133), touched up the skin a bit which covered most of the gloss and tightened up the transition to that highest highlight.
From there I moved on to the gloves and boots, following pretty much the same process as the jackets and overalls; a dark, a mid-tone and a highlight. These areas are small and don't need those transitional 50:50 mixes that I used on the larger areas. I went with brown for the boots and dark grey for the gloves. I'm not quite sure what would have been a common color for railroad workers' gloves in the 50's so I went neutral.


Next its time to add some "nature" (a phrase we use when our Great Pyr brings in an assortment of leaves and twigs on her coat into the house). For me these will be diesel crews for warehouse row served by the Rio Grande. On to the dirt. I used two colors from my Pan Pastel stash, one dark and one light.


Since it is powder I might continue to play around with this, but for now I’ll call them done
Friday, November 24, 2023
Painting the Modelu O Scale Transitional Era Crew Bundle - Part 6 The Blues - Jackets
Continuing on I layered up the blues on the jackets from the dark nightmare black to some highlights. I did a lot more glazing on these larger models to smooth out the transitions from dark to light. Still looking a little rough at the end but at some point you just have to say enough.


Looking back at the colors in order (all of these are paints from Reaper Miniatures)
Nightmare Black 9280
Solid Blue 29816
Nightsky Blue 29818
Winter Blue 29817
Intermediate mixes are, more less, a 50:50 mix of the two colors next to each other in the sequence. When I glaze back I use the Nightmare Black thinned down about 1:10 paint to thinner. For glazes I don't use water as a thinner I use an airbrush thinner (Vallejo's in this case). Basically I'm thinning with binder to keep the paint from beading up on the model.


Subscribe to:
Posts (Atom)