Reviews are not something I usually do but Jon Russel from Warlord Games shoved this set of templates into my hands at Reaper Con 2022 and asked me to let him know what I thought about them. This is for you Jon! Just to be clear, I did not pay for these I was just asked to say what I think of them.
I have a fondness for Sarissa Precision (https://sarissa-precision.com/) products and I have built a fair number of their MDF buildings, I still have some of their buildings in the que to be built (part of the never ending World War II project), but I haven't purchased anything from them for about 4 years or so, so it was off to visit their website to see what Jon had really handed me.
This is Stencil Set 1 part of the Sarissa Stencil System. You get a ziplock style plastic bag with stencils and instructions. inside are 8 Mylar stencils and instructions labeled "Stencils and Paste" written by Gary Faulkner of March Attack, who also helped design the stencils (http://www.marchattack.co.uk/index.htm).
The stencils are; Slate/Tile Small, Herring Bone Brick, Red Brick, Block Stone, Rough Stone, Tiles, Slate/Tile Large and Edging/Pillar Detail. There are two ways to use these, first as a standard stencil for paint and second as a stencil to apply texture with. They are thick enough to be used for texturing and I would say are actually more useful this way.
The instructions are nice, well written and include full color pictures to help you through the process. They are very short! But really there isn't a lot to say. At this point I would say you have a pretty high quality product in your hands. The question really is how do they perform.
Mr. Faulkner uses a pre-colored wood filler along with some PVA glue to create a more or less peanut butter like mixture. I didn't have any wood filler on hand and I'm far more likely to use stuff that modelers are going to have on hand. I have a large jar of Liquitex Matte Gel, a medium jar of Liquitex Natural Sand and a jar of Ammo's Acrylic Mud (A.MIG-2103 Turned Earth Ground). The Ammo product is very similar to the Liquitex Natural Sand but pre-colored. I used these products straight from the jars and applied that to some MDF that I had left over from some project or another.
Pictures tell the story best:
 |
| This little package, marked at $34.95 US when Jon handed it to me at Reaper Con. About $4.37 per template. You can buy them individually on the Sarissa website, certainly more expensive than buying them in the set. |
 |
| 8 Mylar templates. Each template measures 2 7/8" x 4 1/8" (73mm x 105mm approximately) |
 |
| Instructions - Front |
 |
| Instructions - Back |
 |
| The materials I'm using for the test run. This is stuff I typically have on hand. The only thing missing is the Liquitex Modeling Paste, mine had dried up. |
 |
| After the initial spreading with a palette knife. Tried to keep it thick enough to cover the Mylar. |
 |
| Then I scrapped off the excess so the material was just where it should be and you could see the template and the pattern. |


 |
| I let it dry for a few minutes to harden up a bit, but I didn't want it to harden completely and perhaps trap the Mylar in place. It pulled up quite easily and left a nice 3D imprint behind. You do need to be careful pulling it up so that the Mylar doesn't slide and mess up the pattern. |
 |
| The rough stone template, a small issue at the top where I managed to get some matte gel underneath the template. |
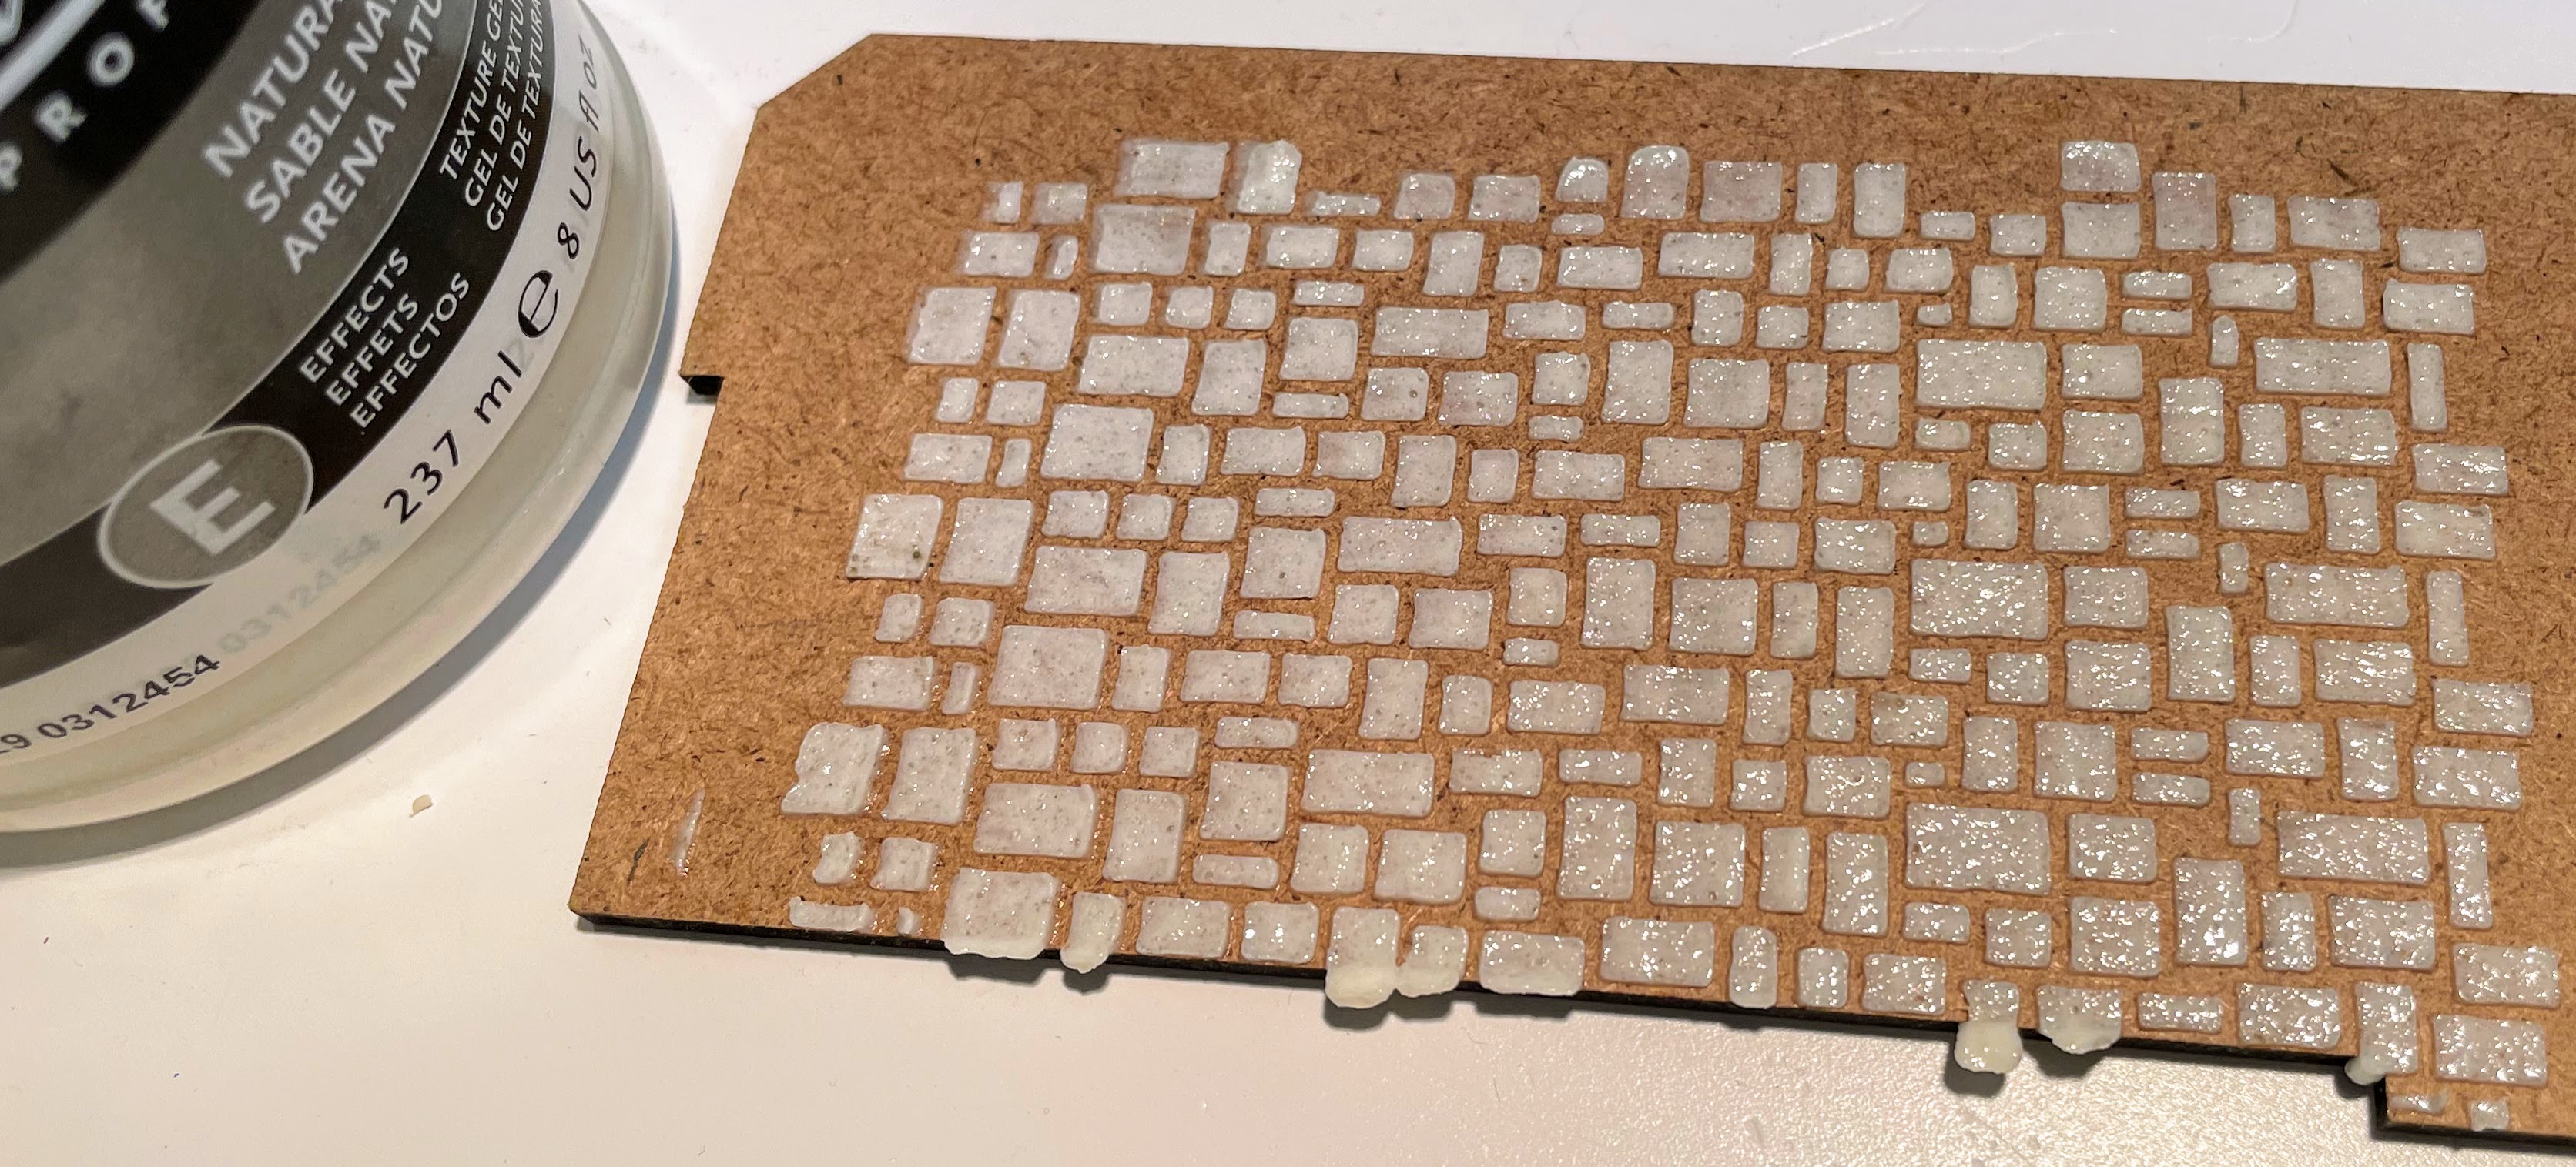 |
| The rough stone template with the Natural Sand |
 |
| The Herring Bone Brick template with the mud. You can see what happens when you let the template slide a bit when you pull it off on the right. I smudged up a good chunk of the Herring Bone pattern there. |
I have to say that I was quite pleased with the results. The instructions say that the templates were designed so you can continue to repeat the pattern. That I didn't try, from my brief experience I would say that you really need to let the first part harden up completely before you add to it otherwise you might smudge your work. I can see a lot of uses for these templates as I work on different projects. While the initial price tag feels a little steep I think they are worth the price.
That being said I do think the choice of templates could have been better (that old personal opinion coming to the fore). I would like to see a couple of different brick patterns and less tile patterns. While the Edging/Pillar Detail is quite nice, another one featuring brick arches for doorways and windows would not be amiss (although likely to be difficult to actually create). The Red Brick template is very nice but this type of pattern is typically used when the wall is hollow and likely has some fill. I would definitely keep it, but I would like to see a Flemish Bond and an English Bond pattern (oddly enough Flemish Bond is very common in Britain while the English Bond is common in the US).
From the top then:
Herring Bone Brick - keep (very useful for all kinds of places)
Red Brick (or running course) - keep
Block Stone - Keep (again very useful)
Rough Stone - Keep (love this one)
Tiles - keep (although I'm 50/50 on it. I don't think I would miss it)
Slate/Tile Large - drop
Edging/Pillar Detail - keep (useful but could be better)
I wonder whether you could use these on a parchment or waxed paper substrate to produce individual bricks or blocks. Might be useful for making arches or for adding a few bricks to a corner of a building or the like.
ReplyDeleteIf I were doing something like that, I would consider using spackle or Hydrocal, though latex might be useful for its flexibility.
My thought was to use them as appliques on an existing arch to make the arch look more like stone or brick. Start with foam or plywood and then glue on the "bricks". That might allow you to get the characteristic look of a masonry arch. In principle, you could do the same with less curved doorways.
ReplyDeleteThe hard bit would (I suspect) be to get them off the substrate without fragmenting them.
Of course, it might be easier to do a bit of sculpting instead of using the tool in a way it's not intended for, but there you go.
That would make sense. I'm sort of doing that on the railroad station. Using the underlaying laser cut to guide the cutting of the paper bricks to match the arch.
DeleteDefinitely possible but as you say maybe not best tool to use for it. I would still like to see a stencil like this for doorways even if it just matched Sarissa's own doors and windows.
Well those are pretty cool. The flagstone one (which I think you have labeled as rough stone) seems pretty useful for fantasy towns or town themed bases.
ReplyDeleteThanks for doing the review.