Quotes

Life is short, break the rules. Forgive quickly, kiss slowly. Love truly, laugh uncontrollably and never regret anything that makes you smile. - Samuel Longhorne Clemens (Mark Twain)
Showing posts with label Perry Miniatures. Show all posts

Tuesday, May 14, 2019

World War II Project - Perry Miniatures US Infantry Squad Build

I started assembling the box of US Infantry. Getting the first squad together was a bit frustrating. While there is a nice sheet detailing what's on the weapons sprue, there is no such sheet for the regular sprue and nothing is numbered. The reality is that while the box has enough figures for a complete platoon I think it might take a little more than that. I accidentally managed to build two BAR gunners for the first squad and lost a left arm. I have searched the entire floor and nothing so far. It was the classic drop piece, hear it hit the hardwood floor and bounce and have no idea which way it went.

I discovered that not all of the arms will fit all of the bodies, so when I get to the second squad I'm going to need to make some notes on what fits to what and what doesn't fit. I might also take a slightly different approach to the whole build, which will make having two boxes quite handy. Since I'm using the TOEs from Chain of Command some of the support weapons need a lot of miniatures, the bulk of the second box may well go towards creating these weapon teams. Anyway here are the results of the first build:

There are a couple of things that I don't like about  the composition of the box. On the main infantry sprue there are two men prone and two kneeling. That makes for some flexibility with the support weapon mix as these figures do double duty as crew for the .30 cal MG and the Bazooka. I don't find them as useful though when just building a straight up squad.


For the bazooka team I used one of the kneeling figures from the main sprue and the other from the weapon sprue.


And there are far to many legs to glue on. Both of these require a leg to be glued in place and I found that patience is required and the glue needs to fully set or the leg will slip out of position. I highly recommend either the Testor's Model Master liquid cement for this or Plastruct Plastic Weld. They both setup fast. I don't recommend super glue, you need to be able to slide the parts around a bit and super glue isn't going to let  you do that and eventually the bond will break. These are plastic use glues made for plastic!

The figure on the left is from the weapon sprue and the arms and M1 Garand are a single piece. He is going to need a little filler at the shoulders.

The prone figures, there are no options for the arms on these. Everyone one of these is going to look alike so be prepared to add extra pouches and the backpacks to make them different.


The other split leg figure on the right. I need to go back to this one as it looks like it slipped a bit before the glue had fully set.


Monday, May 6, 2019

World War II Project - Perry GIs vs Warlord GIs (old box)

I was pretty enthused at the release of a plastic box of US Infantry from Perry Miniatures. So I ordered two boxes. Each box has enough infantry for a full platoon including some additional support weapons like bazooka and 30 cal MGs. In fact there are enough weapons to actually build three full squads plus the platoon command section. 

I decided to compare them against the Warlord US Infantry box, now the box I have is the old box (I have one regular infantry and one of Rangers). I know there are some significant changes from the old to the new box. If I have an opportunity to pick one up I'll make another comparison. I do know that the new box is similar to the Perry's with weapons already attached to arms which is a very good thing, definitely less fiddly.

The Perry weapon sprue is much superior than the Warlord one. I can equip a squad as it should be equipped and there are enough extra BARs to add a second one if needed. The Warlord sprue has an odd mix of Springfields and Garands to the point where you can't do anything remotely accurately. Hopefully that has been addressed in the new box. Only early war US Marines should be equipped with that many Springfield rifles.

The detail on the Perry plastics is much crisper than the Warlord plastics although the faces definitely lack the character of the Warlord heads. The Perry Miniatures are 1/56th scale, the Warlord are 28mm and tend to be a bit chunkier. I think after painting them up and getting them on the table you would be hard pressed to tell the difference between them.

On to the pictures!


Warlord Instructions


The minimum pieces to put a Warlord miniature together. Although I missed the entrenching tool.


Perry Instructions


Minimum pieces for a Perry Plastic, note in this case the entrenching tool is included on the pack.


And side by side


Tuesday, April 24, 2018

AWI Project - First Unit In Progress - Pt VII - 1000th Post

A bit of a milestone, this quick post on the AWI Project marks my 1000th post on the blog. Seems like it has taken forever to get here! I should probably say something profound at this point but that seems like just to much effort on a snowy morning in Colorado.

Anyway over the weekend I was able to finally finish up the black on the accouterments and start working on the white crossbelts. I know it will be necessary to go back and touch up all the sloppy paint work but to this point I'm pretty pleased with this first run at those belts.


The black is finally done, on to the white!


First stick done with Reaper Linen White. I'll go back with pure white as a highlight.


Monday, April 9, 2018

AWI Project - First Unit In Progress - Pt VI

Sorry for the short hiatus here, but some things around the house just had to get done which put painting on a serious hold last week. I did manage to get in a short session with the Continentals. As I slowly move towards the finish I painted all the various belts, pouches..basically everything except the muskets black. This will serve as my base for painting the accouterments and to help tighten up the sloppy paint work that you have been seeing so far.

The ten miniatures that managed to receive a coat of black paint.

The twenty figures that still need it!

Thursday, March 29, 2018

AWI Project - First Unit In Progress - Pt V

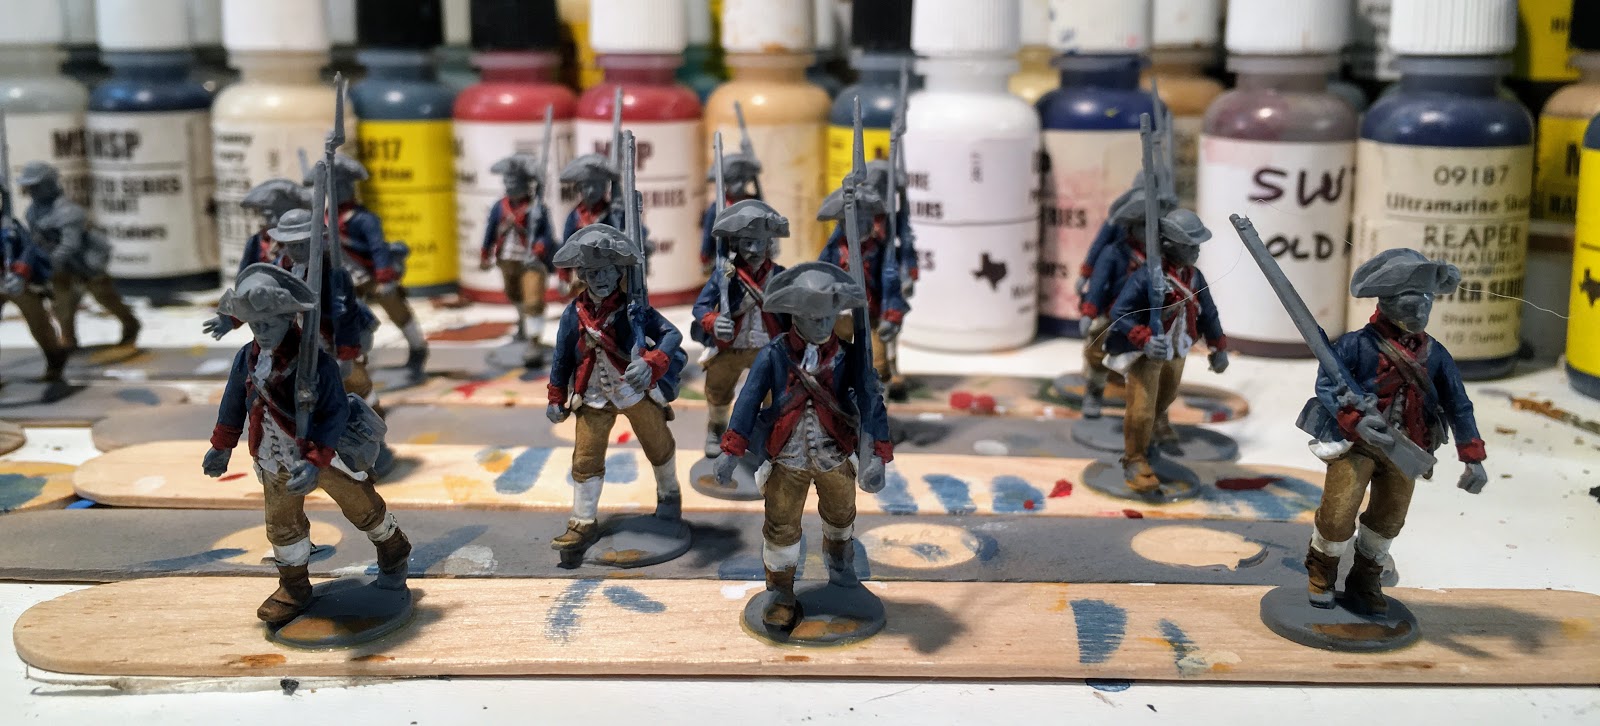
I am managing to keep up the progress on the AWI Continentals. I was able to work in another session and finished off the red facings. I then moved on to the white turnbacks and stockings. I based the turnbacks with a light brown (Reaper Leather Brown) and then moved up through an ivory (Reaper HD paint Tusk Ivory) and then to pure white (Reaper again). I also when back in on the waistcoats and brighten those up a bit more. They still look pretty messy but they are starting to come together. Next I'll go in with black and base all the belts, shoes and accouterments.

Finishing the red, Big Top Red with a bit of Fresh Blood Red, both from Reaper.


Skipped the step with the leather brown these shots are after the tusk ivory was added


And then pure white on the stockings, turnbacks and waistcoats.