Quotes

Life is short, break the rules. Forgive quickly, kiss slowly. Love truly, laugh uncontrollably and never regret anything that makes you smile. - Samuel Longhorne Clemens (Mark Twain)

Thursday, June 19, 2014

Plastic Soldier Models - SdKfz 251/1 C

I received PSM's newsletter announcing that they would be running monthly contests for their models. I had these halftracks sitting on the shelf and I have been thinking about working on my 15mm DAK army again so I figured I would break these out. There were a few SdKfz 251/1Cs in the motorized infantry regiment of the 21st Panzer Division. I need a grand total of four so this box is plenty, at least until I need to started doing the conversions to 251/3s.

While I realize that reviews of these kits have already been done to death I figured I would still through out my construction photos and comments for the world to ignore. On to the pictures!

The box! Contains enough parts for 5 SdKfz 251/1Cs. Works out to about $6.50 each.

The sprues plus the "instructions"

A single sprue with everything you need to build one halftrack

I cut out all the main parts for the halftrack and cleaned them up. Mold lines were only serious on the front tires, which is kind of expected.

Putting on the tracks. Hard to mess this part up

Front wheels and both tracks in place

Ready for the rest

The "bathtub" portion of the model. 

The "bathtub" attached and everything back to right side up

Adding the driver position and the benches

The backrests are in, still looks uncomfortable

The side storage compartments in place

Dropping on the top. I did not glue this piece on yet, I want to be able to paint the interior and it will be a lot easier without the top shell in place.

I left off the MGs and the MG shield as well. Somethings are just easier to attach after the painting is done.


The sprue after I cut everything out. Plenty of extra pieces for stowage.
This kit was a snap to put together (its not a snap together kit though, use your favorite plastic model glue). I spent more time taking pictures than I did actually assembling and cleaning mold lines. I could probably build the entire box inside of an hour. Feels pretty sturdy so I think it will hold up to the rigors of the gaming table quite well. I'm looking forward to getting out the paints and starting on the little base diorama I have planned.

Calamity Gets a New RR Station - Part 2.5

I didn't get as far as I wanted to on the build tonight. I was cutting out the vertical planking for the exterior and discovered that I was out of the trim pieces that I needed. So its not really a full part three posting.

Here are the rather boring pictures of this evening's work. Actually, I'm sure that the whole thing is rather boring to watch from the other side of the page.

Right Side, the vertical planking is just below the windows. It should be bracketed with trim pieces. Next time I'll remember to make sure I have those trim pieces.

Freight side with my little weights holding down the planking. I'm using Passenger Car siding to represent the vertical planking.

The sides to the bay windows

The front of the station

Trackside

Freight side with "wings"

Right side with "wings"

Wednesday, June 18, 2014

Calamity Gets a New RR Station - Part 2

Tonight I grabbed the pieces that I had marked up and started cutting. Cutting windows and doors out of styrene is just a pain. Always easier with a sharp knife though, so I made sure I had plenty of blades ready to go. With the cuts all completed I kind of stacked everything into place to get an idea of how it might look. At this point I'm pretty pleased with the overall feel. I start working on the exterior pieces that I can do without the doors and windows. I need to place that order or things are going to stall pretty quick. I also need to decide on the foundation. I'm actually thinking about a stone foundation for this one it will provide a nice contrast to the other buildings in town.

Here are the pictures from tonight's work.
Right Side Elevation, lower windows cut out

Right Side Elevation with some citizens for scale

Left Side Elevation, top windows and the freight door in. Check the height where the freight platform will sit. I may need to modify this a bit. Time to pull out some track and a box car and see if they line up properly.

The windows cut out for the sides of the bay windows

Now in individual sections

The front (two windows) and the trackside portions of the bay windows. On the left is the wall for the baggage/freight room.

Checking the heights and a scale for the bay window.

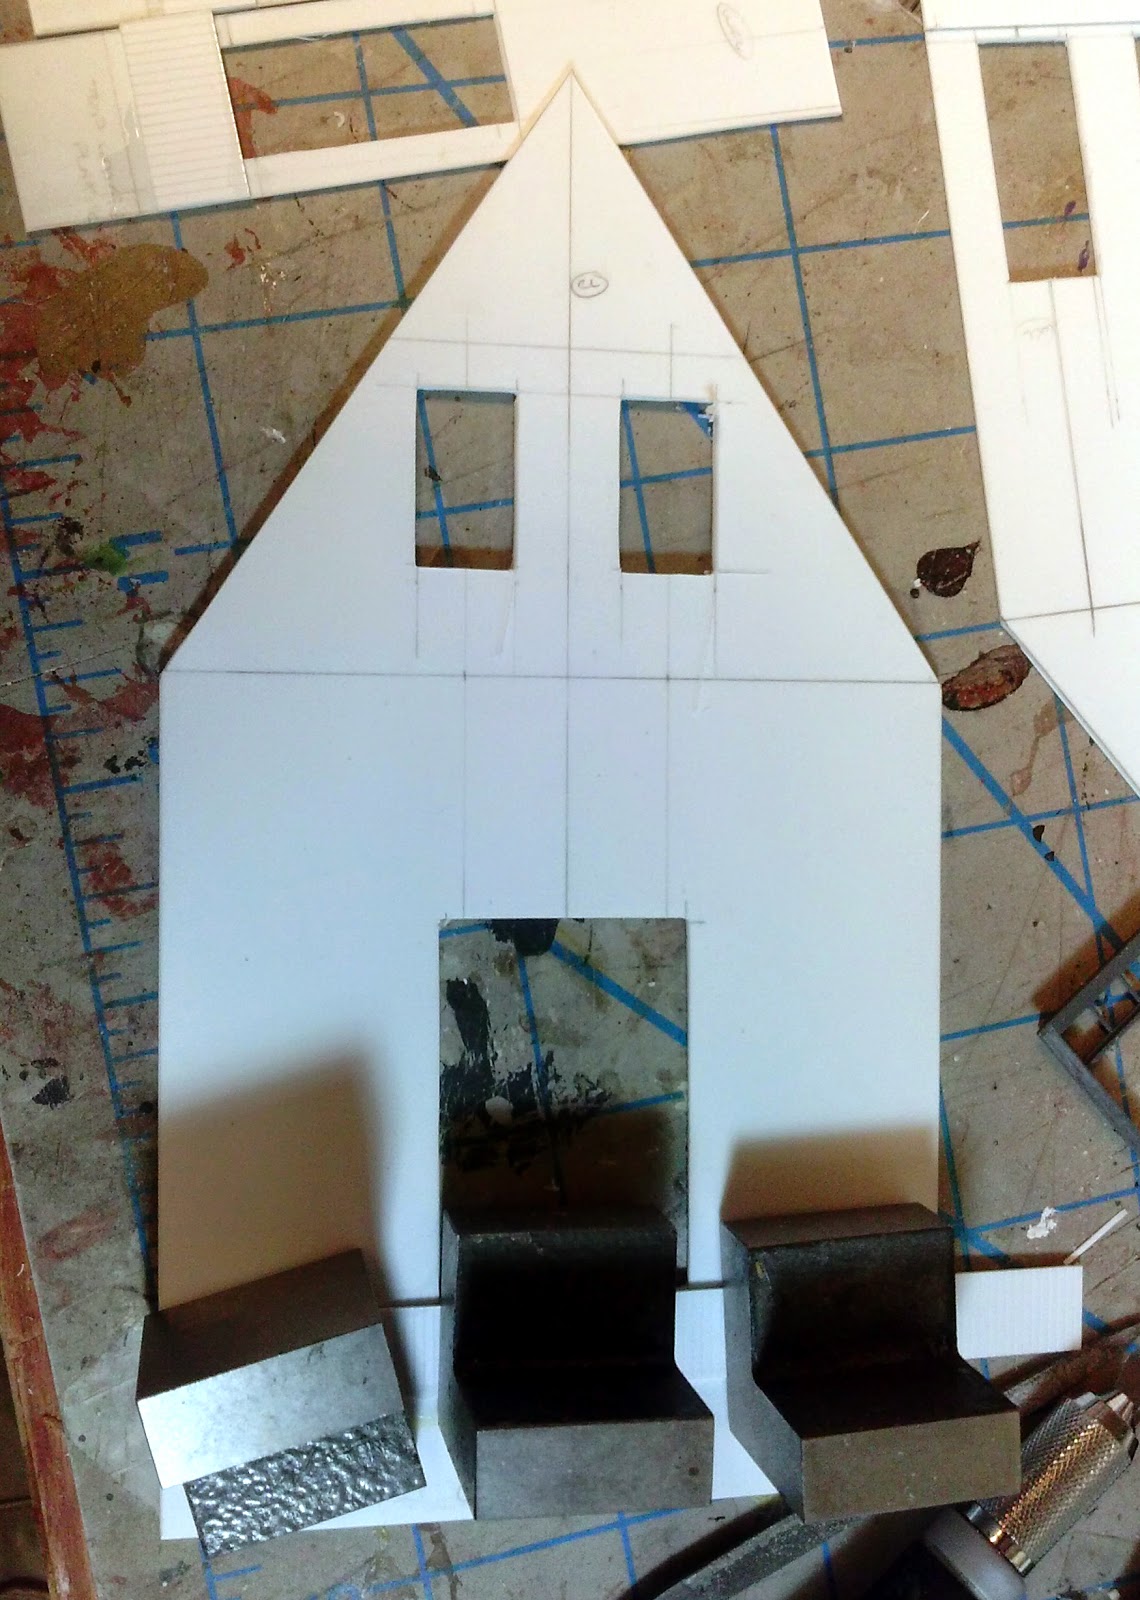
Front Elevation. Note how short the actual door casting is. I'll add some framing to lengthen it and a couple extra pieces of plastic to the top and bottom of the door to make it match the new space. It will look a lot better with the taller miniatures.

Front elevation, opposite side

Trackside elevation, waiting room door

Trackside pieces

Front side pieces

Standing the front side up. Look, another use for clamps!

Front Side, all standing up, more or less


A few citizens for scale


And the trackside elevation. I didn't cut out the bay windows because I need to "build" it from three of the window castings so I'm not exactly sure what the size will be. The baggage platform will occupy most of the right side of the building

Sunday, June 15, 2014

Calamity Gets a New RR Station - Part 1

If you have been following the construction of my wild west town of Calamity you are thinking that I already have a railroad station, and you would be right. I built the Sarissa Precision railroad station and if you dig back far enough in my blog you will find the series of posts that I wrote about building it.

I have never really been happy with the Sarissa kit though and I pretty much intended to replace almost as soon as I had finished it. I have been periodically going through my plan books and collection of railroad modeling magazines and I finally settled on the new station for Calamity. Its a bit on the fancy side, but I figure that if Calamity really wants to bring new settlers to town they might well start with a fancy new railroad station.

The station I picked out was drawn by Pat Harriman and appears in his plan book "Early Wood Frame and Stone Structures" and appears on page 129. I scanned the plans for my own use since I need to "scale up" the station to fit in with the rest of Calamity (the infamous 1/56th scale that I have settled on). Pat's book is spiral bound which makes it really easy to use since the pages always lay flat.. There are 45 buildings in the book which retails for $29.95. I highly recommend it even if you just use it for reference. This station was built in the town of Phantaci, Oregon by the 
Shelter Bay Railway Company

With this model I elected to skip my standard matte board prototype stage. I'm building this one out of styrene plastic (like the newspaper office I built back in January of this year) and I start marking up the plastic. I had some O scale windows that I thought would work quite well, but they turned out to be to wide. I spend some time browsing at Caboose Hobbies and purchased some S scale windows that, initially, I liked better. As you go through the pictures you can see that I have had a hard time deciding which windows to actually use on this build.

Here are the pictures of stage 1:


Pat Harriman's Depot from "Early Wood Frame and Stone Structures"

Here were the first windows that I had picked out. O Scale versions from Grandt Line.
These are just to big for the look of the building from the plans.

Here's a selection of S scale windows instead. I like the look quite a bit better. Still hadn't decided on upper story windows at this point. And, yes, the bottom floor windows are upside down. This is the right side elevation.

These are the four sides that make up the "bay window" sections. I'm not sure what else to call them. This is the point that I decided I wasn't sure I liked these windows. Something a bit thinner or at least taller might be better.

This is one portion of the front and trackside elevation. The three window will face the tracks the two window section faces the front. At this point I had have settled on the upper windows.

This is the portion of the front and trackside elevation. I like the door but its going to be a little short for some of the miniatures but it matches up nicely with the windows.

I only had the one door so it had to do double duty.

The left side elevation with the freight door.

I found another S scale window in my bag of parts. Its a bit taller than the door so you can see the window is hanging down into the section of vertical planks. If I raise it into the right position the door is to short. At this point a little light bulb went on. I would put the window in the proper position and just modify the door to be a little taller, which will look better with most of Calamity's citizens. 
In the end I have decided on the 8-pane window for the upper story, the 2-pane window for the 1st story and the commercial door and the freight door. The next step is to cut out all this plastic and start cutting out the window and door openings.

I'll be using the following parts from Grand Line:
4024 - 30x78 2 pane, double hung window (17 of these ouch!)
4027 - 27x38 8 pane window
4039 - RGS style door
4040 - RGS style freight door
Everything else will be made from sheet plastic either from Evergreen or Plastruct.

The one thing I will do different this time is to build and paint the interior walls before I start putting the whole thing together. The inside of the newpaper office was really difficult to finish off nicely once I had put it together.

And one last thought. Since I build in an odd scale no scale rulers are available. I built up this reference sheet so I didn't need to do scale conversions in my head all the time.

Wednesday, June 11, 2014

Reaper's Dark Maiden

The Dark Maiden was my only entry for ReaperCon this year. I was hoping that I was going to pull in that elusive gold medal with this one but it wasn't to be. I spent the first four months of this year constantly on the road for work which just didn't allow me to work on this mini the way I wanted to. I'm lucky I managed to finish her off at all, I think the paint may have still been wet in a couple of places when I turned her in. I know she wasn't gold level at that point, I just didn't execute the way I needed to. She did get a silver but this time I'm going to chalk that up as a failure. I wasn't upset with the result but I knew when I put her in that Silver was the best I was going to get this time.

I'm already prepping pieces for Genghis Con XXXVI and ReaperCon 2015, this time I should be able to get the gold.


I was really trying to get a peeled paint effect on this one and for the most part that worked out pretty well. I wasn't happy with the yellow band and the green vines and I should have gone back and repainted it but I ran out of time.