Quotes

Life is short, break the rules. Forgive quickly, kiss slowly. Love truly, laugh uncontrollably and never regret anything that makes you smile. - Samuel Longhorne Clemens (Mark Twain)
Showing posts with label Force on Force. Show all posts

Thursday, August 2, 2012

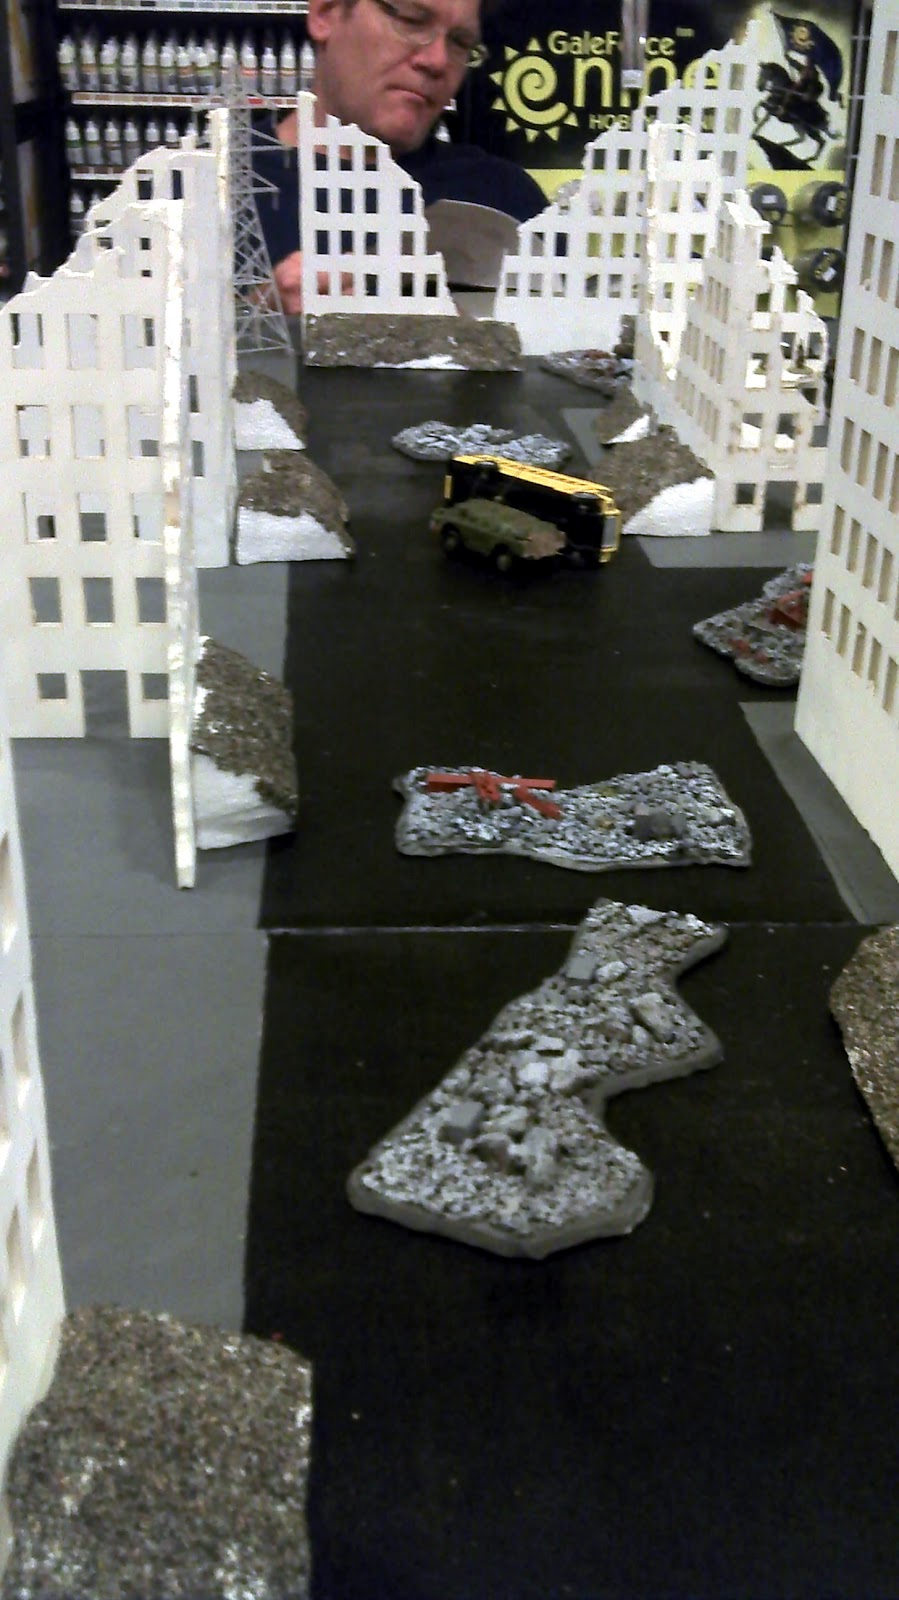
Force on Force AAR - Russians vs Chechens

Managed to get my third Force on Force game in. Once again I get to play the irregular forces. On a positive note the Chechens are actually better than the Russian regulars that they are facing. Its still an asymmetrical battle though which puts my partner and I a bit behind the curve. Rob and I are playing against Kirk and Nick this time with Matt running the game. This is a playtest for Tacticon (coming up on Labor Day weekend) so there was a lot of ongoing discussion to make sure it was a good game for both sides.

Turn 1 goes very well for the Chechens as one of Rob's squads lights up a BMP with their RPG and took out a good chunk of the squad and the crew right away. The T80s split each slowly moving down the two main streets to the ministry of defense and the local government buildings. Russian return fire was pretty devastating taking out all but one of the Chechen defenders.

Turn 2 is kind of a stalemate with Chechen units using hot spot movement to shift positions. Two of these moves are key to slowing down the Russian advance. One squad manages a hot spot move into the corner of the streets threatening both the flank of the T80 and the advancing infantry trying to cross the street. Another hot spot move puts a Chechen squad behind the T80, which fires reactively doing considerable damage. The Chechen BMP 1 opens up with its Sagger ATGM  on that T80 but misses. The T80's return fire fails to hit as well.

Turn 3 sees a lot of Russian firepower pouring into the Chechen squad at the corner and with the Chechen returning fire with the RPG at the T80 (as an irregular unit I can't split my fire so my choice is the T80's flank or advancing infantry. I go for the armor, probably a poor choice, and my RPG bounces off. Russian reinforcements start to arrive

Turn 4 sees much the same. Russian reinforcements start to whittle down the Chechens at the corner. BMPs and infantry pour in fire along with the T80 main gun and MGs. The T80 also misses a shot at the BMP again, while the BMP manages to score a hit and immobilize it. The other T80 continues down the street pretty much unimpeded at this point with the Chechen BRDM running for cover. Russian infantry assault the shaken Chechen squad and despite a serious advantage in numbers and firepower is wiped out by the shaken squad.

Turn 5 sees the T80 finally scoring a hit and destroying the Chechen BMP. The other T80 turns the corner and prepares to fire on the last Chechen squad, two RPGs hit it but fail to penetrate the frontal armor. Its return fire is ineffective. Chechen reinforcements finally arrive and fortunately show up in just the right place.

Turn 6 becomes the final turn as we have to clean up before the game can really end. A round of terribly ineffective fire sees more RPGs bounce off the T80s, including shots from the rear and against the top deck. We had a quite a bit of discussion on play balance on this one, it would have been nice to finish it off, but we had a good time with it.

At the start

Turn 1 Results


Turn 2


 Turn 3


Turn 4 and Beyond


Thursday, July 19, 2012

Force on Force - US Army vs Taliban - Enduring Freedom: Sangin Ambush

Tonight I was able to get my second game in of Force on Force. Nick Johnson provided the terrain and the Taliban miniatures and Bill Kehrman provided the US Army troops complete with HMMWVs and Strykers.
We played the Sangin Ambush scenario substituting US Army for the British Army. Since I would be playing John and Ray again, I opted to go ahead and take on the role of the Taliban again.. I had plenty of Taliban troops which is good since they have a habit of melting away when coming under fire from any kind of regular force. Included this time were a couple of old Soviet DshKs, I was hoping these would add a little punch to my assault.

In this scenario, one of the AFVs has been disabled by an IED and the objective for the US (in this case) is to recover the wounded and get them off the board by turn 8. The Taliban have attempted to cut off the lead element consisting of two HMMWVs and a Stryker with a truck rolled across the road. The rear elements consists of the remaining three Strykers which includes the disabled vehicles.


Turn 1 starts off with the HMMWVs taking off to one side of the board to try and out flank the Taliban positions. Hidden Taliban units try to react to the fire only to discover that HMMWVs can take the damage and deliver it as their positions are ripped apart by AGL and M2 .50 cal fire. One Taliban group is almost wiped out as the M2s from the lead Stryker joins in. I also discover that my RPGs are nearly as effective as I had hoped as they bounce off the bar armor of the Strykers. The DshK had little to no effect on the HMMWVs. The US medic and the fireteam from the HQ AFV dismount and head to the disabled Stryker. Taliban fire is pretty ineffective especially with US troops staying buttoned up in their vehicles. I move one group up to prepare to move through a door in the wall and straight into the disabled Stryker.

Turn 2 the HMMWVs continue to spit fire at known Taliban positions causing casualties and only taking sporadic fire in return. The US medic and the fireteam reach the disabled Stryker and their Stryker moves up in support. The Taliban assault group bide their time waiting for the right moment. Another Taliban group goes down after they revealed their position with an RPG shot in Turn 1, they never get a chance to return fire in Turn 2, with one RPG gunner going down and the other running from the scene taking his RPG with him. The first DshK is wiped out but the other bides its time in hiding hoping that a target it can deal with comes into sight. A donkey cart rolls out from a sidestreet and calmly proceeds across the battlefield.

Turn 3 with the HMMWVs ocupied and other Taliban units taking overwatch fire the assault group decides its now or never. They pass their check to start the assault, two Strykers in overwatch are slow on the triggers and miss their chance to fire at the Taliban charge into close combat with the HQ fireteam. Three rounds of close combat ensue. At the end the Taliban have taken no casualties and have taken down the medic and his supporting fire team. At the far end of the board two motorcycles roar down the road towards the fight.


Turn 4 the assaulting Taliban are rapidly dealt with by Stryker weapons and dismounted fireteams. The Taliban get one last shot in a golden BB from the hidden DshK that takes out the lead Stryker as it comes back to help the rest of the unit. Two dead and one seriously wounded are the result as the Stryker goes up in a spectacular fireball (The result of one of only two fog of wars cards that were drawn this game).


At this point we called the game. Although the remaining US forces were starting to mop up the remaining Taliban they had suffered to many losses to make up for the points they would earn to get the wounded from the first disabled Stryker off the board. Chalk up another Taliban win for me.

So yes, in the end I pulled out a convincing win. However, I was incredibly lucky to do it. Since my attempts to knock out AFVs were terribly unsuccessful I had to take a huge gamble to stop the medic and his fireteam from getting into the disabled Stryker. To pull this off I had to make an check to assault (4+ on a D6), then avoid the overwatch fire from not one but two Strykers (a head to head skill check with me getting to roll a 4+ on a D6 for a success and beat my opponents opposed die roll consisting of a 4+ on a D8). Both Strykers rolled a 3 or less and completely failed their attempt to cut down my unit. I then fought three rounds of combat with the US Fireteam taking no casualties, killing four troopers and capturing one. The odds were definitely not in my favor. However, I'll take home the win with a night of hot dice rolling. Maybe its time to head to Las Vegas.

Wednesday, April 4, 2012

Force on Force - British Paras vs Taliban

This was my first game of Force on Force. Nick Johnson had the night off and brought his miniatures and boards to teach us the game. This is his standard convention scenario and features 2 squads of British Paratroopers against a horde of Taliban. Their mission objective is to find the cache of weapons rumored to be in a building in the back corner of the board. Nick and Lee Schultz built the boards up from a wood frame with half inch Styrofoam on top as the base. Trees and buildings (Gamecraft Miniatures) are separate pieces but everything else is built directly on the boards. Its a good looking setup and has survived traveling pretty well at this point. Its been used for six games at Genghis Con XXXIII (in Denver last February) and traveled around for about another 15 games at this point. In this game Ray and John ran the British Paras and J (John's son) and I ran the Taliban forces. I'll let the pictures tell most of the story but a quick synopsis had the Taliban taking out the British GPMG team on turn 1 and then fighting a delaying action for the rest of the game. The Taliban sniper team died on turn 1 without causing a casualty to the advancing Paras. From there on it was just stubborn resistance (and some really good die rolling) to slow the British advance. In there somewhere a Taliban news crew managed to show up and promptly caught the attention of a fire team that spent two or three turns taking them down. A fortunate placement of an IED cut off one of the British avenues of advance forcing them to split up. It came down to the last turns as two British fire teams converged on the weapons cache. One team lost two members trying charge the building. The other team managed to get in the building but couldn't wipe out the remaining Taliban. This was a great game and well played by both sides. I picked up the win for the Taliban this time as the British Paras ended up with 2 KIA and 2 seriously wounded and did not control the objective. I took a lot of pictures and here are some of the better ones.
At the start of the game British in the LZ and a Taliban sniper team on the roof.
A wider view of the initial positions
Taliban occupy a building on the right flank and open up on the British GPMG team
British fire teams taking cover in the irrigation ditch
British fire team takes on a Taliban flank attack head on, and takes a casualty while doing it.
Paras finish off the Taliban right flank.
Advancing Paras discover more Taliban
Paras continue the advance on the right
Taliban in the Para's rear tie up the second squad and occupy the landing zone
Paras take out the Taliban taking cover in the second irrigation ditch
A Para fire team, with casualties of its own, defends against the Taliban attacking from behind
Para squad closing in on the hidden weapons cache
Paras take a group of Taliban on top of the building under fire and take down the entire unit. Things are looking up but time is short.
The Taliban news team goes down. No video is getting out about this action. (Taliban lose 5 victory points for the news team not surviving).
Para fire teams converge for the final assault.
Another angle on the Taliban holding the building
The British point of view as another unit of Taliban suddenly appear to block the way.
That's a bunch of AKs!
British contest but do not hold the objective. Two Para casualties, one KIA, one serious. Nick has AARs as well as modeling info on his blog at: http://littlenickysgameroom.blogspot.com (I have tried getting this URL in here about 5 times, blogger doesn't like it very much for some reason).