Quotes

Life is short, break the rules. Forgive quickly, kiss slowly. Love truly, laugh uncontrollably and never regret anything that makes you smile. - Samuel Longhorne Clemens (Mark Twain)
Showing posts with label Jagdpanther. Show all posts

Monday, January 11, 2021

World War II Project - Jagdpanther - basic camo

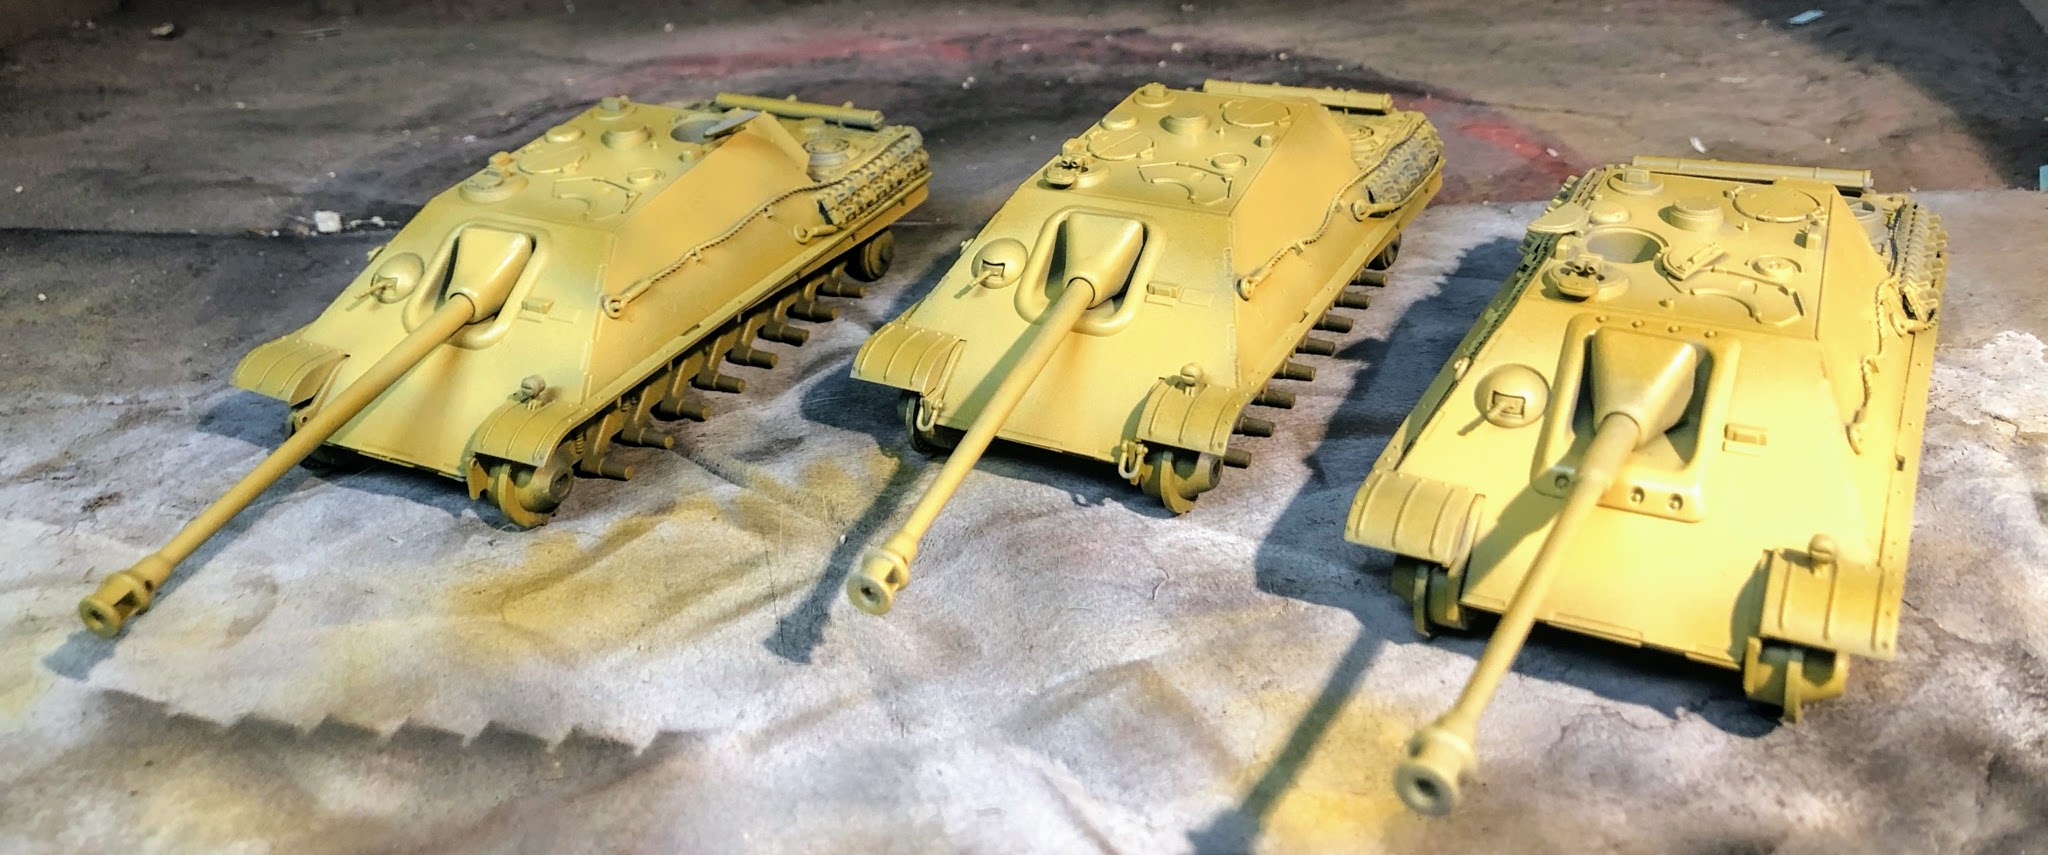
Since I had the airbrush out for the STuGs and there was some extra time I went ahead and added the basic camo job to the Jagdpanthers. I'm pretty pleased with them, although I didn't get the green quite right to suit me. I'm not going to go back and fix it. Next time I won't try using Nato Green as a base, I think I picked it up by mistake and didn't check the color before I started. These still need to be sealed before they are ready for decals. I'll just work on them as its convienent at this point.


Monday, January 4, 2021

World War II Project - Jagdpanthers - dunkelgelb

Back from the holidays. Just setting up a few posts to get 2021 off to a fresh start.

Here are the Jagdpanthers in their base coat of dunkelgelb. They will probably sit like this for a while till the STuGs are done.

In progress, starting off with the darkest shade of Dunkelgelb that I have.

Blending in the mid-tone to get the contrasts going.


Tuesday, November 10, 2020

World War II Project - Jagdpanther Mods - Brackets and Tow Cables

It was a good weekend, along with finishing off the STuG modifications I was also able to finish off the Jagdpanther mods. I was originally trying to cut the brackets from little square pieces of styrene sheet. This was not going well. I then ran across some styrene angle stock and cut the rest of the brackets from that. They aren't as consistent looking as I would like but I figure with a little paint folks aren't likely to notice. The tow cables are made from the cable ends provided in the get and some black thread. I have no idea where the black thread came from but its braided and is just about the perfect diameter.

It was certainly a struggle to get everything to fit nicely and the cable to bend a bit but I sure like how it looks on the Jagdpanthers. I'll definitely keep using this thread for cables (I used it on the M32B1 as well) and looking at the spool I probably have a lifetime supply.

Tow cables ready to go

The brackets after I starting cutting them from the angle stock I found. It was hard to control the width go freehand with an xacto knife. Of course afterwards I remembered that I do have a chopper that would have made it much easier. After I cut them from the styrene stock I trimmed the ends with my good clippers to the right size.

The G2 ready for brackets

Looks pretty good. Note that the I ended up replacing the bracket on the lower left side with styrene rod and moved it over to the right a bit more. It was to close to the spare tracks and I noticed in a couple of pictures that this appeared to be a post rather than a bracket. A lot of variety is apparent when you go through pictures of the 654th .

Brackets on the other side

Three Jagdpanthers ready for tow cables

A little straighter than I wanted on my first attempt.

This might be to much on the other side.

Tow cables complete


Ready for the airbrush booth.


Monday, October 12, 2020

World War II Project - Jagdpanther by Rubicon - Progress continues

Found some more time to work on the Jagdpanthers but not the STuGs, still struggling with the debris shield (I just need to go to the hobby shop and gaze at the Evergreen and Pastruct racks for a while). I also forgot to mention I have one more reference book, the Panzer Tracts book (Panzer Tracts No. 9-3) and from a technical perspective is most thorough work, it does make for some rather dry reading though. Panzer Tracts books seem to go in and out of print so if you can't get your hands on this one then the Kagero Photosniper book is a reasonable replacement for it.

The  build is basically complete at this point. Note that while I have the tracks in place right now they are not glued on and I'll remove them for painting. I have one more to build and I'll use the G2 hull for the last one.


Making sure that the lower hull is firmly attached to the upper hull


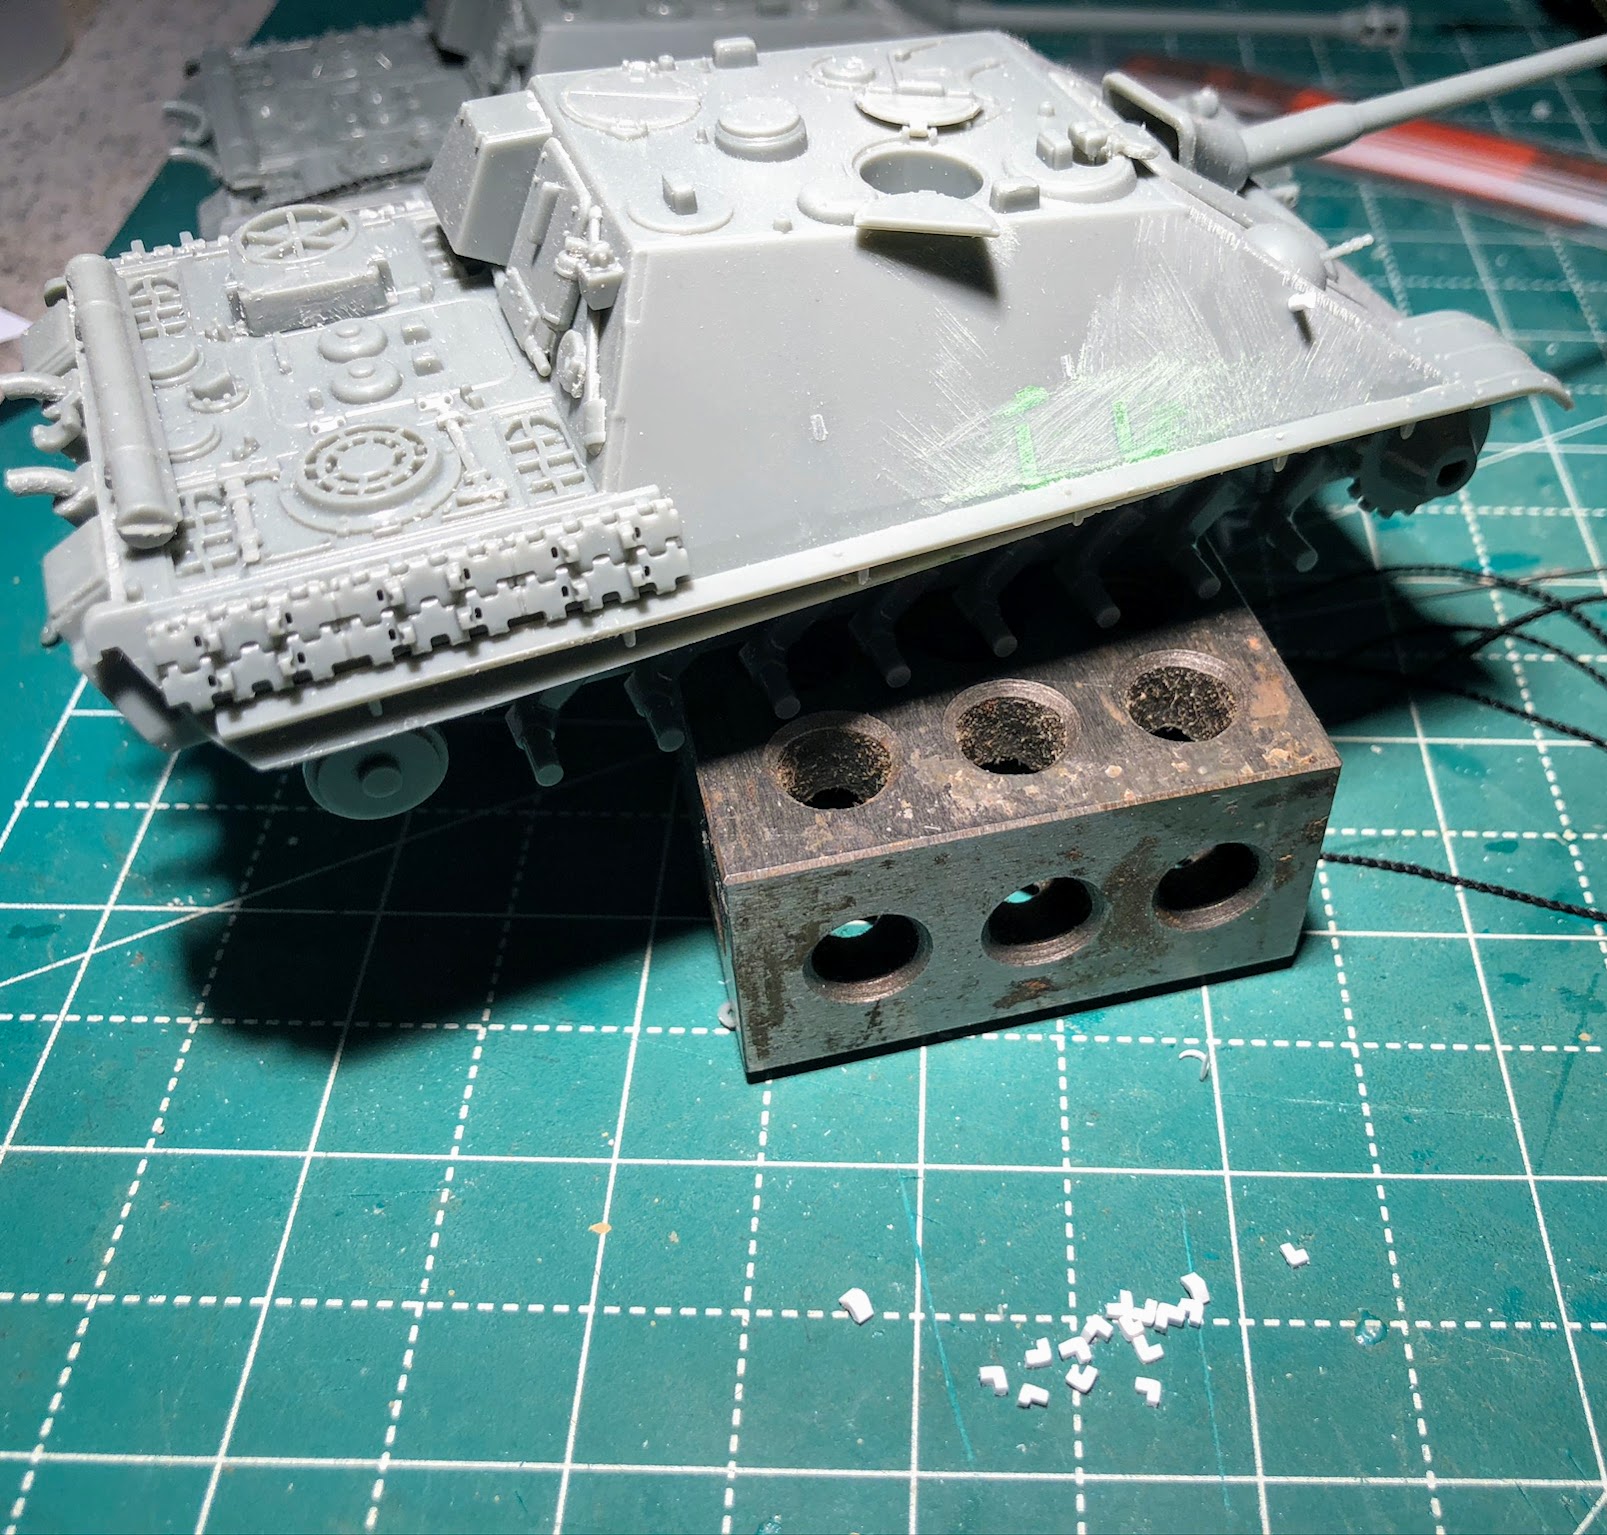
Initial filling of the attachment spots that I don't need on the sides


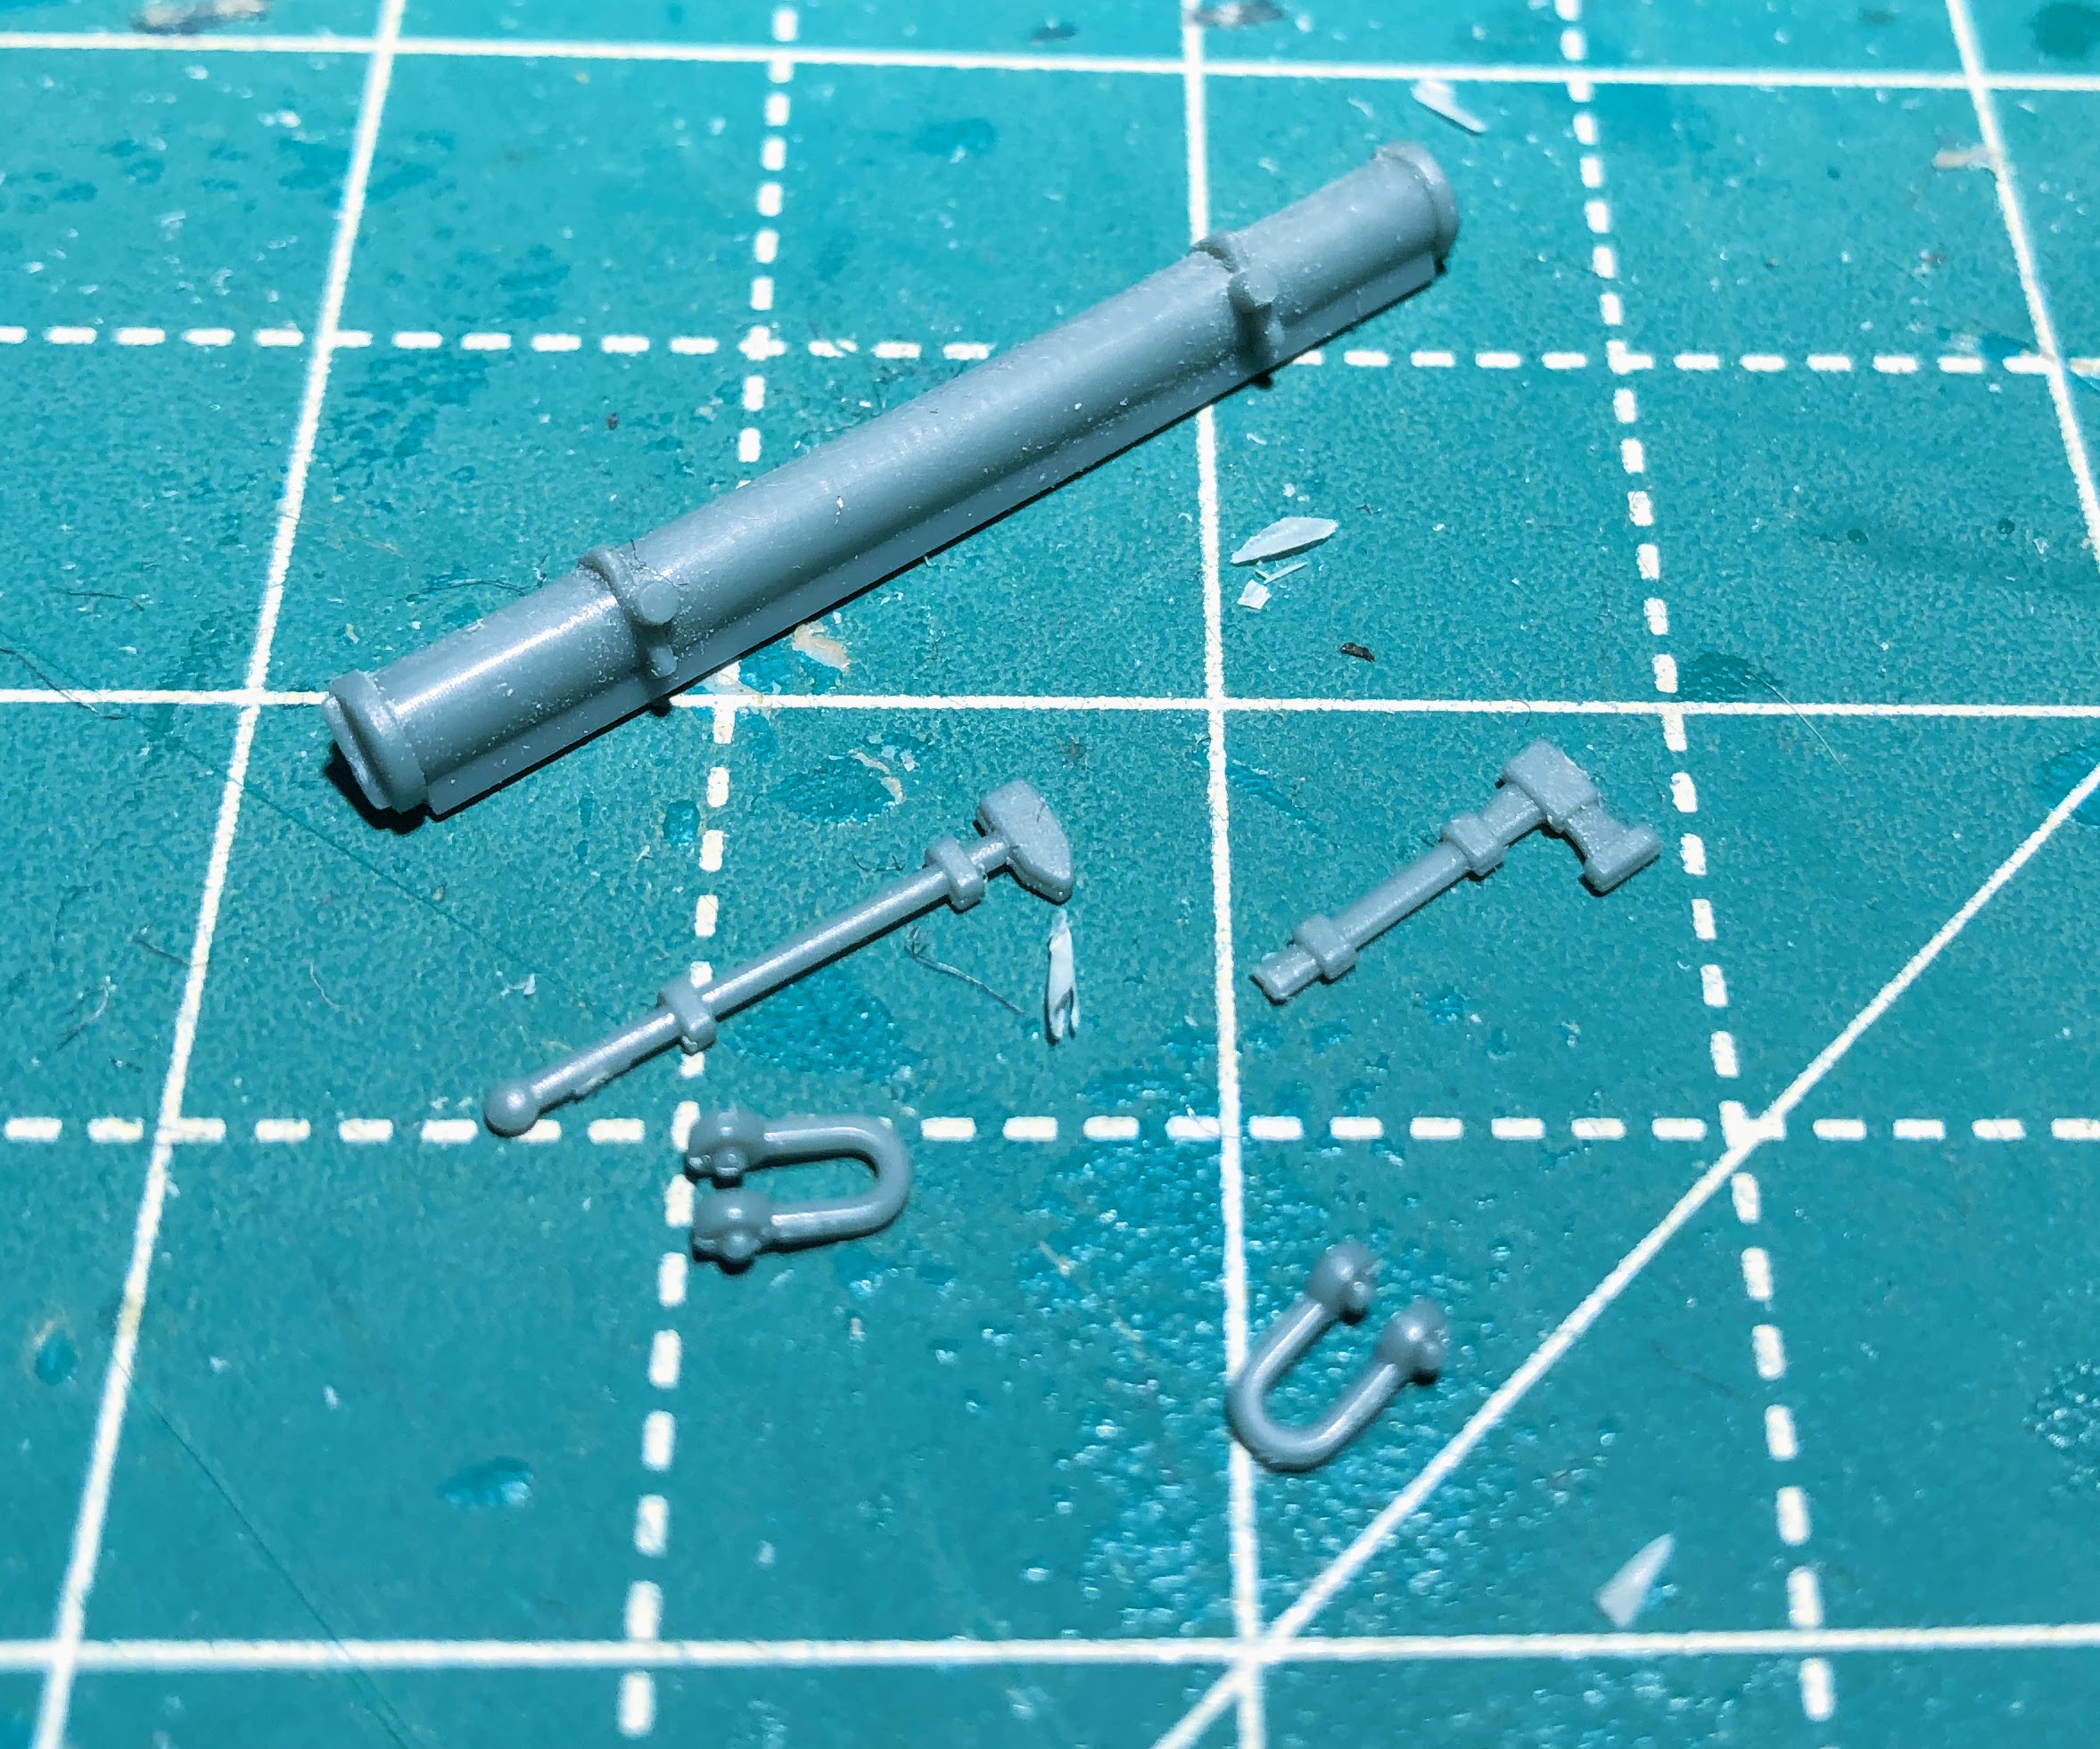
Stuff that needs to be relocated to the back deck or in the case of the D-Rings (C12 & C13) moved from Step 1 to Step 3

Based on the photo I looked at, after I glued these on, The axe should be located where I put the sledgehammer. The Sledgehammer should be mounted perpendicular to the back edge, rather than parallel like I did, and between the engine hatch and the fan on the right side. 

The  bolt cutters can me mounted here or on the top of the rear deck.


Friday, October 9, 2020

World War II Project - Jagdpanther by Rubicon - In progress

I have stalled out, again, on the STuG builds. I want to add the debris shield over the gun mantlet but my first few attempts were poor at best. That, of course, delays getting them painted...again. In the meantime I decided to take on the Rubicon Models' Jagdpanther.

The first one is just about completed. I was able to replace some of the posts and hooks on the side to better match what you might see on a vehicle from the 654th Schwere Panzerjäger Abteilung. I have also found some better thread to represent the tow cables so I need to return replace the ones I made originally, fortunately that won't hold up the painting itself. I have left the tracks unassembled at this point. It consists three major pieces; the tracks with the outer road wheels, the middle road wheels and the inner road wheels. I really can't even think about assembling these until after everything has been painted. That, of course, means that you would have to wait to add the side skirts till after painting as well. Fortunately I have no intention of adding the skirts, the maintenance unit of the 654th typically removed the skirts, along with all the other changes, before they were released to a combat platoon.

With the first one, basically, complete and ready for paint I started building the second model. This one will also use G1 hull and the single piece cannon. I didn't get very far last night but I was able to complete the lower hull and start modifying the upper hull. Modifying the upper hull basically requires scrapping off some of the cast on details like the shovel and the axe that are located near the front on either side. Again not a lot of progress but its a start and the Rubicon kits are relatively quick builds after you have finished the first one. I think the one criticism I have on this kit that the G1 really should have a coating of zimmerit on it, the G2 hull is kind of a 50/50 proposition but the G1 definitely should.

Filling the gaps in the hull. These are where tools and other things would have been located on a factory fresh Jagdpanther G1 hull. The 654th removed all these things are relocated them to the rear deck, rear plate and rear of the superstructure. If I was really clever I would figure out a way to leave the marks where the brackets were located. Something to think about for a future build.


Here I have added the round post to the front edge and the three "L" brackets to the side.


Here is the second Jagdpanther under construction. Lower hull is complete and tools have been removed from the side. On the lower hull which is Step 1 in the instructions there are two D-Rings (for lack of a better term) Parts C12 and C13 that attach to the lower glacias. DO NOT assembly these in step 1 has indicated. They are in the way and will either pop off or you will have to remove them when you assembly the lower and upper hulls together (either in Step 3E for the G1 hull or 4F for the G2 hull). This happened to me during the first build and fortunately I remembered this on the second build. I didn't add these D-Rings until after I had assembled the upper and lower hulls.

The other side. In the background you can see the STuG that I'm using to test fit the debris shield to.

I have more Jagdpanther references than I realized including the Tank Craft book for the Jagdpanther which I had totally forgotten about it. The primary, and definitive, reference is "The Combat History of Schwere Panzerjager Abteilung 654" which is also an excellent reference for the Ferdinands/Elephants that the unit initially deployed with on the Eastern Front at the battle of Kursk. Another good reference is the Photosniper book on the Jagdpanther from Kagero and the last one is the Military Miniatures book on Jagdpanzers which is okay, but its not focused specifically on Jagdpanthers (especially considering there the Jagdtiger is featured on the cover!).


Tank Craft book by Oliver

Schwere Panzerjager Abteilung 654 by Munch (This one may be out of print, it is the companion volume to Schwere Panzerjager Abteilung 653)

Photosniper series from Kagero. This one has some great walkaround pictures of a Jagdpanther in a museum as well as a ton of line drawings.

Military Miniatures publication on Jagdpanzers


Monday, March 16, 2020

World War II Project - a Trio of Jagdpanthers - the Build


This one is going to be a bit extensive, the proverbial wall of text perhaps. I'll go through a step by step build of a Rubicon Jagdpanther. This will be the G1 version for the Schwere Panzerjager Abteilung 654 after it was modified by their maintenance shops.

Step 1: Building the running gear and the lower hull. I'm not assembling the tracks and wheels at this point, it will be to hard to paint the inner wheels if I build them up, so those parts are all loose at the moment. One thing to keep in mind when you do assemble them is that the solid side of the wheel (no visible hole) faces to the outside. If you build them backwards you won't be able to mount them properly to the hull! At this point the only part of the running gear I have actually assembled is to glue on the driver and return wheels.

The Parts, that's the most extensive set of running gear I have put together from a Rubicon kit.

Note that I have not actually glued together the road wheels and the track assembly. I'll do some priming and an initial coat of paint before I assemble them.

The D rings on the front. I have not glued them because they fit nice and tight. However, DO NOT actually glue or otherwise attach them in this step. They will get in the way when you attach the upper hull to the lower hull and you risk damaging and/or losing them.
Step 2: Periscopes. In step 2 you need to make the decision between the G1 and the G2 version. For this build I will be building a G1 so I'll be using part C01 - G1 Hull. Since I will be building a version as modified by 654's a maintenance shops this is a good time to clean up the hull by removing the tools. I'm also going with a closed periscope hatch on this one. As always be careful with the knife and file work! On the left side I managed to file away a piece I shouldn't have and a slip of the knife removed a couple of attachment points up higher on the hull. Fortunately I have plenty of plastic stripping that I can replace the unintended consequences. It was quite a bit easier to remove the tools from the right side of the hull.

G1 hull right off the sprue

Tools removed from the right side. You can see the spot were the tools were on the left side in the next step.

Step 3a: G1 Gun assembly. The only note I would make here is that you can glue piece D26 into place before you try to assemble the jigsaw assembly of the gun and I would recommend you do that. The gun is very "movable" I will probably glue it into a straight ahead orientation rather than leave it as built.
Parts for the gun and mantlet. Note the tools removed from the left side, along with the missing attachment points on the hull from the knife slipping.

The gun from underneath.

Step 3B: G1 Right Side and Upper Hull. There are a lot of optional parts in this step. The first thing to note is that D01 is unique to the 654th. If you are modeling a vehicle from another unit only use C09. I'm just happy that I didn't end up having to build this component from scratch. I'm definitely using C07 and D06 as those are tools that were moved from the hull sides to the rear. More appropriate for a 654th Jagdpanther but since they made recommendations to the manufacturer about placement they could be found placed in this way in other units. For now I'm leaving off the tow cable and the tracks. Based on the pictures the tow cable is just way to short and the spare tracks will go back on after the base camouflage is on. There are two selections for the rear hatch; B09 is closed, B10 is open. Although you can use B10 for open or closed. Not quite sure where I should be putting the jack block either. From the 654th history I don't see it any pictures so it may just go on the side if I can't find an alternate placement point.

Beginning the upper hull detail. Note that while I'm very grateful that piece D01 (last piece on the left) in included it is unique to the Jagdpanthers of the 654th.

The jack block is the last piece. You can see where it is suppose to go on the hull side. I did find a picture where it was mounted further back on a Jagdpanther from the 654th so that's where I glued it. You can see it in place in some later photos.
Step 3C: At this point, I had to go off the reservation because of the modifications. Again primarily moving tools from one point to another. There is a fair amount of filling that needs to be done on the hull at this point, I'll follow up with that later.

You do need to be patient when gluing on B12 to the left side (and B11 to the right. I found that it was easier to start at the front fender and gradually apply glue backwards. The piece likes to slip out of the trough at every opportunity. At least I know what it was this time and didn't slice it off like I did on the Trenchworx Jagdpanther.

All of the tools in this step are moved to the rear deck.
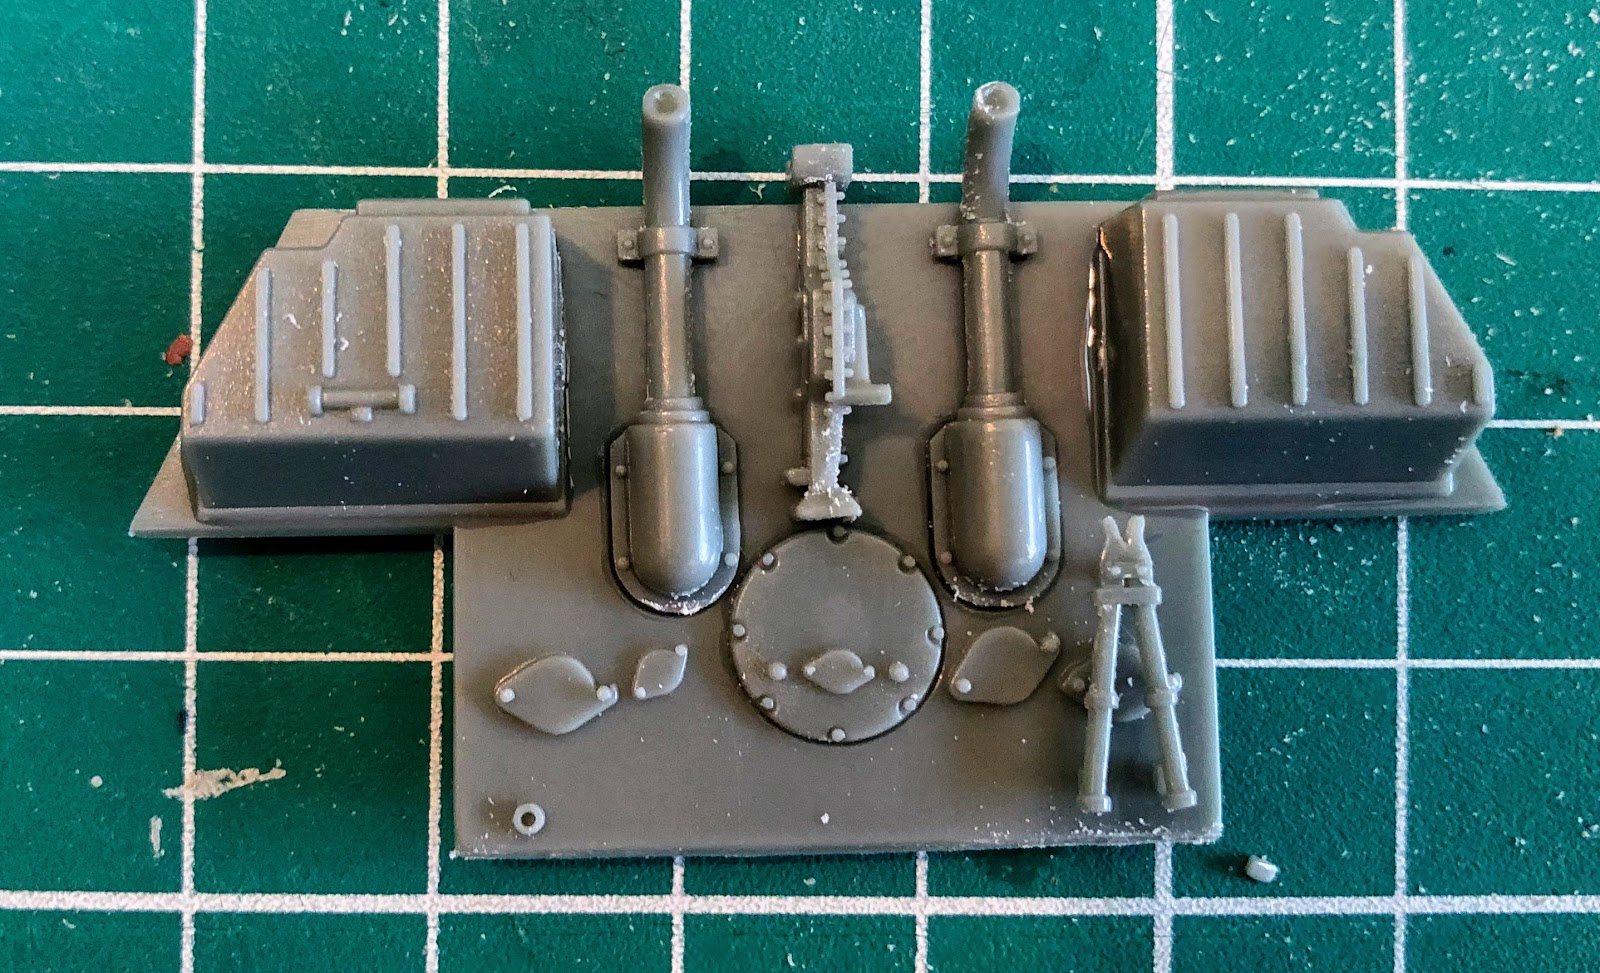
Step 3D: Rear Plate. While I glue everything together (and used the earliest style exhaust pipes, there are three options for these) for the next two I wouldn't glue anything to the rear hull plate until after the hull halves have been assembled. I ended up needing to reattach the hull jack and one of the exhausts.


Step 3e: Here you will be attaching, and maybe cursing, gluing the upper hull to the lower hull. After that comes the sideskirts, which I won't be using, the crew figure (I wish there was more than one) and the rear plate.
Mostly finished. Lower hull and upper hull glued together. If you look close you can see that the front D rings are missing because of how you need to slide the upper hull into place. The gun cleaning rod container has been moved to the back deck along with a couple of other tools. My sledgehammer is missing, I lost my grip on the tweezers and it went flying somewhere.


So a few more notes. In step one there you attach C12 and C13, don't attach those in step 1. Do not attach those D Rings until you have assembled the lower and upper hulls. As I was putting the two hulls together I heard two pops as those D Rings went flying off into the vastness of the room, likely to never be found again. Its not a huge deal that they are missing now but the hulls will go together easier if you do this after the hulls are assembled.

Overall I'm pleased with the kit but I do feel there are somethings that could have been done better. The instructions certainly should have gone through an edit or two and it would have been nice if the G1 hull had a zimmerit coating since most of the G1 hulls had the concrete coating. I also had a hard time getting the hulls to match up cleanly. I'm going to do a little filling on the front to sharpen up that edge. The rear isn't to bad although I would have liked to have clamped it in place while it dried.

Overall, I like the kit and would recommend it. Should be a nice sturdy vehicle for the wargame table. Now I just need to figure out how to put zimmerit on it and make it look good. Never been one of my strong points.

Wednesday, March 11, 2020

Acquisition - Rubicon Jagdpanther

Rubicon had their new Jagdpanther up for sale in a buy two get one free deal so I'm now the owner of three of Jagdpanthers. They arrived quite promptly yesterday and I'm hoping to build at least one of them this week. You can build either a G1 or the G2 version so Rubicon has supplied to different hulls to work with. There are going to be a lot of extra parts in this one (much like the new Sherman kit).

My plan at the moment is to build a G1 and a G2 version for Schwere Panzerjager Abteilung 654 and build the third for a different unit. Battalion 654 was the first to receive the Jagdpanthers and recommended changes that would later be worked into the G2 version. That's the plan at this point. It also means the backlog of German vehicles ready for painting is going to expand again. I may as well figure out how to put those Warlord Games P107 halftracks together.


Three box for the price of two, can't pass that deal up

4 sets of sprues which include two upper hulls, a G1 and a G2. I just wish the G1 had been done with a zimmerit pattern.

Typical set of Rubicon instructions, in this case they could have been better thought out.

Decals, I do like Rubicon's decals, although the selection of markings is somewhat limited. Jagdpanthers weren't known for their extensive markings.

Time to pull out the reference books!