Quotes

Life is short, break the rules. Forgive quickly, kiss slowly. Love truly, laugh uncontrollably and never regret anything that makes you smile. - Samuel Longhorne Clemens (Mark Twain)
Showing posts with label Jumbo Sherman. Show all posts

Thursday, September 10, 2020

World War II Project - Building the Rubicon M4A3E2 "Jumbo" Sherman - Done

I'm calling the Jumbo ready for paint. While it lacks a lot (well all) of the stowage you typically find on American vehicles I don't want to add that till its painted. I have also decided to leave the 76mm gun as it is. I'm not sure why I picked the baffled version from the sprue but I did and its glued in there nice and tight. I figure that since this gun was swapped out in the field anyway there is every possibility that one made on to either a regular or field modified Jumbo.


Friday, September 4, 2020

World War II Project - Building the Rubicon M4A3E2 "Jumbo" Sherman - Hull

After the turret you move to the upper hull and add the additional armor plating represented by the resin parts. Unfortunately you have to use super glue for this step. The front plate is pretty straight forward, you need to remove just about everything on the front of the plastic hull but that is easily done with clippers or a knife (be careful of slipping when using a blade though). I did a quick file across the whole surface to provide a good gluing surface.

So the front plate pretty much just slid into place. The side plates are a different story. Even though I checked the placement, twice, before applying glue I still managed to get things slightly out of alignment. There is a lip on the bottom of the side of the upper hull and the side plates fit quite neatly on to this little ledge. My mistake was trying to slide them down on to the ledge, of course the super glue grabbed quicker than I had hoped and the plates came out somewhat misaligned. It stands out, to me, quite a bit at the moment but after things are painted up it will look fine. Remember the new front plate and the new side plates don't touch each other, there really is a gap, take a look at some reference materials before you glue them in place if you aren't sure.

The lower hull just replaces the plastic transmission cover with a resin one, that was a piece of cake, just slid right into place.


Thursday, September 3, 2020

World War II Project - Building the Rubicon M4A3E2 "Jumbo" Sherman

I have decided to leap ahead and build the M4A3E2 "Jumbo" Sherman this week. Moving it ahead of even my favorite PzKfw IIIs that I recently added to the stack. If you have been keeping up with the blog this is a resin conversion kit from Rubicon Models, which means you also need to buy their M4A3 kit to go along with it. Makes it a fairly expensive model after all that but sacrifices must be made.
Unlike a lot of conversion kits on the market the Rubicon kit comes with a full set of instructions so you won't be referring back and forth between two separate sets of instructions. A very good thing, I can only imagine what problems I would have manage to run into building the kit if I was referring to both sets.
The pictures here will focus only on the resin portions of the build. The rest I have covered in an earlier posting when I built my first Rubicon M4A3 (although I do need to find a new hatch cover for that one I managed to snap it off and lose it, and maybe get it painted up properly as well).
Starting off with the gun mantlet and then moving on to the turret itself:


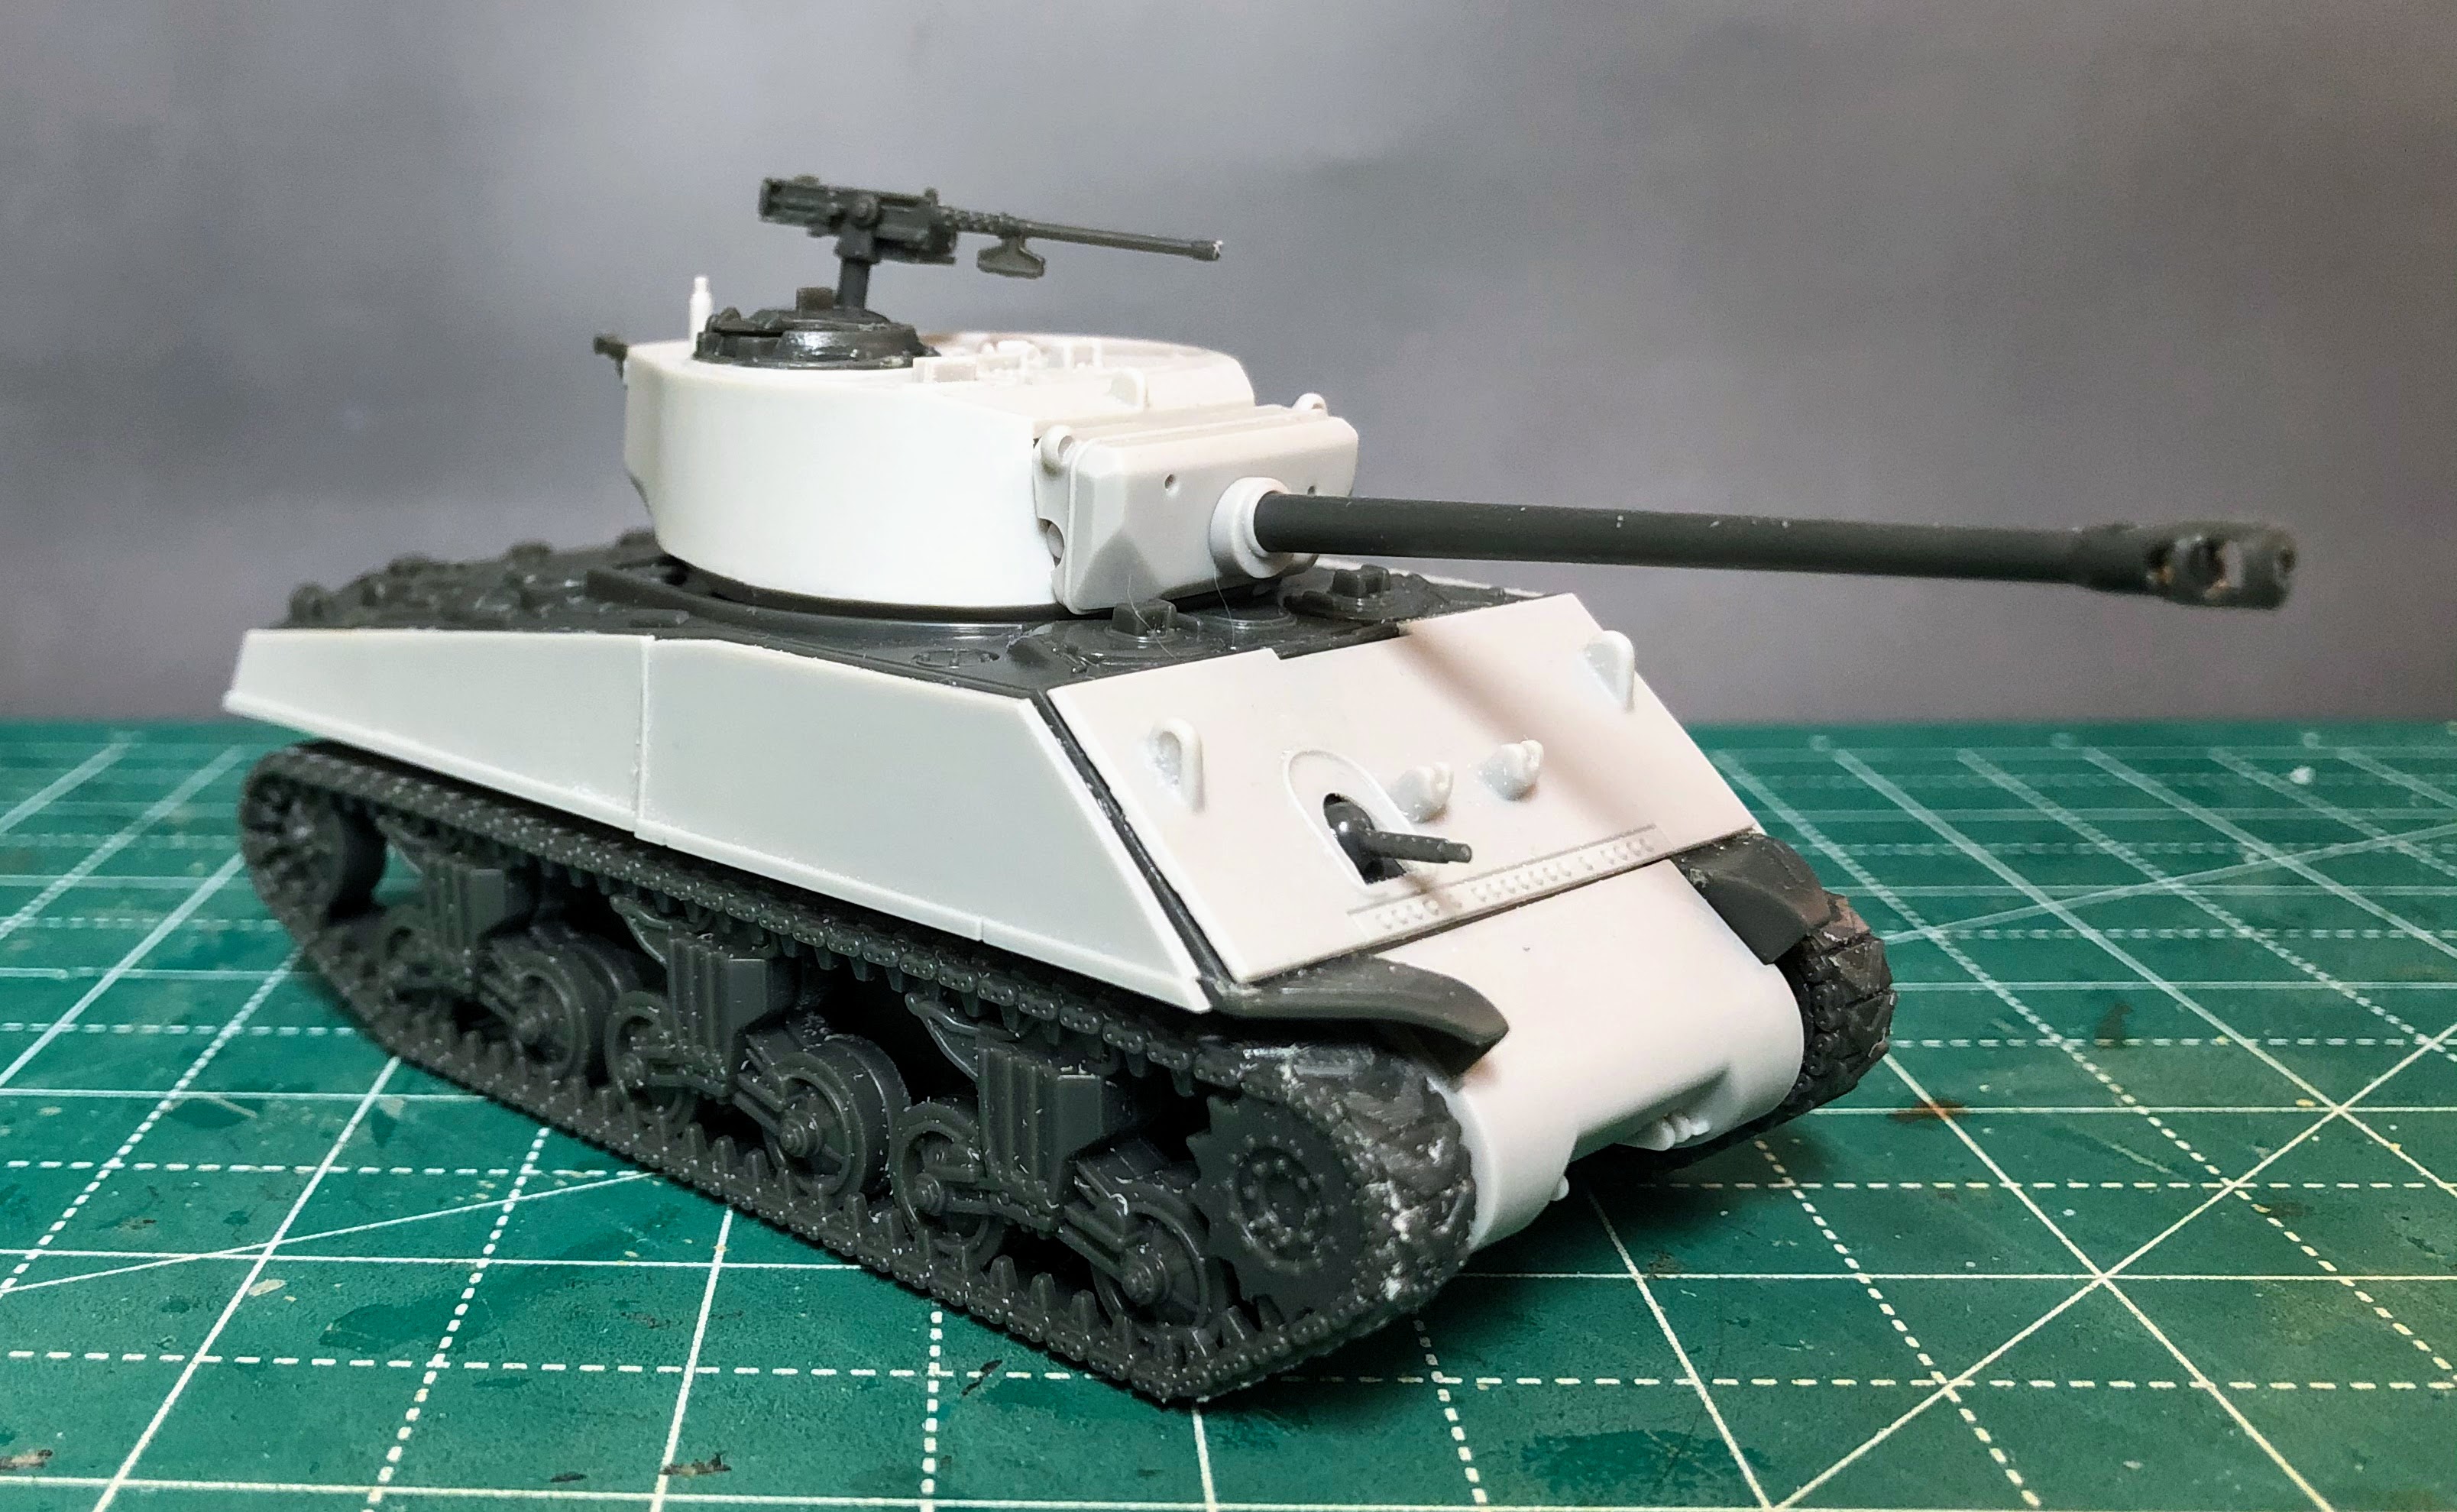
I found that the turret base does not fit snugly so I opted to move it all the way forward to the front of the turret and leave an even gap the rest of the way around. I'll fill this with putty, not terribly concerned about it since its not at all visible but I was a little surprised by the gap.

The turret complete with the plastic parts. The MG is not glued in place so I can remove it for painting. I used Locktite gel superglue to attach all the plastic parts at this point and to glue the resin together as well. Its relatively cheap, easily applied and the gap ensures that it doesn't get clogged up.


Tuesday, August 25, 2020

World War II Project - Unboxing - Rubicon M4A3E2 "Jumbo"

I have tried to be good and concentrate specifically on the German forces I need for the Too Fat Lardies Von Luck pint sized campaign. For the most part I thing I have done okay, as the German AFVs for this campaign are nearing completion now. But there are still a lot of German vehicles waiting in line (I discovered a Warlords Game Tiger I in the cabinet yesterday). Not to mention moving towards finishing all the German Infantry and British Paras that I need for Von Luck. However, I have always had a fascination for the "Jumbo" Sherman (M4A3E2). I needed to fill out an order to Rubicon to get free shipping so I slipped this resin conversion kit in along with the M4A3 kit (which is required).

I have already built and M4A3 from Rubicon and it is a marvelous kit so I know what to expect from that. What came in the small box was a bit unexpected though. Traditionally conversion kits usually just provide the parts and you provide the knowledge to get it right during the build. Not the case with this conversion kit. First thing out of the box was an instruction manual covering the areas where the conversion parts come into play so I'll mark the instructions for the base M4A3 kit so I know when to move over to a section where the resin parts come into play. The resin parts are amazing, I'm not sure they will need any clean up at this point. The turret sides may actually be to clean and may need to be roughened up a bit to better represent the rougher surface of the cast turret (if I go that far with it). Right now I have no qualms about the parts fitting well with the plastic kit. I need to do a little research on this one. I'm fairly certain that the parts are for the production version that came from the US factories and not the "Panther" conversions that were done in the field.

Although I'm in the middle of all those German kits, I may need a break from those to build up this little gem.

A few pictures: