Quotes

Life is short, break the rules. Forgive quickly, kiss slowly. Love truly, laugh uncontrollably and never regret anything that makes you smile. - Samuel Longhorne Clemens (Mark Twain)
Showing posts with label Pulp Sci Fi. Show all posts

Tuesday, April 25, 2023

The Sci Fi Pulp Diorama - Interior Continued

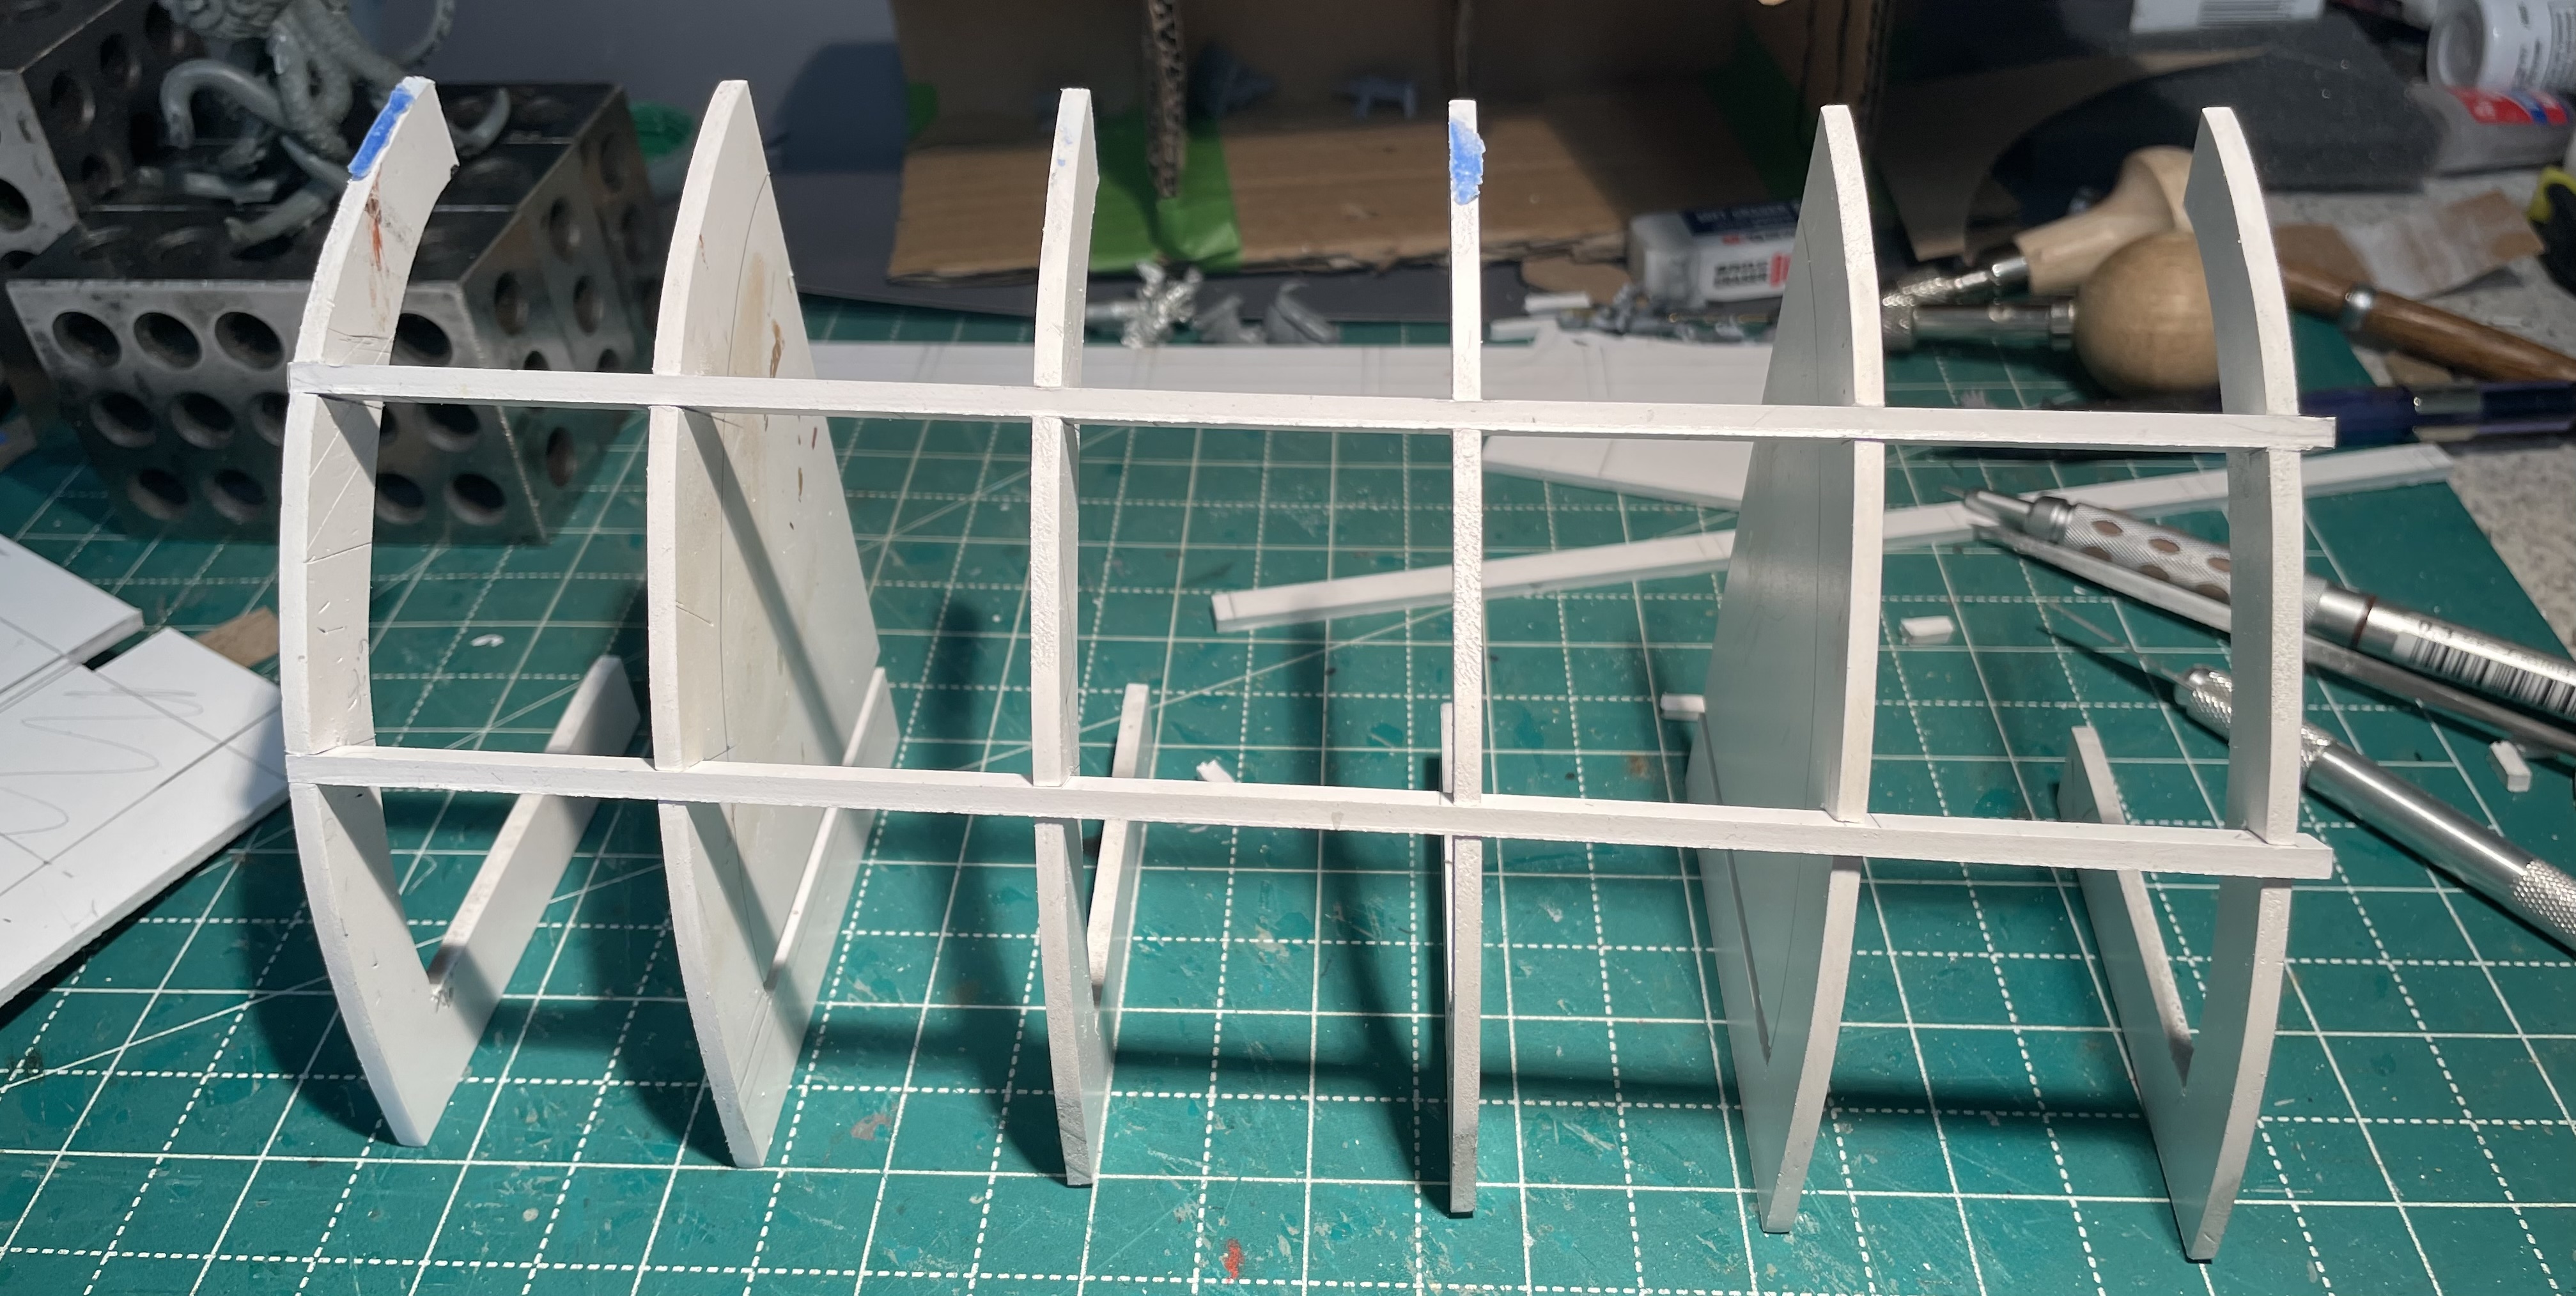
It feels like things are coming together. However, it was feeling a bit fragile so I decided that some interior ribs would add strength and provide more visual interest. It took a bit of thought but in the end I was able to cut some long "ribs" from Sintra to make it work. I'm happy enough that I think I have reached the gluing stage except I don't have any glue! I pulled my bottle of solvent from Plastruct and it was empty! Now I have to find some, the local hobby shop doesn't carry this solvent anymore so I need to find a replacement. I also need to order some 1mm Sintra to make the curved hull from.


Here I was experimenting with the spacing and trying to keep in mind that there are two solid bulk heads that have to go in there as well.

Its mostly equally spaced, this is the view from the "outside".

Looking down the "side" I like this view, to bad it won't be a visible part of the scene.

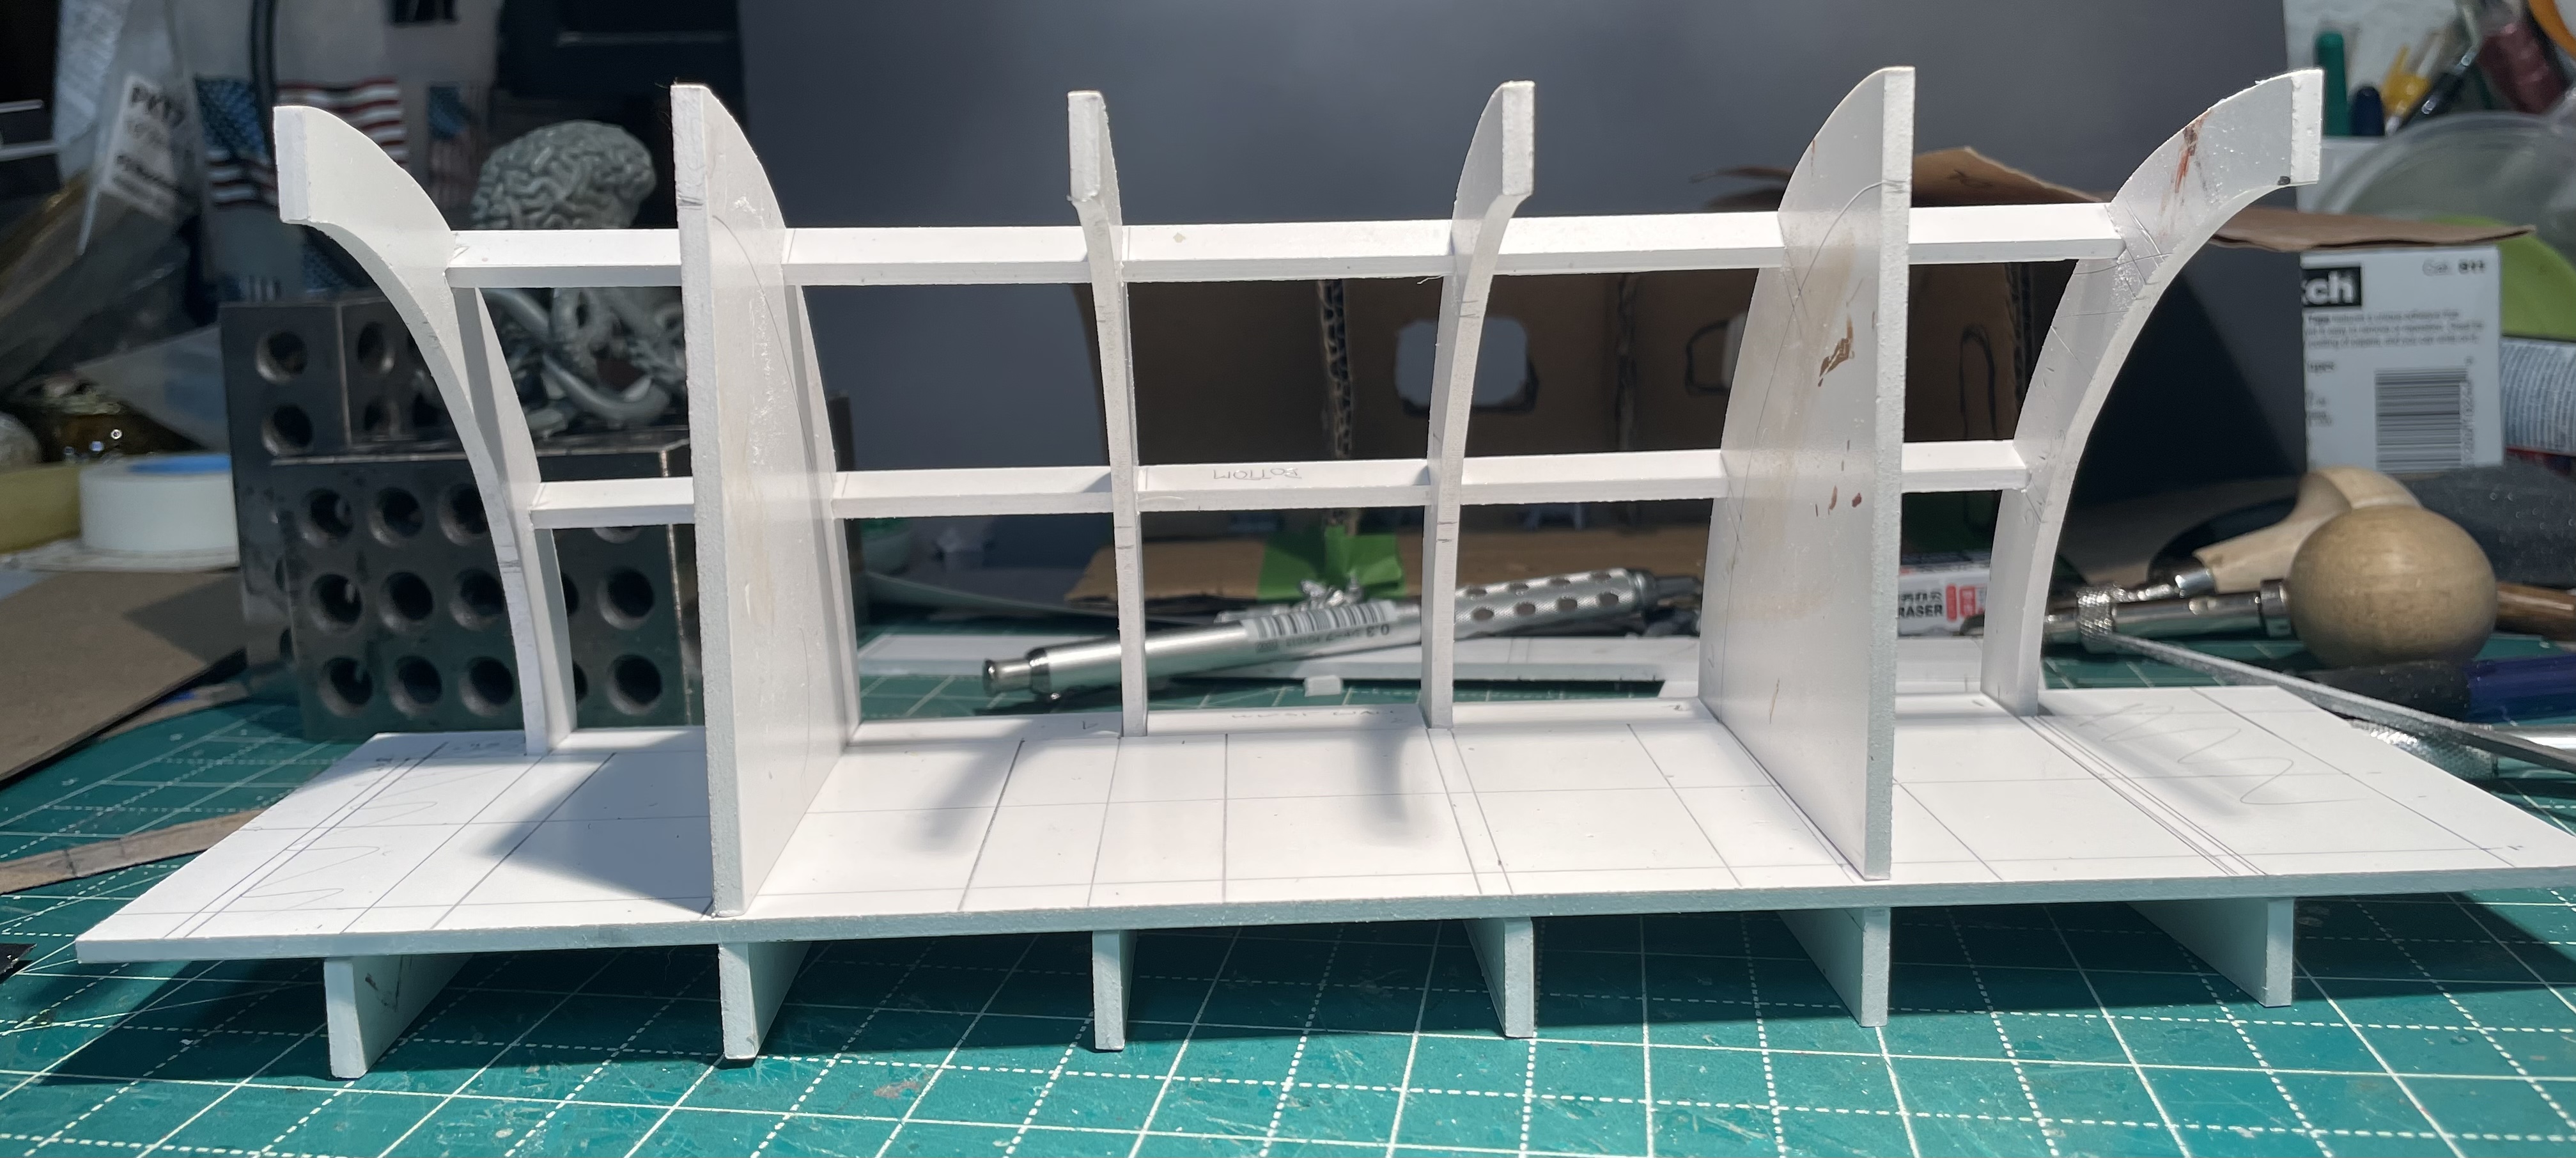
With the floor in place the whole thing feels a lot more rigid than before,

A view from inside the rocket ship.

And our main cast of characters. The Alien will be set back another inch or so actually coming through the doorway, I'm still struggling with how I'm going to create the "bursting through" effect.

Right now everything is very symmetrical and now I'm leaning towards keeping it that way. I think I'll be cutting it off, on both ends, right after that first rib before/after the bulkhead depending on which side you are on. I'm contemplating mirrors on the ends to create the effect of a larger ship but the one on the right is going to reflect the backside of the Alien and I'm not quite sure how to get around that. Plus I'm worried that it will amplify the light from the LEDs to much,


Monday, April 17, 2023

The Sci Fi Pulp Diorama - The Mock Up

For this particular diorama I want a curved wall representing the outer hull of the rocket ship. The term rocket ship is deliberate, this is pulp sci fi after all. So out came the cardboard and a flurry of cutting I pieced together this mock up. I can see a couple of issue right of the bat, which is the whole point. 

First thing to keep in mind is that this will be a shadow box. The interior will not depend on room lighting for illumination. The largest white LED will be mounted on the "outside" of the ship, in theory representing the sun. With two windows cut into the hull it should cast some interesting shadows and I might even be able to use them as spot lights.  I'm thinking that the actually section for the fight will have two smaller while LEDs mounted with some kind of shade, again, to help direct the lighting. In the center of the main section I'll mount a small red LED, obviously we are in a condition red situation. I'm not sure where I'll mount the buttons for the LEDS yet. If they are on the front there might be to much interaction with attendees. If they are on the back, they may never get turned on. So I'm thinking along the top at this point.

With that background I think its to long. I'll need to reduce what can be seen on the "stage left" and "stage right" ends. Its to wide, I need to rethink how I want to position the bulkhead hatches. Right now they are to far forward but the curve of the hull is to extreme to move them deeper into the diorama. I need to reduce the curvature of the hull and increase the height. While I want the alien to be massive I also need to have a little room to work with so somewhere between 1/2" and 1" added to the height. I'm thinking of reducing the width by at least an 1".

The number of miniatures feels just about right at this point. The heroine can probably go as is or maybe with a minor arm and/or head adjustment. The dwarf gunner needs some work. One foot is a bit miscast, I'll fix that with putty. His biggest need is for some kind of ammunition feed for the gatling gun he is firing. I'll need to build up his existing backpack and add an ammunition belt.

The toolbots needs a lot of modification but these are plastic so that should be a lot easier than it was modifying the original metal versions. The rats will be sprinkled amongst what ever nooks and crannies end up be created as part of the scene. On the top I want to show some internal girders between "floors" with a rat or two running through that. I have 8 rats to removed from their bases, that should be fun. I'm going to use 4-5 of them.

The Alien needs some work as well. I assembled the "legs" to see what I was working with. I'm hoping a little heat will allow me to bend the tentacles without to much effort and without distorting the casting go much. We will see how that goes.
The beginning. Nothing to see here, move along.

Windows added, one doorway cut. Don't like the Alien's position at this point.

Just not conveying the whole terror vibe yet.

That's a little better. Alien  mostly through the bulkhead and a little support for our Heroine.

Weapon fire definitely seems to be ineffective at this point. Need to remember to add a lot of spent brass casings to the floor. Need to leave a trail as the intrepid crew fall back to the next bulkhead.

Will our plucky toolbot get the hatch open in time?
Tune in next week, same time, same channel.


Monday, April 10, 2023

The Sci Fi Pulp Diorama - The Gathering

While I was messing around with templates and finding the bits and bobs that I had already accumulated I went back to Reaper to find some more stuff to work with. I wanted to get some more toolbots for sure, I figure more than a couple of them were going to end up as crushed remnants along the floor. You can never have enough toolbots. I picked up a possible alternative to the heroine. Then, of course, while I like the original protagonist quite a bit, I think he is just to small to get the whole "terror" aspect of the diorama. 

That care package arrived on Friday, here are the contents:
Here is the whole lot. Everything I could possibly need...yeah right.

This is really most of what I want to work with. I think I have already eliminated the alternative heroine (somehow I managed to order 2, oops) and will go with the original. But toolbots and extra weapons should come in handy.

Here are the big beasties. All three of the Bathalians and the Hivewarden. I think the Hivewarden has a lot of potential, perhaps add some bits from the others to up the "fear" factor.


Thursday, April 6, 2023

Once more into the Breach - The Sci Fi Pulp Diorama

I have had this concept for a Sci Fi Pulp Era diorama in my head for years now. I even have miniatures primed and ready to go but I just couldn't seem to make any headway on it. Those minis were scattered across my workbench or even repurposed for other projects. This one has really been in my head the last week or so. Enough that I decided that maybe I would make a couple of templates and mock up what it might look like.

With a ruler and an old circuit template I stared doodling some lines on a piece of cardboard. Grabbed the hero mini and decided how tall the interior of the rocket ship needed to be and I was off. In 30 minutes or so I managed to create the template for the ribs and bulkheads. Drew a couple of circles on it to represent where the cut out sections might go and things were on their way.

I also managed to find all the LED lights I bought and I pulled those out so I could figured out what I would need to do to fit the lights into place.

I need to use the template to make some ribs and bulkheads from thicker stock and I think I can mock things up pretty quickly at this point. I'm actually excited about it again! Enough so that I went in and purchased some more minis and paint from Reaper to play around with a couple of ideas for the alien menace.

I only drew on one half of the template. I cut that shape and then folded it in the middle to cut the other side. I didn't really need to, I will only be using a little more than half of it for the interior. Basically to the line to the right of the centerline.

I went ahead and cut out as many of these as I could from the piece of cardboard that I had. Don't know if I will need them but its nice to have them available.

Lights, Camera, Action! While a single 9-volt battery will run all of these lights and more, I want them on different circuits. So the plan is to have three nine volt batteries, one to run the "Sun" light, one for the main interior lights and one to run the condition red lights.