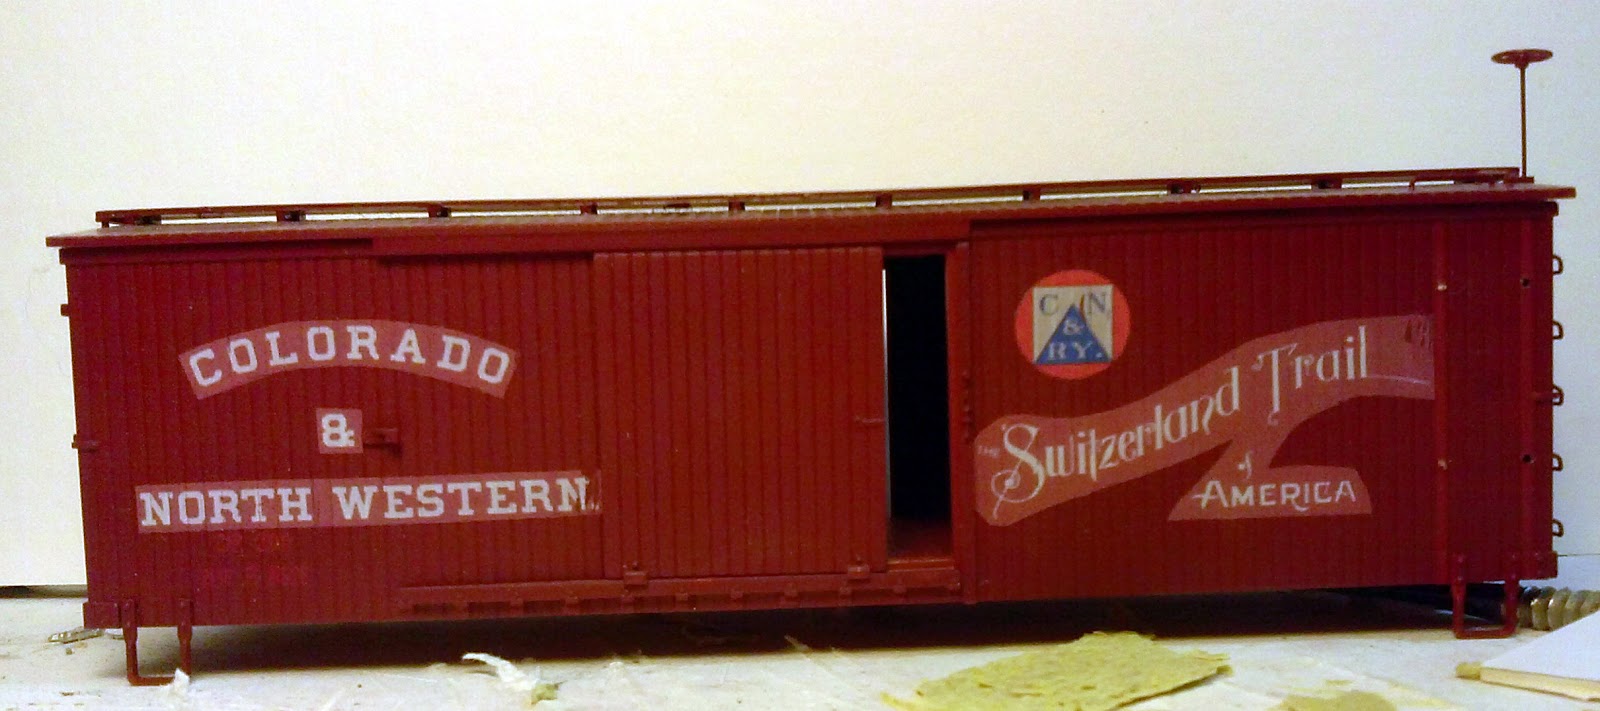
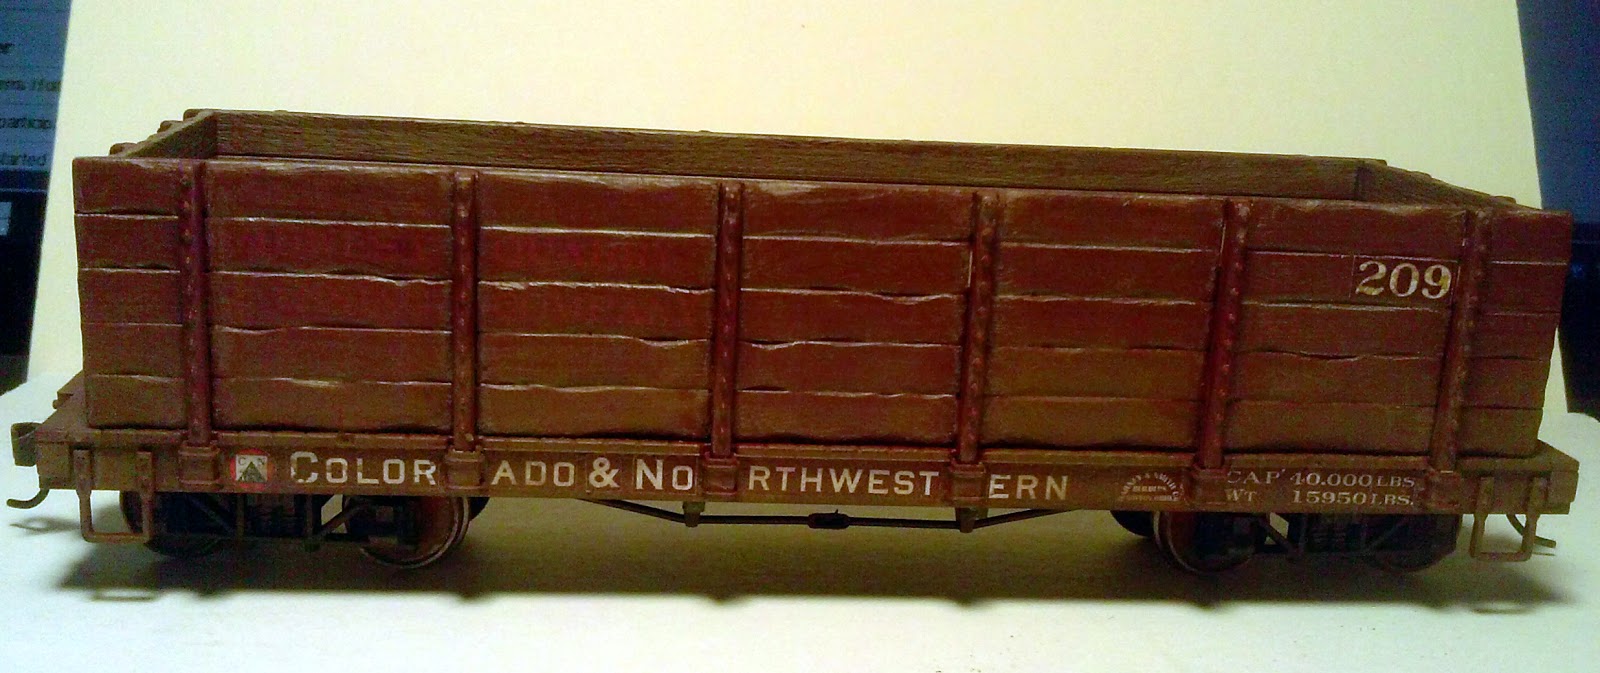
It’s been a rough month to get anything done but there has been a little progress. I managed to replace the missing corbels on the Bakery (you will have to flip back a month or two for that). and even a little bit on the boxcar. You would think that I could have just knocked the boxcar out but no such luck. I did try some new alcohol based markers for weather and I'm seriously impressed with them. I'll try to remember to show them off in the near future.
The Town of Calamity, The D&RGW RR Warehouse Row and Historical Miniature Gaming
Quotes
Life is short, break the rules. Forgive quickly, kiss slowly. Love truly, laugh uncontrollably and never regret anything that makes you smile. - Samuel Longhorne Clemens (Mark Twain)
Showing posts with label Boxcar. Show all posts
Wednesday, November 19, 2025
Monday, October 20, 2025
Mount Blue Model Co - On30 22' Boxcar
I have been doing a lot of fanciful doodling with railroad plans roughly based on space, potentially, available in the family room. I found that I was suffering from some fairly serious grandiose designs. So I added a couple of parameters to make things actually fit in the space available.
It has to be portable, best case I should be able to put it up, take it down and move it on my own. I decided I would use a 36"x 80". This means that my widest curve radius can only be 16" which is pretty darn tight. I know that all my On30 engines can be modified to run this tight a curve, although the 2-8-0s might look a little odd. All my current equipment is either 30' (freight cars) or 40' (passenger cars). I'm not sure how those are going to look on this sharp curve so I went looking for some of the shorter kits out there. Mount Blue Model Co has a nice boxcar kit that's 22' long so I ordered two to build and have them ready when I start to do some tests with the curvature.
I haven't built a freight car kit in years and this laser kit is very different from what I'm use to. It practically falls together and has more detail that those older kits I used to build.
Tuesday, October 11, 2022
Acquisition - Accurail - D&RGW 40' DBL DR AAR Boxcars
This is my first acquisition of D&RGW rolling stock for the Warehouse Row layout. Granted construction of said layout is still a long way out but it was a good deal. I like Accurail kits and this was a set of three 40' Boxcars in one of their 3 box series, so you know the car numbers will be different.
I was looking forward to putting these together, but I didn't read the listing close enough and these are already built. Nicely built I might add, the only thing I need to do is through on some better trucks and do some weathering and these will be ready to go. I was pleasantly surprised with the quality of the build so the $15 I spent on each one was money well spent!
Tuesday, February 27, 2018
Research - Freight Car Fleet Development; ATSF - Part 3
At this point I have gone as far as I want to go into the details of the Santa Fe boxcar fleet for this period. I still have some things that I haven't been able to identify but there is enough information that I can buy boxcars with confidence.
The thing I found most interesting is that the 50' cars only made up a little more than half the numbers, the 40' cars were pretty close behind.
There were approximately 7600(+) 40' boxcars still in service in '74-'75 and the bulk of that (6388) were made up of 17 types. Among these are three series that I can seem to pin down; 22232-22424, 33500-35999 and 50000-50309. The known types are (from largest to smallest): Bx-60, Bx-85, Bx-63. Bx-62, Bx-126, Bx-85, Bx-57, Bx-59, Bx-11/12 (rebuilds), Bx-136, Bx-13, Bx-115, Bx-136 and Bx-153.
There were approximately 8900(+) 50' boxcars in service for '74-'75 and the bulk of that (6955) were made up of 26 types. There are a lot more series here that I can't identify; 4100-4399, 48050-48549, 8000-8999, 48601-48999, 49501-49899, 47550-47849, 9700-9998, 47850-48409, 13500-13999, 42750-42949, 49300-49499, 4100-4399, 62000-62299. The known types are (from largest to smallest): Bx-72, Bx-81, Bx-69, Bx-145, Bx-74, Bx-75, Bx-66, Bx-70, Bx-79, Bx-154, Bx-163, Bx-61, Bx-82, Bx-64, Bx-178 and Bx-170.
I'll cast about for the missing series and see what I can come up, but the next step is really trying to figure out what boxcar types are actually commercially available. That might take even more effort since manufacturers typically don't indicate which Santa Fe boxcar type they are selling. Should be interesting.
The thing I found most interesting is that the 50' cars only made up a little more than half the numbers, the 40' cars were pretty close behind.
There were approximately 7600(+) 40' boxcars still in service in '74-'75 and the bulk of that (6388) were made up of 17 types. Among these are three series that I can seem to pin down; 22232-22424, 33500-35999 and 50000-50309. The known types are (from largest to smallest): Bx-60, Bx-85, Bx-63. Bx-62, Bx-126, Bx-85, Bx-57, Bx-59, Bx-11/12 (rebuilds), Bx-136, Bx-13, Bx-115, Bx-136 and Bx-153.
There were approximately 8900(+) 50' boxcars in service for '74-'75 and the bulk of that (6955) were made up of 26 types. There are a lot more series here that I can't identify; 4100-4399, 48050-48549, 8000-8999, 48601-48999, 49501-49899, 47550-47849, 9700-9998, 47850-48409, 13500-13999, 42750-42949, 49300-49499, 4100-4399, 62000-62299. The known types are (from largest to smallest): Bx-72, Bx-81, Bx-69, Bx-145, Bx-74, Bx-75, Bx-66, Bx-70, Bx-79, Bx-154, Bx-163, Bx-61, Bx-82, Bx-64, Bx-178 and Bx-170.
I'll cast about for the missing series and see what I can come up, but the next step is really trying to figure out what boxcar types are actually commercially available. That might take even more effort since manufacturers typically don't indicate which Santa Fe boxcar type they are selling. Should be interesting.
Monday, December 22, 2014
Another Round of Boxcars - Weathering (and finished)
This wraps up my RGS boxcar. My weathering process is never quite the same twice and this particular car gave me difficulties. At one point I decided that I had over weathered it and it was looking decidedly splotchy. Once I was back at my workbench I wiped it down and started over, more or less. Since I used alcohol the initial coat of soot was pretty well fastened down. I tried to keep it a bit lighter the next go around. I'm happier with the outcome but it could be better, but its time to set it aside for now, I might come back to it later but its "good enough" for now.
I'm looking forward to a new product coming out from Fast Tracks for freight car storage and transport. These green Bachmann boxes take a lot of room. Fast Tracks is introducing something they call Freightcrates. They are currently available in HO and N so hopefully they will have On3/30 versions out soon!
Fast Tracks
And now a little photo lineup.
I'm looking forward to a new product coming out from Fast Tracks for freight car storage and transport. These green Bachmann boxes take a lot of room. Fast Tracks is introducing something they call Freightcrates. They are currently available in HO and N so hopefully they will have On3/30 versions out soon!
Fast Tracks
And now a little photo lineup.
![]() |
| Made quick work of the trucks |
![]() |
| Clan slate |
![]() |
| Soot down the car side, got a little heavy |
![]() |
| Soot on the roof, not quite enough but maybe its always farther back on the train. |
![]() |
| Adding some dirt |
![]() |
| Adding way to much dirt |
![]() |
| These are better, not perfect but better. |
Wednesday, December 17, 2014
Another Round of Boxcars - Dry Transfers
It took a day to hunt down the dry transfers from Clover House. They weren't quite where I thought they were. There were two sets for the Colorado & Northwestern and one for the Rio Grande Southern. I completely messed up the first set of C&N transfers, totally disgusted with myself. I'll have to strip it down and start again. I decided to try the RGS set and they went on without a problem. This is another "fantasy" set of RGS decals featuring logos and lettering that didn't necessarily appear on the prototype versions. So the only pictures are of the RGS car and I'm setting aside the C&N cars for now. I'm still seriously considering going forward with getting custom decals made for the C&N instead.
Here are the pictures from tonight's work. Hopefully I'll be able to do some weathering tomorrow. Hard to say with the holidays bearing down on us.
![]() |
| The large logo on the left and the first layer for the galloping goose logo on the right. |
![]() |
| The white added to the galloping goose logo unlike with car data |
![]() |
| And the end, which contains a bit more information than most cars. I see I didn't quite get my numbers straight on this side. |
Saturday, November 29, 2014
A Grab Iron Jig
The Bachmann On30 box cars (goods car for you UK readers) has nice wire grab ends on the ends but on the sides the opted for what looks like a ladder and quite frankly I don't like the look of. I was willing to put up with it on the non C&N box cars since it helps set them apart. But I wanted grab irons for the C&N. My first problem was trying to figure out how to get a consistent spacing and location. That's what jigs are for. This evening I constructed a jig and performed surgery on my poor decal test car. Overall I would call it a success. However, I didn't realize that the grab irons I purchased were actually white metal castings. While they work, they are a bit soft and I'm not sure I like them. They might look better after they have been painted, I think I will go looking for some actual wire ones though.
I kept track of the trials and tribulations in vivid color.
![]() |
| The issue, the ladder instead of grab irons on the right side |
![]() |
| The victim, the box car that has my first run of decals on it. I have removed the ladder already |
![]() |
| The opposite side, plenty of room for more decal experimentation |
![]() |
| What I want, wire grab irons like the ones that appear on the ends. Why didn't they use these on the sides? |
![]() |
| First jig attempt. A piece of sheet styrene cut to fit between the top of the eves and the top of the step |
![]() |
| I thought I should cut it down to make it easier to use |
![]() |
| Drawing the first lines to figure out where to drill the holes. I'm having second thoughts at this point |
![]() |
| I decide to take a slightly different direction. I grab a piece of new plastic and set the jig so that the machined edges, which I know are square, line up against straight edges on the box car. |
![]() |
| I mark the jig so that I remember which edge is which. |
![]() |
| Drawing the lines to determine where the holes for the grab irons need to go. Each place where the lines cross is where a hole needs to be drilled. |
![]() |
| Jig in place complete with holes. I used a #73 bit for this. |
![]() |
| The grab irons. I never really looked at these before and I didn't realize they were cast instead of wire. |
![]() |
| The holes are drilled, need a little cleanup. |
![]() |
| Cleaned up and grab irons in place. They look a little rough partially because they bend a bit when inserted and my holes are a tad to close together. |
Friday, August 29, 2014
Freight Cars for Calamity - Step by Step Weathering - Wrapping it Up
Up to this point all the previous steps have really just been prep to get to the fun part. Especially in the case of the gondola since I had to cut apart my decals to get them to fit between the stake pockets. The reality is that the weathering process itself doesn't take very long, it gets stretched out trying to take pictures (or remembering to take pictures).
The next step for the gondola is to get some paint on the boards on the interior sides and floor. What I want to do here is show paint worn away by heavy use. The normal load for these gondolas was probably coal since the C&N had its own fleet of drop bottom hoppers for ore. However, I'm sure that they were pressed into service to carry various ores as needed. Boulder County is mostly mined for gold ore and tungsten although there were silver mines as well but none that were actually served by the railroad. I drybrushed some of the upper edges of the outside with a greyish brown paint and gave a heavy coating on the inside, leaving more of the original red in the corners and edges where the sides come together with the floor.
I then followed up with a burnt umber wash made from Liquitex Ink and distilled water. Colorado water is a little on the hard side and I try to keep the minerals out of my paints as much as I can by using distilled water.
Now all of that ink needs to dry before I can start applying pigments to it. Otherwise you can create quite a mess when dry pigment meets wet ink. Its not pretty, but it can be cleaned up when it happens.
With the gondola drying its time to turn to the boxcar. I want to try a different technique on this one involving Isopropyl Alcohol (rubbing alcohol you can get it at the grocery store or your local drugstore. I buy the 99% pure stuff) and dry pigments. I'll create a wash with this and see how that goes. Remember weathering is all about experimenting and thinking outside the lines a bit. Although its probably smarter to try something new on a cheap test car first!
For this one I used MiG pigments, their Cargo Dust and Black Smoke. The Black Smoke is to strong by itself so I tried to lighten up a bit with the Cargo Dust.
To this mixture I added the Isopropyl Alcohol. You want a wash so keep adding till you get something that just rolls right back to the bottom when you swipe your brush against the side. Keep in mind you are using alcohol and it evaporates fast (especially if you are in a high dry climate like mine)! I started on one side and proceeded to work my way around the boxcar.
The problem with this particular technique is I really lost the faded look that I had started with. Maybe a thinner more directed wash would have helped maintain that effect or the two techniques just shouldn't be used on the same car. This also has to dry but you can come back with more alcohol later and continue to clean it up if you feel the need to. This is one way to set pigments, the resulting finish won't rub off without some serious effort.
Now its time to apply some straight up dry pigments. I'm using my Pan Pastels along with one another one from MiG (because, once again I put my Bragdon pigments in a safe place). While the best way to apply MiG pigments is still with a brush the best way to apply the Pan Pastels is with a very sponge. When I bought my set from Stoney Creek he included a couple of handles and variety of sponges to fit on the ends along with a couple of the big sponges for large areas. While you can brush the Pan Pastels on I have found that the sponges are definitely more effective. I was quite happy to find the Caboose Hobbies had a full kit of the brushes for the handles so I have a bunch. They come in different shapes so you can adjust to the surface you are working on.
Much like painting I like to start with the darkest pigment at the bottom edges of the car in this case I decided to use Burnt Sienna Extra Dark. On the gondola I kept it on the bottom frame, on the boxcar I went up a little bit on the sides (and its not easy to see in the pictures).
This really doesn't take very long and you don't have to wait for it to set so you can go straight to the next pigment. Next up was straight Raw Umber. I applied it starting at the top edge of the previous color to soften that line a bit and took it up a bit higher on the side.
The last application was with a brush using the MiG Pigment Gulf War Sand, which is a nice dusty color
Now the roof of the boxcar needs a little attention. It needs a lighter layer of soot which should even out the surface a bit. For this I'm using Neutral Grey Extra Dark.
Its really hard to see in the photos but I followed all of this up with a Burnt Sienna Prismacolor pencil run across the top of all the metal components to rust them up a bit. And that about wraps it up. I put the trucks back on and these are ready to hit the rails.
The gondola could probably use a bit more work, there is a lot of grain visible in the side boards and I really didn't bring them out very well and I'm not completely happy with the interior drybrushing or the final coat of dust on the outside. On the other hand sometimes they just have to look good enough and this one definitely falls into that category.
I'm quite pleased with the boxcar although I'm disappointed that my grimy wash really killed the faded look I wanted. I'm not going to go back and do anything about it but I will keep it in mind for future projects and there are certainly a number of those coming up.
I'm happy enough with my custom decals that I'll go ahead and bring out the passenger cars and get started on those which should be a pretty quick job. I'm still working on trying to perfect the Switzerland Trail of America logo for the C&N boxcars though. The C&N boxcars are going to get a little extra work as well. I thought that the ladder on the right side was molded on it looked like to much work to just try and shave off. However, I discovered that its actually a separate piece and can be pulled off without to much effort. I have some new grab irons ordered and I'll be installing those on C&N boxcars as the next step there.
So more work on those and of course there is a railroad station to get finished up as well. September should be another productive month as I continue work on the different parts of Calamity.
The next step for the gondola is to get some paint on the boards on the interior sides and floor. What I want to do here is show paint worn away by heavy use. The normal load for these gondolas was probably coal since the C&N had its own fleet of drop bottom hoppers for ore. However, I'm sure that they were pressed into service to carry various ores as needed. Boulder County is mostly mined for gold ore and tungsten although there were silver mines as well but none that were actually served by the railroad. I drybrushed some of the upper edges of the outside with a greyish brown paint and gave a heavy coating on the inside, leaving more of the original red in the corners and edges where the sides come together with the floor.
I then followed up with a burnt umber wash made from Liquitex Ink and distilled water. Colorado water is a little on the hard side and I try to keep the minerals out of my paints as much as I can by using distilled water.
With the gondola drying its time to turn to the boxcar. I want to try a different technique on this one involving Isopropyl Alcohol (rubbing alcohol you can get it at the grocery store or your local drugstore. I buy the 99% pure stuff) and dry pigments. I'll create a wash with this and see how that goes. Remember weathering is all about experimenting and thinking outside the lines a bit. Although its probably smarter to try something new on a cheap test car first!
For this one I used MiG pigments, their Cargo Dust and Black Smoke. The Black Smoke is to strong by itself so I tried to lighten up a bit with the Cargo Dust.
To this mixture I added the Isopropyl Alcohol. You want a wash so keep adding till you get something that just rolls right back to the bottom when you swipe your brush against the side. Keep in mind you are using alcohol and it evaporates fast (especially if you are in a high dry climate like mine)! I started on one side and proceeded to work my way around the boxcar.
![]() |
| Still much darker than I anticipated |
![]() |
| I loaded up a brush with clean alcohol and proceeded to swab down the sides again. Wiping off the brush every few strokes to get rid of the excess. |
![]() |
| That looks better |
![]() |
| Roof is a bit uneven at this point but some additional steps latter on will help smooth it out. |
The problem with this particular technique is I really lost the faded look that I had started with. Maybe a thinner more directed wash would have helped maintain that effect or the two techniques just shouldn't be used on the same car. This also has to dry but you can come back with more alcohol later and continue to clean it up if you feel the need to. This is one way to set pigments, the resulting finish won't rub off without some serious effort.
Now its time to apply some straight up dry pigments. I'm using my Pan Pastels along with one another one from MiG (because, once again I put my Bragdon pigments in a safe place). While the best way to apply MiG pigments is still with a brush the best way to apply the Pan Pastels is with a very sponge. When I bought my set from Stoney Creek he included a couple of handles and variety of sponges to fit on the ends along with a couple of the big sponges for large areas. While you can brush the Pan Pastels on I have found that the sponges are definitely more effective. I was quite happy to find the Caboose Hobbies had a full kit of the brushes for the handles so I have a bunch. They come in different shapes so you can adjust to the surface you are working on.
Much like painting I like to start with the darkest pigment at the bottom edges of the car in this case I decided to use Burnt Sienna Extra Dark. On the gondola I kept it on the bottom frame, on the boxcar I went up a little bit on the sides (and its not easy to see in the pictures).
This really doesn't take very long and you don't have to wait for it to set so you can go straight to the next pigment. Next up was straight Raw Umber. I applied it starting at the top edge of the previous color to soften that line a bit and took it up a bit higher on the side.
The last application was with a brush using the MiG Pigment Gulf War Sand, which is a nice dusty color
Now the roof of the boxcar needs a little attention. It needs a lighter layer of soot which should even out the surface a bit. For this I'm using Neutral Grey Extra Dark.
Its really hard to see in the photos but I followed all of this up with a Burnt Sienna Prismacolor pencil run across the top of all the metal components to rust them up a bit. And that about wraps it up. I put the trucks back on and these are ready to hit the rails.
The gondola could probably use a bit more work, there is a lot of grain visible in the side boards and I really didn't bring them out very well and I'm not completely happy with the interior drybrushing or the final coat of dust on the outside. On the other hand sometimes they just have to look good enough and this one definitely falls into that category.
I'm quite pleased with the boxcar although I'm disappointed that my grimy wash really killed the faded look I wanted. I'm not going to go back and do anything about it but I will keep it in mind for future projects and there are certainly a number of those coming up.
I'm happy enough with my custom decals that I'll go ahead and bring out the passenger cars and get started on those which should be a pretty quick job. I'm still working on trying to perfect the Switzerland Trail of America logo for the C&N boxcars though. The C&N boxcars are going to get a little extra work as well. I thought that the ladder on the right side was molded on it looked like to much work to just try and shave off. However, I discovered that its actually a separate piece and can be pulled off without to much effort. I have some new grab irons ordered and I'll be installing those on C&N boxcars as the next step there.
So more work on those and of course there is a railroad station to get finished up as well. September should be another productive month as I continue work on the different parts of Calamity.
Subscribe to:
Posts (Atom)