Here are the shots of the Hearse build.

 |
| The instructions are only one sided for the Hearse |
 |
| The parts sheet. Nothing is missing the gaps are the pieces that fell out. There are no cardboard parts in this kit |
 |
| Floor and under carriage going together |
 |
| Adding the axles |
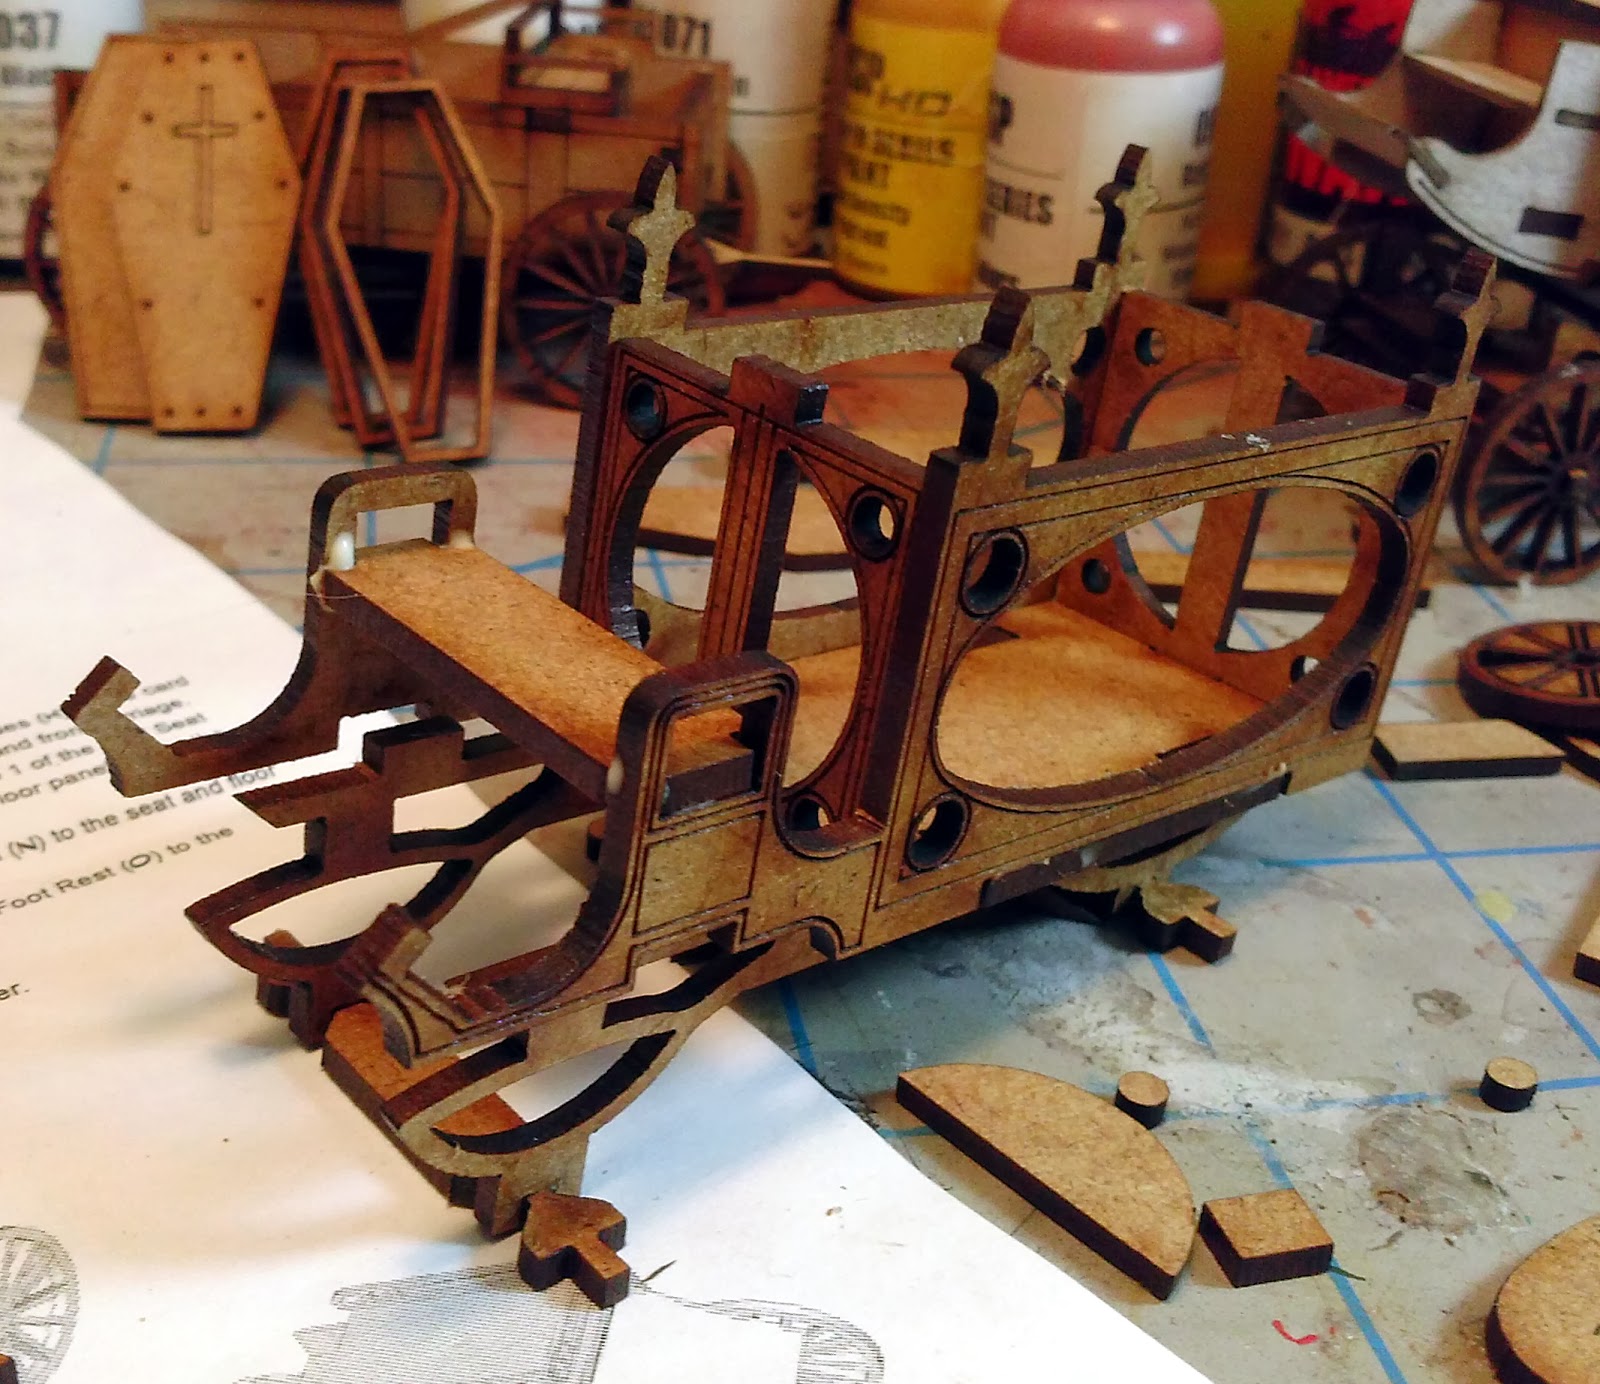 |
| Adding the sides and ends for the cabin. This locks the drivers seat into place. |
 |
| Adding the top, looking good so far. |
 |
| Adding the wheels, definitely looks good! Yet it feels incomplete. |
 |
| Mmm, this looks like an important piece. Yes, its the floorboards for the driver's seat and with everything in place I can't just slide it in. I figured out that if I cut off the lugs on either side I could slide it into place, save those little pieces though! Without them you will have a couple of blank spots on the sides that won't look right. I filed the lugs down a bit and slide them into position from the outside. Problem solved! |
 |
| Here you can see the floorboards in place and the gaps (right under the driver's seat) filled with the lugs that I had cut off. Nothing like a little emergency surgery. |
 |
| Just put the coffin inside (it will slide right in through the openings on the side) and you are off to boot hill. |
Beautiful work!
ReplyDeletenice cart !
ReplyDeletewill you paint it ?
(it seems that those laser-models don't need paint but I'm not sure...)
I will paint it. I'll get them all painted eventually. You can certainly leave the MDF laser kits unpainted but I prefer to prime and paint them so I can work in my own weathering, or just make sure that not everything looks alike.
DeleteWow, this hearse looks beautiful! Great job on building it!
ReplyDeleteGreetings, Sofie
Thanks Sofie! It needs a little paint to be truly finished but I am pleased with how it came out.
Delete